28.OpenFeign快速入门
28.OpenFeign快速入门

AI码师
发布于 2024-05-17 13:52:34
发布于 2024-05-17 13:52:34
OpenFeign
OpenFeign是一个用于构建声明性、模板化HTTP客户端的Java库。它是一个开源项目,最初由Netflix开发,并在Spring Cloud项目中得到广泛使用。
使用OpenFeign,你可以通过编写接口来定义服务的API,然后OpenFeign会基于这些接口自动生成具体的HTTP请求。你可以在接口方法上使用注解来配置请求的细节,例如URL路径、HTTP方法、请求头、请求体等。OpenFeign还支持请求和响应的拦截器,用于执行额外的处理逻辑。
快速上手
引入依赖
dependencies {
    implementation 'org.springframework.boot:spring-boot-starter-web'
    implementation 'org.springframework.cloud:spring-cloud-starter-openfeign'
    implementation 'org.springframework.cloud:spring-cloud-starter-loadbalancer'
    implementation 'com.alibaba.cloud:spring-cloud-starter-alibaba-nacos-discovery'
}
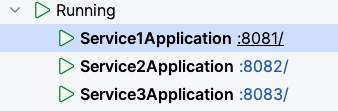
创建三个服务
Service1
@SpringBootApplication
@EnableFeignClients
@EnableDiscoveryClient(autoRegister = false)
public class Service1Application {
    public static void main(String[] args) {
        SpringApplication.run(Service1Application.class, args);
    }
    @LoadBalanced
    @Bean
    public RestTemplate restTemplate() {
        return new RestTemplate();
    }
}

/**
 * @Author 乐哥聊编程
 * @Doc  关注公众号"乐哥聊编程"获取文档和源码
 * @Date 2023/6/17
 * @Description
 */
@RestController
public class IndexController {
    @Autowired
    private Service3Feign service3Feign;
    @Autowired
    private Service2Feign service2Feign;
    @GetMapping("/service1")
    public String service1(String name) {
        return "service1 回复:"+name +service3Feign.service3(name) + service2Feign.service2(name);
    }
}

# 配置
server:
  port: 8081
spring:
  application:
    name: service1
  cloud:
    nacos:
      discovery:
        #        ephemeral: false
        server-addr: 192.168.64.2:8848
        namingRequestTimeout: 10000000
Service2
/**
 * @Author 乐哥聊编程
 * @Doc 关注公众号"乐哥聊编程"获取文档和源码
 * @Date 2023/6/17
 * @Description
 */
@SpringBootApplication
public class Service2Application {
    public static void main(String[] args) {
        SpringApplication.run(Service2Application.class, args);
    }
}
/**
 * @Author 乐哥聊编程
 * @Doc  关注公众号"乐哥聊编程"获取文档和源码
 * @Date 2023/6/17
 * @Description
 */
@RestController
public class IndexController {
    @GetMapping("/service2")
    public String service2(String name) {
        return "service2 回复:"+name;
    }
}

# 配置
server:
  port: 8082
spring:
  application:
    name: service2
  cloud:
    nacos:
      discovery:
        #        ephemeral: false
        server-addr: 192.168.64.2:8848
        namingRequestTimeout: 10000000
Service3
/**
 * @Author 乐哥聊编程
 * @Doc 关注公众号"乐哥聊编程"获取文档和源码
 * @Date 2023/6/17
 * @Description
 */
@SpringBootApplication
public class Service3Application {
    public static void main(String[] args) {
        SpringApplication.run(Service3Application.class, args);
    }
}
/**
 * @Author 乐哥聊编程
 * @Doc  关注公众号"乐哥聊编程"获取文档和源码
 * @Date 2023/6/17
 * @Description
 */
@RestController
public class IndexController {
    @GetMapping("/service3")
    public String service3(String name) {
        return "service3 回复:"+name;
    }
}
# 配置
server:
  port: 8083
spring:
  application:
    name: service3
  cloud:
    nacos:
      discovery:
        #        ephemeral: false
        server-addr: 192.168.64.2:8848
        namingRequestTimeout: 10000000
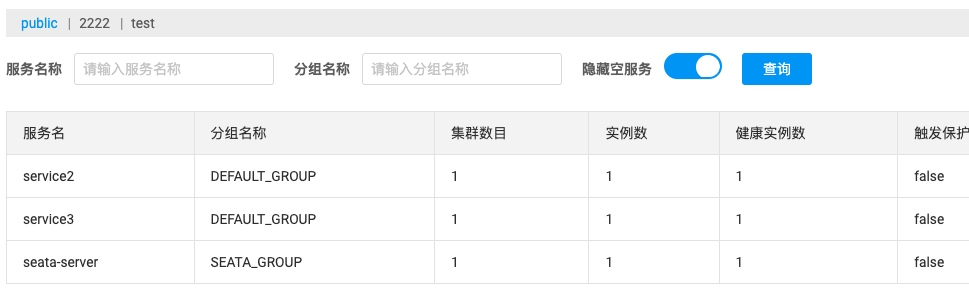
启动三个服务,请求service1的接口
本文参与 腾讯云自媒体分享计划,分享自微信公众号。
原始发表:2024-05-11,如有侵权请联系 cloudcommunity@tencent.com 删除
评论
登录后参与评论
推荐阅读
目录