KubeSphere 最佳实战:KubeKey v3.1.1 部署 KubeSphere v3.4.1 和 Kubernetes v1.28 实战指南
原创KubeSphere 最佳实战:KubeKey v3.1.1 部署 KubeSphere v3.4.1 和 Kubernetes v1.28 实战指南
原创
KubeSphere 最佳实战:KubeKey v3.1.1 部署 KubeSphere v3.4.1 和 Kubernetes v1.28 实战指南
2024 年云原生运维实战文档 99 篇原创计划 第 023 篇 |KubeSphere 最佳实战「2024」系列 第 004 篇
你好,欢迎来到运维有术。
今天分享的内容是 KubeSphere 最佳实战「2024」 系列文档中的 KubeKey v3.1.1 部署 KubeSphere v3.4.1 和 Kubernetes v1.28 实战指南。
本文将详细介绍如何利用 KubeKey v3.1.1 部署 KubeSphere v3.4.1 以及包含 3个 Control Plane 和 3个 Worker 节点的 Kubernetes v1.28.8 集群。
KubeSphere 最佳实战「2024」 系列文档的实验环境硬件配置和软件信息如下:
实战服务器配置(架构1:1复刻小规模生产环境,配置略有不同)
主机名 | IP | CPU | 内存 | 系统盘 | 数据盘 | 用途 |
|---|---|---|---|---|---|---|
ksp-control-1 | 192.168.9.91 | 4 | 8 | 40 | 100 | KubeSphere/k8s-control-plane |
ksp-control-2 | 192.168.9.92 | 4 | 8 | 40 | 100 | KubeSphere/k8s-control-plane |
ksp-control-3 | 192.168.9.93 | 4 | 8 | 40 | 100 | KubeSphere/k8s-control-plane |
ksp-worker-1 | 192.168.9.94 | 4 | 16 | 40 | 100 | k8s-worker/CI |
ksp-worker-2 | 192.168.9.95 | 4 | 16 | 40 | 100 | k8s-worker |
ksp-worker-3 | 192.168.9.96 | 4 | 16 | 40 | 100 | k8s-worker |
ksp-storage-1 | 192.168.9.97 | 4 | 8 | 40 | 300+ | ElasticSearch/Ceph/Longhorn/NFS/ |
ksp-storage-2 | 192.168.9.98 | 4 | 8 | 40 | 300+ | ElasticSearch//Ceph/Longhorn |
ksp-storage-3 | 192.168.9.99 | 4 | 8 | 40 | 300+ | ElasticSearch//Ceph/Longhorn |
ksp-gpu-worker-1 | 192.168.9.101 | 4 | 16 | 40 | 100 | k8s-worker(GPU) |
ksp-gpu-worker-2 | 192.168.9.102 | 4 | 16 | 40 | 100 | k8s-worker(GPU) |
ksp-registry | 192.168.9.90 | 4 | 8 | 40 | 200 | Harbor 镜像仓库 |
ksp-gateway-1 | 192.168.9.103 | 2 | 4 | 40 | 自建应用服务代理网关/VIP:192.168.9.100 | |
ksp-gateway-2 | 192.168.9.104 | 2 | 4 | 40 | 自建应用服务代理网关/VIP:192.168.9.100 | |
ksp-mid | 192.168.9.105 | 4 | 8 | 40 | 100 | 部署在 k8s 集群之外的服务节点(Gitlab 等) |
合计 | 15 | 56 | 152 | 600 | 2000 |
实战环境涉及软件版本信息
- 操作系统:openEuler 22.03 LTS SP3 x86_64
- KubeSphere:v3.4.1
- Kubernetes:v1.28.8
- KubeKey: v3.1.1
1. 前置条件
请参考 Kubernetes 集群节点 openEuler 22.03 LTS SP3 系统初始化指南,完成操作系统初始化配置。
初始化配置指南中没有涉及操作系统升级的任务,在能联网的环境建议初始化的时候升级操作系统,然后重启节点。
2. 安装部署 Kubernetes
2.1 下载 KubeKey
本文将 Control-1 节点作为部署节点,把 KubeKey 最新版 (v3.1.1) 二进制文件下载到该服务器。具体 kk 版本号可以在kk release 页面查看。
- 下载最新版的 KubeKey
mkdir ~/kubekey
cd ~/kubekey/

# 选择中文区下载(访问 GitHub 受限时使用)
export KKZONE=cn
curl -sfL https://get-kk.kubesphere.io | sh -- 查看 KubeKey 支持的 Kubernetes 版本列表
./kk version --show-supported-k8s
$ ./kk version --show-supported-k8s
v1.19.0
......(受限于篇幅,中间的不展示,请读者根据需求查看)
v1.28.0
v1.28.1
v1.28.2
v1.28.3
v1.28.4
v1.28.5
v1.28.6
v1.28.7
v1.28.8
v1.29.0
v1.29.1
v1.29.2
v1.29.3
说明: 输出结果为 kk 支持的结果,但不代表 KubeSphere 和其他 k8s 也能完美支持。
kk 支持的 k8s 版本还是比较新的。本文选择 v1.28.8,生产环境可以选择 v1.26.15 或是其他次要版本是双数且补丁版本数超过 5 的版本。不建议选择太老的版本了,毕竟 v1.30 都已经发布了。
2.2 创建部署 Kubernetes 集群配置文件
本文部署一套 3 个 control-plane 节点和 3个 worker 节点的 Kubernetes 集群和只启用默认插件的 KubeSphere 平台。
- 创建集群配置文件
本文选择了 KubeSphere v3.4.1 和 Kubernetes v1.28.8。因此,指定配置文件名称为 ksp-v341-v1288.yaml,如果不指定,默认的文件名为 config-sample.yaml。
./kk create config --name opsxlab -f ksp-v341-v1288.yaml --with-kubernetes v1.28.8 --with-kubesphere v3.4.1注意: 生成的配置文件内容较多,详细的配置、参数请参考 官方配置示例。
- 修改配置文件
编辑配置文件, vi ksp-v341-v1288.yaml,主要修改 kind: Cluster 小节的相关配置,修改说明如下。
- hosts:指定节点的 IP、ssh 用户、ssh 密码、ssh 端口。示例演示了 ssh 端口号的配置方法。
- roleGroups:指定 3个 etcd、control-plane 节点, 3个 worker 节点
- internalLoadbalancer: 启用内置的 HAProxy 负载均衡器
- domain:自定义域名 lb.opsxlab.cn,无特殊需求可使用默认值 lb.kubesphere.local
- clusterName:自定义 opsxlab.cn,无特殊需求可使用默认值 cluster.local
- autoRenewCerts:该参数可以实现证书到期自动续期,默认为 true
- containerManager:使用 containerd
- storage.openebs.basePath:新增配置,指定 openebs 默认存储路径为 /data/openebs/local
修改后的完整示例如下:
apiVersion: kubekey.kubesphere.io/v1alpha2
kind: Cluster
metadata:
  name: opsxlab
spec:
  hosts:
  - {name: ksp-control-1, address: 192.168.9.91, internalAddress: 192.168.9.91, port:22, user: root, password: "OpsXlab@2024"}
  - {name: ksp-control-2, address: 192.168.9.92, internalAddress: 192.168.9.92, user: root, password: "OpsXlab@2024"}
  - {name: ksp-control-3, address: 192.168.9.93, internalAddress: 192.168.9.93, user: root, password: "OpsXlab@2024"}
  - {name: ksp-worker-1, address: 192.168.9.94, internalAddress: 192.168.9.94, user: root, password: "OpsXlab@2024"}
  - {name: ksp-worker-2, address: 192.168.9.95, internalAddress: 192.168.9.95, user: root, password: "OpsXlab@2024"}
  - {name: ksp-worker-3, address: 192.168.9.96, internalAddress: 192.168.9.96, user: root, password: "OpsXlab@2024"}
  roleGroups:
    etcd:
    - ksp-control-1
    - ksp-control-2
    - ksp-control-3
    control-plane:
    - ksp-control-1
    - ksp-control-2
    - ksp-control-3
    worker:
    - ksp-worker-1
    - ksp-worker-2
    - ksp-worker-3
  controlPlaneEndpoint:
    ## Internal loadbalancer for apiservers
    internalLoadbalancer: haproxy

    domain: lb.opsxlab.cn
    address: ""
    port: 6443
  kubernetes:
    version: v1.28.8
    clusterName: opsxlab.cn
    autoRenewCerts: true
    containerManager: containerd
  etcd:
    type: kubekey
  network:
    plugin: calico
    kubePodsCIDR: 10.233.64.0/18
    kubeServiceCIDR: 10.233.0.0/18
    ## multus support. https://github.com/k8snetworkplumbingwg/multus-cni
    multusCNI:
      enabled: false
  storage:
    openebs:
      basePath: /data/openebs/local # 默认没有的新增配置,base path of the local PV
  registry:
    privateRegistry: ""
    namespaceOverride: ""
    registryMirrors: []
    insecureRegistries: []
  addons: []
2.3 部署 Kubernetes
执行下面的命令,使用配置文件 ksp-v341-v1288.yaml 部署 Kubernetes。
export KKZONE=cn
./kk create cluster -f ksp-v341-v1288.yaml
上面的命令执行后,KubeKey 先检查部署 Kubernetes 的依赖及其它配置是否符合要求。通过检查后,系统将提示您确认安装。输入 yes 并按 ENTER 继续部署。
部署完成需要大约 10-20 分钟左右,具体看网速和机器配置。
部署完成后,您应该会在终端上看到类似于下面的输出。提示部署完成的同时,输出中还会显示用户登陆 KubeSphere 的默认管理员用户和密码。
#####################################################
###              Welcome to KubeSphere!           ###
#####################################################

Console: http://192.168.9.91:30880
Account: admin
Password: P@88w0rd
NOTES:
  1. After you log into the console, please check the
     monitoring status of service components in
     "Cluster Management". If any service is not
     ready, please wait patiently until all components
     are up and running.
  2. Please change the default password after login.

#####################################################
https://kubesphere.io             2024-05-19 14:27:26
#####################################################
14:27:29 CST skipped: [ksp-control-3]
14:27:29 CST skipped: [ksp-control-2]
14:27:29 CST success: [ksp-control-1]
14:27:29 CST Pipeline[CreateClusterPipeline] execute successfully
Installation is complete.

Please check the result using the command:

        kubectl logs -n kubesphere-system $(kubectl get pod -n kubesphere-system -l 'app in (ks-install, ks-installer)' -o jsonpath='{.items[0].metadata.name}') -f
3. 验证 k8s 集群
3.1 KubeSphere 管理控制台验证集群状态
我们打开浏览器访问 Control-1 节点的 IP 地址和端口 30880,可以看到 KubeSphere 管理控制台的登录页面。
输入默认用户 admin 和默认密码 P@88w0rd,然后点击「登录」。
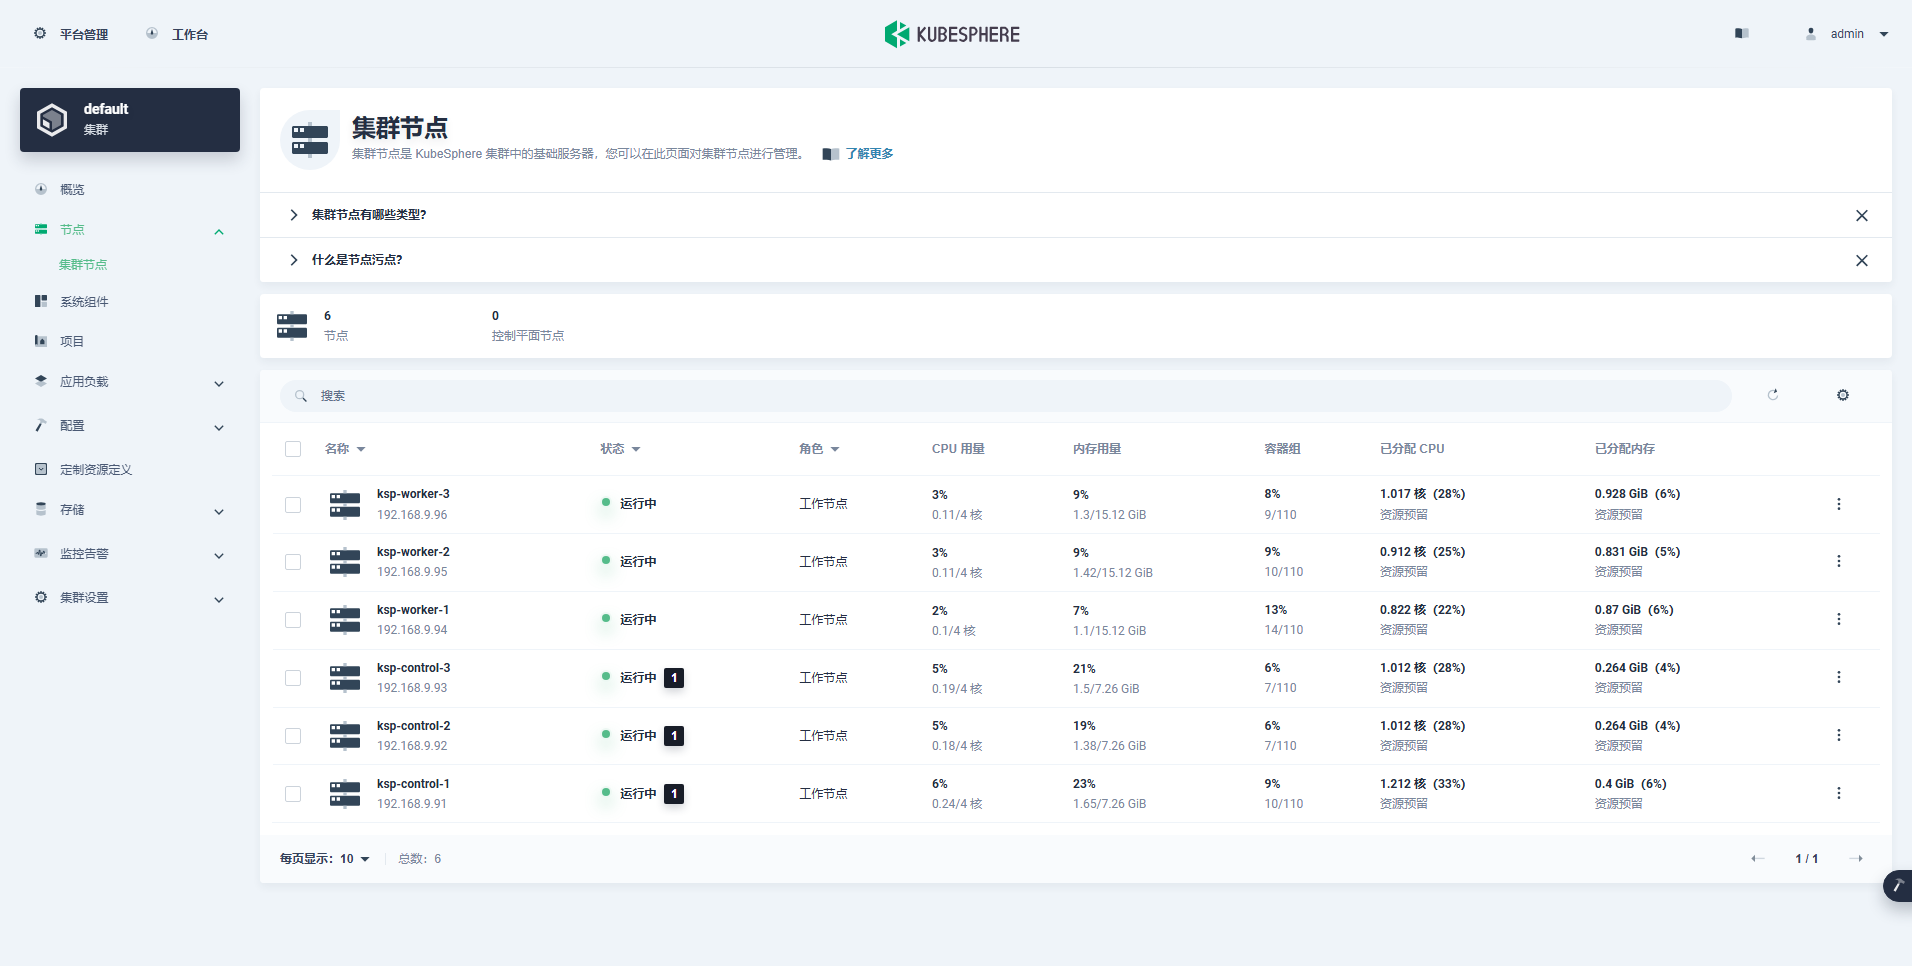
- 查看集群节点信息(资源占用很少)
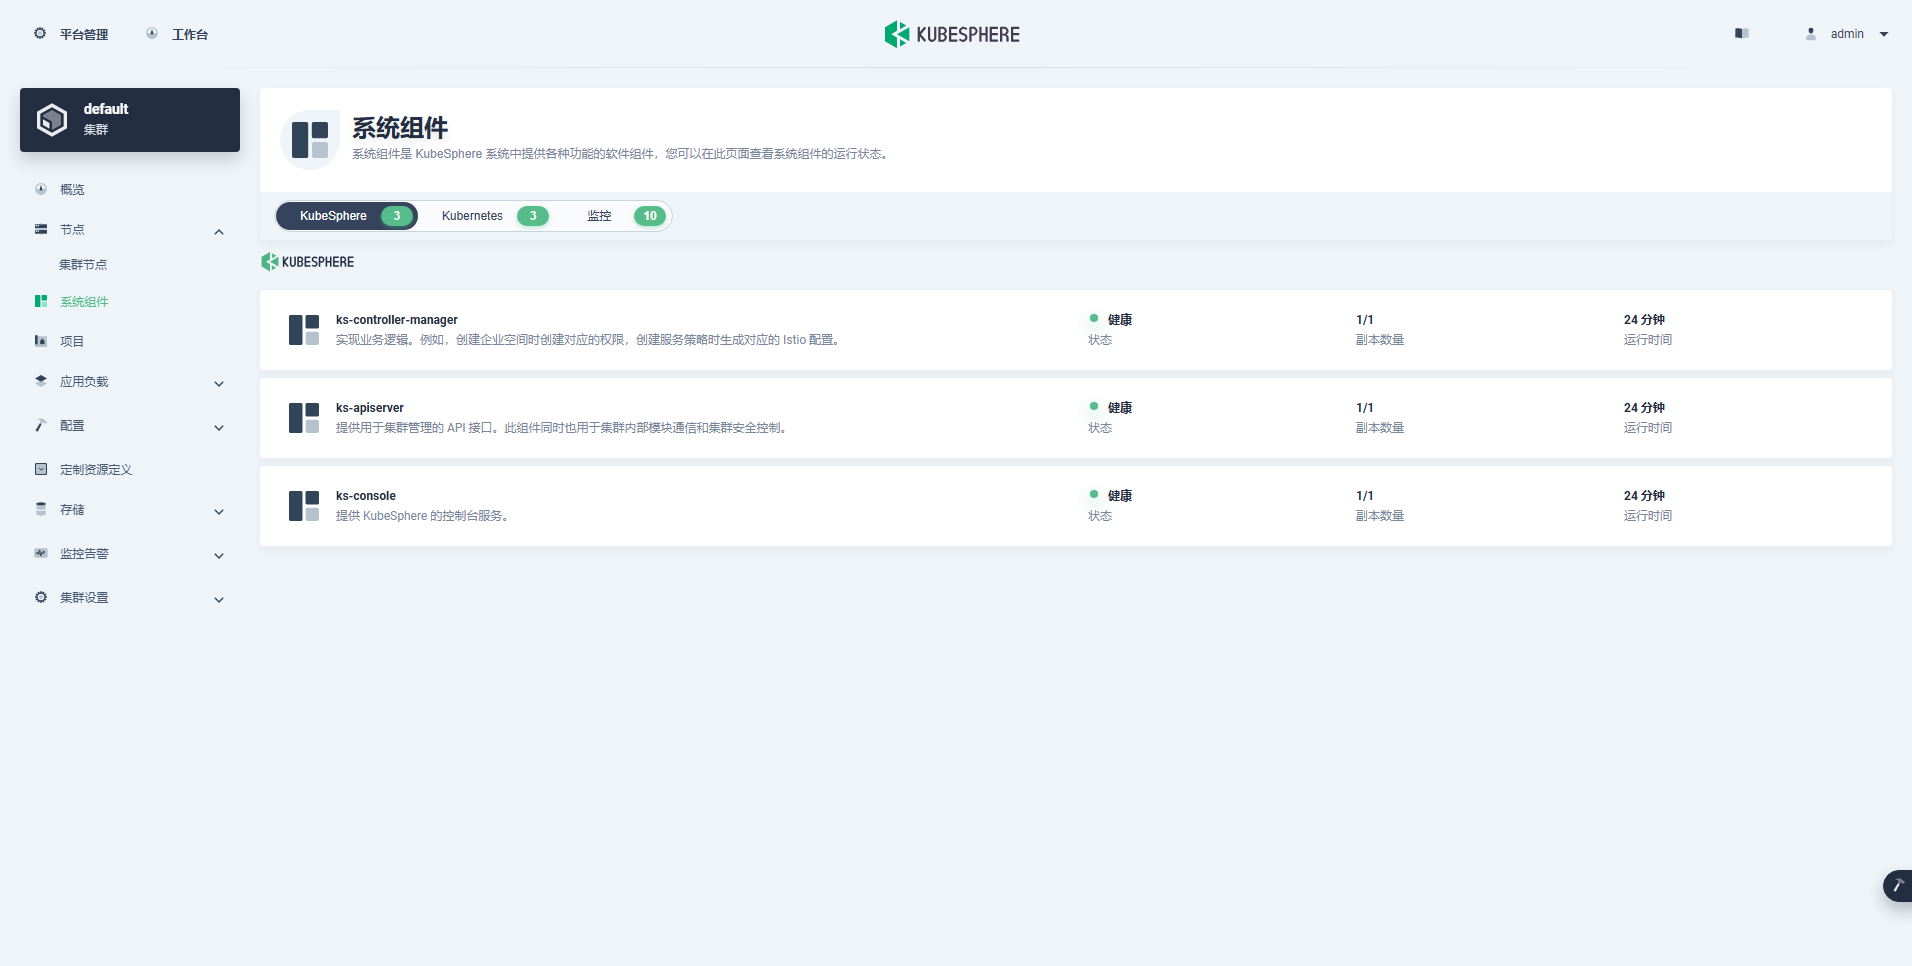
- 查看组件信息(最小化)
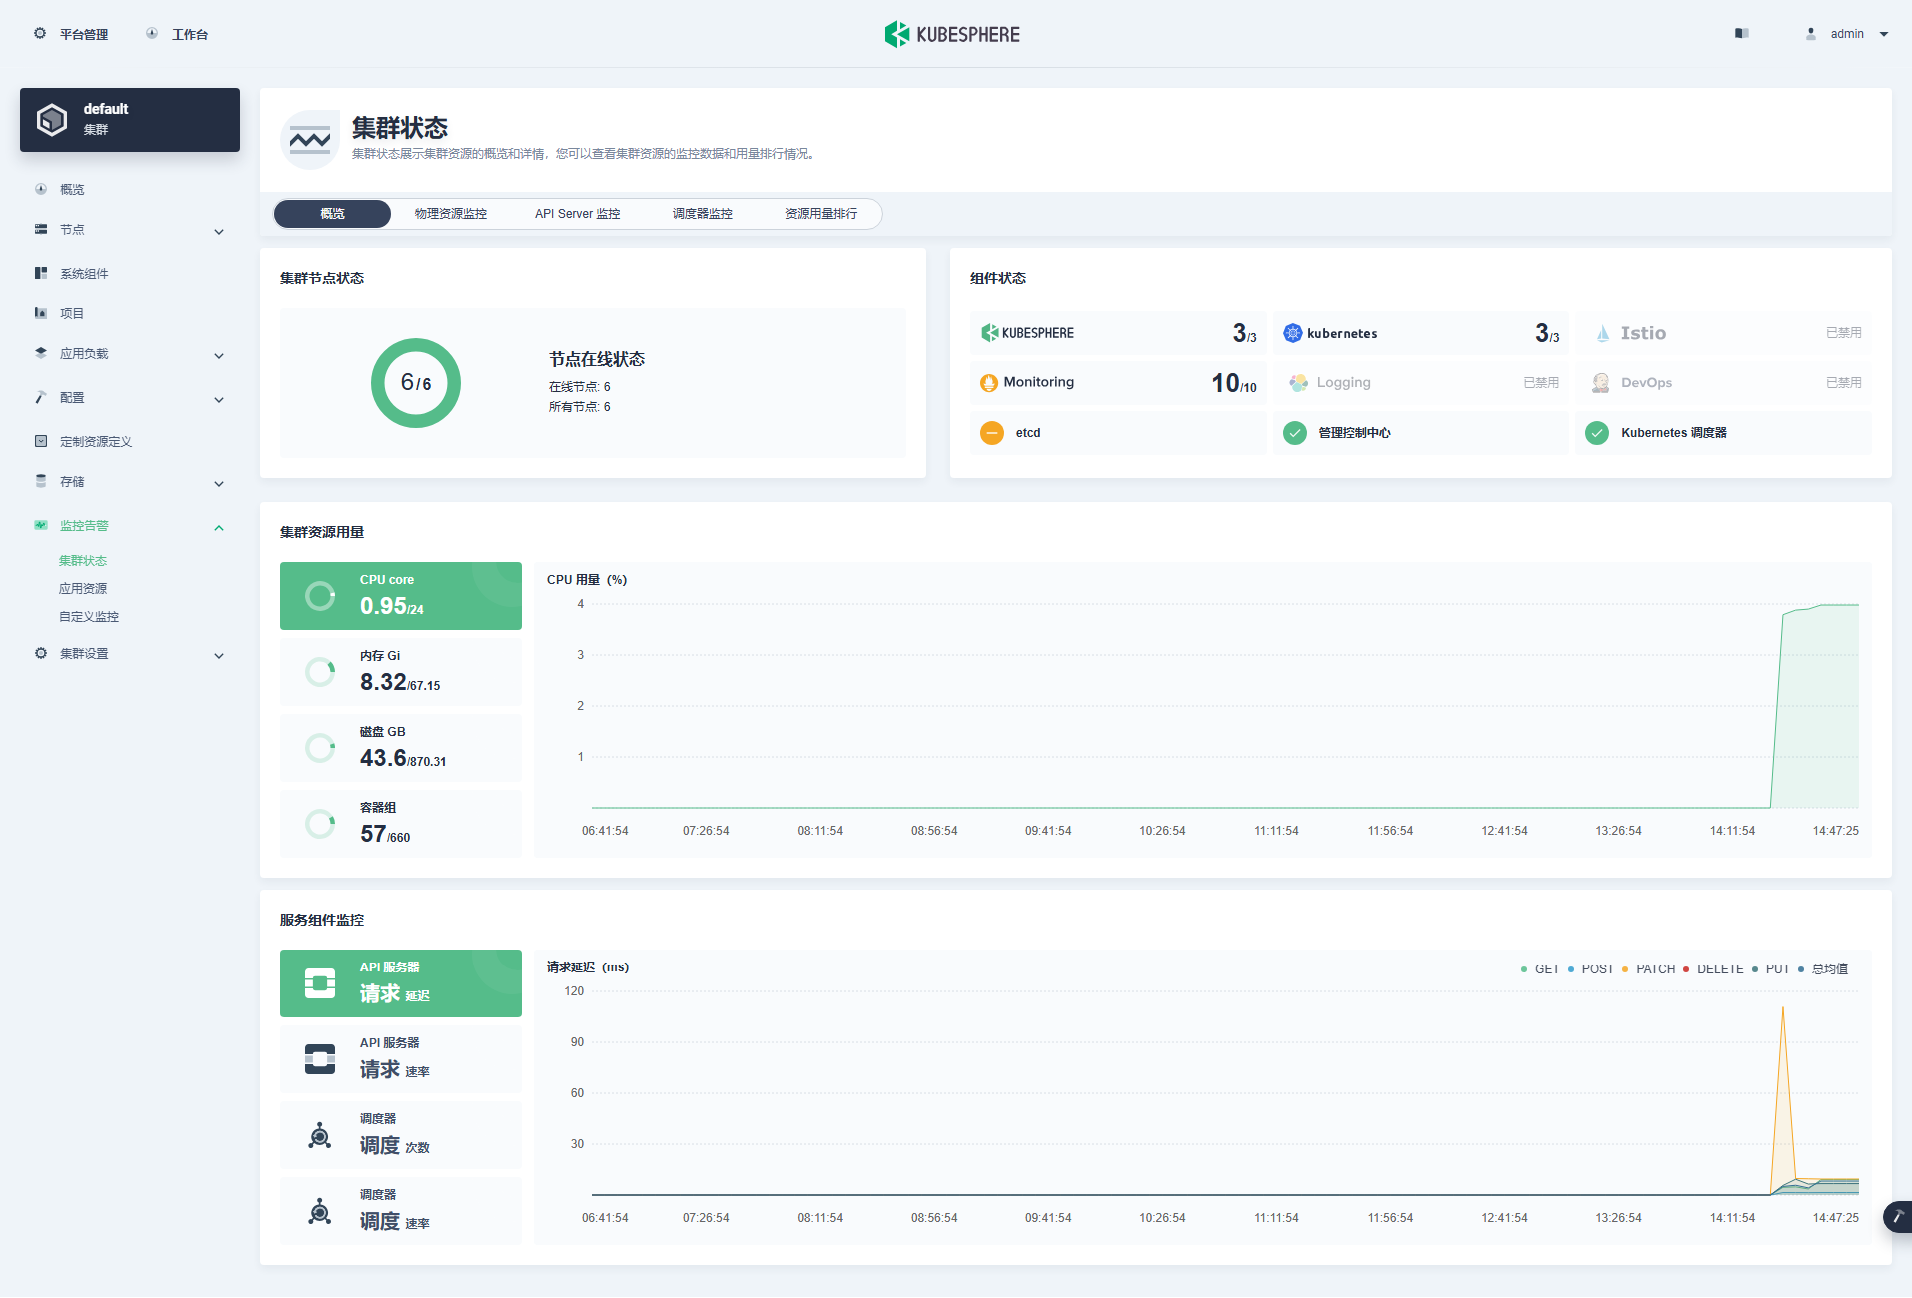
- 查看监控信息
3.2 kubectl 命令行验证集群状态
本小节只是简单查看基本状态,并不全面,更多的细节请自己体验探索。
- 查看集群节点信息
在 control-1 节点运行 kubectl 命令获取 Kubernetes 集群上的可用节点列表。
kubectl get nodes -o wide在输出结果中可以看到,当前的 Kubernetes 集群有 6个节点,并详细展示每个节点的名字、状态、角色、存活时间、Kubernetes 版本号、内部 IP、操作系统类型、内核版本和容器运行时等信息。
$ kubectl get nodes -o wide
NAME            STATUS   ROLES           AGE   VERSION   INTERNAL-IP    EXTERNAL-IP   OS-IMAGE                    KERNEL-VERSION                       CONTAINER-RUNTIME
ksp-control-1   Ready    control-plane   32m   v1.28.8   192.168.9.91   <none>        openEuler 22.03 (LTS-SP3)   5.10.0-182.0.0.95.oe2203sp3.x86_64   containerd://1.7.13
ksp-control-2   Ready    control-plane   31m   v1.28.8   192.168.9.92   <none>        openEuler 22.03 (LTS-SP3)   5.10.0-182.0.0.95.oe2203sp3.x86_64   containerd://1.7.13
ksp-control-3   Ready    control-plane   30m   v1.28.8   192.168.9.93   <none>        openEuler 22.03 (LTS-SP3)   5.10.0-182.0.0.95.oe2203sp3.x86_64   containerd://1.7.13
ksp-worker-1    Ready    worker          30m   v1.28.8   192.168.9.94   <none>        openEuler 22.03 (LTS-SP3)   5.10.0-182.0.0.95.oe2203sp3.x86_64   containerd://1.7.13
ksp-worker-2    Ready    worker          30m   v1.28.8   192.168.9.95   <none>        openEuler 22.03 (LTS-SP3)   5.10.0-182.0.0.95.oe2203sp3.x86_64   containerd://1.7.13
ksp-worker-3    Ready    worker          30m   v1.28.8   192.168.9.96   <none>        openEuler 22.03 (LTS-SP3)   5.10.0-182.0.0.95.oe2203sp3.x86_64   containerd://1.7.13
[root@ksp-control-1 kubekey]#- 查看 Pod 列表
输入以下命令获取在 Kubernetes 集群上运行的 Pod 列表,确保所有的容器状态都是 Running。
kubectl get pods -o wide -A至此,我们部署完成了 3 台 Control-plane 节点 和 3 台 Worker 节点的 Kubernetes 集群。
接下来我们在 Kubernetes 集群上部署一个简单的 Nginx Web 服务器,测试验证 KubeSphere 和 Kubernetes 集群是否正常。
4. 部署测试资源
本示例使用命令行工具 kubectl 在 Kubernetes 集群上部署一个 Nginx Web 服务器。
4.1 创建 Nginx Deployment
运行以下命令,创建一个部署 Nginx Web 服务器的 Deployment。此示例中,我们将创建具有两个副本基于 nginx:alpine 镜像的 Pod。
kubectl create deployment nginx --image=nginx:alpine --replicas=24.2 创建 Nginx Service
创建一个新的 Kubernetes 服务,服务名称 nginx,服务类型 Nodeport,对外的服务端口 80。
kubectl create service nodeport nginx --tcp=80:804.3 验证 Nginx Deployment 和 Pod
- 运行以下命令查看创建的 Deployment 和 Pod 资源。
kubectl get deployment -o wide
kubectl get pods -o wide- 正确执行后,输出结果如下 :
$ kubectl get deployment -o wide
NAME    READY   UP-TO-DATE   AVAILABLE   AGE   CONTAINERS   IMAGES         SELECTOR
nginx   1/2     2            1           15s   nginx        nginx:alpine   app=nginx

$ kubectl get pods -o wide
NAME                    READY   STATUS    RESTARTS   AGE   IP             NODE           NOMINATED NODE   READINESS GATES
nginx-b4ccb96c6-7qjn8   1/1     Running   0          20s   10.233.94.11   ksp-worker-1   <none>           <none>
nginx-b4ccb96c6-z8h72   1/1     Running   0          19s   10.233.96.6    ksp-worker-3   <none>           <none>
4.4 验证 Nginx Service
运行以下命令查看可用的服务列表,在列表中我们可以看到 nginx 服务类型 为 Nodeport,并在 Kubernetes 主机上开放了 31597 端口。
kubectl get svc -o wide正确执行后,输出结果如下 :
$ kubectl get svc -o wide
NAME         TYPE        CLUSTER-IP    EXTERNAL-IP   PORT(S)        AGE   SELECTOR
kubernetes   ClusterIP   10.233.0.1    <none>        443/TCP        37m   <none>
nginx        NodePort    cu   <none>        80:31597/TCP   47s   app=nginx
4.5 验证服务
运行以下命令访问部署的 Nginx 服务,验证服务是否成功部署。
- 验证直接访问 Pod
curl 10.233.94.11正确执行后,输出结果如下 :
$ curl 10.233.94.11
<!DOCTYPE html>
<html>
<head>
<title>Welcome to nginx!</title>
<style>
html { color-scheme: light dark; }
body { width: 35em; margin: 0 auto;
font-family: Tahoma, Verdana, Arial, sans-serif; }
</style>
</head>
<body>
<h1>Welcome to nginx!</h1>
<p>If you see this page, the nginx web server is successfully installed and
working. Further configuration is required.</p>

<p>For online documentation and support please refer to
<a href="http://nginx.org/">nginx.org</a>.<br/>
Commercial support is available at
<a href="http://nginx.com/">nginx.com</a>.</p>

<p><em>Thank you for using nginx.</em></p>
</body>
</html>- 验证访问 Service
curl 10.233.12.6

# 访问结果同上,略- 验证访问 Nodeport
curl 192.168.9.91:31597

# 访问结果同上,略
4.6 管理控制台查验
接下来我们登录 KubeSphere 管理控制台,查看创建的 Nginx 服务相关资源。
说明: KubeSphere 的管理控制台具有友好地、图形化创建和管理 Kubernetes 各种资源的功能,主要是截图太麻烦了,所以本文采用了更简单的命令行方式创建测试资源。 只是在查看的时候展示了 KubeSphere 管理控制台的基本功能,实际使用中,大家可以使用图形化方式创建和管理 Kubernetes 资源。
- 查看工作负载

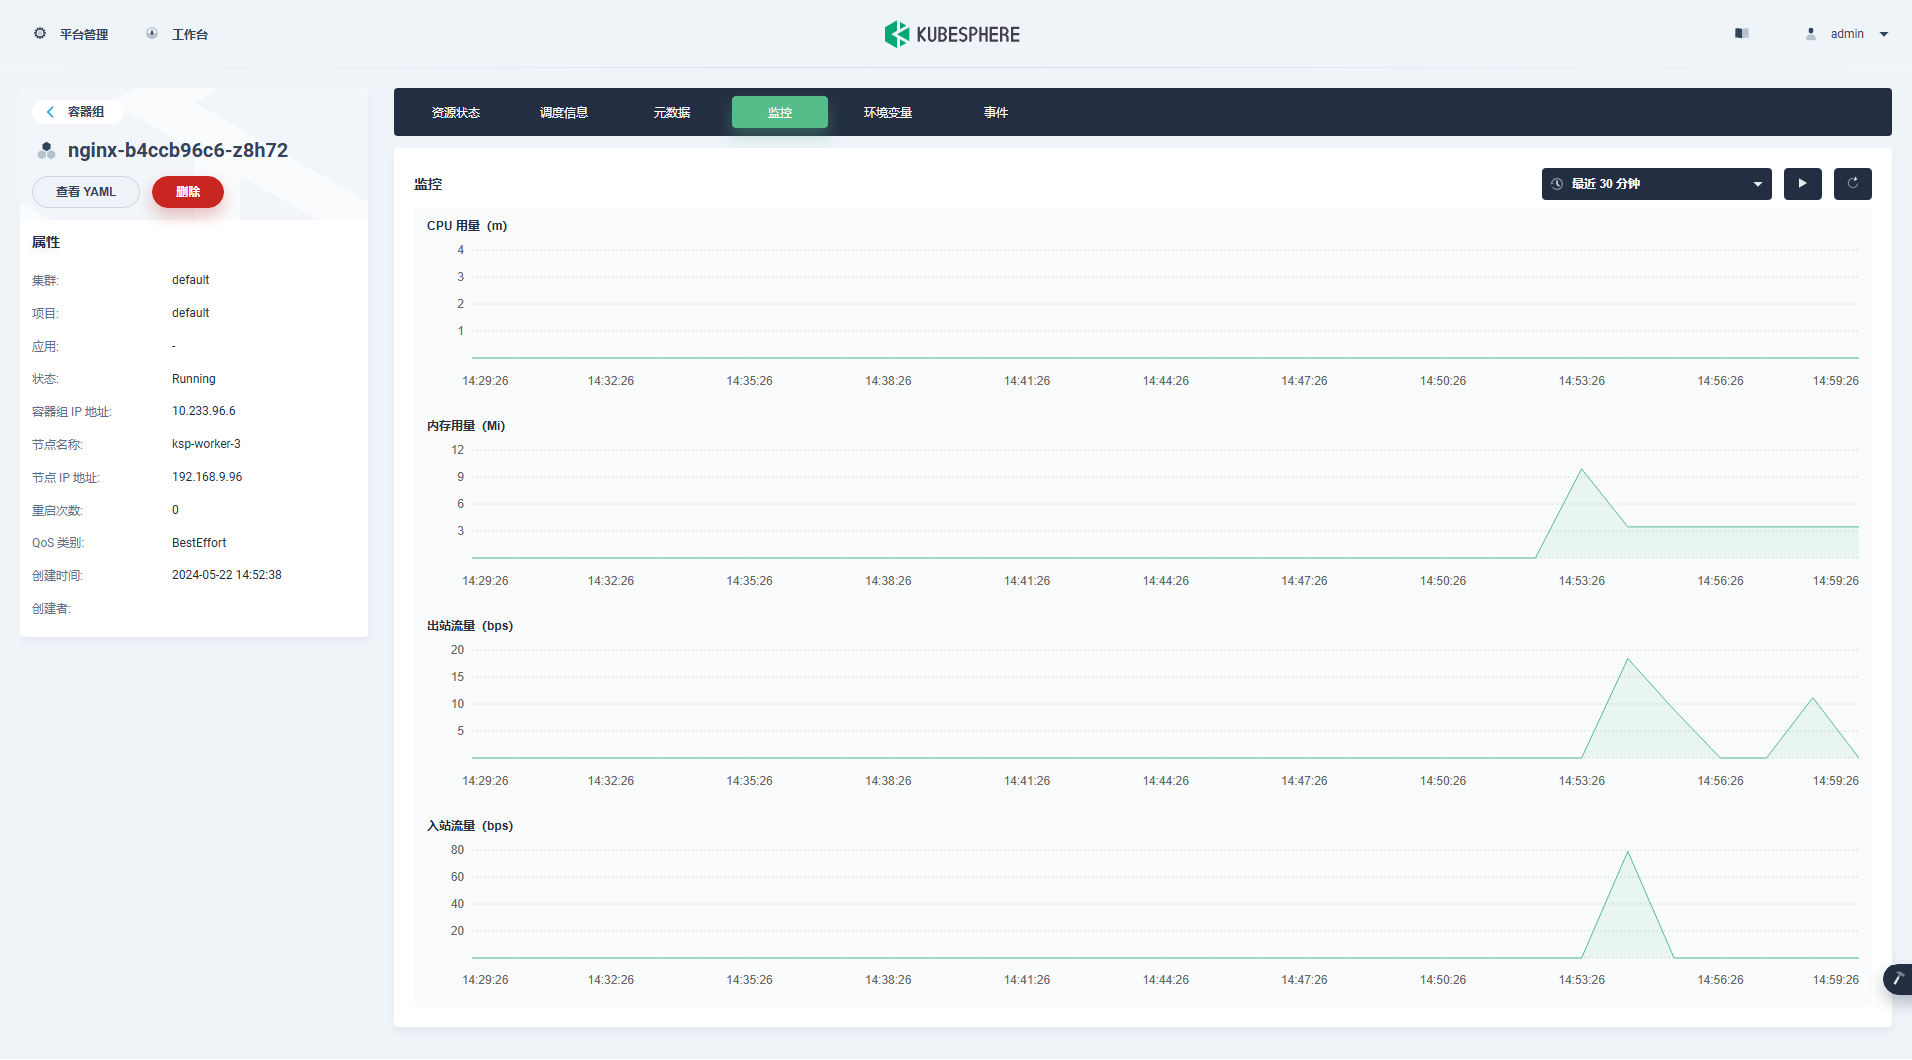
- 查看 nginx 容器的状态
- 查看 nginx 服务
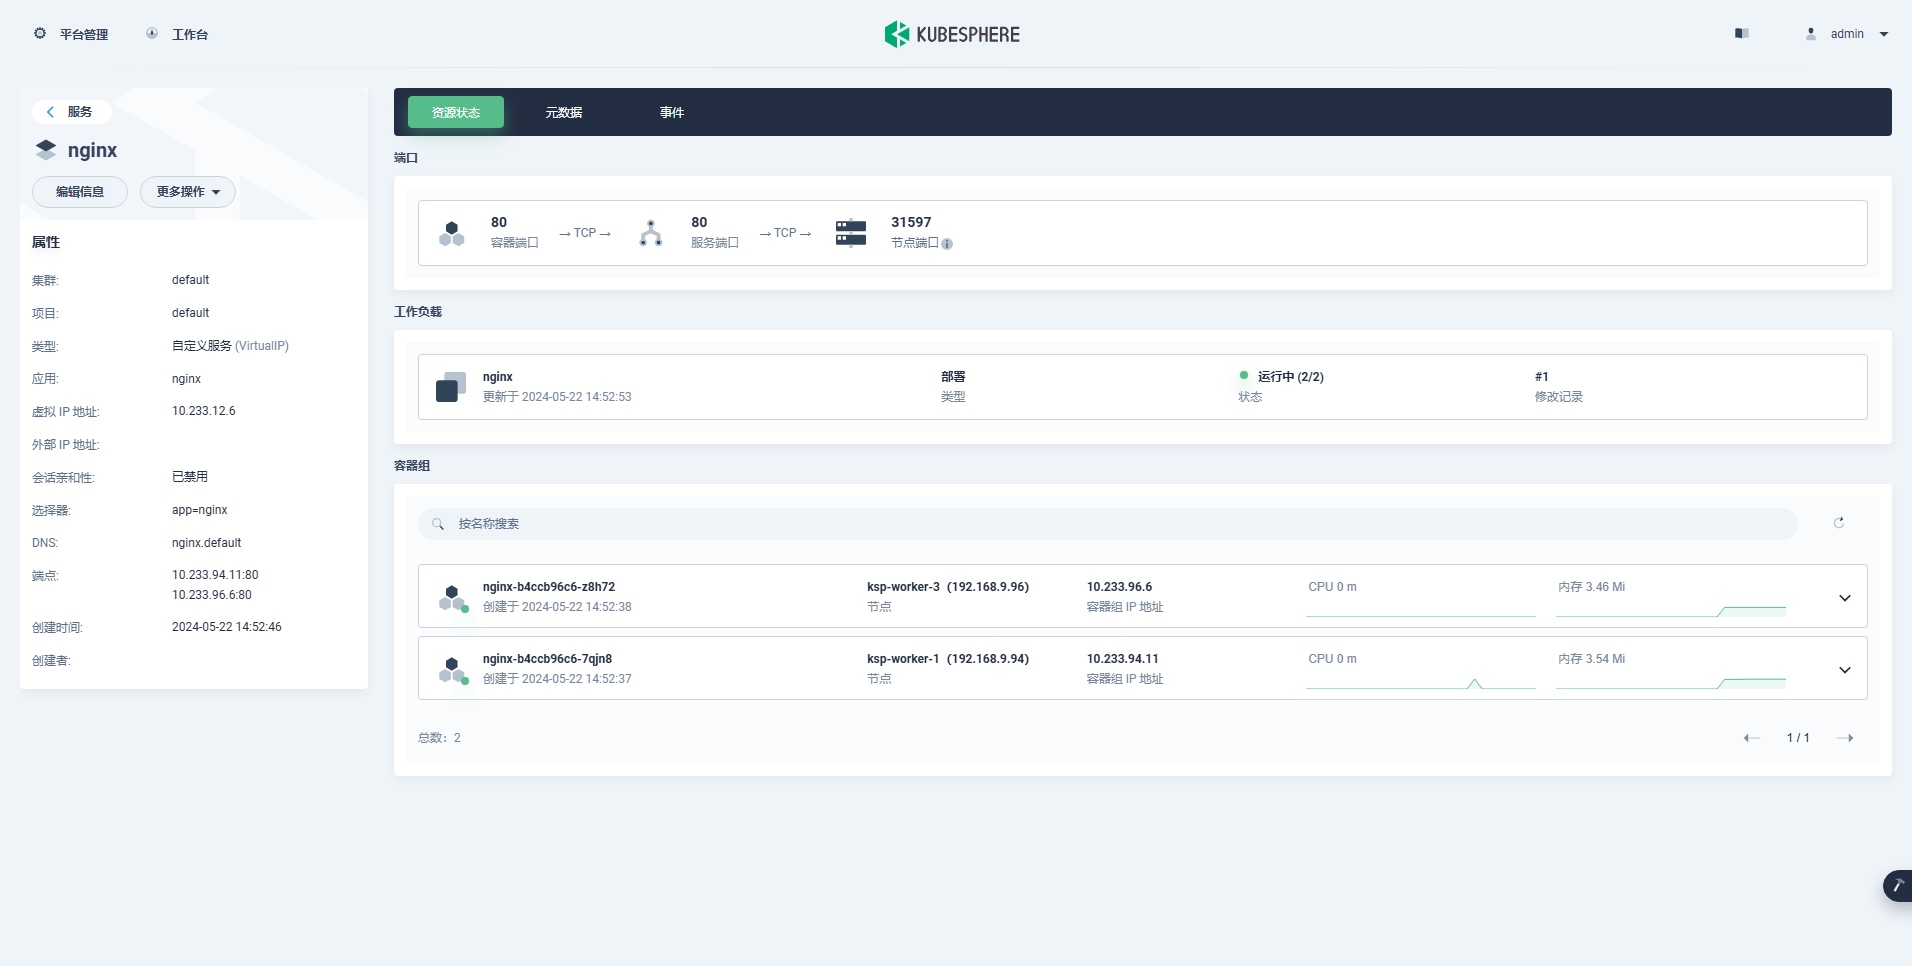
至此,我们实现了将 Nginx Web 服务器部署到 Kubernetes 集群,并通过 KubeSphere 管理控制台查看、验证了部署的 Deployment、Pod、Service 的详细信息。
5. 自动化 Shell 脚本
文章中所有操作步骤,已全部编排为自动化脚本,包含以下内容(因篇幅限制,不在此文档中展示):
- Ansible 初始化操作系统基础配置
- Ansible 初始化磁盘配置
运维有术星球会员请到专属代码仓库下载(价值内容,仅星球会员专享)。
以上,就是我今天分享的全部内容。下一期分享的内容还没想好,敬请期待开盲盒。
如果你喜欢本文,请分享、收藏、点赞、评论! 请持续关注 @运维有术,及时收看更多好文!
免责声明:
- 笔者水平有限,尽管经过多次验证和检查,尽力确保内容的准确性,但仍可能存在疏漏之处。敬请业界专家大佬不吝指教。
- 本文所述内容仅通过实战环境验证测试,读者可学习、借鉴,但严禁直接用于生产环境。由此引发的任何问题,作者概不负责!
Get 本文实战视频(请注意,文档视频异步发行,请先关注)
欢迎加入 「知识星球|运维有术」 ,获取更多的 KubeSphere、Kubernetes、云原生运维、自动化运维、AI 大模型等实战技能。未来运维生涯始终有我坐在你的副驾。
版权声明
- 所有内容均属于原创,感谢阅读、收藏,转载请联系授权,未经授权不得转载。
原创声明:本文系作者授权腾讯云开发者社区发表,未经许可,不得转载。
如有侵权,请联系 cloudcommunity@tencent.com 删除。
原创声明:本文系作者授权腾讯云开发者社区发表,未经许可,不得转载。
如有侵权,请联系 cloudcommunity@tencent.com 删除。