Hexo侧边栏添加知乎热榜
前言
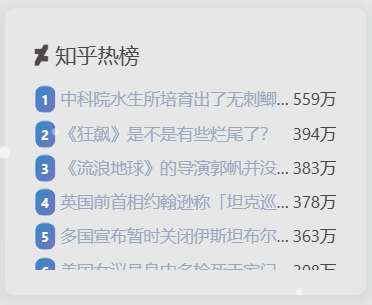
仿照微博热搜编写知乎热榜模块,效果如下:
基于
Butterfly 4.2.2版本
操作
1.在\themes\butterfly\layout\includes\widget目录下新建card_zhihu.pug文件,并写入如下代码:
if theme.aside.card_zhihu.enable
  .card-widget.card-zhihu
    .card-content
      .item-headline
        i.fab.fa-deviantart
        span 知乎热榜
      #zhihu-container
.zhihu-list由于
Font Awesome并没有知乎的图标,这里随便找了一个。
2.在\themes\butterfly\layout\includes\widget\index.pug文件中page项添加如下代码:
!=partial('includes/widget/card_zhihu', {}, {cache: true})3.在\themes\butterfly\source\js目录下新建zhihu.js文件,并写入如下代码:
fetch('https://api.gmit.vip/Api/ZhiHuHot?format=json').then(data=>data.json()).then((json)=>{
    let html = ''
    html += '<div class="zhihu-list">'
    var i = 1
    for (let item of json.data) {
        html += '<div class="zhihu-list-item"><div class="zhihu-hotness">' + i + '</div>' + '<span class="zhihu-title"><a title="' + item.title + '"href="' + item.url + '" target="_blank" rel="external nofollow noreferrer">' + item.title + '</a></span>' + '<div class="zhihu-hot"><span>' + item.hot + '</span></div></div>'
        i++
    }
    html += '</div>'
    document.getElementById('zhihu-container').innerHTML = html
}).catch(function(error) {
    console.log(error);
});4.并在主题配置文件_config.butterfly.yml的bottom处引入该文件:
inject:
  bottom:
- <script src="/js/zhihu.js"></script>5.在\themes\butterfly\source\css目录下新建zhihu.css文件,并写入如下代码:
#zhihu-container{
  width: 100%;
  height: 150px;
  font-size: 95%;
}
#zhihu-container{
  overflow-y:auto;
  -ms-overflow-style:none;
  scrollbar-width:none
}
#zhihu-container::-webkit-scrollbar{
  display:none
}
.zhihu-list-item{
  display:flex;
  justify-content:space-between;
  flex-direction:row;
  flex-wrap:nowrap
}
.zhihu-title{
  white-space:nowrap;
  overflow:hidden;
  text-overflow:ellipsis;
  margin-right:auto
}
.zhihu-hot{
  flex-shrink: 0;
}
.zhihu-hotness{
  display:inline-block;
  padding:0 6px;
  transform:scale(.8) translateX(-3px);
  font-weight: bold;
  color:#fff;
  border-top: rgba(255, 255, 255, 0.87) 1px solid;
  border-left: rgba(255, 255, 255, 0.87) 1px solid;
  background: linear-gradient(to bottom right,#348AC7, #7474BF);
  border-radius:8px
}6.并在主题配置文件_config.butterfly.yml的head处引入该文件:
inject:
  head:
- <link rel="stylesheet" href="/css/zhihu.css">7.在主题配置文件_config.butterfly.yml的aside处添加如下配置:
aside:
    card_zhihu:
    enable: true
sort_order: # Don't modify the setting unless you know how it works可以在配置文件中选择开启或关闭
重新部署,即可看到效果。
本文参与 腾讯云自媒体分享计划,分享自作者个人站点/博客。
原始发表:2023-02-04,如有侵权请联系 cloudcommunity@tencent.com 删除
评论
登录后参与评论
推荐阅读
目录