【Android】实现聊天背景框效果


一:聊天小功能设计
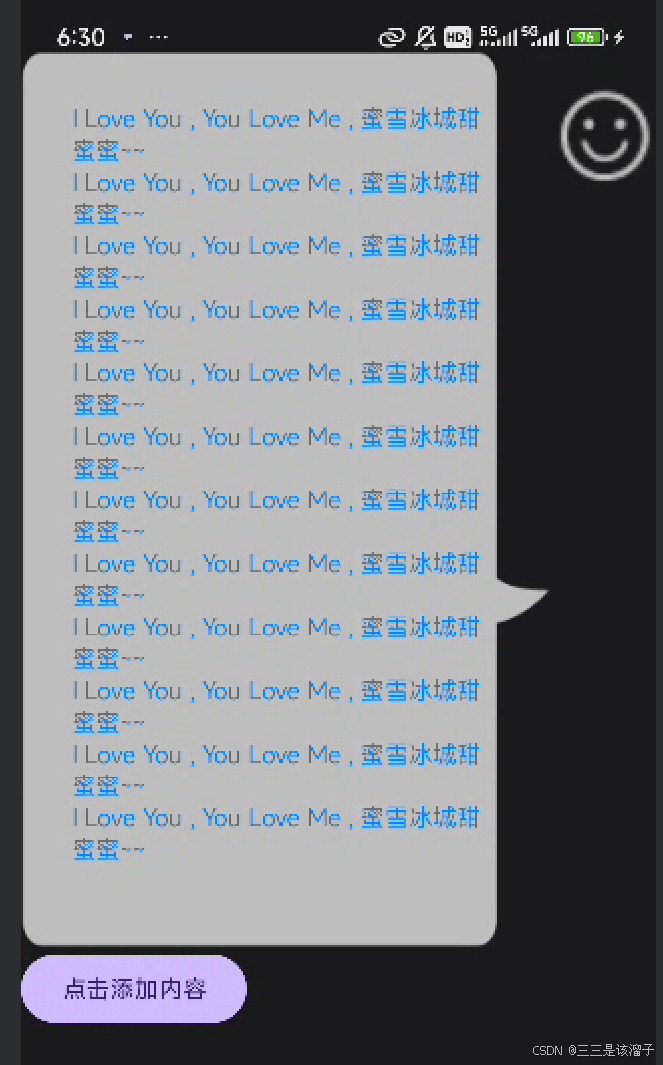
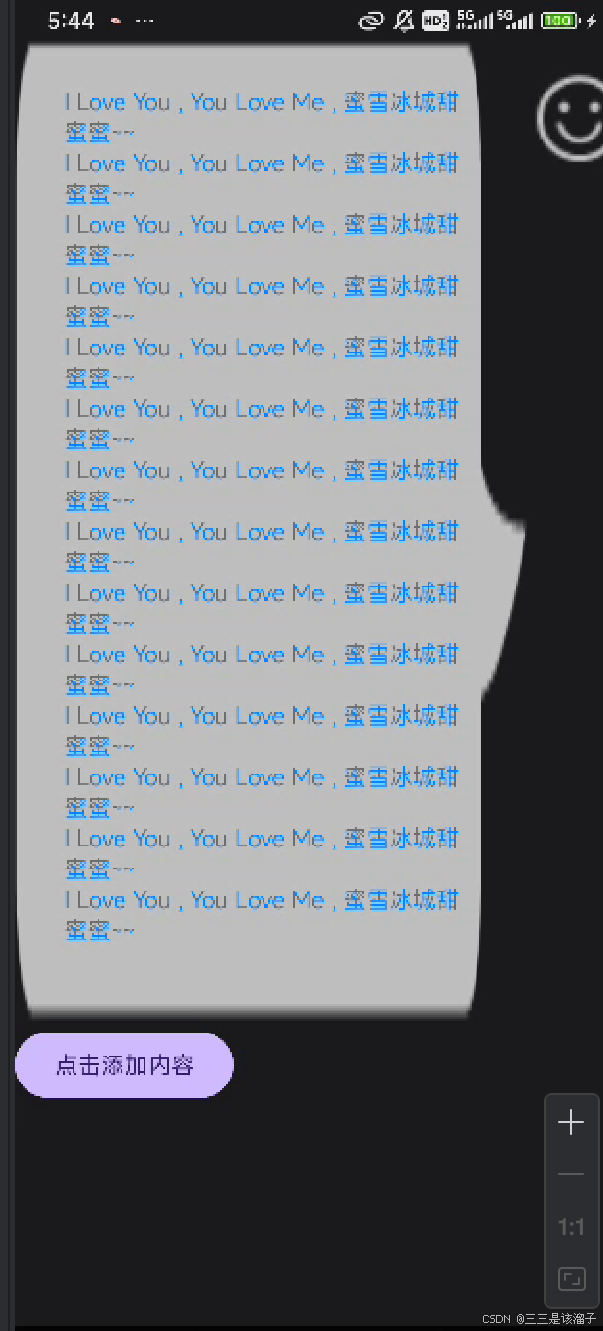
我们现在要做一款,聊天冒泡小功能要达成的效果
①点击按钮聊天框中自动添加设置好的内容
②聊天框的尺寸大小跟随文本内容的大小而动态缩放
③avatar随聊天框的移动而移动
1:xml代码
<?xml version="1.0" encoding="utf-8"?>
<LinearLayout xmlns:android="http://schemas.android.com/apk/res/android"
xmlns:app="http://schemas.android.com/apk/res-auto"
xmlns:tools="http://schemas.android.com/tools"
android:id="@+id/main"
android:layout_width="match_parent"
android:layout_height="match_parent"
android:orientation="vertical"
tools:context=".image.ChatActivity">
<LinearLayout
android:layout_width="match_parent"
android:layout_height="wrap_content"
android:orientation="horizontal">
<TextView
android:id="@+id/tv_message"
android:layout_width="0dp"
android:layout_height="wrap_content"
android:layout_marginTop="30dp"
android:layout_weight="1"
android:background="@drawable/bg_chat_message"
android:paddingLeft="30dp"
android:paddingTop="30dp"
android:paddingRight="30dp"
android:paddingBottom="30dp"
android:textColor="@color/my_blue" />
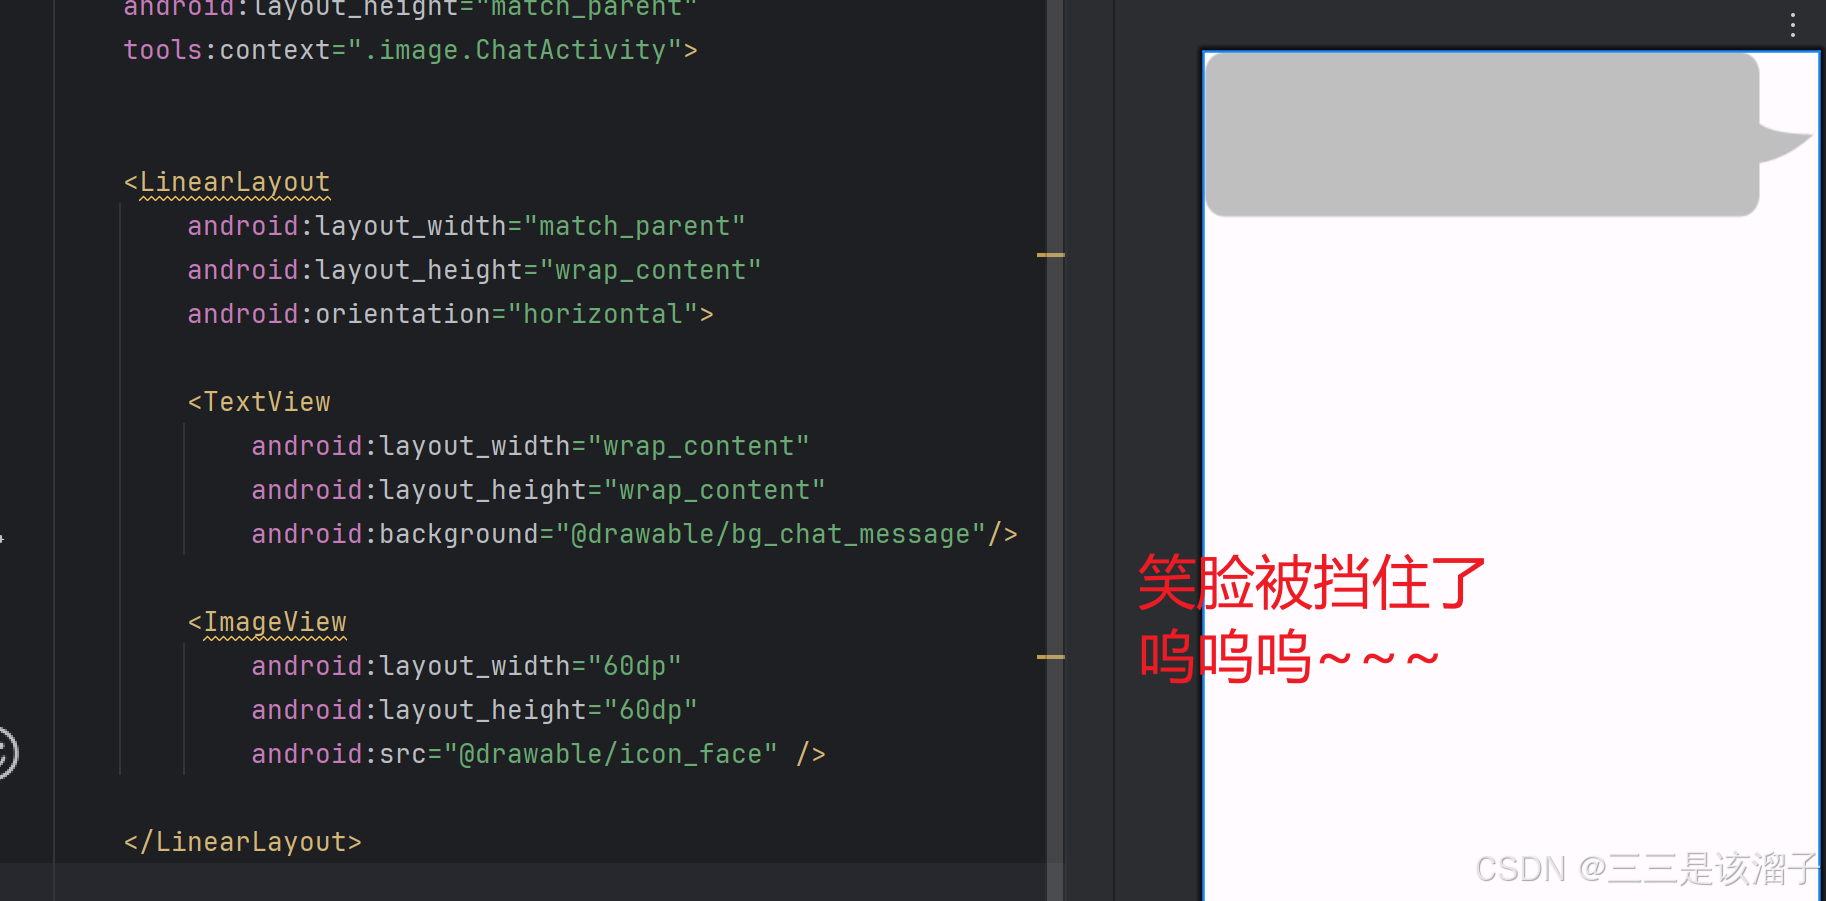
<ImageView
android:id="@+id/iv_avatar"
android:layout_width="60dp"
android:layout_height="60dp"
android:layout_marginTop="50dp"
android:src="@drawable/icon_face" />
</LinearLayout>
<Button
android:id="@+id/btn_send"
android:layout_width="wrap_content"
android:layout_height="wrap_content"
android:text="点击添加内容" />
</LinearLayout>2:Java代码
@Override
    protected void onCreate(Bundle savedInstanceState) {
        super.onCreate(savedInstanceState);
        setContentView(R.layout.activity_chat);

        Button btnSend = findViewById(R.id.btn_send);
        TextView tvMessage = findViewById(R.id.tv_message);

        btnSend.setOnClickListener(new View.OnClickListener() {
            @Override
            public void onClick(View v) {
                String str = "I Love You , You Love Me , 蜜雪冰城甜蜜蜜~~\n";
                tvMessage.append(str);
            }
        });

    }
(1)append方法分析
这里是设置了一个按钮的监听器,每次点击按钮,我们就让TextView中的稳重追加设置好的字符串内容
3:效果
外链图片转存失败,源站可能有防盗链机制,建议将图片保存下来直接上传
二:代码分析
1:margin和padding对比
(1)代码分析
android:layout_marginTop="30dp" android:paddingTop="30dp"
android:paddingBottom="30dp"
android:paddingLeft="30dp"
android:paddingRight="30dp"margin是指外边距:主要是指视图与视图之间的距离,是外部空间
padding是指内边距:比如Top,就是视图内部上边距与文本的距离
(2)效果对比
外链图片转存失败,源站可能有防盗链机制,建议将图片保存下来直接上传
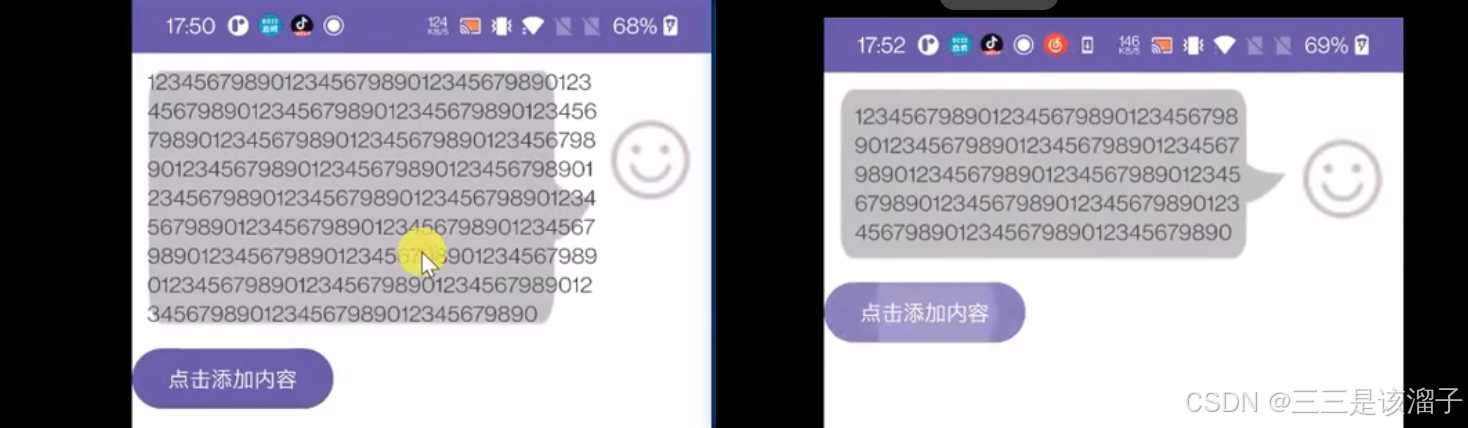
2:Weight
(1)问题引入
外链图片转存失败,源站可能有防盗链机制,建议将图片保存下来直接上传
(2)代码分析
权重,
举个例子,现在聊天框和笑脸是公用,我们如果给ImageView的Weight也设置成1;
那就相当于,总的权重为2,TextVIew所占空间为1/2=二分之一行,ImageView同理
下面这样设置,TextView为0,权重为1,意思就是把除了 Image的60dp宽度以外的所有位置占满;(米奇妙妙屋~~)
<TextView
		android:layout_weight="1"
android:layout_width="0dp"/><ImageView
android:id="@+id/iv_avatar"
android:layout_width="60dp"
android:layout_height="60dp"
android:layout_marginTop="50dp"
android:src="@drawable/icon_face" />(3)有无设置 Weight 效果对比
外链图片转存失败,源站可能有防盗链机制,建议将图片保存下来直接上传
(4)注意点
设置过权重的控件,建议把对应的宽或者高,指定成0dp;
避免空间叠加计算:如果不设置为 0dp ,比如设置为 wrap_content 或固定值(如 100dp ),控件本身先占据了一部分空间,然后权重分配又会基于剩余空间再去分配,就不准了;这样做也是为了统一计算基准
适配不同屏幕:在多屏幕适配场景下,设置 0dp 结合权重的方式,能更好地让布局根据屏幕可用空间灵活调整,按照比例分配空间,保证在不同尺寸、分辨率屏幕上布局的相对一致性;

外链图片转存失败,源站可能有防盗链机制,建议将图片保存下来直接上传
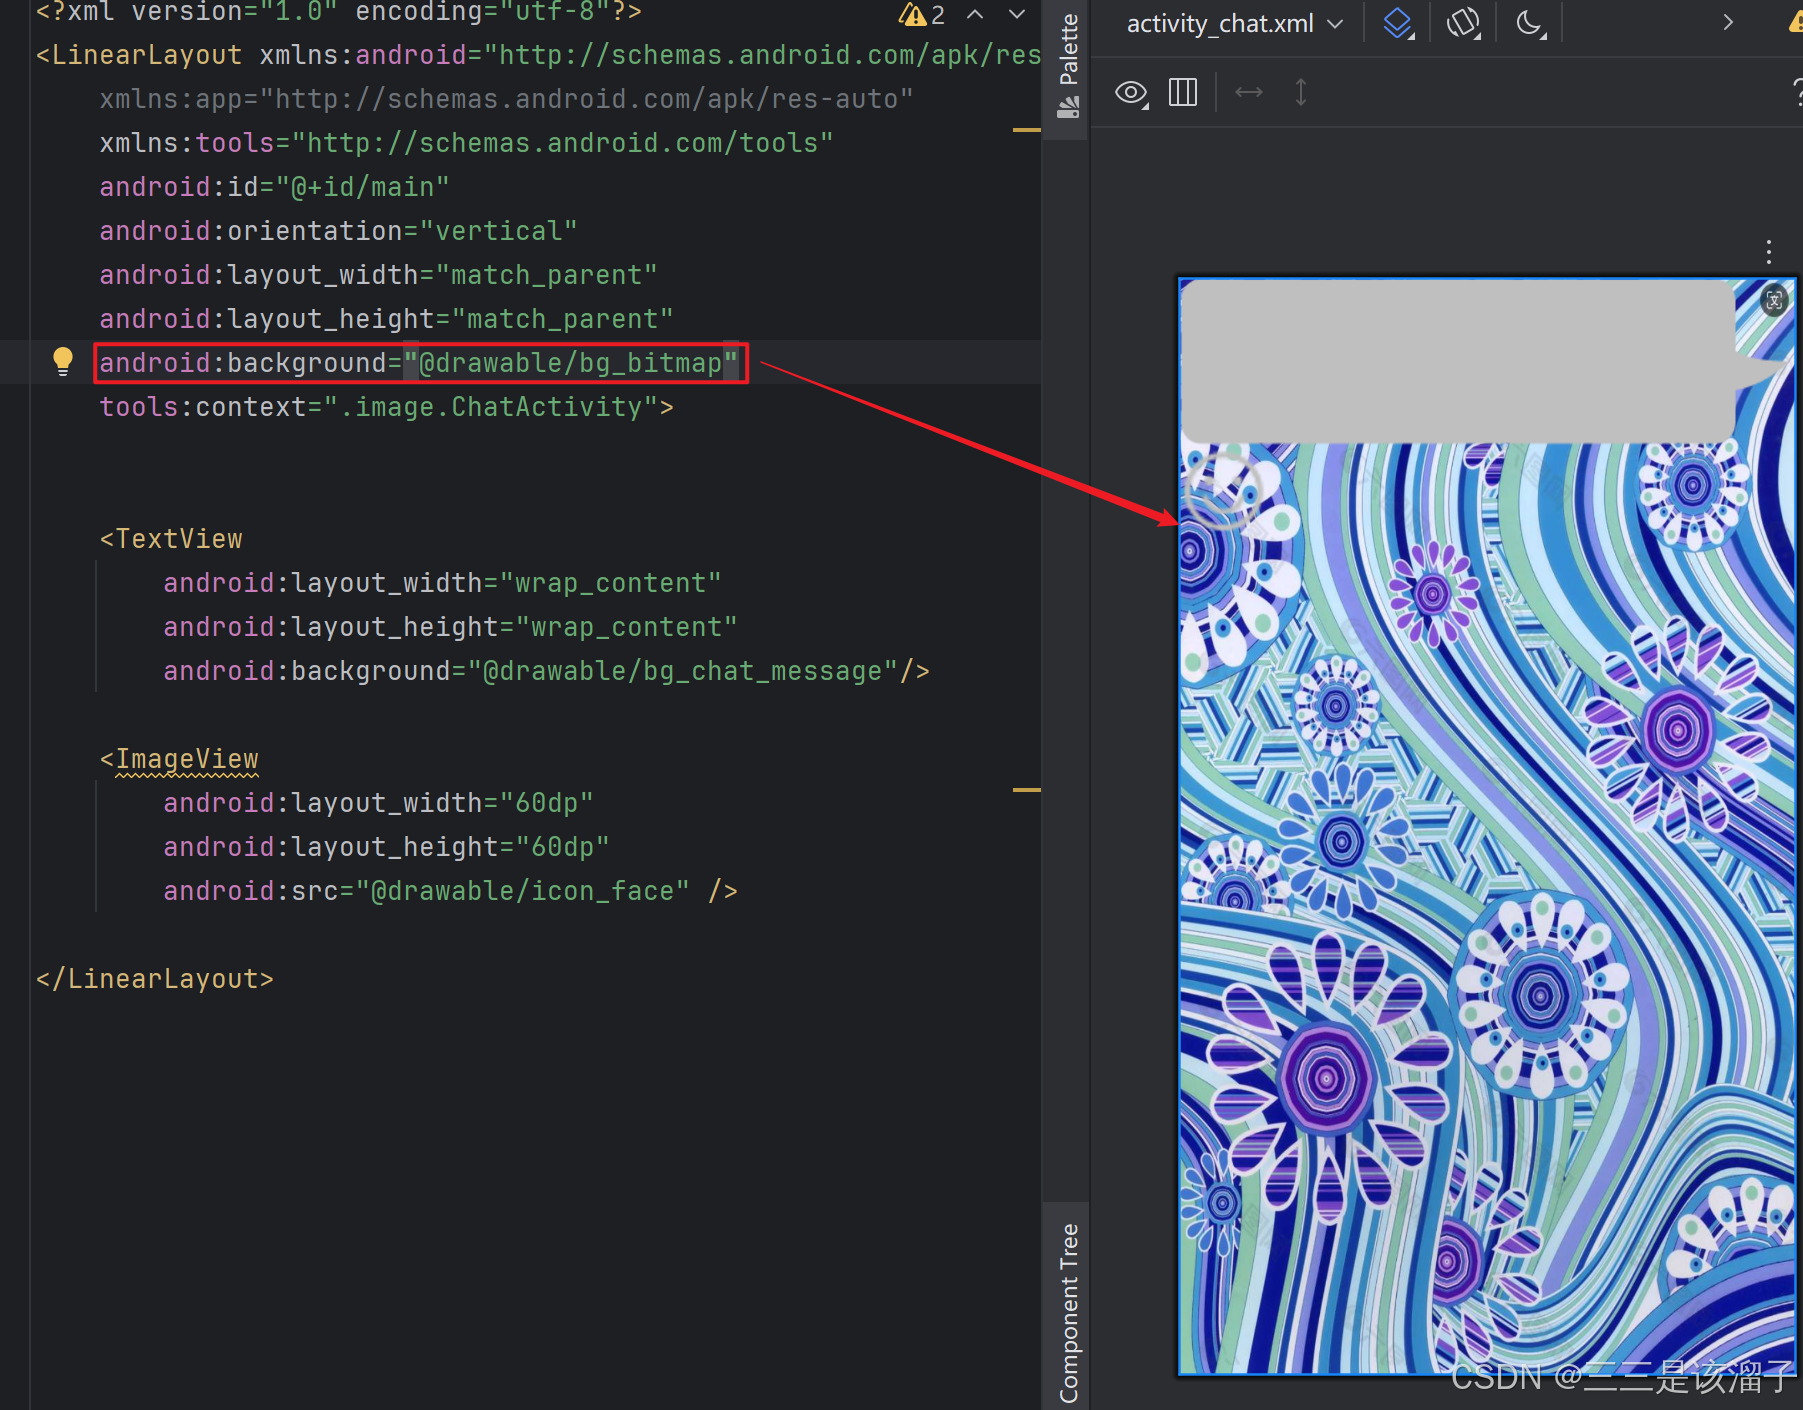
3:background设置背景图
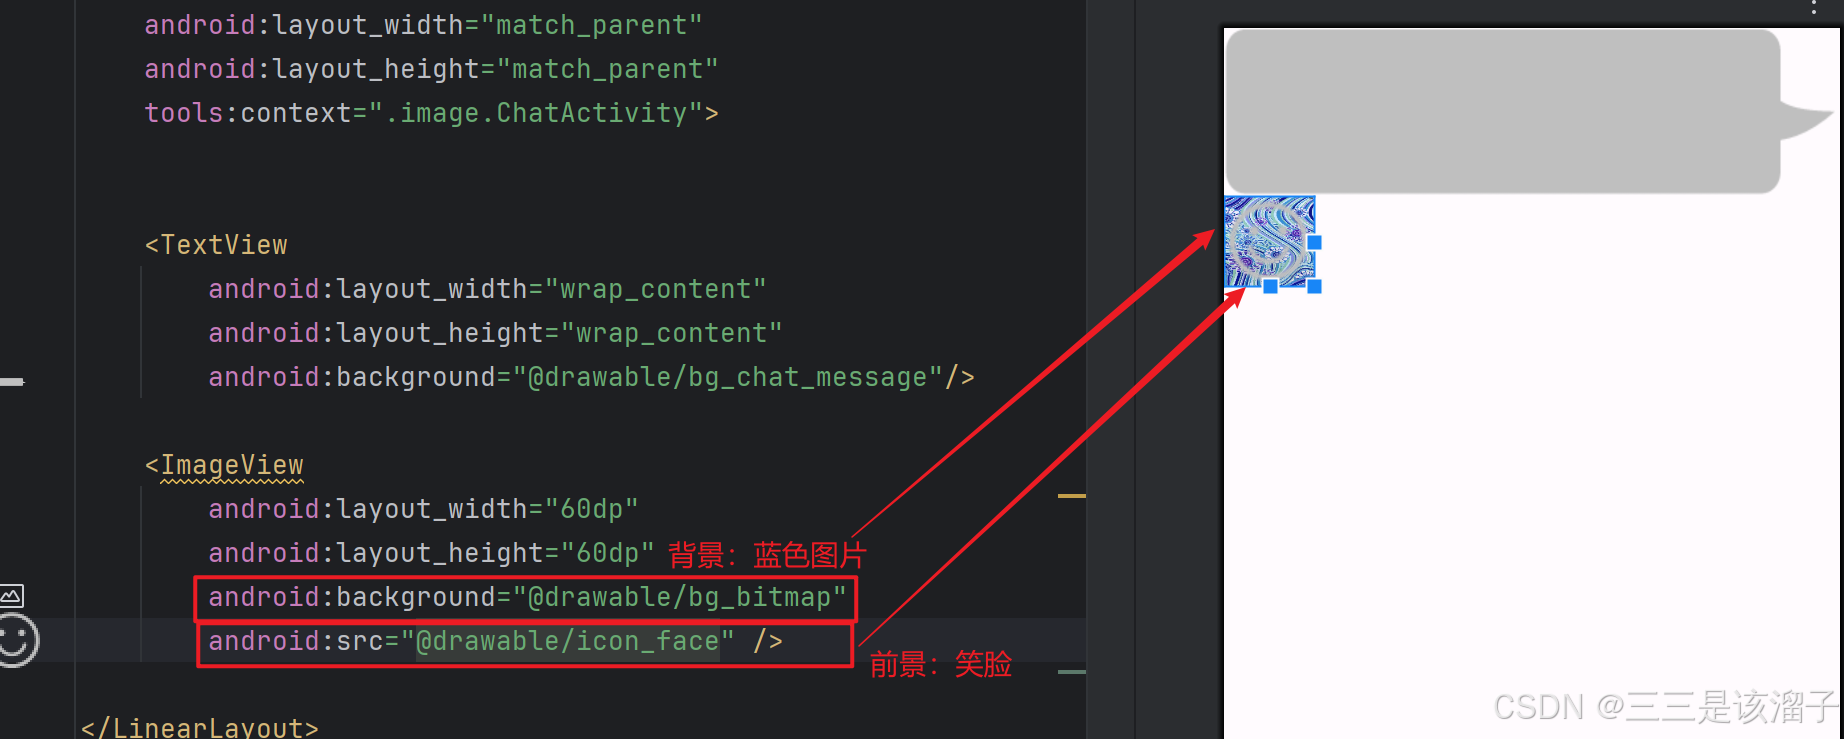
外链图片转存失败,源站可能有防盗链机制,建议将图片保存下来直接上传
了解一下即可——我们拿background要做的事情:背景图片和TextView做关联
外链图片转存失败,源站可能有防盗链机制,建议将图片保存下来直接上传
4:textColor设置字体颜色
设置字体颜色——不熟悉——菜就多练
外链图片转存失败,源站可能有防盗链机制,建议将图片保存下来直接上传
三:.9图片
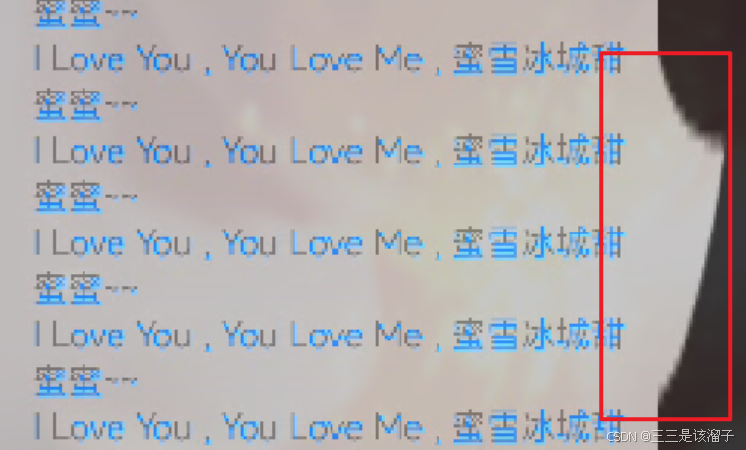
1:问题引入
尖角这一块会随着聊天框的拉伸而拉伸,这显然是不合理的兄弟,于是我们引出.9图片
外链图片转存失败,源站可能有防盗链机制,建议将图片保存下来直接上传
2:创建.9图片
这里在drawable文件夹下面,选择一张png(目前来看只支持png)作为底子,创建一张.9图片

外链图片转存失败,源站可能有防盗链机制,建议将图片保存下来直接上传

外链图片转存失败,源站可能有防盗链机制,建议将图片保存下来直接上传
3:.9图片的三种拉伸效果
从上至上依次是:竖直拉伸,横向拉伸,竖直横向拉伸

外链图片转存失败,源站可能有防盗链机制,建议将图片保存下来直接上传
外链图片转存失败,源站可能有防盗链机制,建议将图片保存下来直接上传
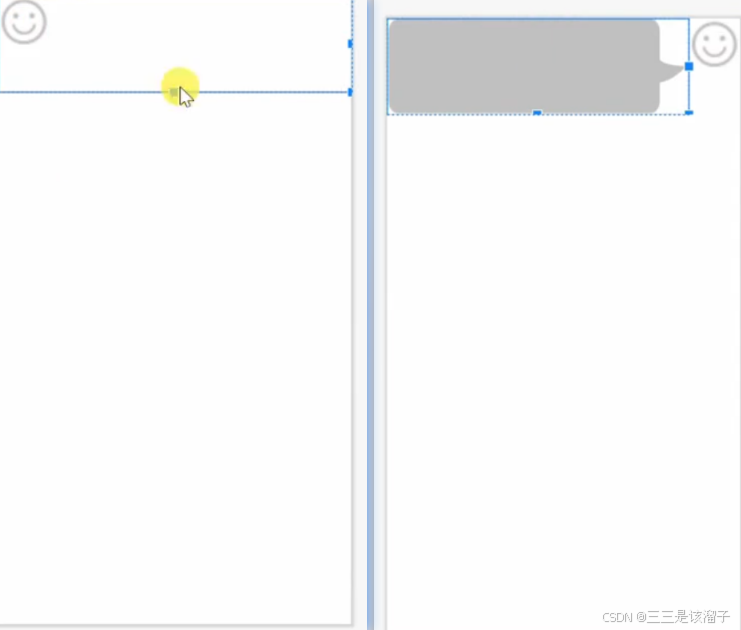
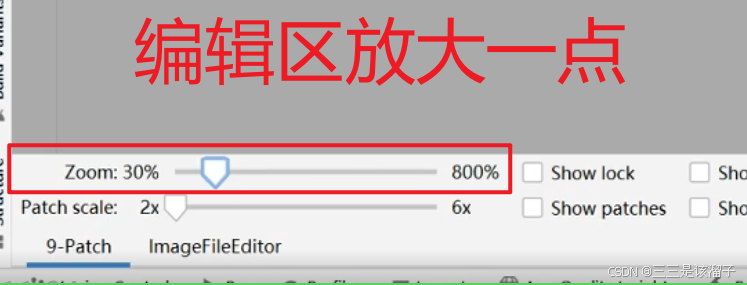
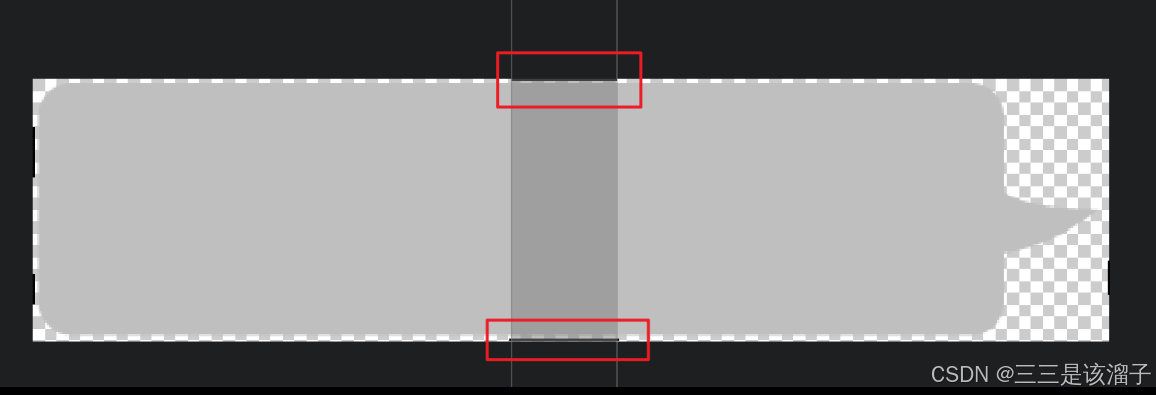
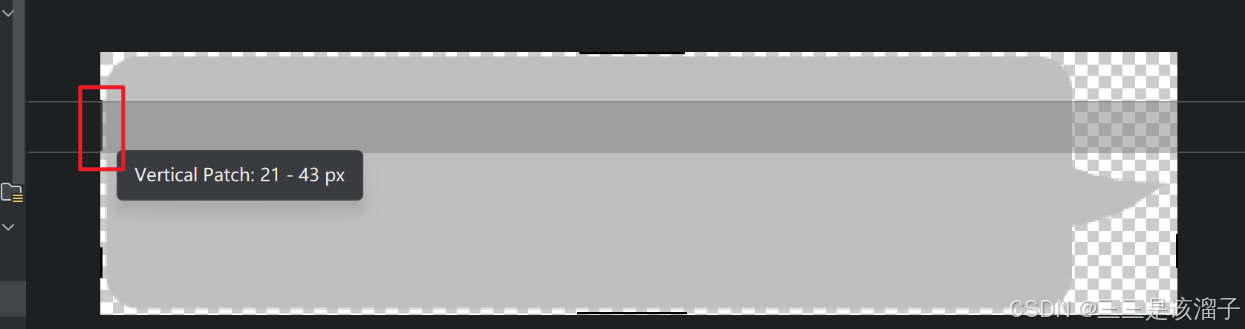
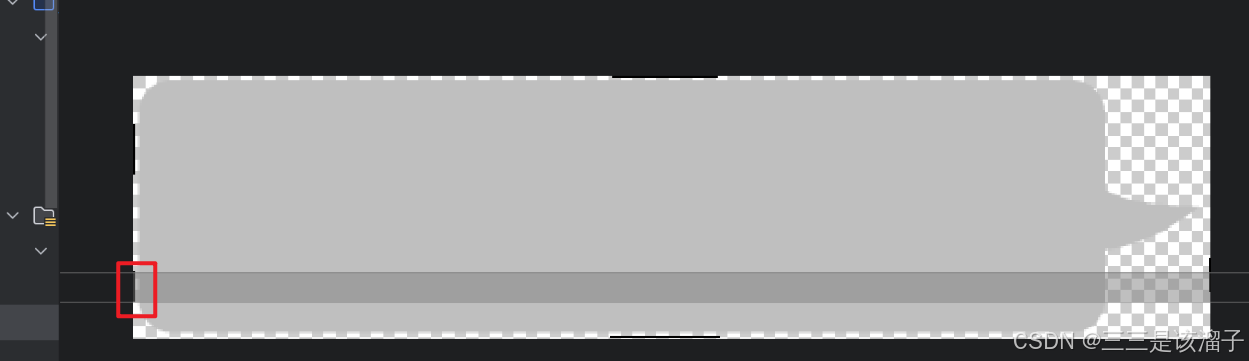
4:设置拉伸区域
看到那条黑色的线了嘛,这代表我们划分出来的拉伸的区域
外链图片转存失败,源站可能有防盗链机制,建议将图片保存下来直接上传
外链图片转存失败,源站可能有防盗链机制,建议将图片保存下来直接上传
外链图片转存失败,源站可能有防盗链机制,建议将图片保存下来直接上传
本文参与 腾讯云自媒体同步曝光计划,分享自作者个人站点/博客。
原始发表:2025-07-19,如有侵权请联系 cloudcommunity@tencent.com 删除
评论
登录后参与评论
推荐阅读
目录
腾讯云开发者

Copyright © 2013 - 2026 Tencent Cloud. All Rights Reserved. 腾讯云 版权所有
深圳市腾讯计算机系统有限公司 ICP备案/许可证号:粤B2-20090059 ![]() 粤公网安备44030502008569号
粤公网安备44030502008569号
腾讯云计算(北京)有限责任公司 京ICP证150476号 | 京ICP备11018762号