简介
Django 是一个基于 Python 的开源 Web 应用框架,它的出现极大地简化了 Web 应用的开发过程。为了更好地满足现代 Web 应用的需求,Django 提供了很多扩展功能,其中包括云存储。
前提条件
已有 COS 存储桶。如无,可参见 创建存储桶 操作指引。
已创建服务器。例如云服务器(Cloud Virtual Machine,CVM)。相关指引可参见 CVM 产品文档。
环境依赖
Python 版本:大于等于3.8版本。本文以 Python 3.12.0版本举例说明。
COS Python 版本:大于等于1.9.31版本。安装方法请参见 COS Python SDK 快速入门。本文以 COS Python 1.9.31版本举例说明。
Django 版本:大于等于2.2,小于3.3版本。本文以3.2.18版本举例说明。
实践步骤
创建 COS 存储桶
1. 创建一个访问权限为公有读私有写的存储桶,存储桶的地域建议与运行 Django 的 CVM 地域相同,创建详情请参见 创建存储桶 文档。
2. 在存储桶列表中找到刚刚创建的存储桶,并获取存储桶名称,例如 examplebucket-1250000000。
创建 Django
1. 前往 PyCharm 官网,并按照您所使用的 CVM 系统选择对应的 PyCharm 版本。
2. 在 CVM 中安装后打开 PyCharm,单击 NEW project 或者 create project,选择下面的 Django。

3. 创建后,在您的目录下找到并打开 setting.py 文件。
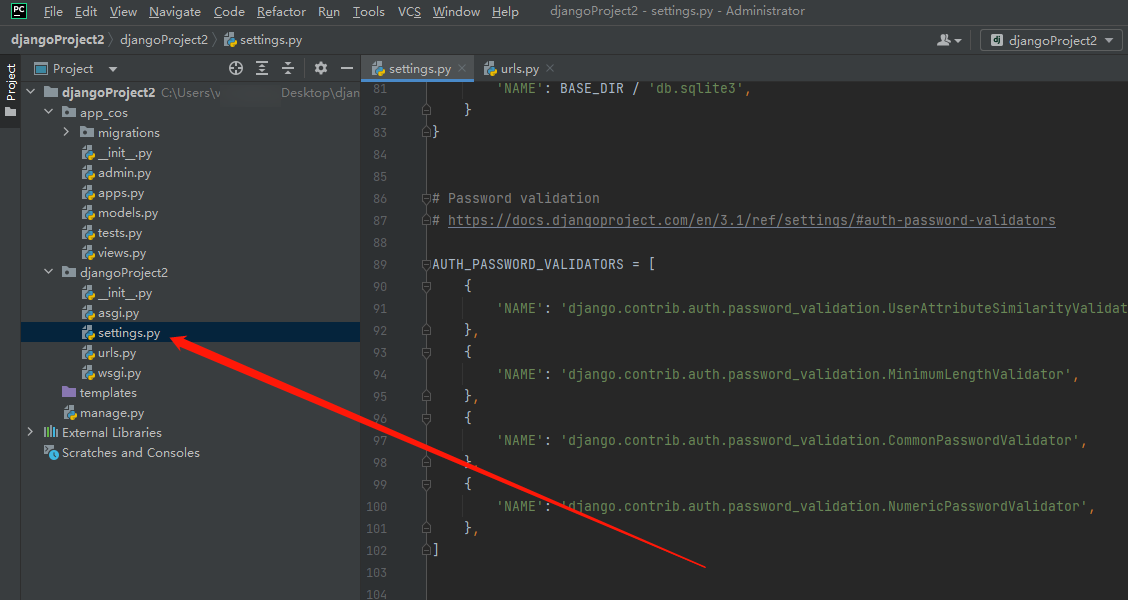
4. 将以下代码复制粘贴进去,并按照参数说明进行 COS 服务配置。
DEFAULT_FILE_STORAGE = "django_cos_storage.TencentCOSStorage"TENCENTCOS_STORAGE = {"BUCKET": "xxx","CONFIG": {"Region": "ap-guangzhou","SecretId": "xxxx","SecretKey": "xxxx",}}
参数说明如下:
下载和配置 COS 插件
1. 前往 Github 下载 COS 插件。下载后将 django_cos_storage 这个目录解压到 django 项目的目录下。
说明:
如需查看其插件信息,打开 terminal,输入
pip freeze,即可查看其模块信息。2. 在 django_cos_storage 目录下创建一个 py 文件,例如 COSStorage.py。
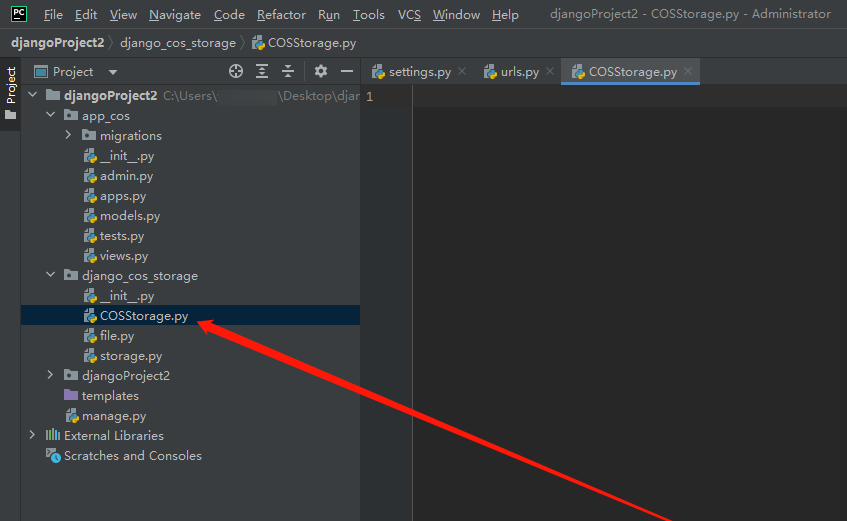
将以下代码复制粘贴进去。
from .storage import TencentCOSStoragefrom functools import wrapsdef decorator(cls):instance = None@wraps(cls)def inner(*args,**kwargs):nonlocal instanceif not instance:instance = cls(*args,**kwargs)return instancereturn inner@decoratorclass QFStorage:def __init__(self):passself.storage =TencentCOSStorage()self.bucket =self.storage.bucketself.client =self.storage.client#上传对象def upload_file(self, Key, LocalFilePath, PartSize=1, MAXThread=5, EnableMD5=False):try:response =self.client.upload_file(Bucket=self.bucket,Key=Key,LocalFilePath=LocalFilePath,PartSize=PartSize,MAXThread=MAXThread,EnableMD5=EnableMD5)return responseexcept Exception as e:print('上传对象失败,error:',e)return None
3. 打开 app_cos 目录下的 views.py。
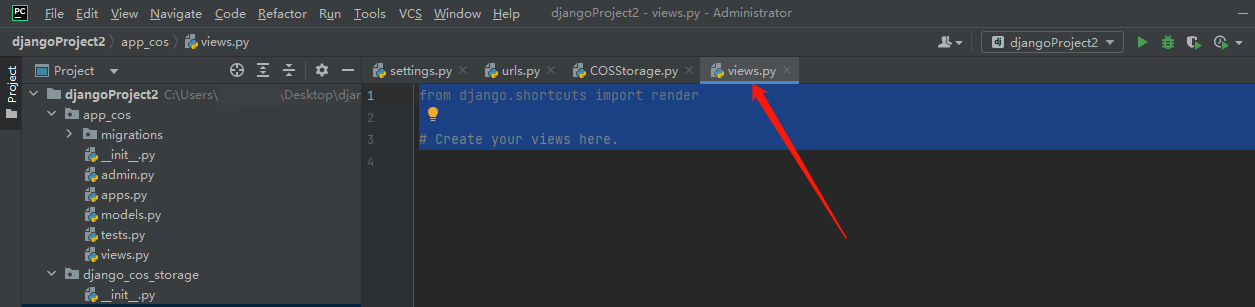
将以下代码复制粘贴进去。
from django.shortcuts import render,redirectfrom django.http import HttpResponsefrom django_cos_storage.COSStorage import QFStoragefrom django.conf import settings#上传对象def upload_file_view(request):response = QFStorage().upload_file(Key='1.png',LocalFilePath=settings.BASE_DIR / 'cessu/1.png')if response:return HttpResponse('上传文件成功!')return HttpResponse('上传文件失败')
注意:
这里示例中
cessu/1.png 表示要上传的本地文件1.png位于项目目录下的 cessu 文件夹中 。上传成功后,您可以在 COS 存储桶的 cessu 文件夹中找到图片1.png。4. 在 djangoProject2 目录下找到并打开 urls.py。

将代码复制粘贴进去。
from django.contrib import adminfrom django.urls import pathfrom app_cos.views import *urlpatterns = [path('admin/', admin.site.urls),path('upload_file/', upload_file_view),]
5. 在 terminal 中输入
python manage.py migrate并执行。6. 在 terminal 中输入
python manage.py createsuperuser,按照提示输入账号密码即可。注意:
如果执行
python manage.py createsuperuser时提示缺少 pkg_resources,请执行安装命令pip install setuptools进行解决。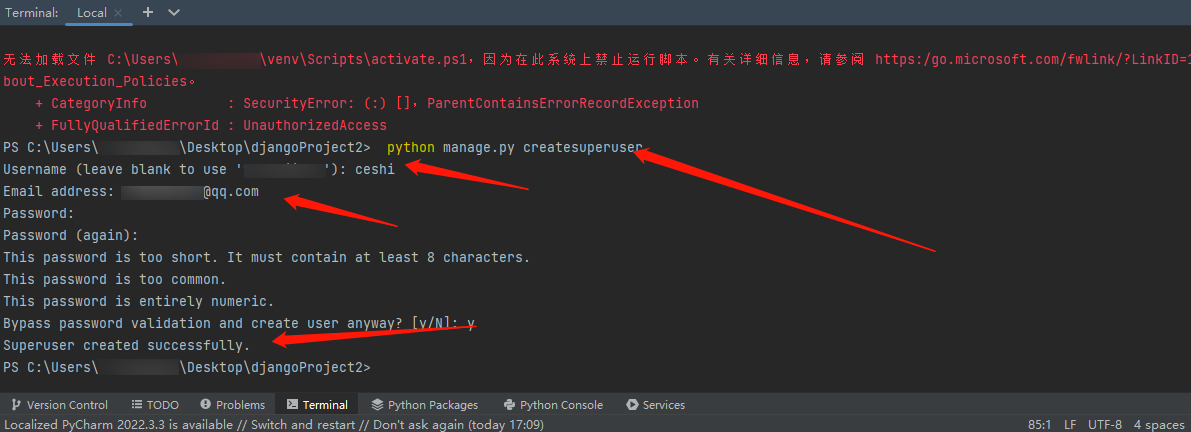
7. 然后在 terminal 中输入
python .\\manage.py runserver 运行。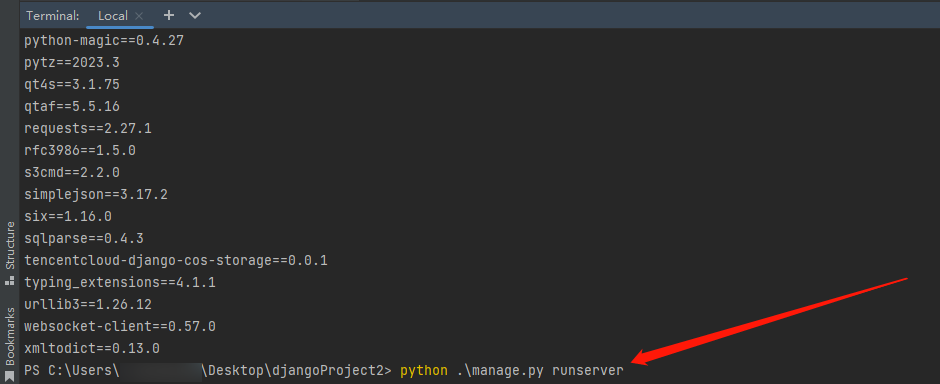
8. 打开网站
http://127.0.0.1:8000/admin/,并输入刚才设置的账号密码即可完成登录。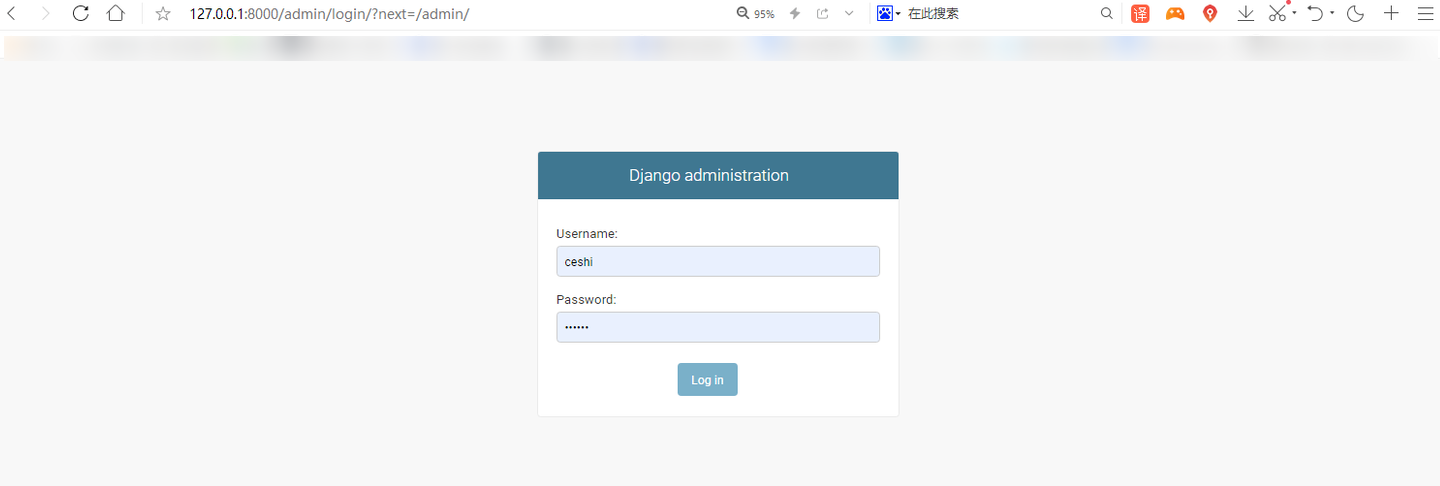
注意:
若打开网站提示报错如下:
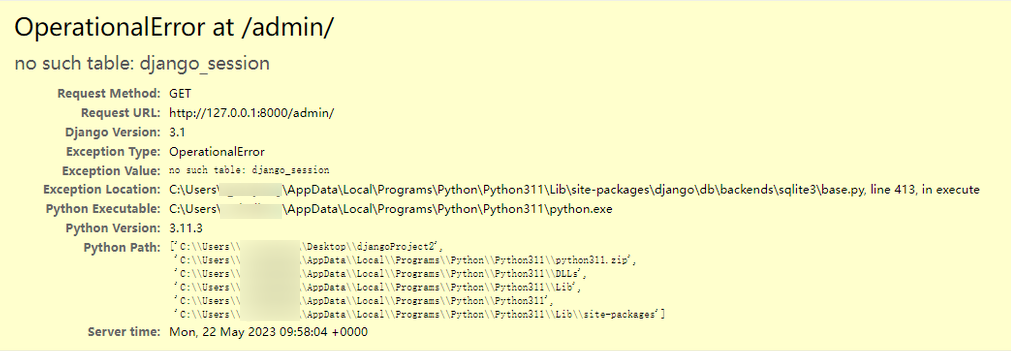
python manage.py makemigrationspython manage.py migrate
最后在 terminal 中输入
python .\\manage.py runserver 运行,然后打开 http://127.0.0.1:8000/admin/ 即可。验证 Django 附件存储到 COS
1. 访问
http://127.0.0.1:8000/upload_file,完成上传文件操作。当提示如下图所示,则表示上传成功。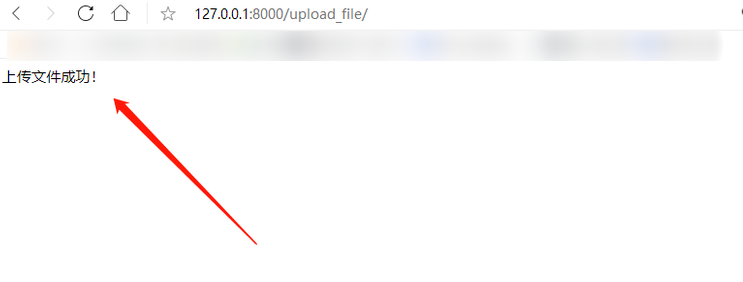
2. 登录 COS 控制台,选择之前创建的存储桶,在 cessu 路径下即可看到已上传的图片。


