开发环境
Android Studio 2.0+
Android 4.2(SDK API 17)及以上系统
集成 TEduBoard SDK
您可以选择使用 Gradle 自动加载的方式,或者手动下载 aar 再将其导入到您当前的工程项目中。由于 TEduBoard SDK 内部使用 TIMSDK 作为内部信令通道,您还需自动或手动添加 TIMSDK 依赖项。
自动加载(aar)
TEduBoard SDK 和 TIMSDK 已经发布到 Maven Central 库,您可以通过配置 gradle 自动下载更新。
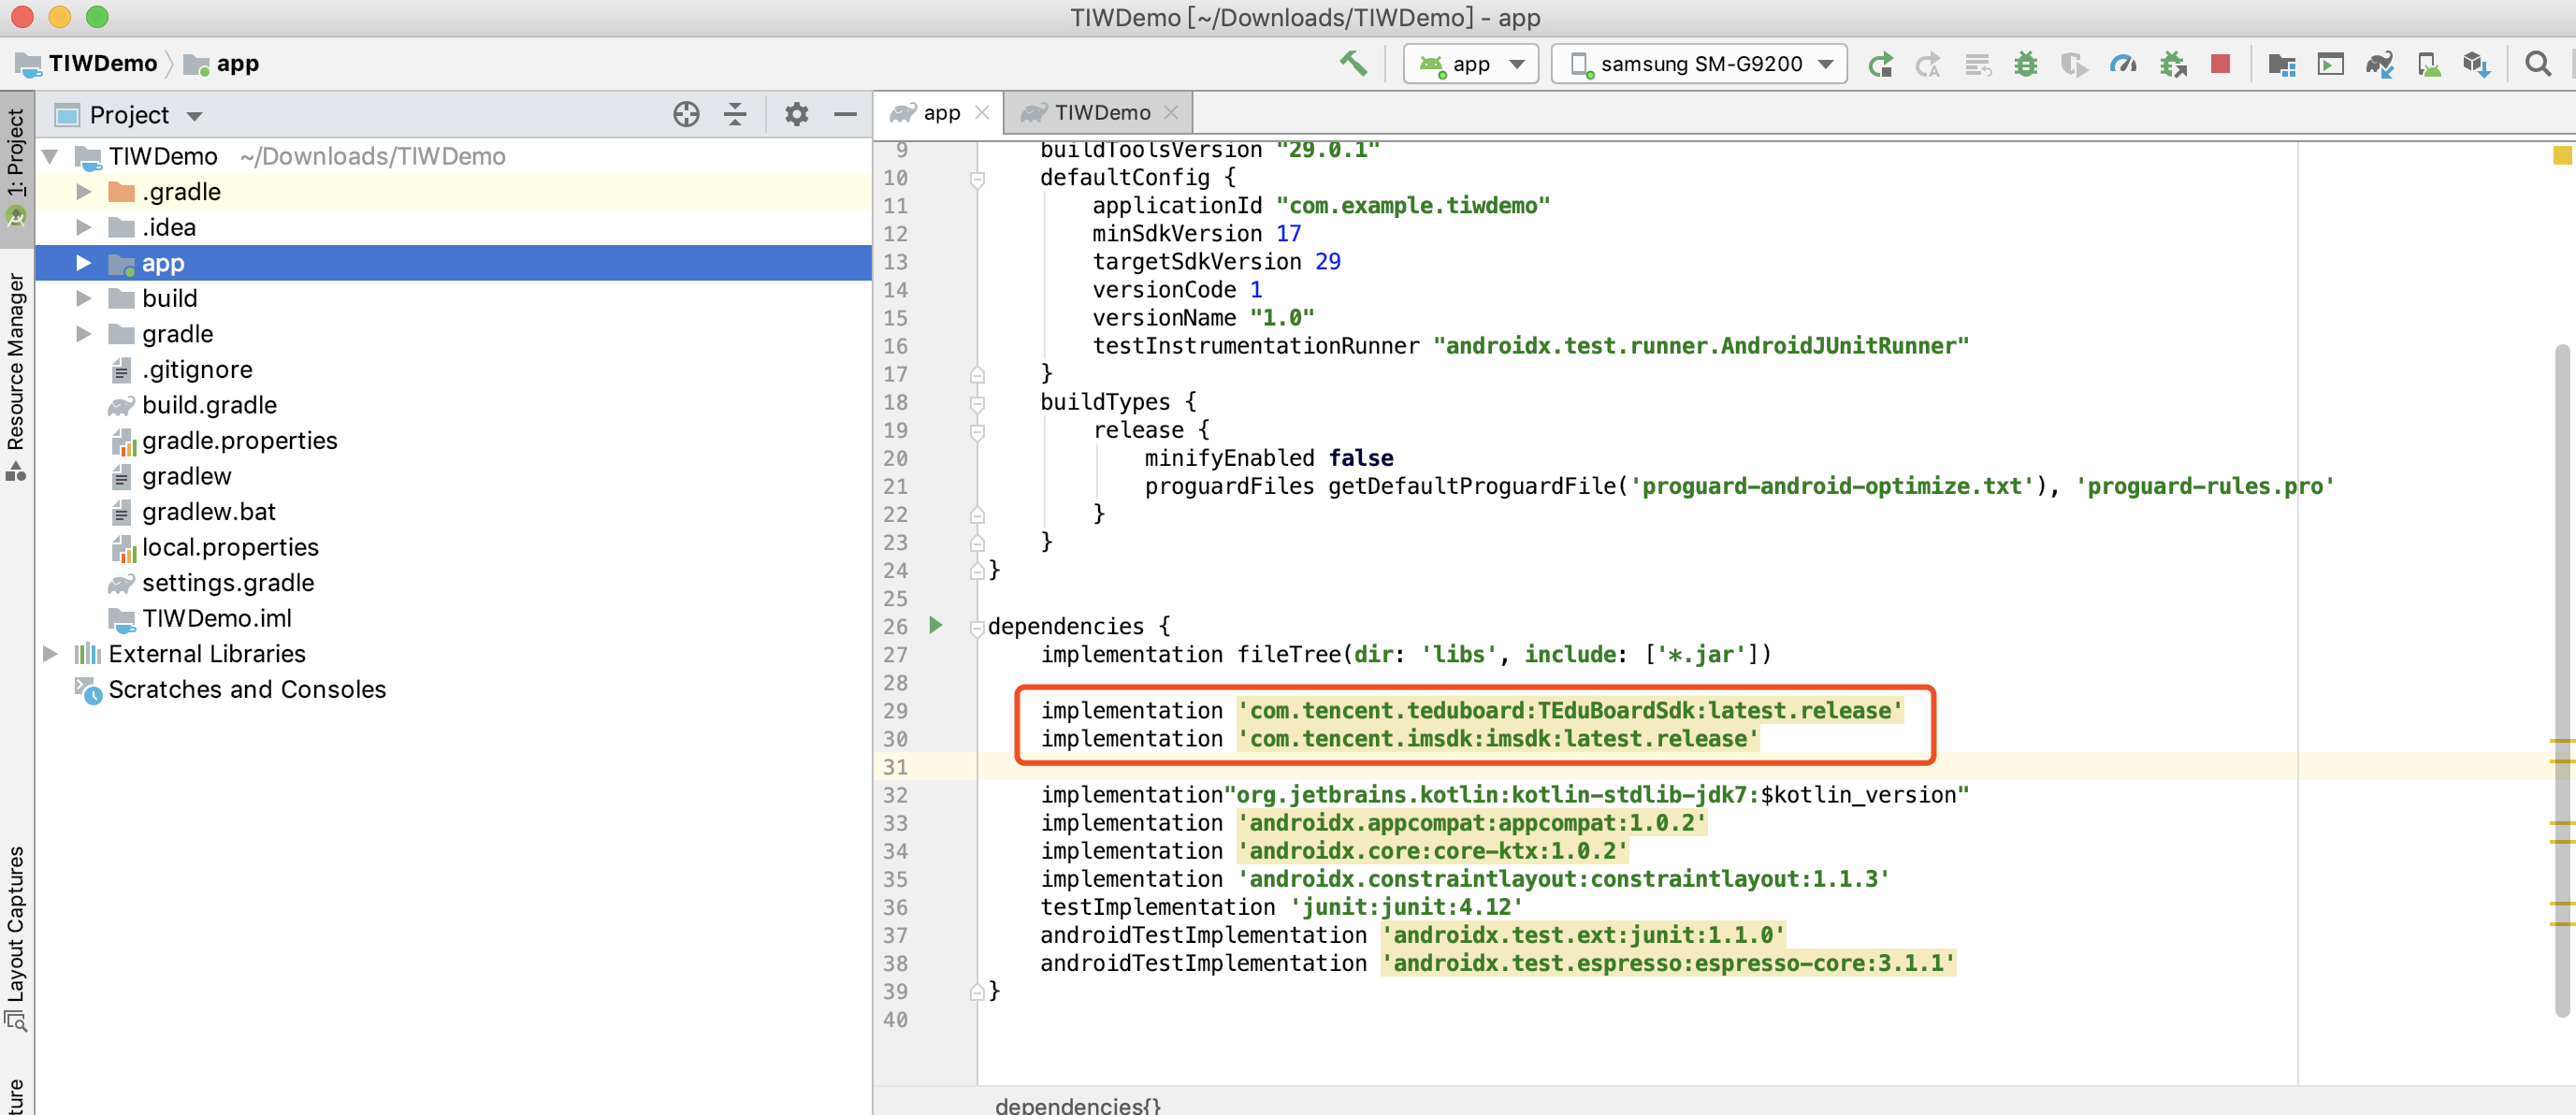
1. 添加 SDK 依赖
dependencies {implementation 'com.tencent.edu:TEduBoardSdk:latest.release'implementation 'com.tencent.imsdk:imsdk:latest.release'}
2. 同步 SDK
单击 Sync Now,如果您的网络连接 Maven Central 没有问题,SDK 会自动下载集成到工程里。
手动下载(aar)
如果您的网络连接 Maven Central 有问题,也可以手动下载 SDK 集成到工程里。
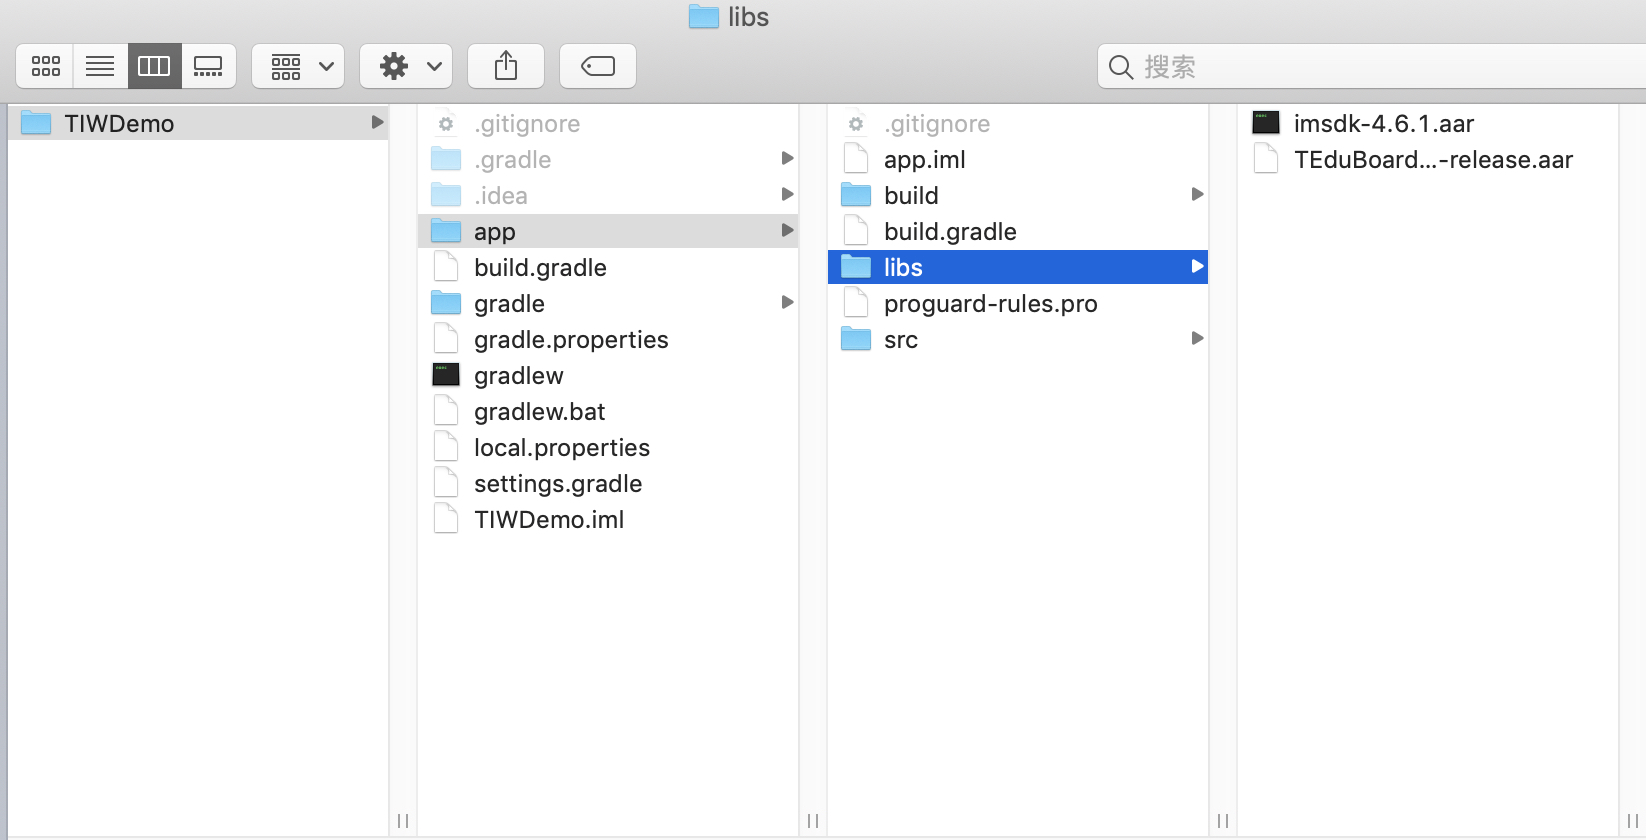
1. 下载 SDK
2. 导入 SDK
将下载到的 aar 文件拷贝到工程的 app/libs 目录下。
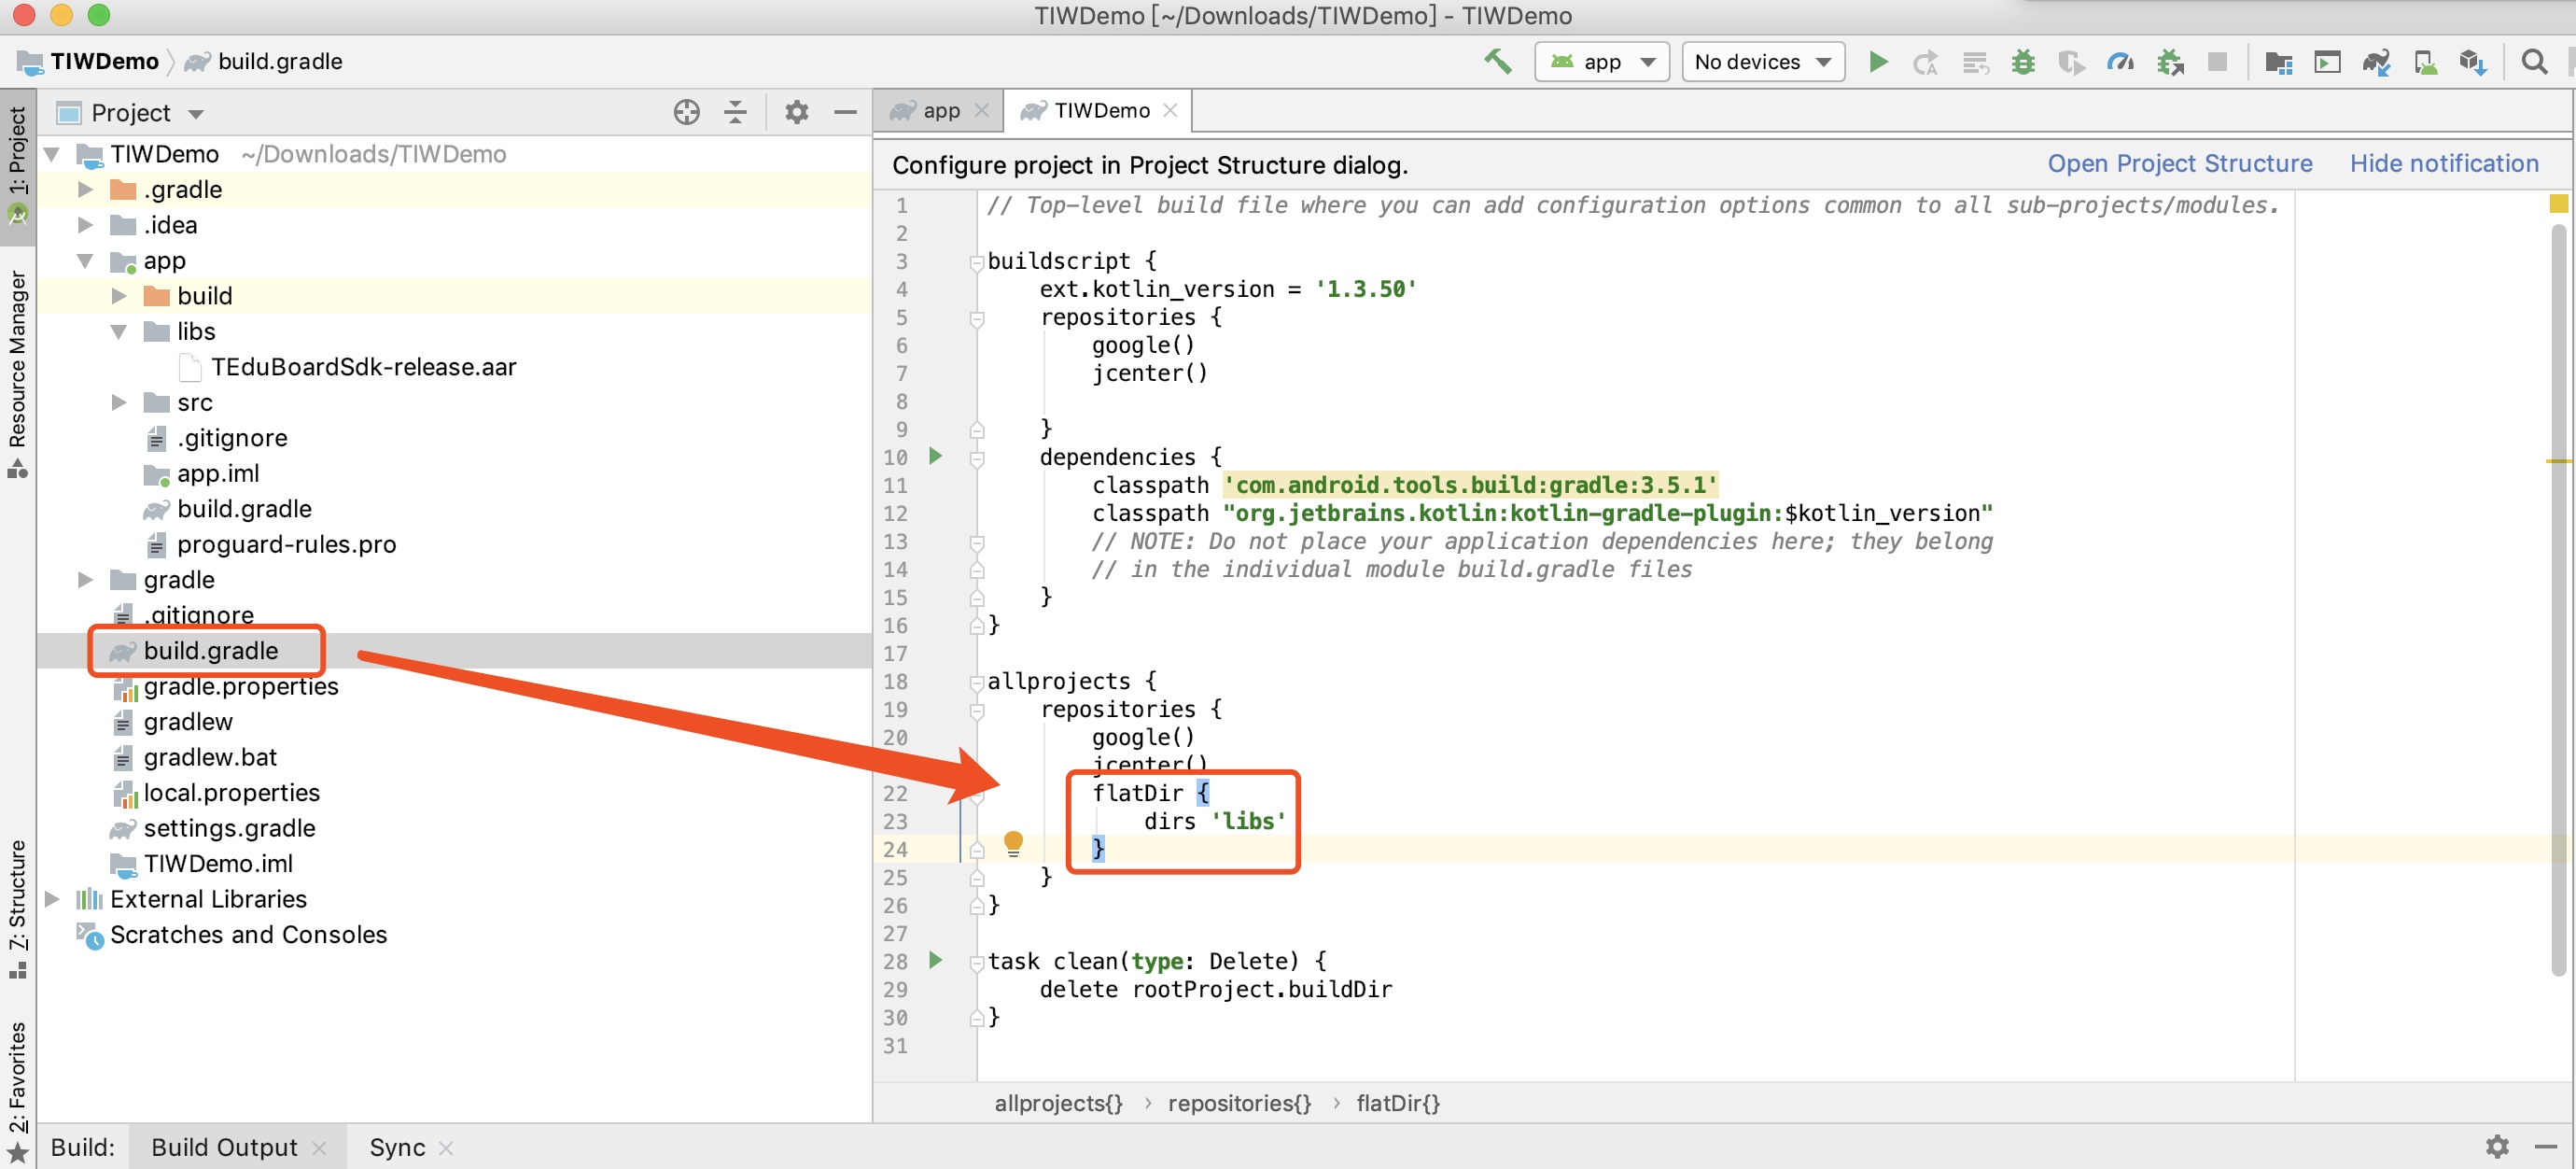
3. 指定本地仓库路径
在工程根目录下的 build.gradle 中,添加 flatDir,指定本地仓库路径。
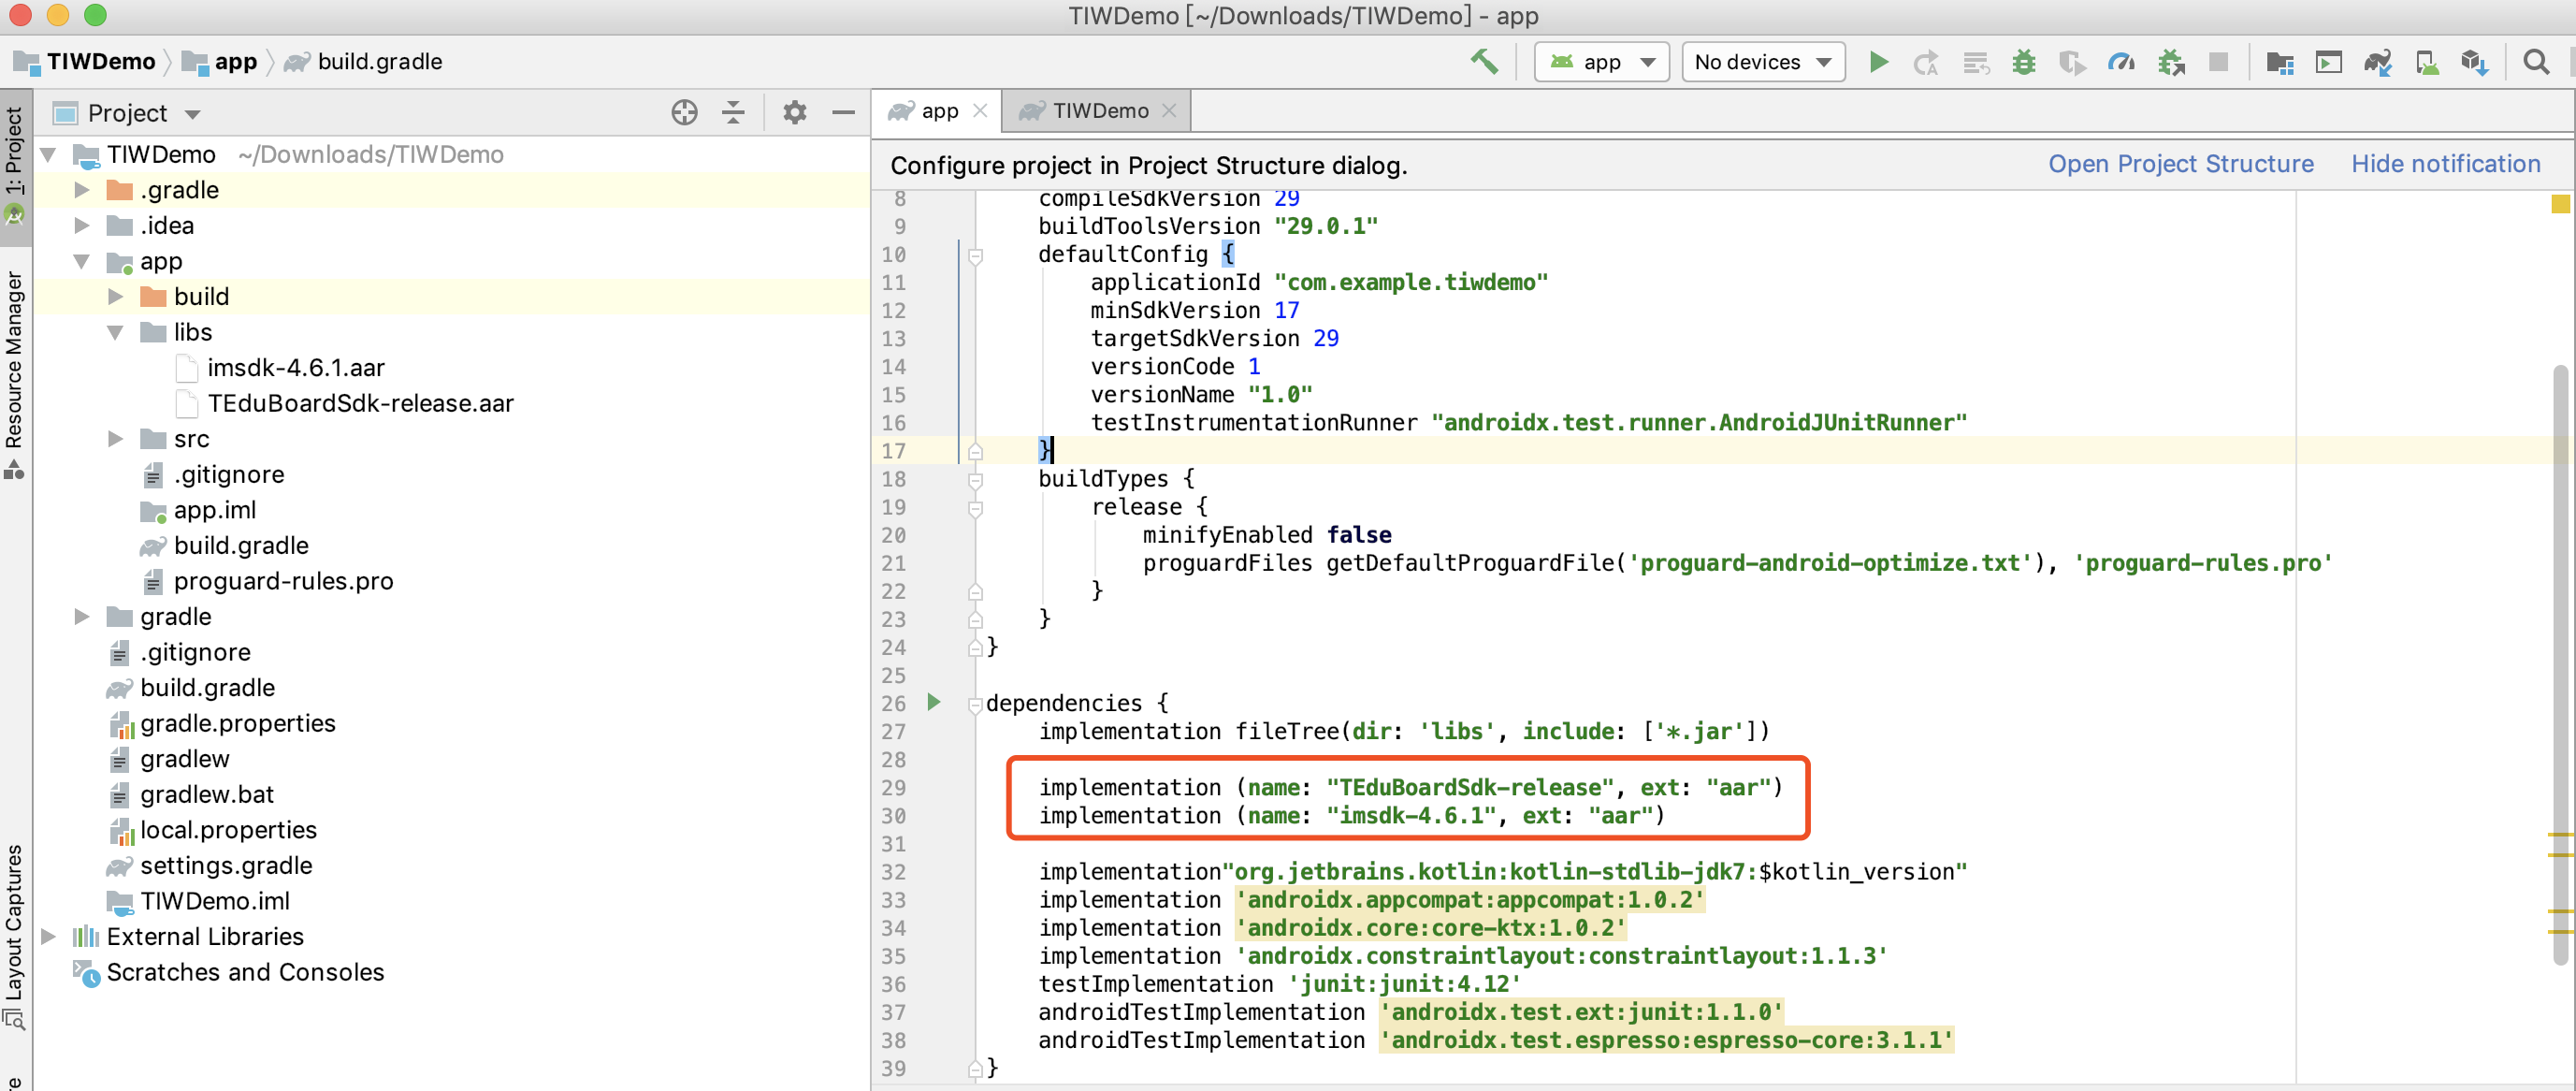
4. 添加 SDK 依赖
在 app/build.gradle 中,添加引用 aar 包的代码。
dependencies {implementation (name: "TEduBoardSdk-release", ext: "aar")implementation (name: "imsdk-plus-6.6.3002", ext: "aar") // IM的版本请尽量用新版本,具体请查阅IM的更新日志 https://cloud.tencent.com/document/product/269/1606implementation 'com.tencent.edu:TIWLogger:1.0.1.76'implementation 'com.tencent.edu:TIWCache:1.0.0.91'}
5. 同步 SDK
单击 Sync Now,完成 TEduBoard SDK 集成。
配置 App 权限
在 AndroidManifest.xml 中配置 App 的权限,TEduBoard SDK 需要以下权限:
<uses-permission android:name="android.permission.INTERNET" /><uses-permission android:name="android.permission.WRITE_EXTERNAL_STORAGE" /><uses-permission android:name="android.permission.READ_EXTERNAL_STORAGE"/>
使用 TEduBoard SDK
1. 创建白板控制器
使用如下代码创建并初始化白板控制器:
// 创建并初始化白板控制器//(1)鉴权配置TEduBoardController.TEduBoardAuthParam authParam = new TEduBoardController.TEduBoardAuthParam(sdkAppId, userId, userSig);//(2)白板默认配置TEduBoardController.TEduBoardInitParam initParam = new TEduBoardController.TEduBoardInitParam();mBoard = new TEduBoardController(context);//(3)添加白板事件回调 实现TEduBoardCallback接口TEduBoardCallback callback = new TEduBoardController.TEduBoardCallback();mBoard.addCallback(callback);//(4)进行初始化mBoard.init(authParam, classId, initParam);
其中
sdkAppId、userId、userSig、classId为需要您自己填写的参数。注意
1. 请在主进程中执行初始化操作,如果您的 App 使用了多进程,请注意避免重复初始化。
2. 由于 HarmonyOS 的 evaluatejavascript 的内部调用改成异步主线程调用,白板 get 接口在主线程等待并同步返回结果将会造成死锁,在沿用 get 接口同步返回的使用方式的前提下,SDK 内部已无法规避,请更新到 2.8.2 及以上版本后在外部使用子线程调用白板 get 相关接口(如下例所示),后续我们将 get 相关接口进行异步优化。
new Thread(new Runnable() {@Overridepublic void run() {TEduBoardFileInfo info = board.getFileInfo(fileId);}}).start();
2. 监听白板关键事件
在 白板事件回调接口
TEduBoardCallback的onTEBError和onTEBWarning 回调方法内监听白板事件/*** 白板错误回调* 必须要监听的事件** @param code 错误码* @param msg 错误信息,编码格式为 UTF8*/void onTEBError(int code, String msg);/*** 白板警告回调* @param code 警告码* @param msg 警告信息,编码格式为 UTF8*/void onTEBWarning(int code, String msg);
3. 白板窗口获取及显示
在 onTEBInit 回调方法内,使用如下代码获取并显示白板视图:
// (1)在 Activity 的布局 xml 文件中,用 FrameLayout 占位,将来放 board 的 View。<FrameLayoutandroid:id="@+id/board_view_container"android:layout_width="match_parent"android:layout_height="200dp"/>
//(2)获取白板 ViewView boardview = mBoard.getBoardRenderView();//(3)添加到父视图中FrameLayout.LayoutParams layoutParams = new FrameLayout.LayoutParams(FrameLayout.LayoutParams.MATCH_PARENT, FrameLayout.LayoutParams.MATCH_PARENT);FrameLayout container = findViewById(R.id.board_view_container);container.addView(boardview, layoutParams);
SDK 所有回调都在主线程内执行,因此可以在回调里直接执行 UI 操作。
4. 白板数据同步
白板在使用过程中,需要在不同的用户之间进行数据同步(涂鸦数据等),SDK 默认使用 IMSDK 作为信令通道,您需要自行实现 IMSDK 的初始化、登录、加入群组操作,确保白板初始化时,IMSDK 已处于所指定的群组内。
步骤1:初始化 IMSDK
V2TIMSDKConfig timSdkConfig = new V2TIMSDKConfig();boolean result = V2TIMManager.getInstance().initSDK(context, sdkAppID, timSdkConfig);
如果您有其他业务使用了 IMSDK 并期望 IMSDK 的生命周期与 App 的生命周期保持一致,请在 Application 的 onCreate 方法中初始化 IMSDK,否则请在登录前初始化 IMSDK,在登出后反初始化 IMSDK 。
步骤2:登录 IMSDK
TIMGroupManager.getInstance().login(userId, userSig, new TIMCallBack() {@Overridepublic void onSuccess(String s) {}@Overridepublic void onError(int errCode, String errMsg) {// 创建 IM 群组失败});V2TIMManager.getInstance().login(userId, userSig, new V2TIMCallback() {@Overridepublic void onSuccess() {// 登录成功}@Overridepublic void onError(int errCode, String errMsg) {// 登录失败}});
步骤3:加入群组
登录 IMSDK 成功后加入白板所在的群组。
V2TIMManager.getInstance().joinGroup(classId, "board group" + classId, new V2TIMCallback() {@Overridepublic void onSuccess() {// 加群成功}@Overridepublic void onError(int i, String s) {// 加群失败}});
如果 IM 群组不存在,请先创建群组。
V2TIMManager.getGroupManager().createGroup(groupInfo, null, new V2TIMValueCallback<String>() {@Overridepublic void onError(int errCode, String errMsg) {}@Overridepublic void onSuccess(String s) {}});
注意
1. 推荐业务后台使用 IM REST API 提前创建群组。
2. 不同的群组类型,群组功能以及成员数量有所区别,具体请查看 IM 群组系统。
5. 销毁白板
调用 unInit 方法后,内部将彻底销毁白板并停止计费,请您确保此接口的调用。
mBoard.uninit();
如果您使用 IMSDK 作为信令通道,请根据业务的需要决定是否退出群组、退出登录并反初始化。
步骤1:退出群组
V2TIMManager.getInstance().quitGroup(classId, new V2TIMCallback() {@Overridepublic void onSuccess() {}@Overridepublic void onError(int i, String s) {}});
步骤2:登出 IMSDK
// IM登出public void logout(final IMCallBack callBack) {V2TIMManager.getInstance().logout(new V2TIMCallback(){@Overridepublic void onSuccess() {}@Overridepublic void onError(int errCode, String errMsg) {}});}
步骤3:反初始化 IMSDK
V2TIMManager.getInstance().unInitSDK();
如果您有其他业务使用了 IMSDK 并期望 IMSDK 的生命周期与 App 的生命周期保持一致,无需调用此接口。


