本教程将帮助您搭建一个具有 IPv6 CIDR 的私有网络(VPC),并为 VPC 内的云服务器开启 IPv6,实现 IPv6 的内外网通信。
操作场景
云服务器启用 IPv6,和 VPC 内其他云服务器的 IPv6 内网互通。
云服务器启用 IPv6,和 Internet 的 IPv6 用户进行双向通信。
注意事项
私有网络 VPC 支持 IPv6 的地域:广州、上海、北京、南京、成都、重庆、中国香港、新加坡、东京、首尔、弗吉尼亚、硅谷、法兰克福、圣保罗、北京金融、上海金融、深圳金融,如需使用,请 在线咨询 。
内网 IPv6 地址类型有 BGP 地址和 ULA 地址两种:
BGP 地址:GUA 地址类型,可同时作为内网 IPv6 地址和公网 IPv6 地址,每个 VPC 分配1个
/56的 IPv6 CIDR,每个子网分配1个/64的 IPv6 CIDR,每个弹性网卡分配1个 IPv6 地址,当前仅对存量用户开放。ULA 地址:仅作为内网 IPv6 地址,每个 VPC 分配1个
/56的 IPv6 CIDR,每个子网分配1个/64的 IPv6 CIDR,每个弹性网卡分配1个 IPv6 地址。当 ULA 地址资源充足时,建议使用 ULA 地址作为内网 IPv6 地址。说明:
支持使用 ULA 地址通信的 CVM 机型:S5、S5se、SA2、S4、SN3ne、S2ne、SR1、M6ce、M6p、M5、MA2、M4、IT5、IT3、D3、D2、C5。
主网卡、辅助网卡均支持申请 IPv6 地址。想要了解更多云服务器和弹性网卡的关系,请参见 弹性网卡。
前提条件
操作步骤
步骤1:为 VPC 分配 IPv6 CIDR
1. 登录 私有网络控制台。
2. 选择支持 IPv6 的地域,在 VPC 所在行的右侧操作栏下,选择更多 > 编辑 IPv6 CIDR。
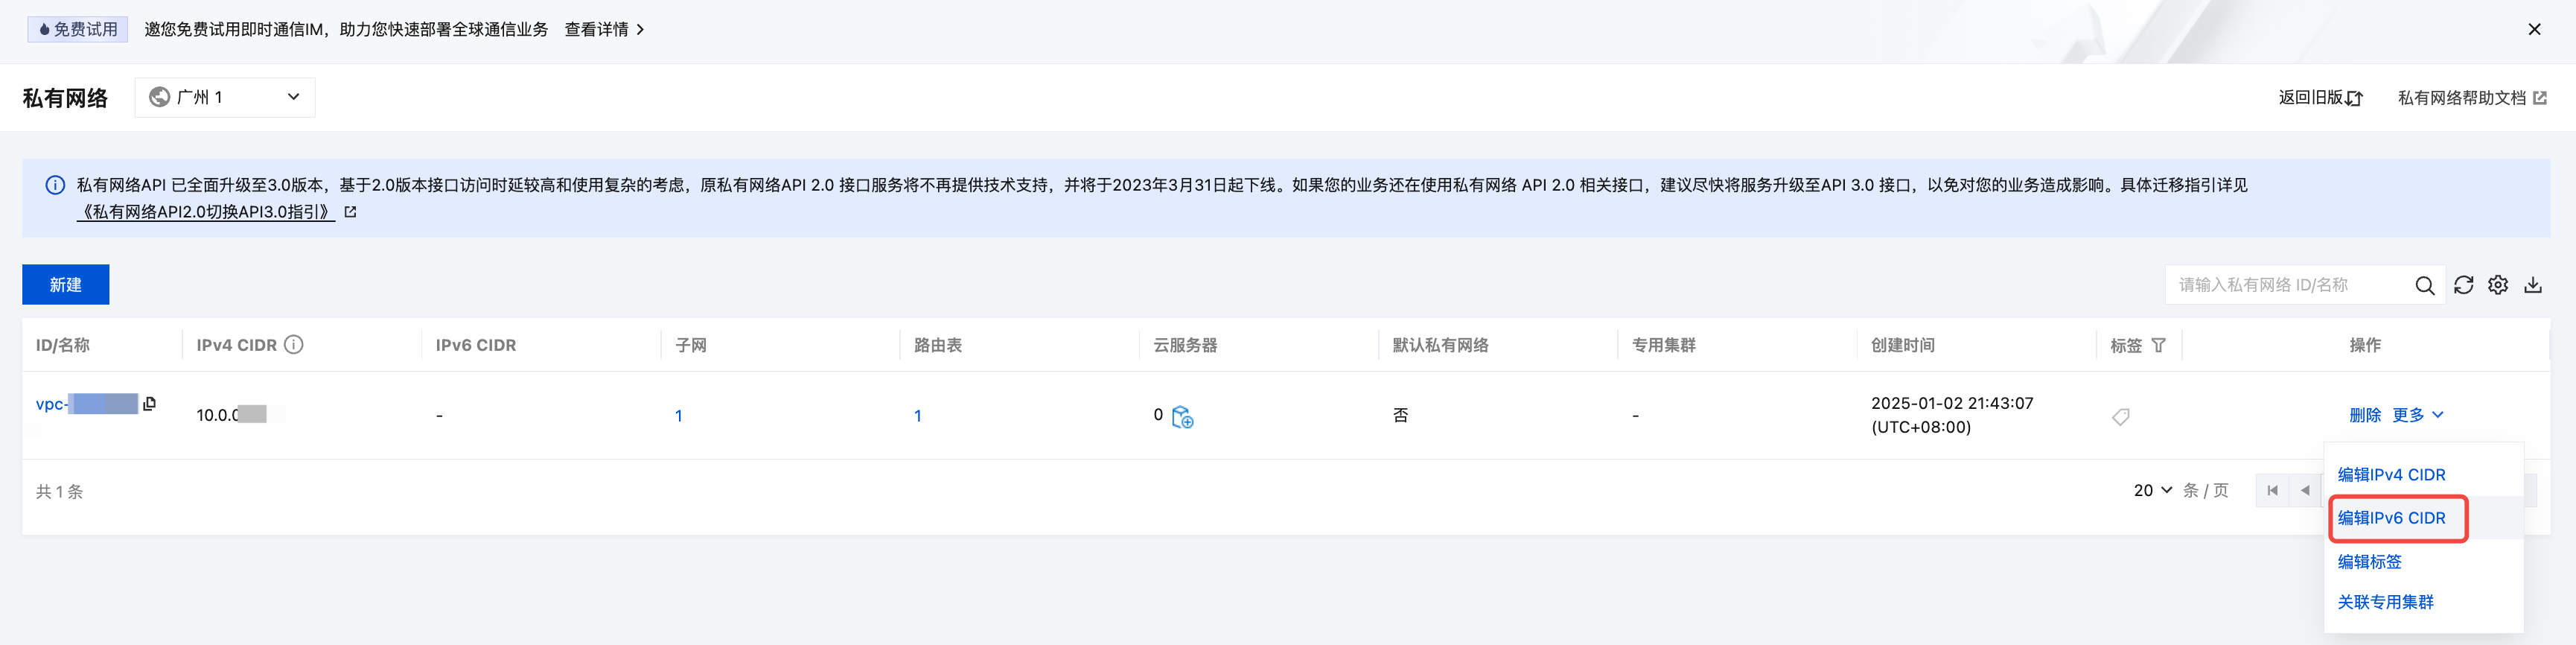
3. 在编辑 IPv6 CIDR 弹框中,单击获取并确认相关信息后,单击确定。
系统将为 VPC 分配一个
/56的 IPv6 地址段,您可以在列表中,查看到 IPv6 地址段的详细信息。
步骤2:为子网分配 IPv6 CIDR
1. 登录 私有网络控制台。
2. 在左侧目录下选择子网,进入管理页面。
3. 在 步骤1 中的 VPC 所属子网所在行的操作栏下,选择更多 > 获取 IPv6 CIDR,并确定操作。
4. 系统将从 VPC 的
/56 IPv6 CIDR 分配一个/64的 IPv6 CIDR。步骤3:购买云服务器并配置云服务器的 IPv6
为 VPC 和子网分配 IPv6 CIDR 后,您需在该子网下创建一个具有 IPv6 地址的云服务器,或为该子网下运行中的云服务器获取 IPv6 地址。
说明:
由于 IPv6 地址目前还不支持自动下发到网卡,因此在控制台获取 IPv6 地址后,您还需要登录云服务器,将 IPv6 地址配置到云服务器的网卡上。
1. 登录 云服务器购买页。
2. 在自定义设置页面,完成云服务器各种配置操作,具体操作请参见 快速搭建 IPv4 私有网络。
注意:
在选择机型时,请注意如下参数:
地域:广州、上海、北京、南京、成都、重庆、中国香港、新加坡、东京、首尔、弗吉尼亚、硅谷、法兰克福、圣保罗、北京金融、上海金融、深圳金融。
IPv6 地址:勾选免费分配 IPv6 地址。
3. 核对购买的云服务器信息,并进行支付。
4. 云服务器购买成功后,即可在 云服务器实例列表 查看到 IPv6 地址信息。

说明:
若云服务器在购买时未分配 IPv6 地址,可在对应云服务器实例的操作栏下,选择更多 > IP/网卡 > 管理 IPv6 地址,为主网卡分配 IPv6 地址。
如果想要给云服务器的其他弹性网卡也分配 IPv6 地址,请参见 申请和释放 IPv6 进行操作。
5. 登录云服务器配置 IPv6,由于各类云服务器操作系统配置 IPv6 的方式不同,详细操作方法请参见 Linux 云服务器配置 IPv6 和 Windows 云服务器配置 IPv6。
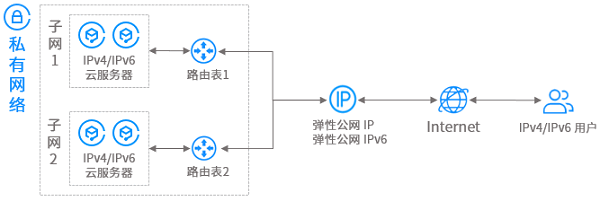
步骤4:为云服务器的 IPv6 地址开通公网
默认云服务器的 IPv6 地址仅具有私网通信能力,若您想要通过该 IPv6 地址访问公网或被公网访问,则需通过弹性公网 IPv6 为该 IPv6 地址开通公网访问能力。
场景一:为使用 IPv6 BGP 地址的云服务器开通公网能力
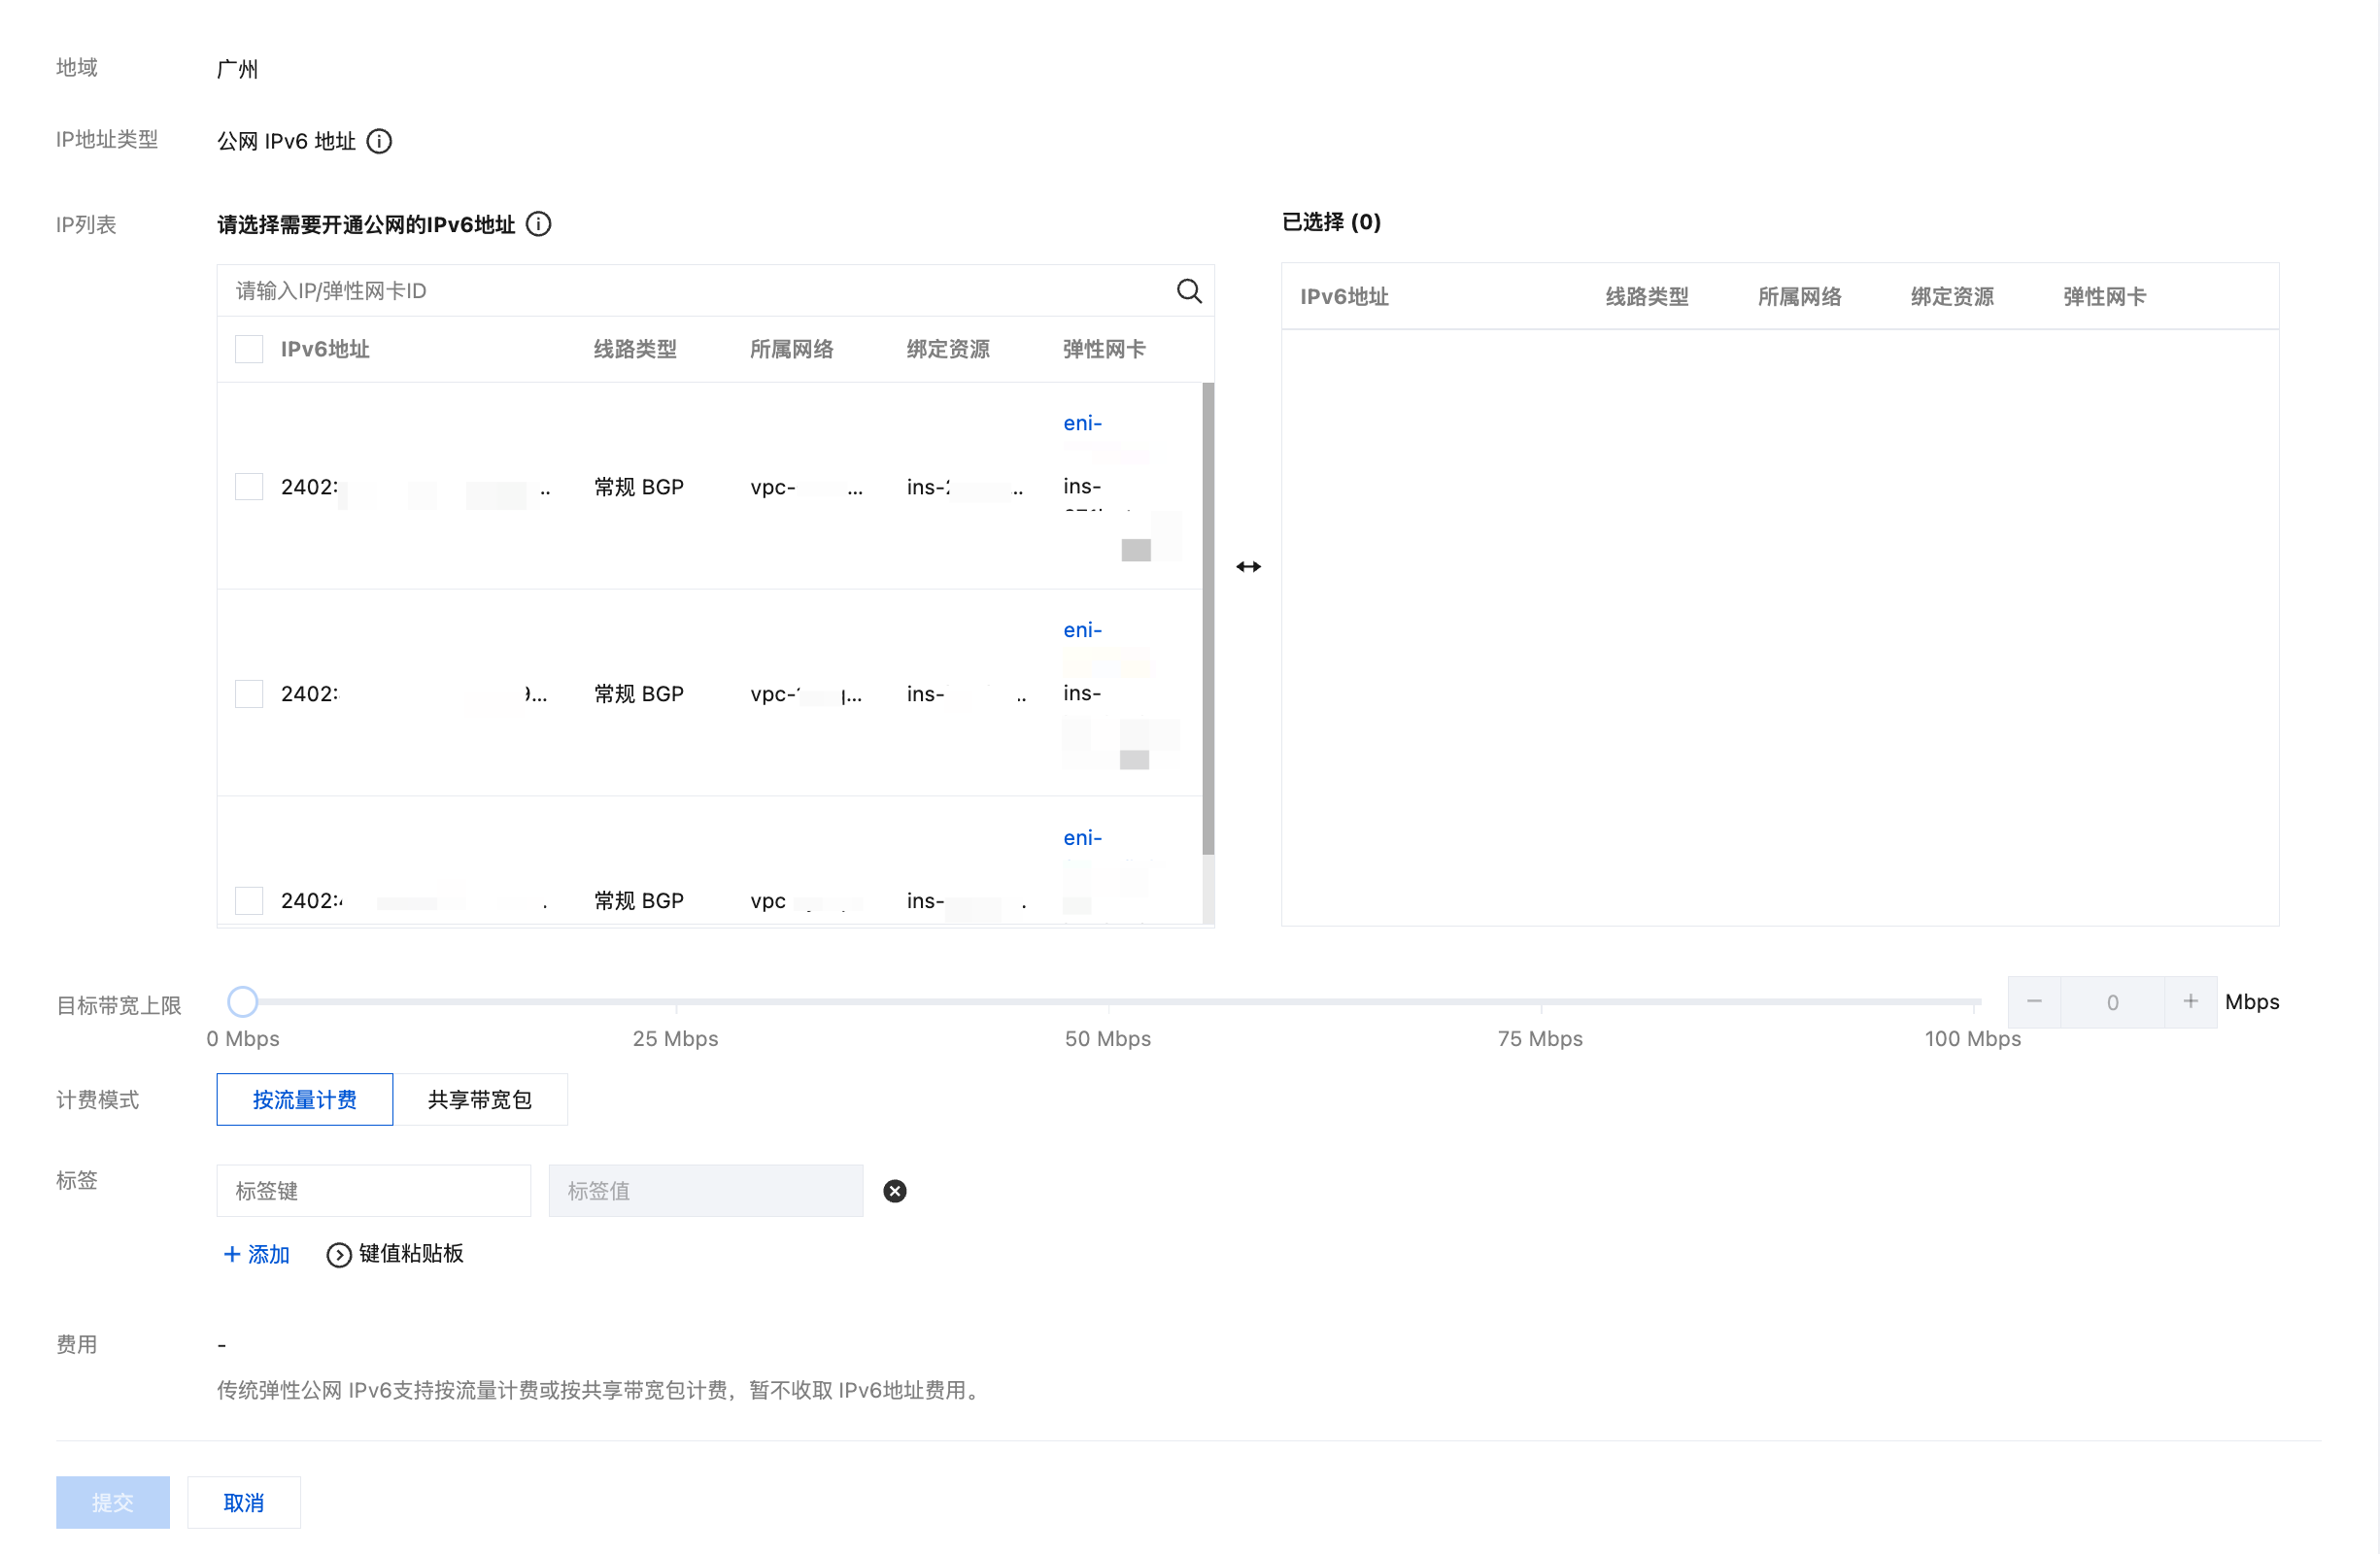
1. 登录 私有网络控制台。
2. 在左侧目录下,选择 IP 与网卡 > 弹性公网 IPv6。
3. 选择云服务器的所在地域,选择传统弹性公网 IPv6 > 开通 IPv6 公网带宽。
4. 进入管理页面,勾选云服务器的 IPv6 地址、设置目标带宽上限,单击提交即可。
说明:
云服务器申请了 IPv6 地址后,默认关闭了公网访问能力,可通过弹性公网 IPv6 管理 IPv6 公网 能力。
当运营商类型为 BGP 时,弹性公网 IPv6 地址即为云服务器获取到的 IPv6 地址,所以请确保云服务器已经获取到 IPv6 地址。
单次操作可支持最多100个 IPv6 地址同时开通公网,如果超过100个 IPv6 地址需要开通公网,请分多次操作。
场景二:为使用 IPv6 ULA 地址的云服务器开通公网能力
1. 申请弹性公网IPv6,详细操作步骤可参见 申请弹性公网 IPv6。
2. 登录 私有网络控制台。
3. 在左侧目录下,选择 IP 与网卡 > 弹性公网 IPv6。
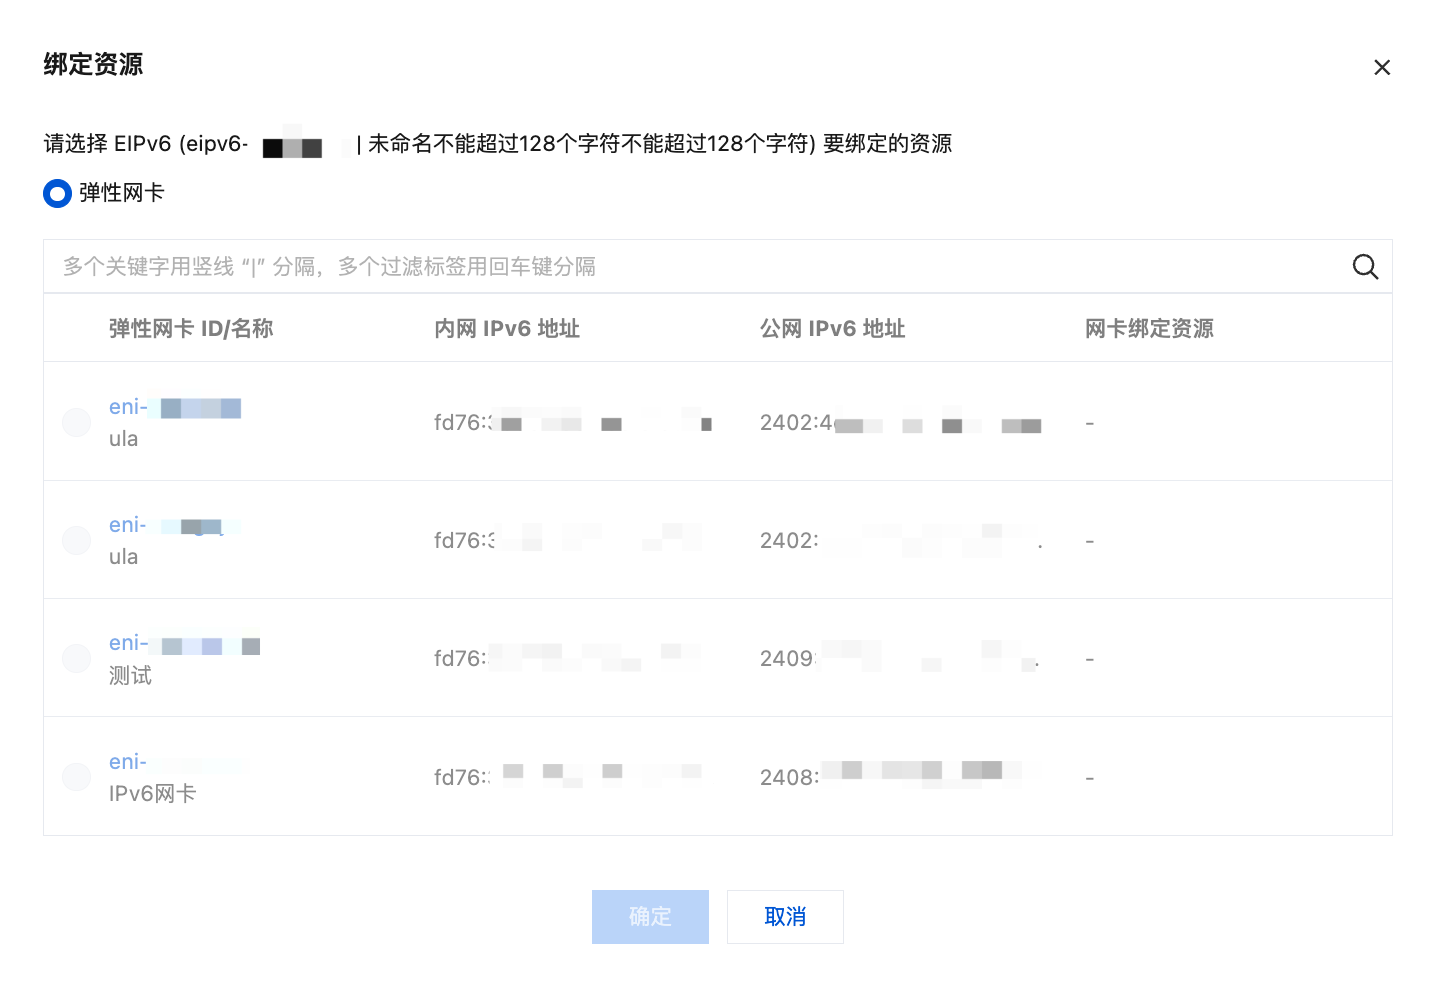
4. 选择云服务器的所在地域,选择弹性公网 IPv6,选择本场景 步骤1 中申请的弹性公网 IPv6,更多 > 绑定。
5. 选择需要绑定的弹性网卡,单击确定。
步骤5:配置 IPv6 的安全组规则
1. 登录 私有网络控制台。
2. 在左侧目录下,选择安全 > 安全组,单击云服务器绑定的安全组 ID,进入详情页。
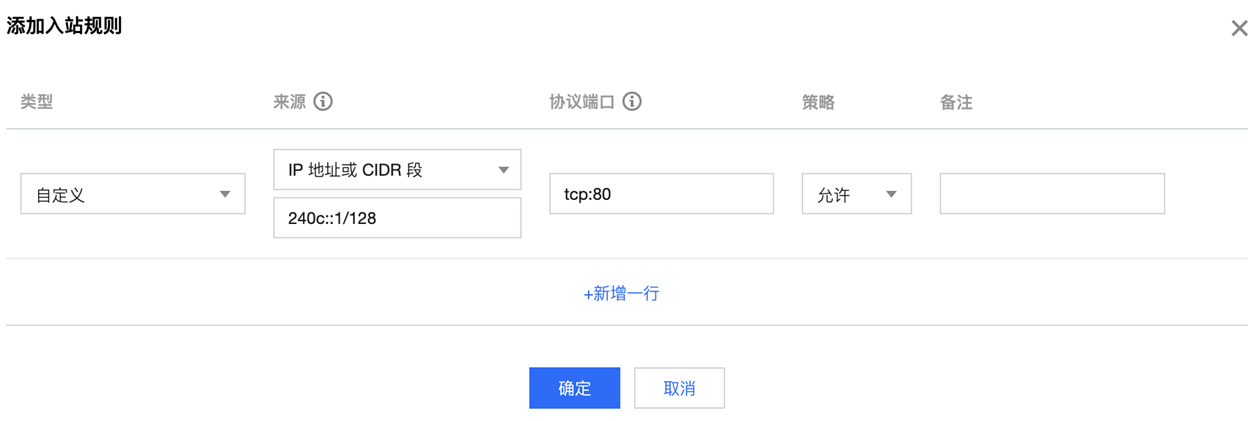
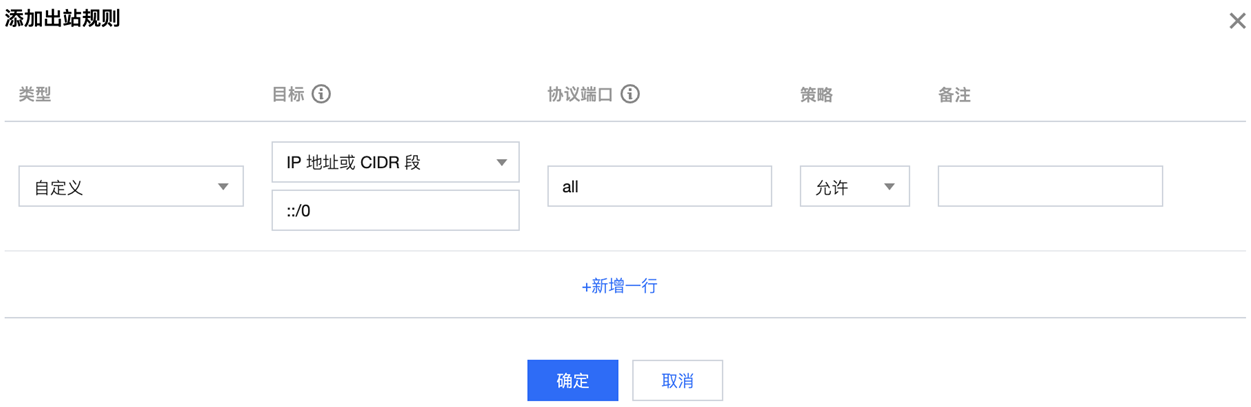
3. 在详情页添加入站规则与出站规则:
选择入站规则 > 添加规则,添加 IPv6 的入站方向安全组规则,单击完成即可。
选择出站规则 > 添加规则,添加 IPv6 的出站方向安全组规则,单击完成即可。
步骤6:测试 IPv6 的连通性
下面分别介绍 Linux 云服务器和 Windows 云服务器如何测试 IPv6 的连通性。
说明:
如果测试公网连通性,请确保已经在“安全组”设置 IPv6 策略、并在弹性公网 IPv6 设置 IPv6 公网带宽。
如果云服务器所在的子网关联了网络 ACL,还需要在对应的网络 ACL 中设置 IPv6 策略。如需开通更多 IPv6 的公网能力,请提交 工单申请。
如果未开通 IPv6 公网,但需要测试 IPv6 云服务器的连通性(Ping 测试、SSH、远程桌面测试),可使用同一私有网络下已经获取 IPv6 地址的云服务器进行连通性测试。
如果云服务器镜像开启了 IPv6,系统则会为每个网卡默认分配一个“FE80”开头的 link-local 地址,该 link-local 并不能作为内外网通信的 IPv6 地址。
建议您选择就近测试点 Ping 测试。
Linu
x 云服务器可通过 Ping
或 SSH 等操作来测试 IPv6 的连通性。方式1:通过 Ping 进行测试,操作如下:
在云服务器中执行 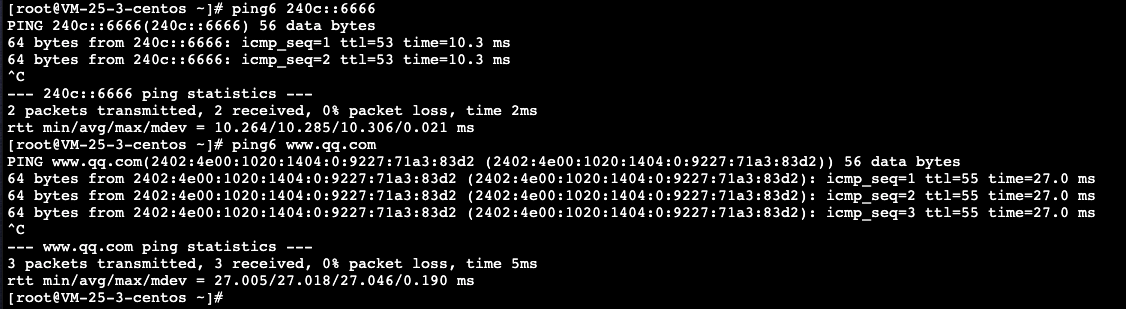
ping6 IPv6地址进行测试,例如,ping6 240c::6666、ping6 www.qq.com、ping6 同一私有网络下的 IPv6 地址,成功结果如下图所示:
方式2:通过 IPv6 地址 SSH 到云服务器,操作如下:
执行如下命令查看 IPv6 地址,并用 PuTTY 或者 Xshell 等软件,测试能否通过 IPv6 地址 SSH 到云服务器。
ifconfig
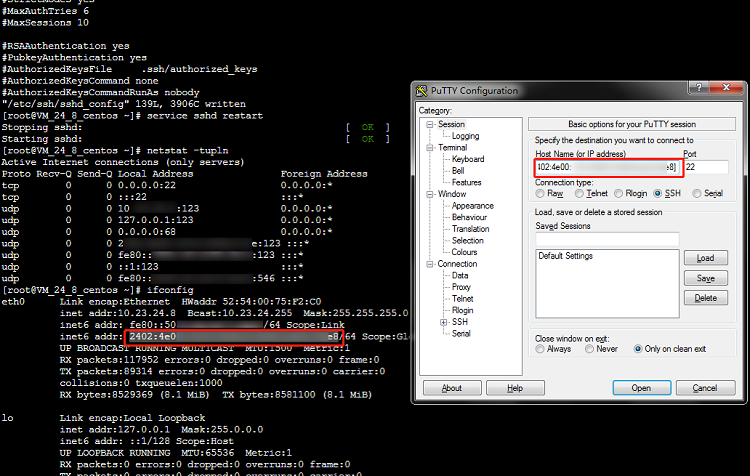
成功结果如下图所示:

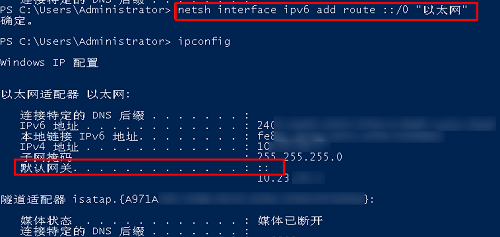
Win
dows 云服务器可通过 Ping 或远
程桌面测试 IPv6 连通性。方式1:通过 Ping 进行测试,操作如下:
在操作系统界面,选择左下角的

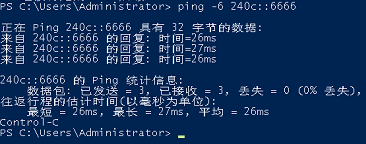
ping -6 IPv6 地址进行测试,例如,ping -6 240c::6666或ping -6 同一私有网络下的 IPv6 地址,成功如下图所示。
方式2:通过 IPv6 地址进行远程桌面,远程桌面操作详情请参见 使用远程桌面连接登录 Windows 实例。