Scenario
This document describes how to use open-source SDK to send and receive messages by using the SDK for Java as an example and helps you better understand the message sending and receiving processes.
Note
The following takes the Java client as an example. For clients in other languages, see SDK Documentation.
Preparations
Instructions
Step 1. Install the Java dependent library
Introduce dependencies in a Java project and add the following dependencies to the
pom.xml file. This document uses a Maven project as an example.Note
The dependency version must be v4.9.3 or later.
<!-- in your <dependencies> block --><dependency><groupId>org.apache.rocketmq</groupId><artifactId>rocketmq-client</artifactId><version>4.9.3</version></dependency><dependency><groupId>org.apache.rocketmq</groupId><artifactId>rocketmq-acl</artifactId><version>4.9.3</version></dependency>
Step 2. Produce messages
1. Create message producers
// Instantiate the message producerDefaultMQProducer producer = new DefaultMQProducer(namespace,groupName,new AclClientRPCHook(new SessionCredentials(accessKey, secretKey))// ACL permissions);// Set the Nameserver addressproducer.setNamesrvAddr(nameserver);// Start the producer instanceproducer.start();
Category | Note |
namespace | Namespace name, which can be copied under the Namespace tab in the console.  |
groupName | Producer group name, which can be copied under the Group tab on the Cluster page in the console. |
nameserver | Copy the cluster access address from the Network module on the cluster's basic information page in the console. |
secretKey | |
accessKey |  |
2. Send a message
There are various methods to send messages: synchronous sending, asynchronous sending, one-way sending, and so forth.
Synchronous sending
for (int i = 0; i < 10; i++) {// Instantiate a message, set the topic and message contentMessage msg = new Message(topic_name, "TAG", ("Hello RocketMQ " + i).getBytes(RemotingHelper.DEFAULT_CHARSET));// Send the messageSendResult sendResult = producer.send(msg);System.out.printf("%s%n", sendResult);}
Category | Note |
topic_name | Topic name, which can be copied under the Topic tab on the Cluster page in the console. |
TAG | A parameter used to set the message tag. |
Asynchronous sending
// Disable retry upon sending failuresproducer.setRetryTimesWhenSendAsyncFailed(0);// Set the number of messages to be sentint messageCount = 10;final CountDownLatch countDownLatch = new CountDownLatch(messageCount);for (int i = 0; i < messageCount; i++) {try {final int index = i;// Construct a message entity, set the topic and message contentMessage msg = new Message(topic_name, "TAG", ("Hello rocketMq " + index).getBytes(RemotingHelper.DEFAULT_CHARSET));producer.send(msg, new SendCallback() {@Overridepublic void onSuccess(SendResult sendResult) {// Logic for message sending successescountDownLatch.countDown();System.out.printf("%-10d OK %s %n", index, sendResult.getMsgId());}@Overridepublic void onException(Throwable e) {// Logic for message sending failurescountDownLatch.countDown();System.out.printf("%-10d Exception %s %n", index, e);e.printStackTrace();}});} catch (Exception e) {e.printStackTrace();}}countDownLatch.await(5, TimeUnit.SECONDS);
Category | Note |
topic_name | Topic name, which can be copied under the Topic tab on the Cluster page in the console. |
TAG | A parameter used to set the message tag. |
One-way sending
for (int i = 0; i < 10; i++) {// Instantiate a message, set the topic and message contentMessage msg = new Message(topic_name, "TAG", ("Hello RocketMQ " + i).getBytes(RemotingHelper.DEFAULT_CHARSET));// Send one-way messagesproducer.sendOneway(msg);}
Category | Note |
topic_name | Topic name, which can be copied under the Topic tab on the Cluster page in the console. |
TAG | A parameter used to set the message tag. |
Note
Step 3. Consume messages
1. Create a consumer
TDMQ for RocketMQ supports two consumption modes: push and pull.
Push consumer
// Instantiate the consumerDefaultMQPushConsumer pushConsumer = new DefaultMQPushConsumer(namespace,groupName,new AclClientRPCHook(new SessionCredentials(accessKey, secretKey))); //ACL Permission// Set the Nameserver addresspushConsumer.setNamesrvAddr(nameserver);
Category | Note |
namespace | Namespace name, which can be copied under the Namespace tab in the console.  |
groupName | Producer group name, which can be copied under the Group tab on the Cluster page in the console. |
nameserver | Copy the cluster access address from the Network module on the cluster's basic information page in the console. |
secretKey | |
accessKey |  |
Pull consumer
// Instantiate the consumerDefaultLitePullConsumer pullConsumer = new DefaultLitePullConsumer(namespace,groupName,new AclClientRPCHook(new SessionCredentials(accessKey, secretKey)));// Set the Nameserver addresspullConsumer.setNamesrvAddr(nameserver);// Specify the first offset as the start offset for consumptionpullConsumer.setConsumeFromWhere(ConsumeFromWhere.CONSUME_FROM_FIRST_OFFSET);
Category | Note |
namespace | Namespace name, which can be copied on the Namespace tab on the cluster details page in the console. Its format is cluster ID + | + namespace. |
groupName | Producer group name, which can be copied under the Group tab on the Cluster page in the console. |
nameserver | Cluster access address, which can be obtained from Access Address in the Operation column on the Cluster page in the console. |
secretKey | |
accessKey |  |
Note
2. Subscribe to messages
The subscription modes vary by consumption mode.
Push subscription
// Subscribe to a topicpushConsumer.subscribe(topic_name, "*");// Register a callback implementation class to process messages pulled from the brokerpushConsumer.registerMessageListener((MessageListenerConcurrently) (msgs, context) -> {// Message processing logicSystem.out.printf("%s Receive New Messages: %s %n", Thread.currentThread().getName(), msgs);// Mark the message as being successfully consumed, returning the handling status based on the consumption situation.return ConsumeConcurrentlyStatus.CONSUME_SUCCESS;});// Start the consumer instancepushConsumer.start();
Category | Note |
topic_name | Topic name, which can be copied under the Topic tab on the Cluster page in the console. |
"*" | If the subscription expression is left empty or specified as asterisk (*), all messages are subscribed to. tag1 || tag2 || tag3 means subscribing to multiple types of tags. |
Pull subscription
// Subscribe to a topicpullConsumer.subscribe(topic_name, "*");// Start the consumer instancepullConsumer.start();try {System.out.printf("Consumer Started.%n");while (true) {// Pull the messageList<MessageExt> messageExts = pullConsumer.poll();System.out.printf("%s%n", messageExts);}} finally {pullConsumer.shutdown();}
Category | Note |
topic_name | Topic name, which can be copied under the Topic tab on the Cluster page in the console. |
"*" | If the subscription expression is left empty or specified as asterisk (*), all messages are subscribed to. tag1 || tag2 || tag3 means subscribing to multiple types of tags. |
Step 4. View consumption details
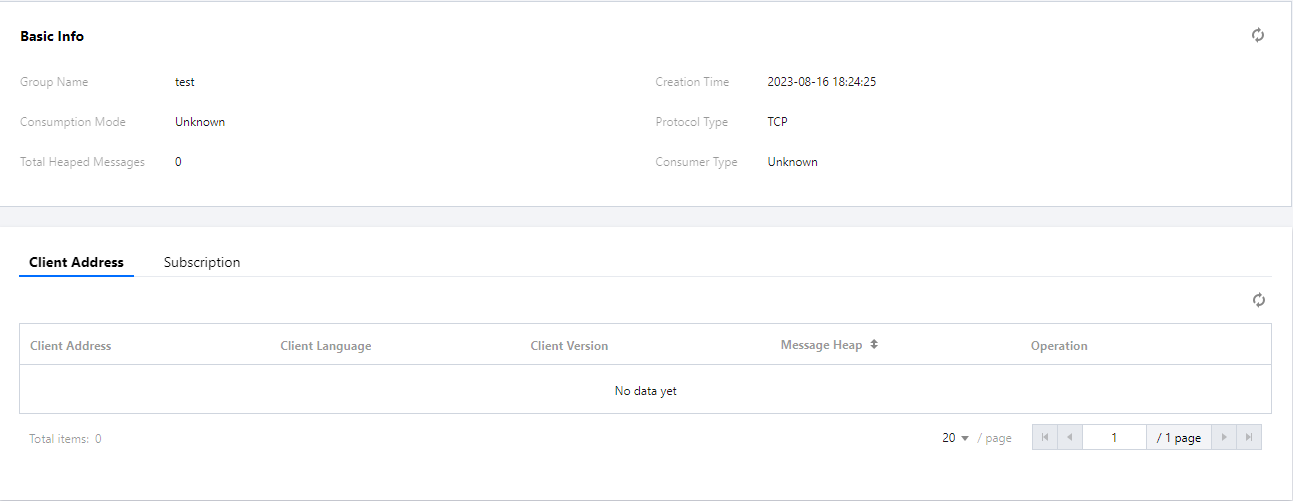
Log in to the TDMQ Console, navigate to Cluster Management > Group page to view the list of clients connected to the Group. Click View Details in the operation column to view consumer details.
Note
The above is a succinct overview of the methods for publishing and subscribing to messages. For additional operations, refer to the Demo or consult the Community Documentation.