简介
本文档提供基于 Windows x64 和 Visual Studio 2022 环境下的 COS C++ SDK 编译 Debug 版本库文件的详细操作步骤。具体包含准备工作、OpenSSL 依赖库编译、POCO 依赖库编译和 COS C++ SDK 版本编译及 demo 调试效果展示。
准备工作
本环节需要下载依赖库源码和安装相关编译工具。
依赖库源码版本及链接
OpenSSL : OpenSSL_1_1_1b
POCO:poco-1.9.4-release
依赖工具及版本
Visual Studio 2022(安装时请勾选“使用C++ 的桌面开发”组件)。
Perl v5.28.2 :StrawberryPerl
Choco 工具:可在 cmd 执行以下命令安装(可选,用于 NASM 安装):
@"%SystemRoot%\\System32\\WindowsPowerShell\\v1.0\\powershell.exe" -NoProfile -InputFormat None -ExecutionPolicy Bypass -Command "iex ((New-Object System.Net.WebClient).DownloadString('https://chocolatey.org/install.ps1'))" && SET "PATH=%PATH%;%ALLUSERSPROFILE%\\chocolatey\\bin"
NASM 2.16.03:可用 choco 直接下载 ( cmd 执行
choco install nasm),或自行在官网下载。下载后需将 NASM 添加到环境变量。CMake 3.23.0-rc1: 官网下载安装即可。
所有依赖工具需确认已安装完毕,可在 cmd 窗口执行对应工具命令检查是否安装成功,如在 cmd 执行
perl命令,检查不出现“不是内部或外部命令,也不是可运行的程序 ”即可。OpenSSL 库编译
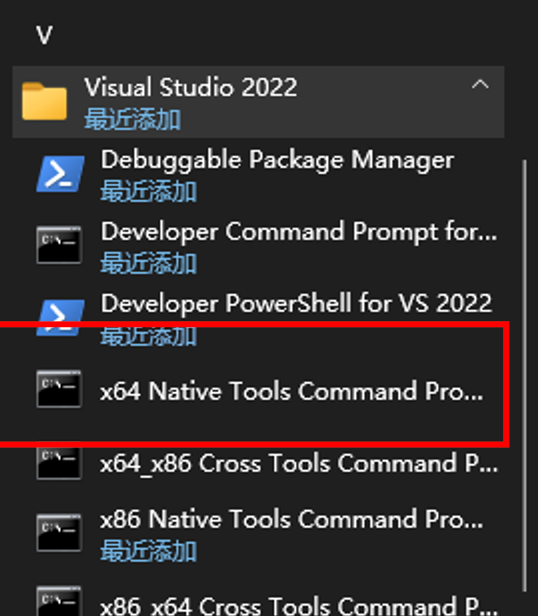
1. 管理员权限进入 Visual Studio 2022 终端:x64 Native Tools Command Prompt for VS 2022。如下图。
2. 在终端中进入 OpenSSL 源码的根目录,确认在该目录可以看到 Configure 文件。
3. 执行
perl Configure debug-VC-WIN64A,会输出如下信息: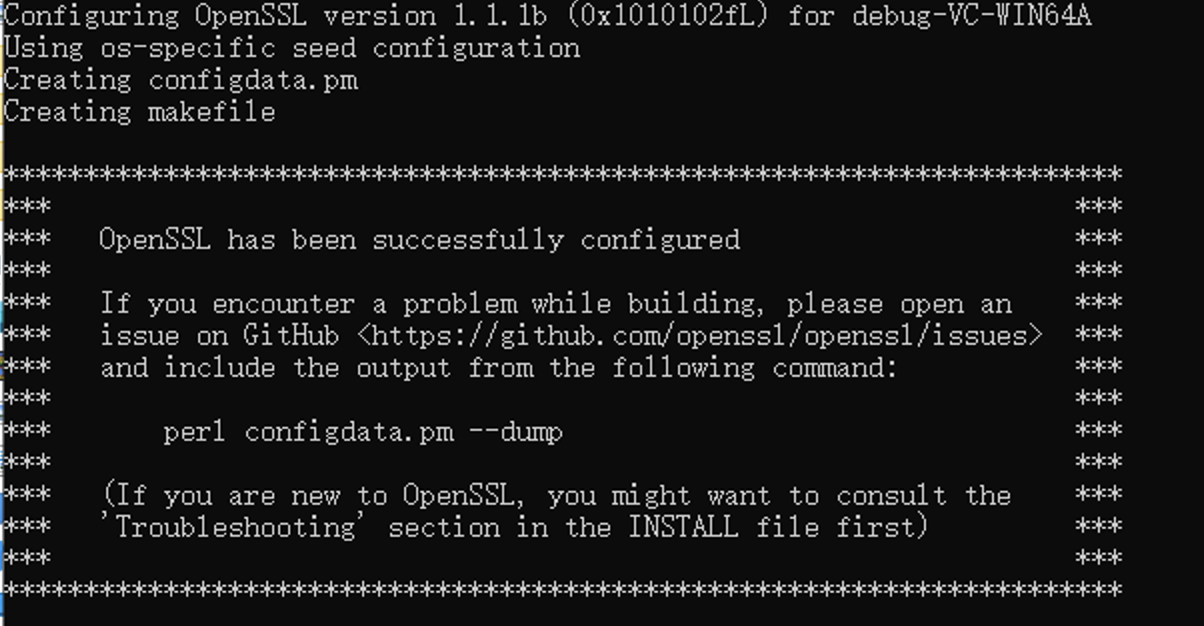
4. 执行
nmake,等待执行结束(执行时间较长)。5. 执行
nmake install 即可安装。POCO 库编译
1. 管理员权限进入 Visual Studio 2022 终端:x64 Native Tools Command Prompt for VS 2022。
2. 进入 poco 根目录,并修改根目录下的 CMakeLists.txt 文件。关闭不需要的库编译,同时添加 utf-8 参数。修改如下:
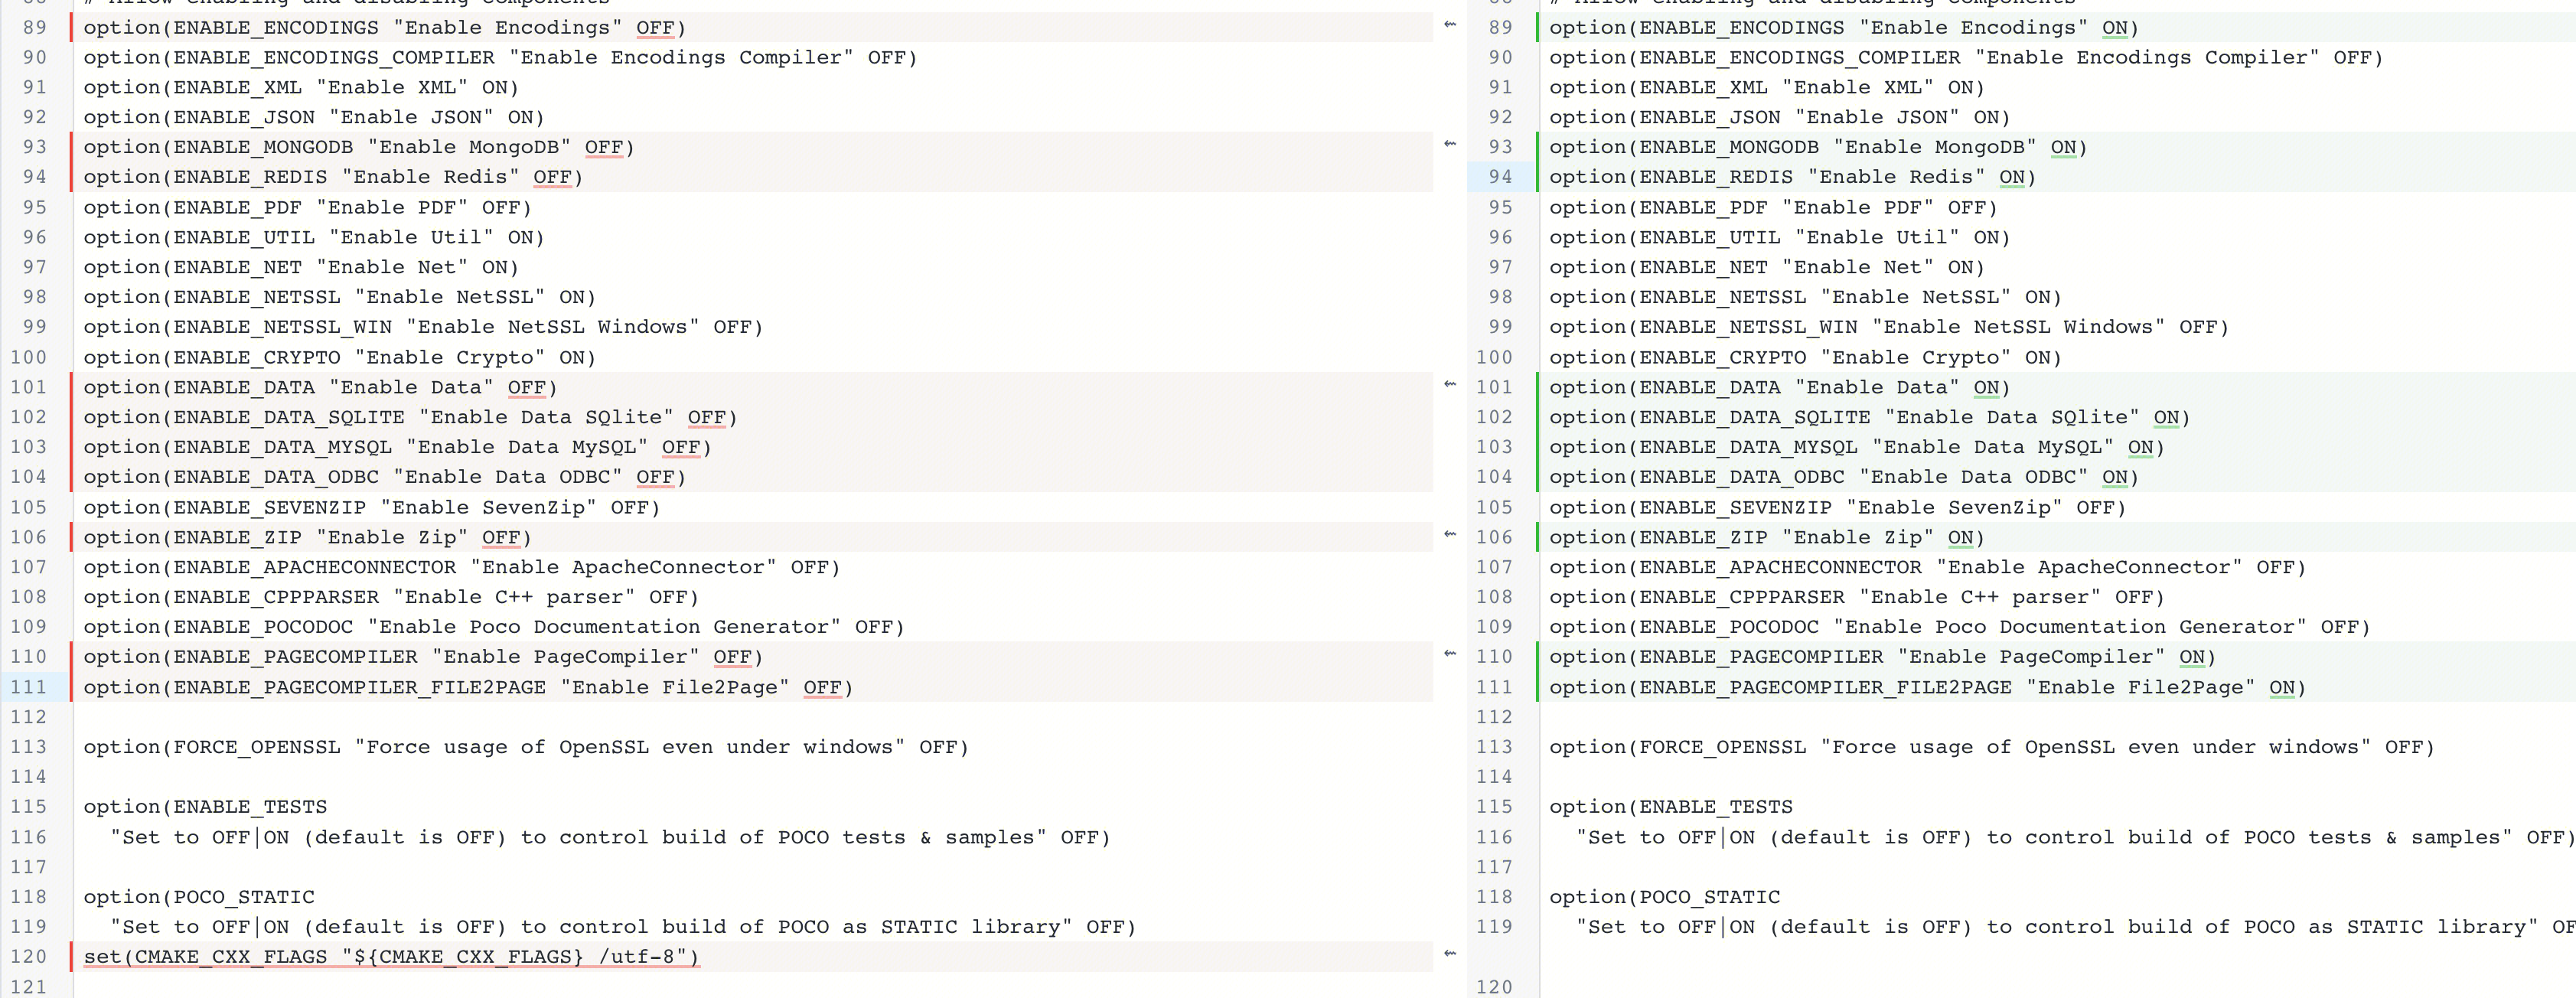
设置 utf-8代码:
set(CMAKE_CXX_FLAGS "${CMAKE_CXX_FLAGS} /utf-8")3. 执行
mkdir mybuild,并且 cd 到 mybuild 目录。4. 执行
cmake -G "Visual Studio 17 2022" -DCMAKE_BUILD_TYPE=Debug ..5. 观察出现如下信息:
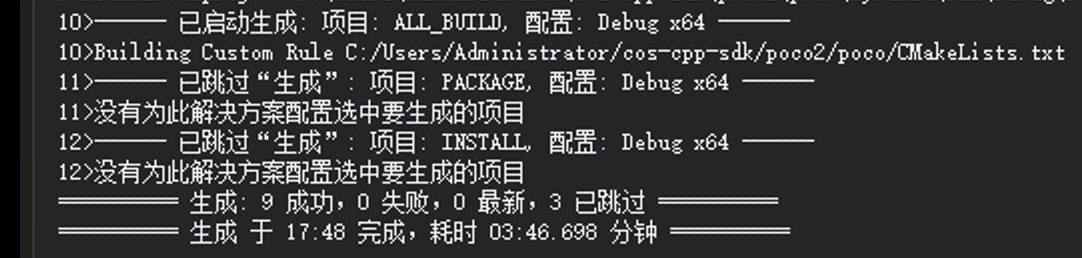
-- Building: XML-- Building: JSON-- Building: Util-- Building: Net-- Building: NetSSL_OpenSSL-- Building: Crypto-- Configuring done-- Generating done
6. 在 mybuild 目录下用 Visual Studio 2022打开 Poco.sln 工程文件。
7. 选择 Debug 和 x64

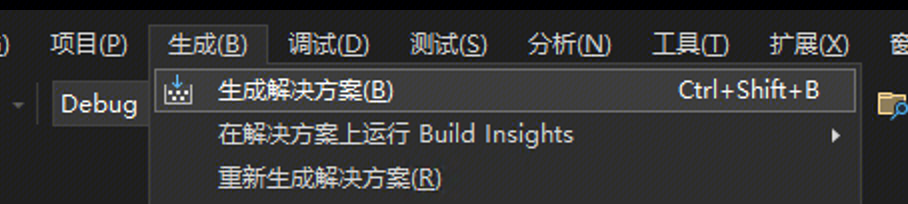
8. 点击上方生成--生成解决方案,并等待编译完成。
COS C++ SDK 编译
1. 进入 sdk 的根目录,并删除
third_party\\lib\\x64\\poco\\ 路径下的所有 poco 库文件( lib 和 dll 均删除,保持空文件夹)。2. 拷贝 poco 库
将 poco
mybuild\\bin\\Debug\\目录下的 dll 文件拷贝进 sdk 的third_party\\lib\\x64\\poco\\ 路径下。将 poco
mybuild\\lib\\Debug\\目录下的 lib 文件拷贝进 sdk 的third_party\\lib\\x64\\poco\\ 路径下。3. 修改 sdk 根目录下的 CMakeLists.txt ,增加 Debug 编译参数,更改依赖库名。如下图:

增加 Debug 编译参数代码:
set(CMAKE_BUILD_TYPE "Debug")4. 进入到 sdk 的根目录,创建并进入编译目录:
mkdir mybuild ,cd mybuild。5. 执行
cmake -G "Visual Studio 17 2022" .. 会看到如下信息-- OS type: WINDOWS-- Build target: x64-- Build type: Debug....//此处省略-- Build demo-- Configuring done (5.9s)-- Generating done (0.1s)
6. 在 mybuild 目录下用 Visual Studio 2022 打开 cos-cpp-sdk.sln 工程文件。
7. 选择 Debug 和 x64,点击上方生成--生成解决方案,并等待编译完成(操作和 poco 一致)

Demo 调试验证
在编译 sdk 结束后,可以在 Visual Studio 2022中继续操作验证,具体步骤如下。
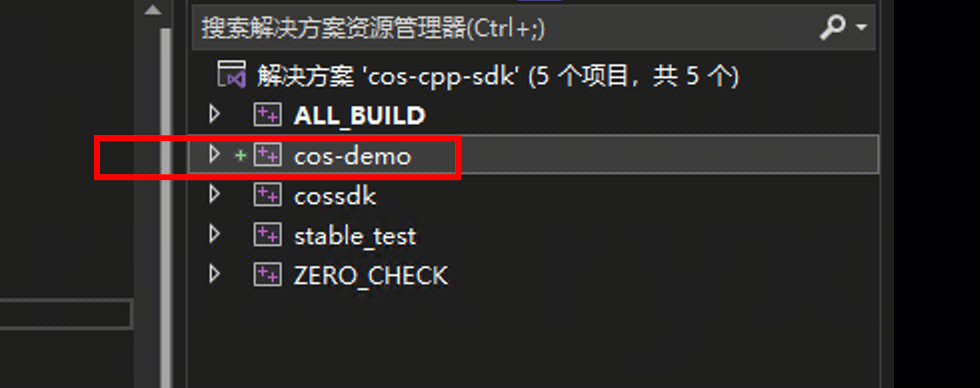
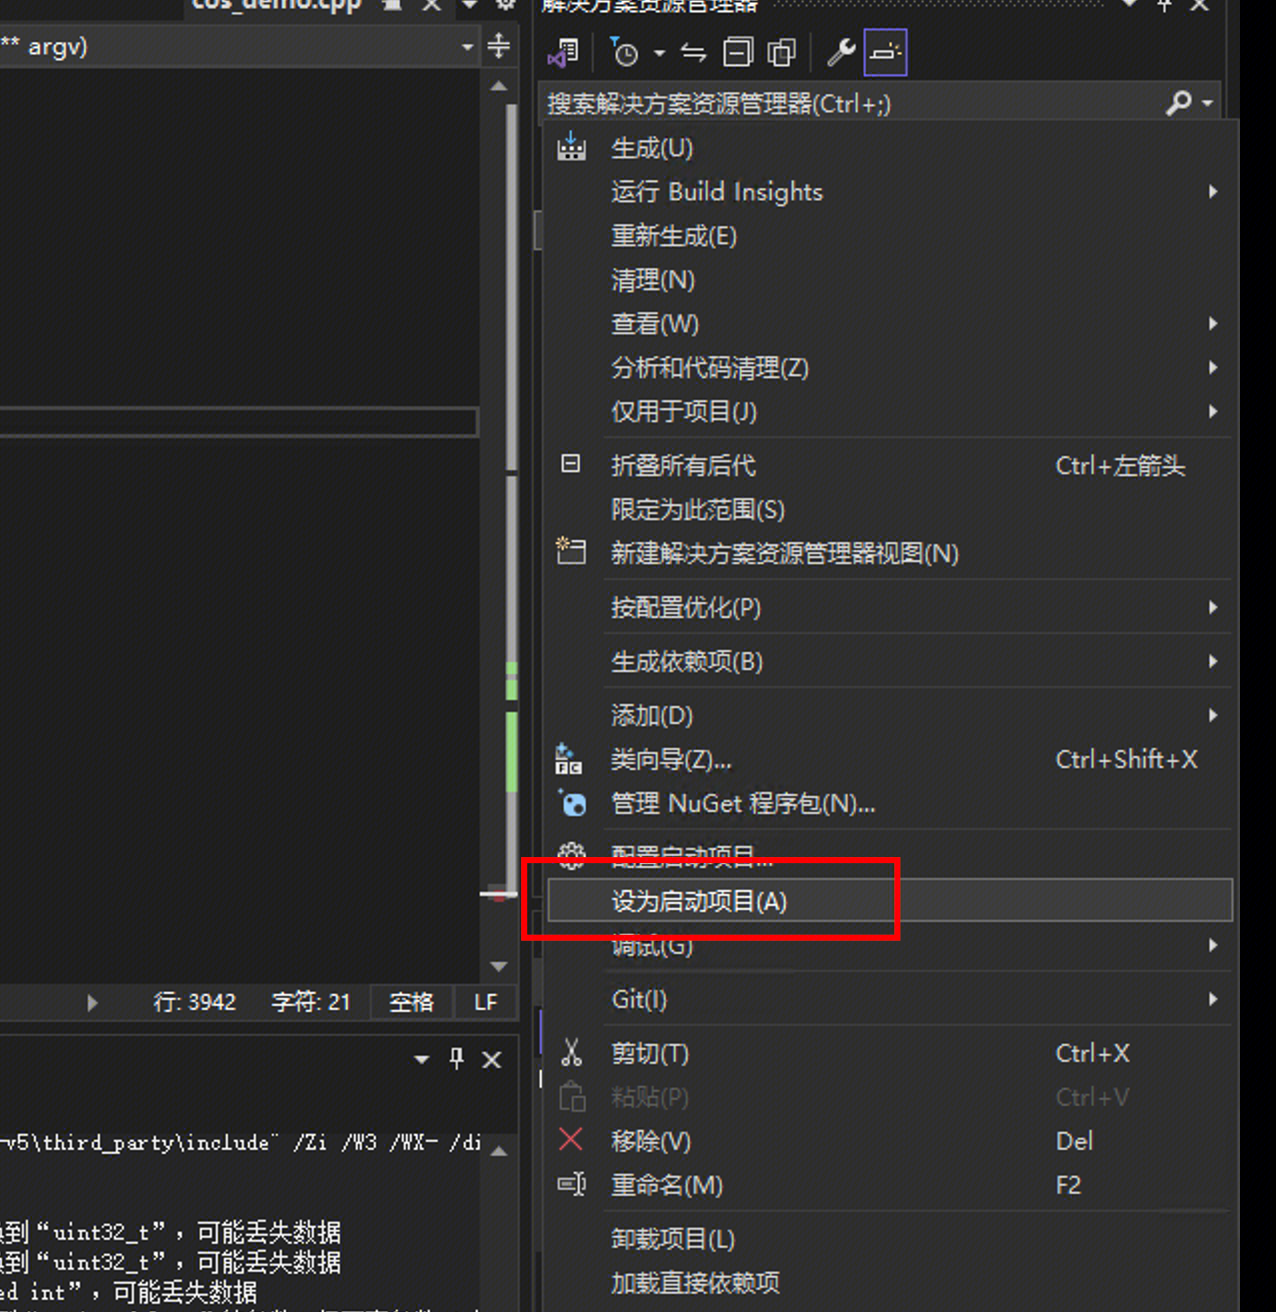
1. 右键解决方案中的 cos-demo,并点击设为启动项目。
2. 打开 cos-demo,在 Source Files 中点击源文件。
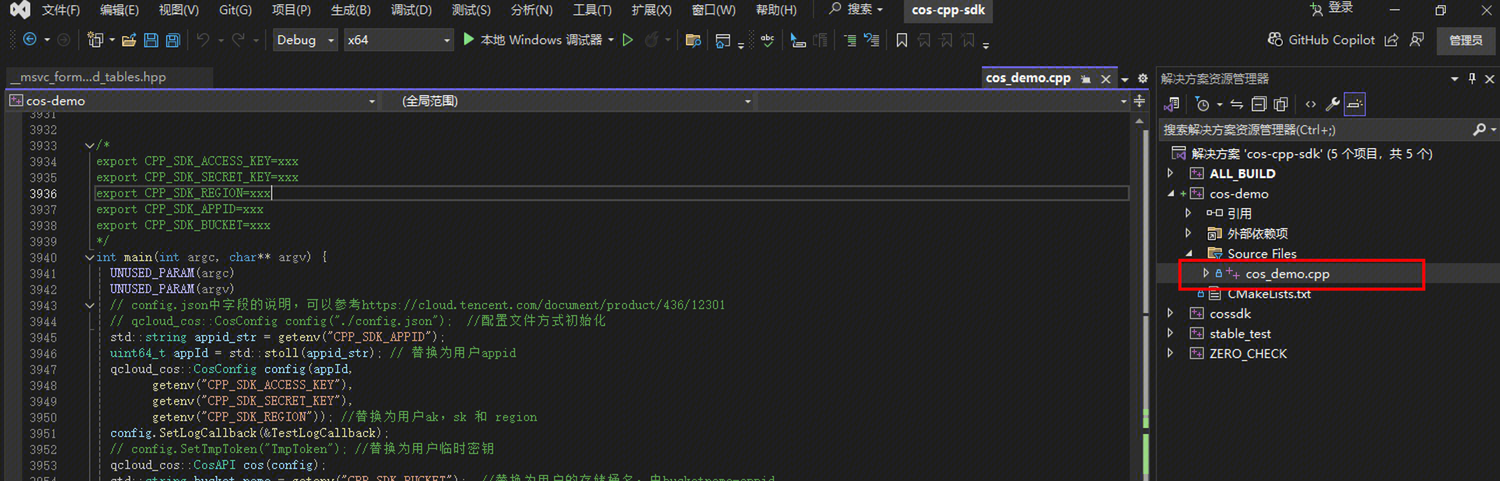
3. demo 中依赖环境变量获取敏感信息,用户可自行赋值后进行测试,如下图:
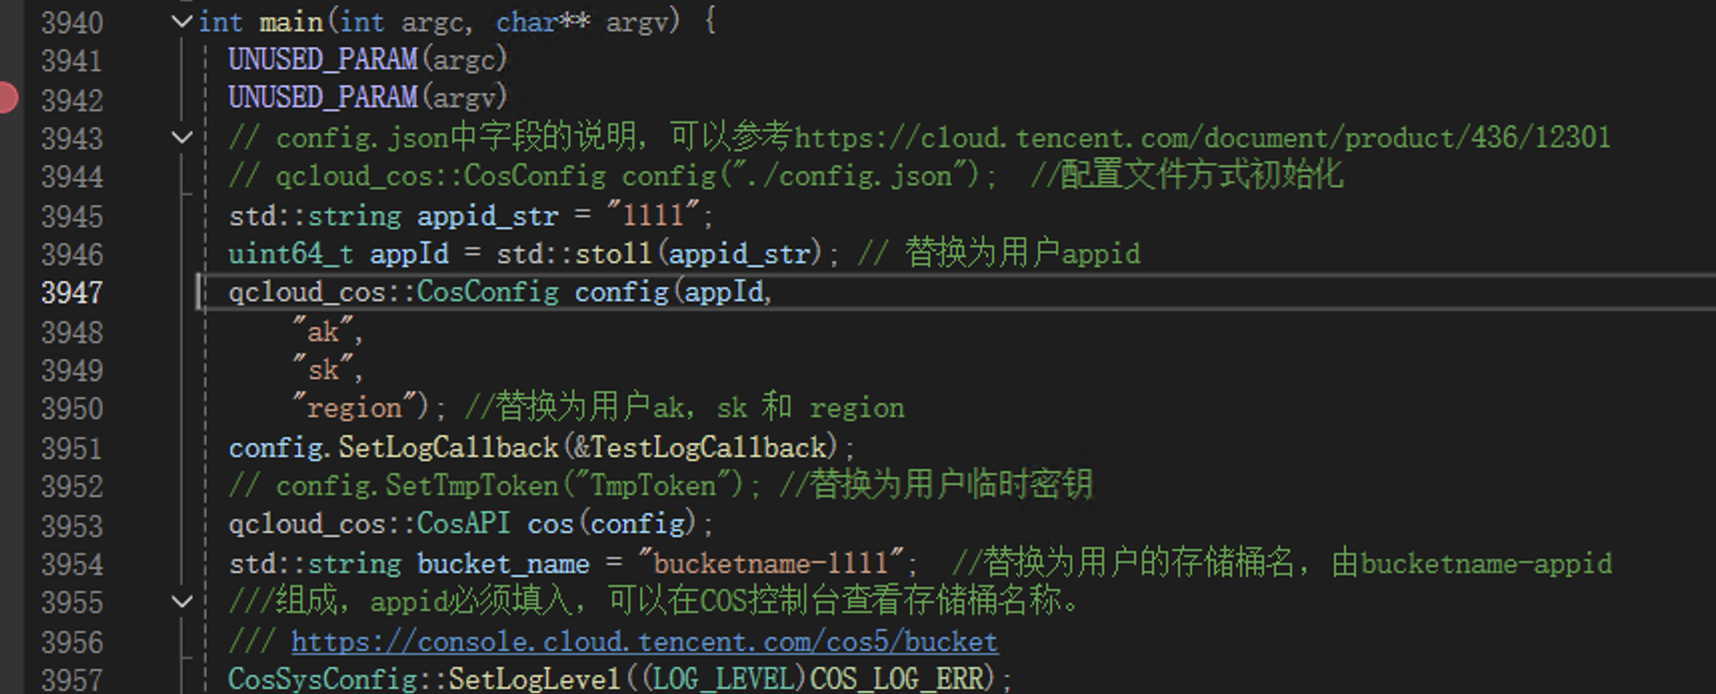
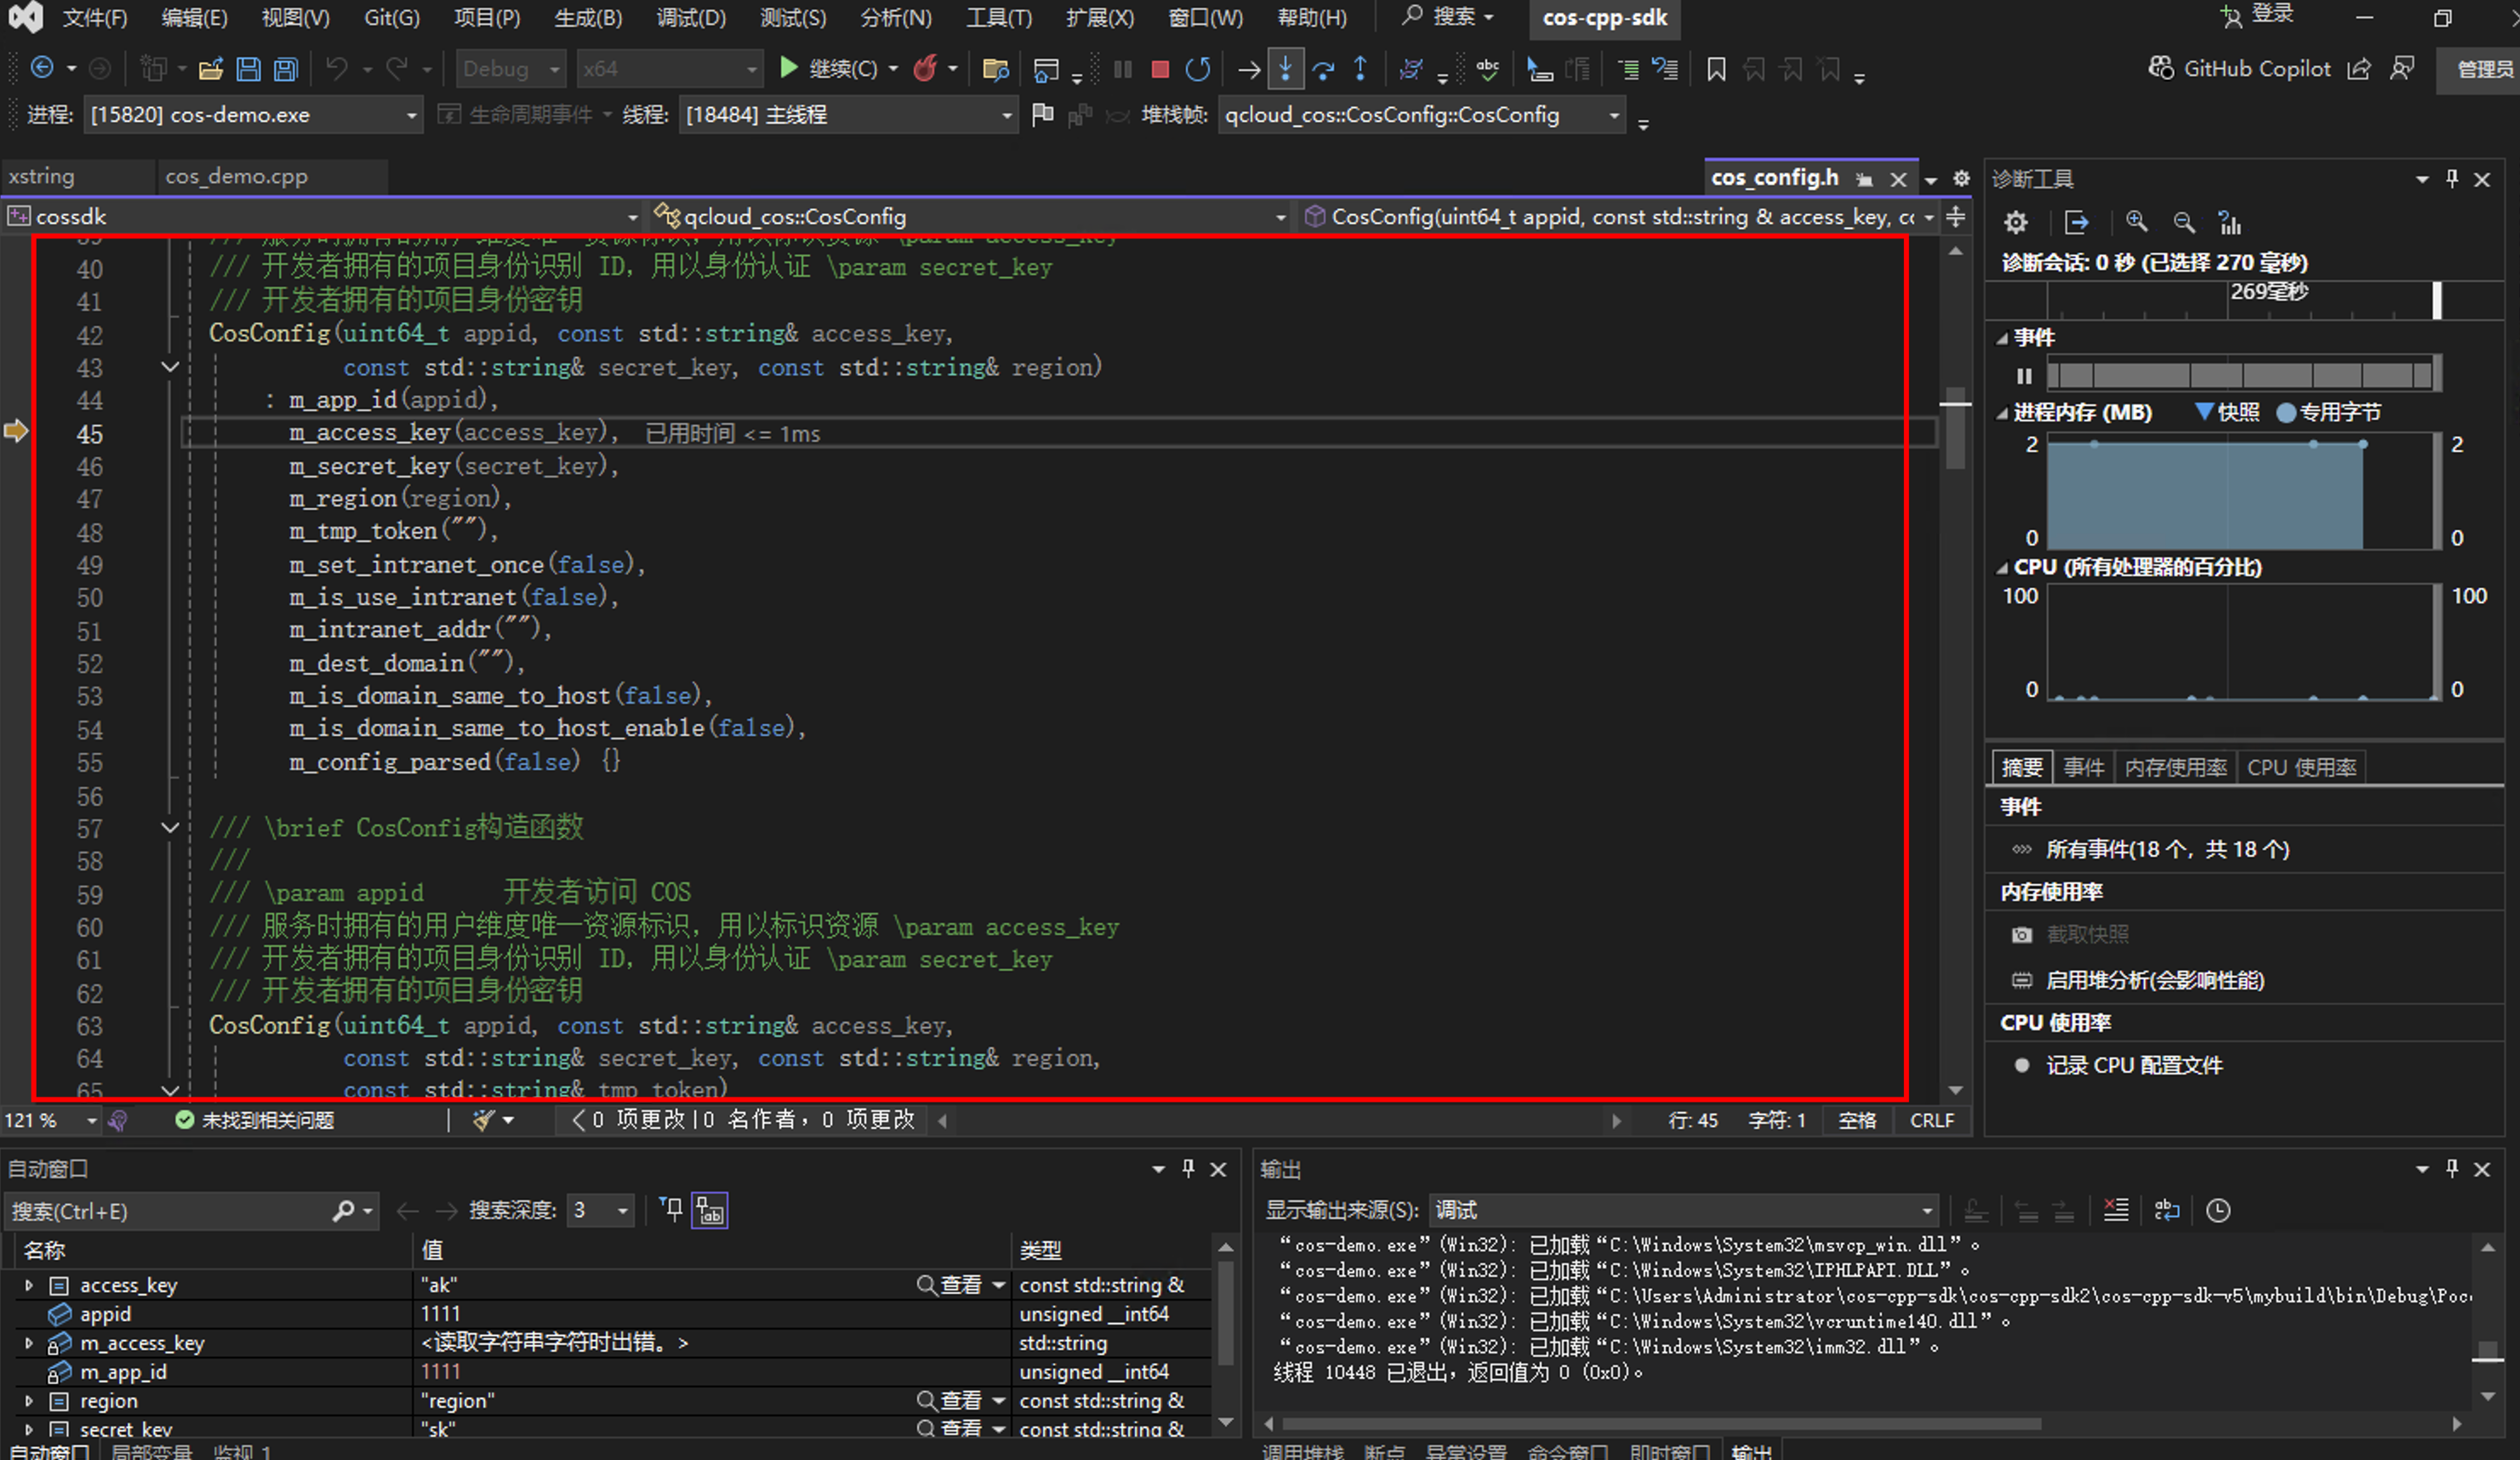
4. 找到 main 方法打断点后点击上方调试-->开始调试。如下图,可以 debug 到 sdk 内部。
常见问题
一次编译错误并进行对应处理后,编译依旧报错,如何处理?
需要对环境进行清理后重新编译。例如编译 openssl 时,发现 nasm 不在环境变量,加入环境变量后依旧报错,此时可清理编译文件夹后重新编译(如删除文件夹重新拉取源码)。
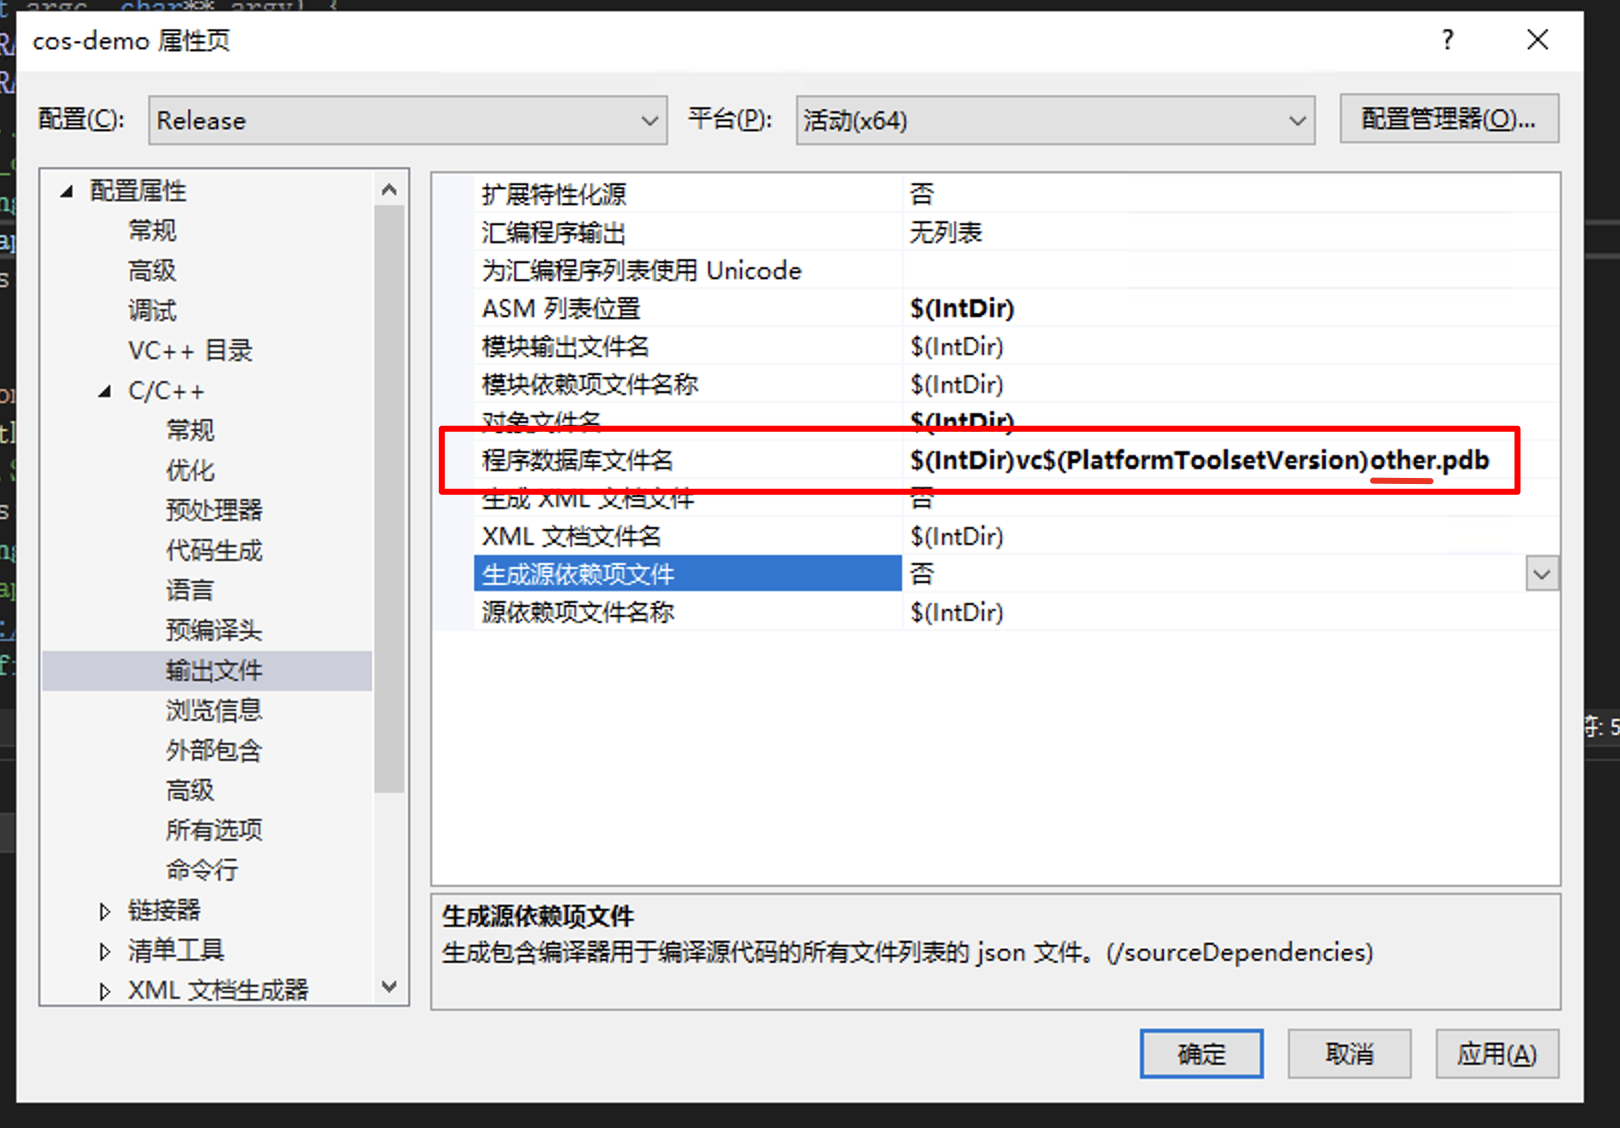
poco 和 sdk 生成解决方案时,报错 pdb 文件打开失败,如何处理?
这个错误,基本原因就是原本的 pdb 被占用且清理不掉,可以彻底清理 mybuild 文件,重启 Visual Studio 2022 ,再生成解决方案。
如果问题依旧存在,可对 pdb 文件输出名称进行修改后重新生成解决方案,如下图: