Scenario
If you are a sub-account with admin permissions (AdministratorAccess) or full access to CAM (QcloudCamFullAccess) and have purchased CVM, VPC, COS, and other Tencent Cloud resources, you can create one or more sub-accounts for your team members and allow them to access your resources.
This document describes how to use the admin account to create a sub-user in the Cloud Access Management Console and bind the sub-user to a permission policy.
Note
Both sub-users and collaborators are sub-accounts. For definitions and permissions, please refer to User Types.
Creation method | Scenarios | Note |
Quick Creation | Creating Admin User | By default, it has AdministratorAccess permissions, which can be modified. |
Custom | Ordinary Sub-user | Bind policy permissions as needed |
WeChat/WeCom Import | WeChat/WeCom Friends as Sub-Users | The Tencent Cloud account is already linked to WeChat/WeCom. |
Preparations
You have already created a sub-account with admin permissions Create a sub-account with administrative privileges or a sub-account with full access to CAM (QcloudCamFullAccess).
Instructions
Creating a Role via Console
Note
You can click the following tabs to view the directions to create and authorize different types of sub-accounts.
A root account with an unverified identity can create up to ten sub-accounts every 24 hours.
1. Log in to the Tencent Cloud console, go to the User List, click Create User to access the Create User page.
2. On the Create User page, click Quick Create to navigate to the Quick Create User page.
3. On the quick user creation page, enter the username in User Information and adjust other options as needed.
Note
Click Create User to create up to 10 users at a time.
4. For "Password resetting required", select whether the sub-user needs to reset the password upon next login as needed.
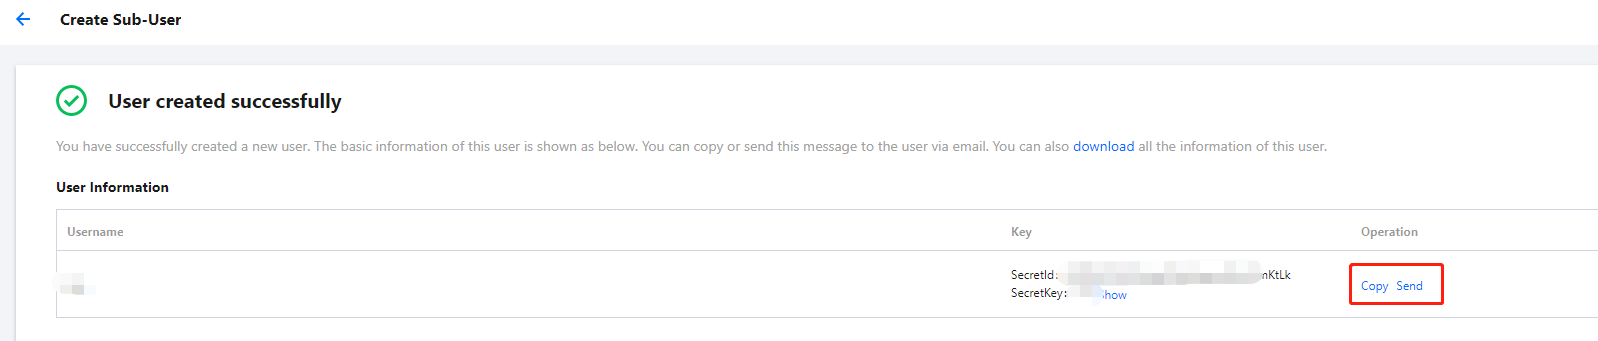
5. Click Create User to navigate to the successful user creation page.
6. You can get the sub-user information in the following two methods:
Click Send to to supplement your email information, and the system will send the complete sub-user information to your email.
Click Copy and paste to save locally.
1. Log in to the Cloud Access Management Console and select Users > User List from the left sidebar to access the user list management page.
2. On the User Management page, click Create User to navigate to the Create User page.
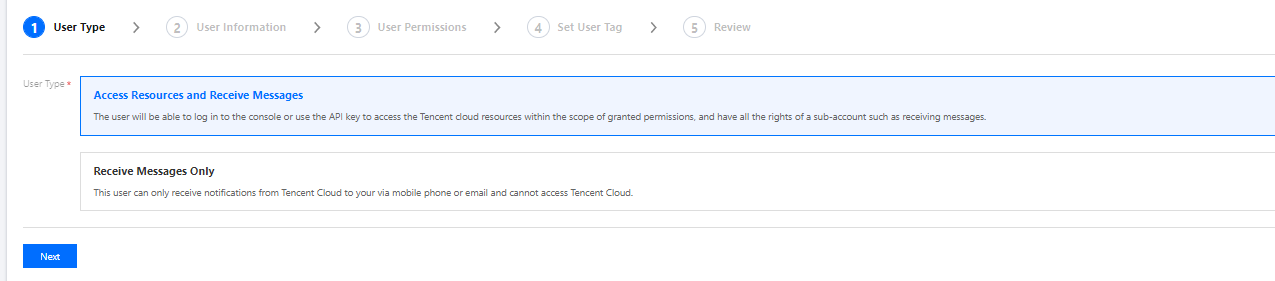
3. On the Create User page, click Custom Create to navigate to the Select User Type page.
4. On the Select User Type page, click Access Resources and Receive messages or Receive messages Only, then click Next to enter user information.
5. Follow the on-screen instructions to fill in and confirm the information, then click Complete to finish creating the custom sub-user.
If Resource Access and Message Receipt is enabled, you will be directed to the page indicating that the sub-user has been created successfully.
If it is for receiving messages only, navigate to the user list page.
1. Log in to the Tencent Cloud console, go to the User List, click Create User to access the Create User page.
2. On the Create User page, click Import via WeChat/WeCom and select Invite via WeChat or Import via WeCom.
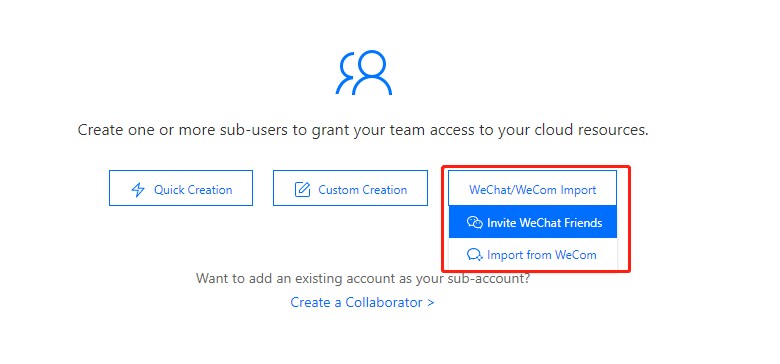
3. Follow the on-screen instructions to complete the creation process. For detailed steps, refer to Creating Sub-users via WeChat or Importing Sub-users via WeCom.
Creating a role using API
You can add sub-users and set permissions by calling the AddUser API with an access key. For more information, see Add Sub-User - API Documentation.
Note:
When creating a sub-user via API, you can restrict the created sub-user to programmatic access only, as demonstrated below.
{"statement": [{"action": ["cam:AddUser"],"condition": {"for_any_value:bool_equal": {"cam:console_login": ["false"]}},"effect": "allow","resource": ["*"]}],"version": "2.0"}
If you wish to understand how to manage sub-users by grouping and authorizing them through user groups, please refer to Adding/Removing Users from User Groups and Adding/Removing Policies from User Groups.
If you wish to learn how to add or delete associated policies for sub-users, please refer to Sub-User Permission Settings.
If you wish to understand how to log in as a sub-user, please refer to Sub-User Login.
If you wish to understand how to reset the key for a sub-user, please refer to Resetting the Login Password for Sub-Users.
If you wish to understand how to subscribe a sub-user to messages, please refer to Sub-User Message Subscription.