The content of this page has been automatically translated by AI. If you encounter any problems while reading, you can view the corresponding content in Chinese.

Step 2. Migrating Metadata to Cloud

Last updated: 2024-08-02 15:45:59

Operation scenarios

This document describes how to migrate metadata from open-source RabbitMQ to TDMQ for RabbitMQ.

Prerequisites

When importing metadata files to TDMQ for RabbitMQ, you need to first export the metadata files from the open-source RabbitMQ.

Operation step

Export metadata from a self-built RabbitMQ cluster

1. Open your browser and log in to the self-built open-source RabbitMQ Console.
enter image description here

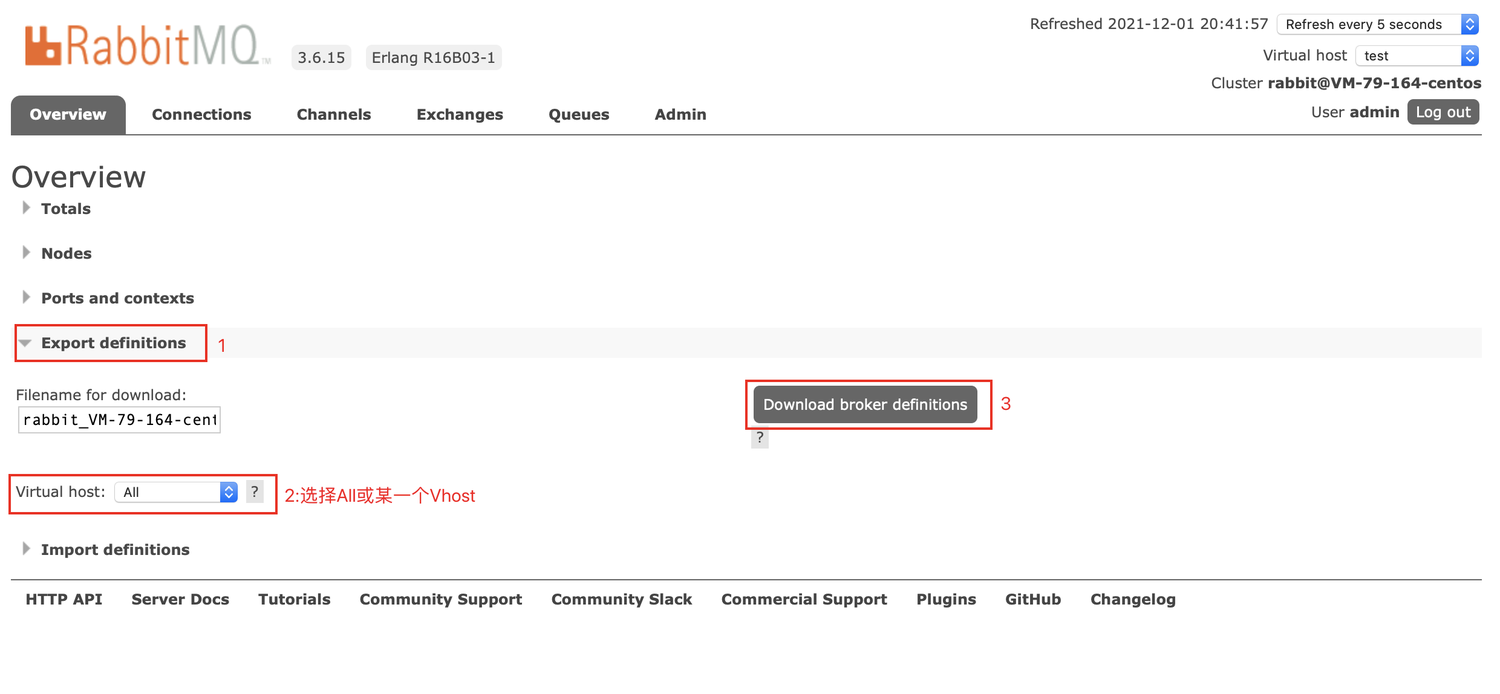
2. On the Overview page, click Export definitions. After entering the desired file name in the text box, select either "All" or a specific Vhost at "Virtual host", then click Download broker definitions on the right to export the metadata file for all Vhosts or a specific Vhost.
enter image description here

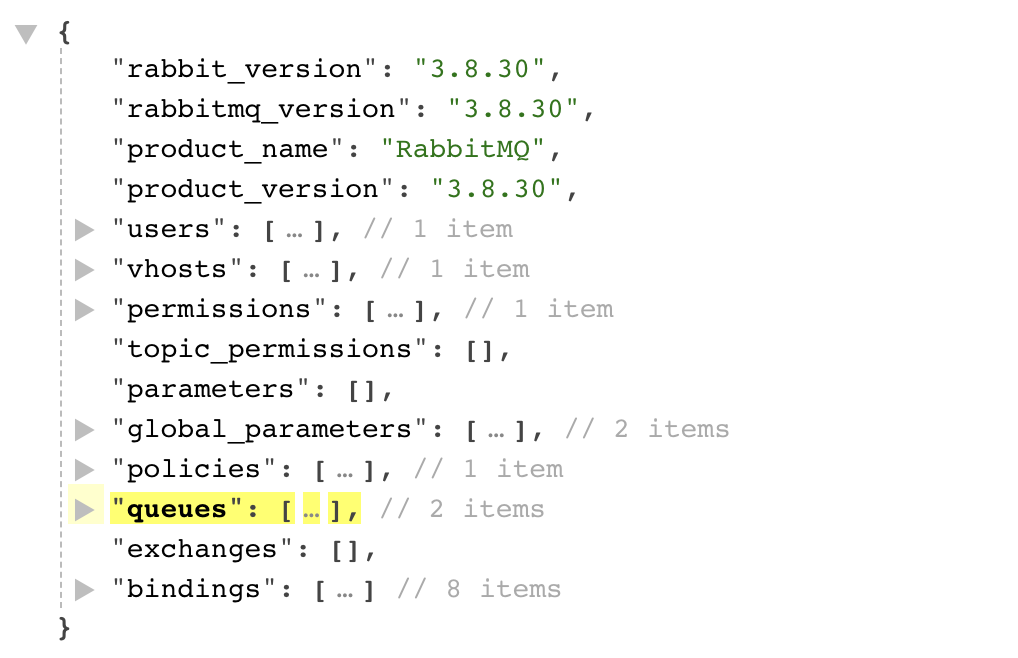
3. Check the content of the exported metadata file
enter image description here


Import metadata into the Tencent Cloud RabbitMQ cluster

1. Open the Tencent Cloud console and click Migration to Cloud.
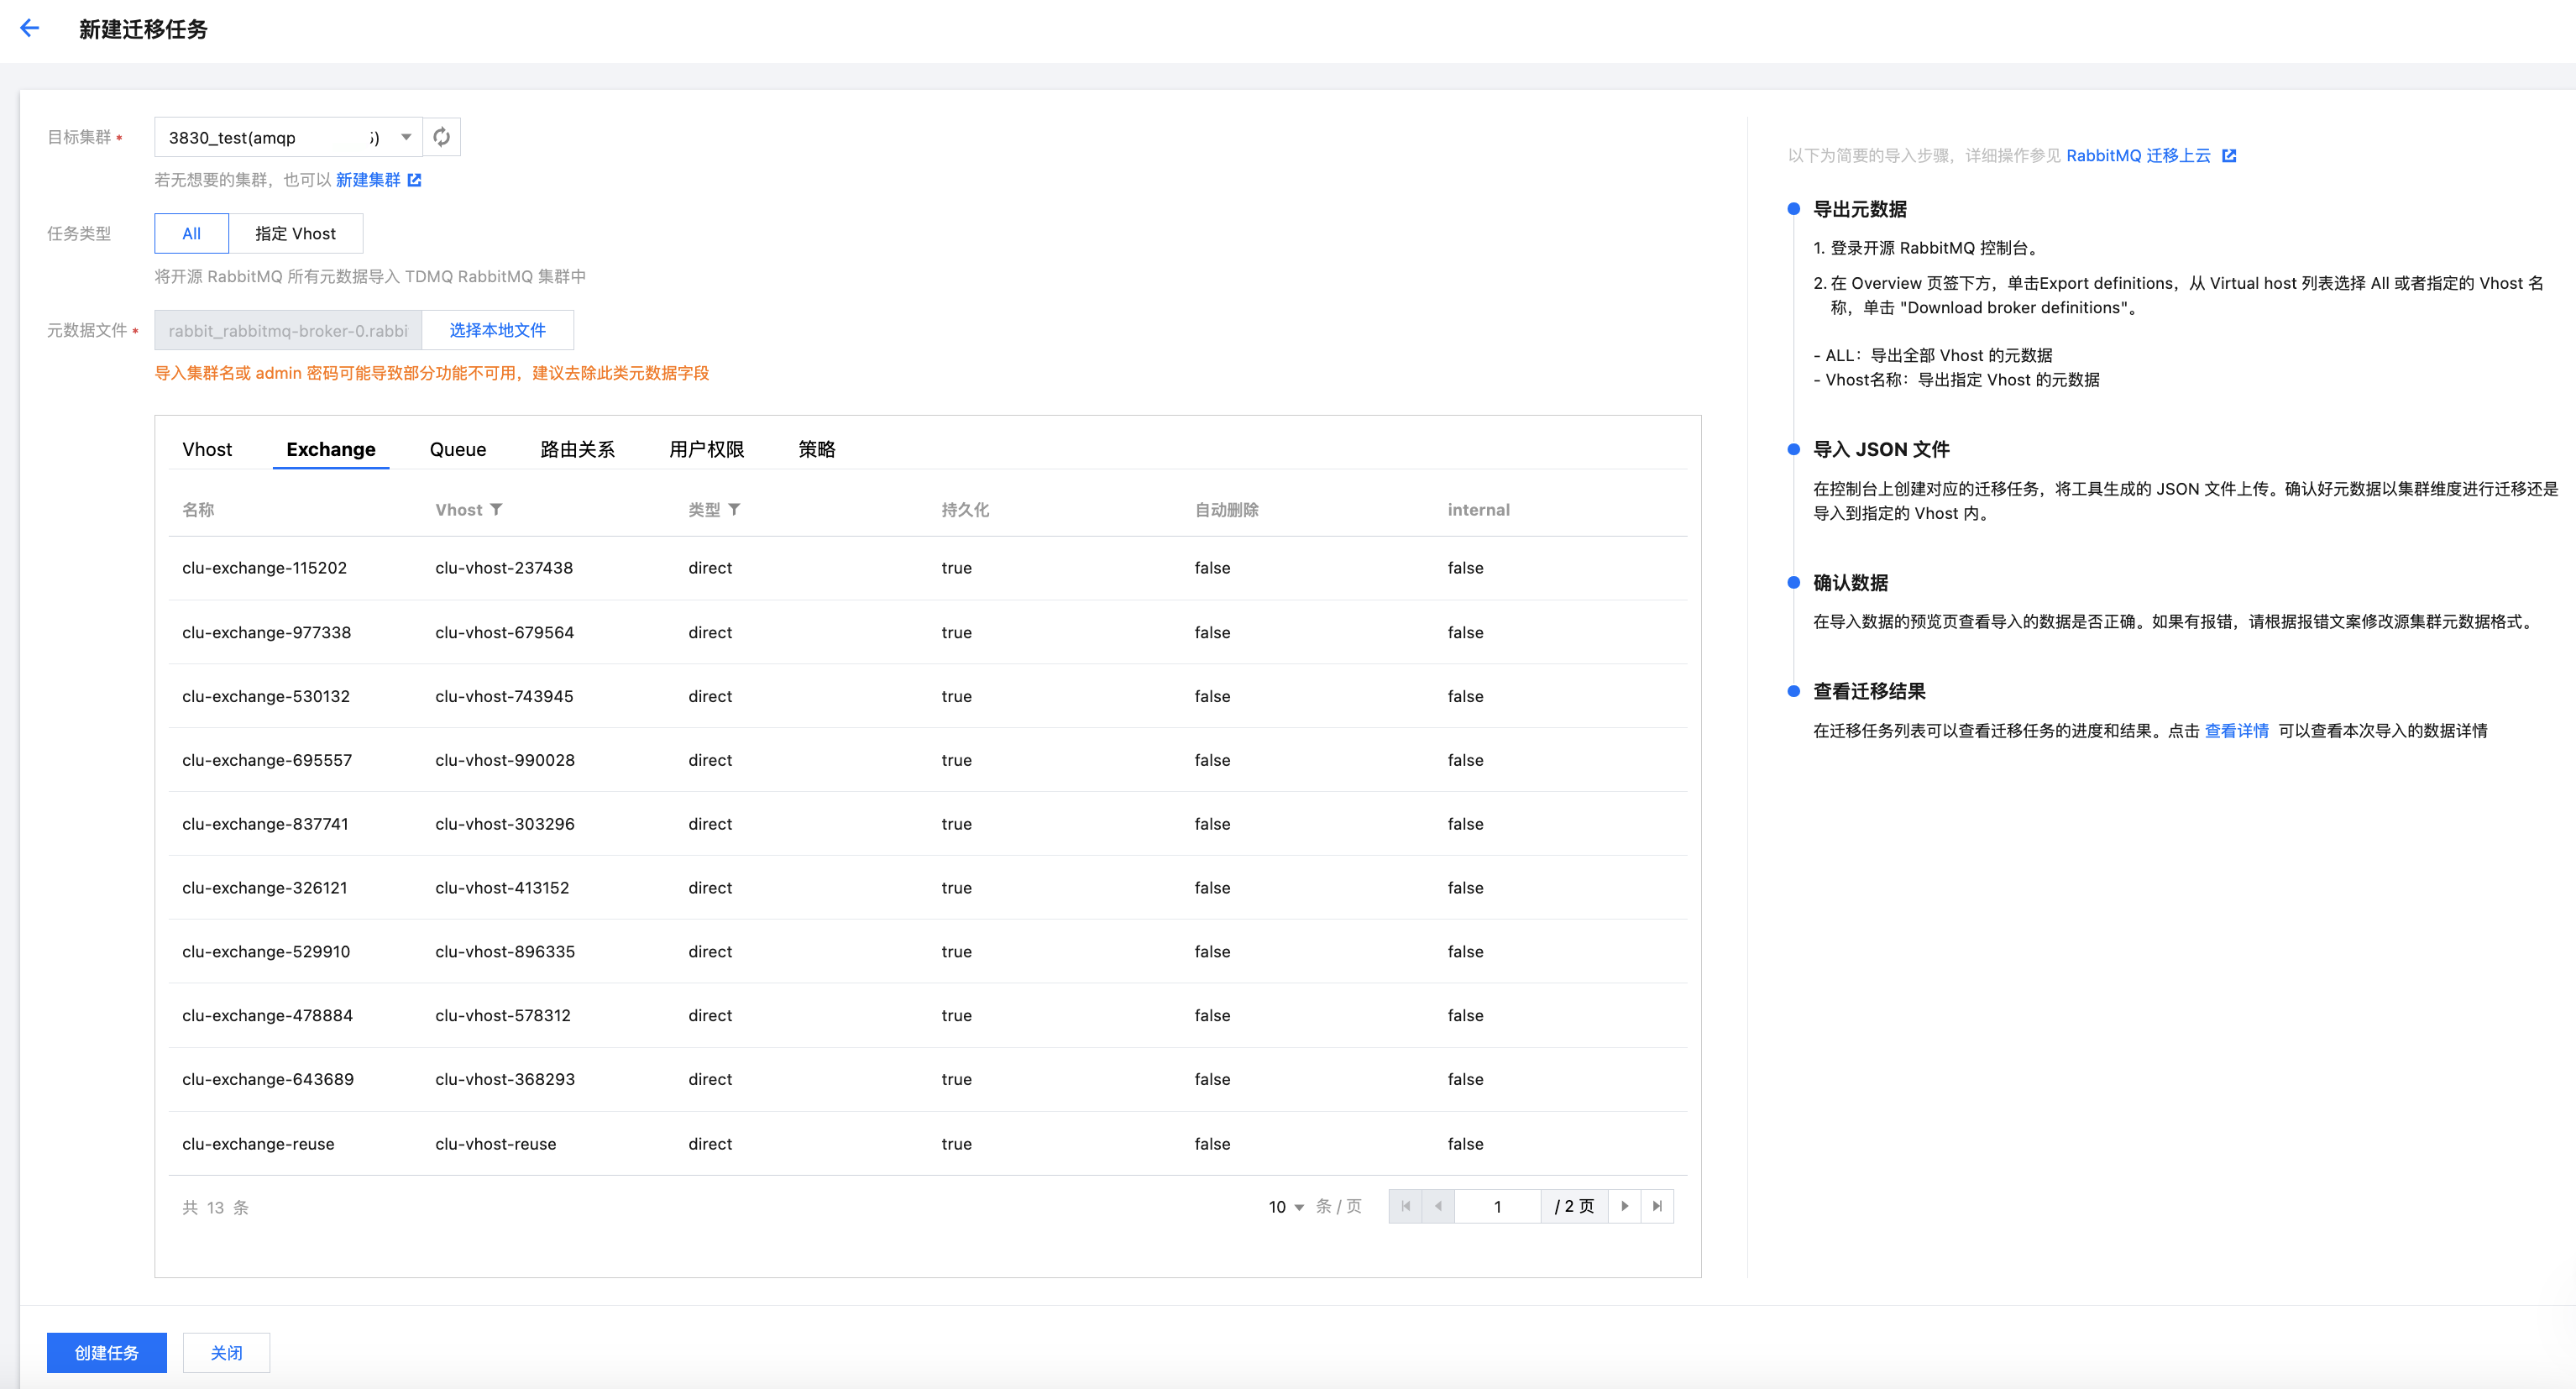
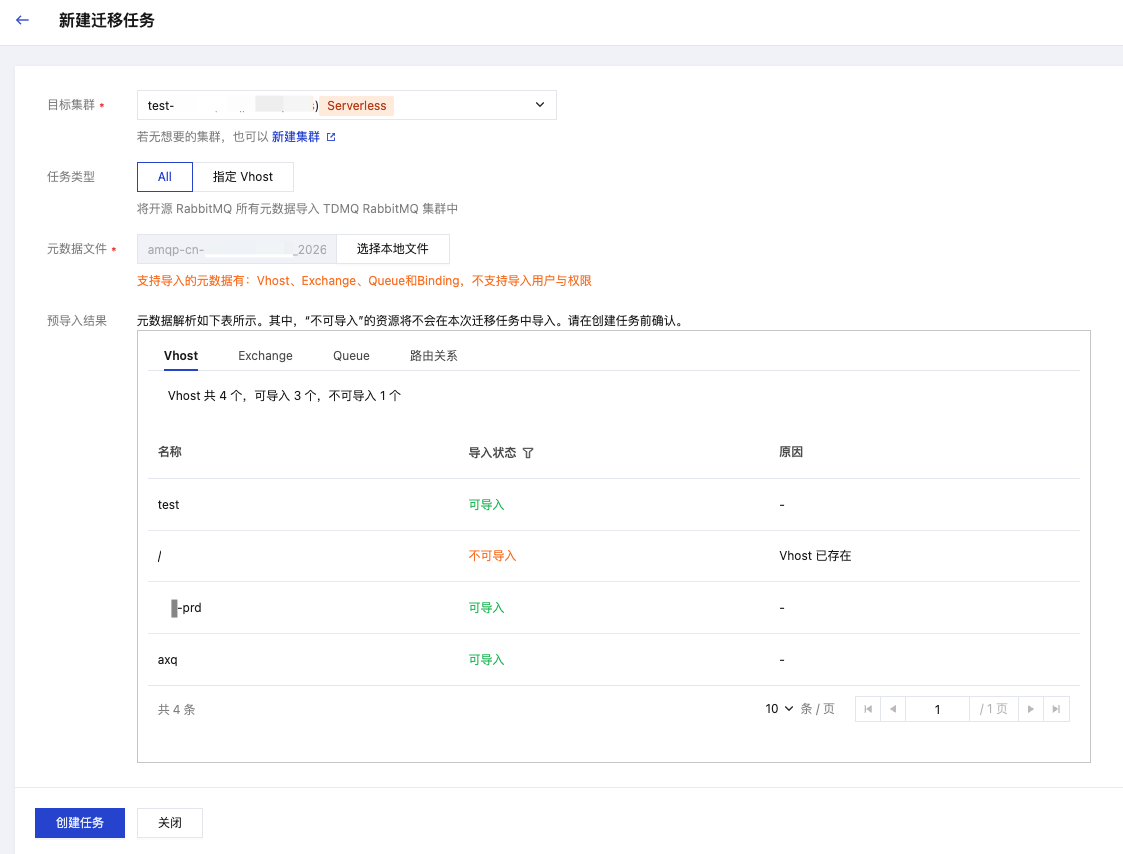
2. On the Migration to Cloud task list page, click Create Task.

Target cluster: Select the target TDMQ for RabbitMQ cluster for metadata import.
Task Type
All: Import all metadata from the open-source RabbitMQ cluster into the TDMQ for RabbitMQ cluster
Specify Vhost: Import metadata for a specified Vhost from the open-source RabbitMQ cluster into a specific Vhost in the TDMQ for RabbitMQ cluster.
Metadata file: Select the local metadata file.
Notes:
Importing cluster names or admin passwords may cause some features to be unavailable. It is recommended to remove such metadata fields.
3. In the data import preview page, check if the imported data is correct. If there are errors, please modify the source cluster metadata format according to the error messages.
4. Click Create Task. A task record will be generated in the Cloud Migration Task List page.
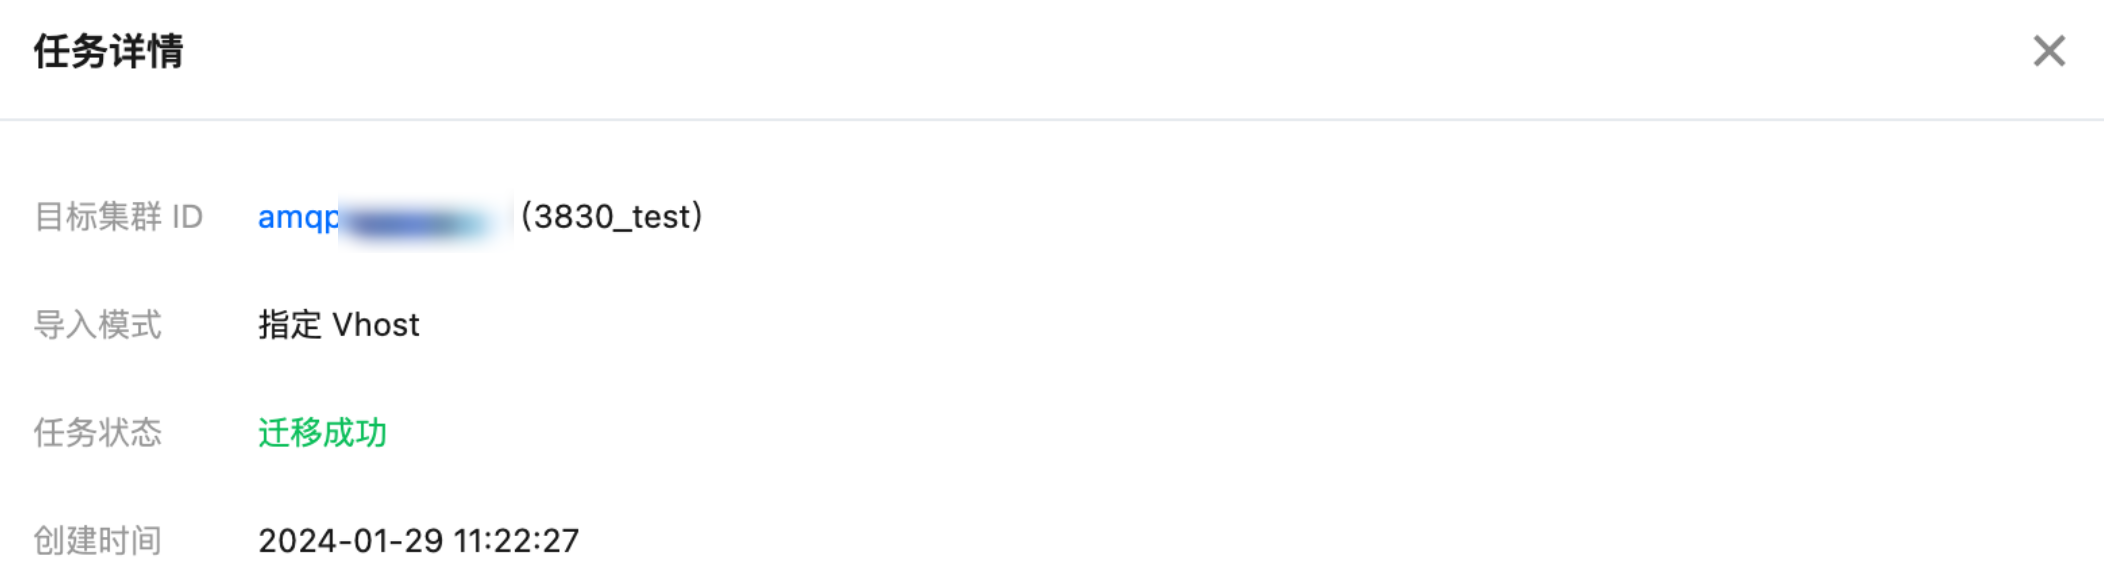
5. Click View details to view the details of this migration task.