As of March 23, 2020, all certificate-related operations for CLB have been integrated with Cloud Access Management (CAM) authentication. Therefore, when using a sub-user account for CLB certificate-related operations, if you receive a message stating "This operation requires authorization, please contact your developer to grant you permission," you can follow the steps below to grant certificate-related permissions to the sub-user account.
Preparations
The account used for login must be either a root account or a sub-user account with CAM-related permissions, specifically, a sub-user account associated with the QcloudCamFullAccess policy (full read and write access to Users and Permissions (CAM)).
Note:
To check the CAM-related permissions of a sub-user account, you can go to the User List in the Cloud Access Management console, enter the details page of the corresponding sub-user, and check under "Permissions" whether the QcloudCamFullAccess policy is already associated.
If you have already associated the QcloudCamFullAccess policy but still encounter the message "No API permissions available (message:GetReceiversOnAllType), please contact the developer for authorization" during the process of granting certificate-related permissions, please ignore the message and continue with the operation.
Instructions
Choose any of the following methods to grant certificate-related permissions.
2. In the left sidebar, select Users > User List to navigate to the "User List" page.
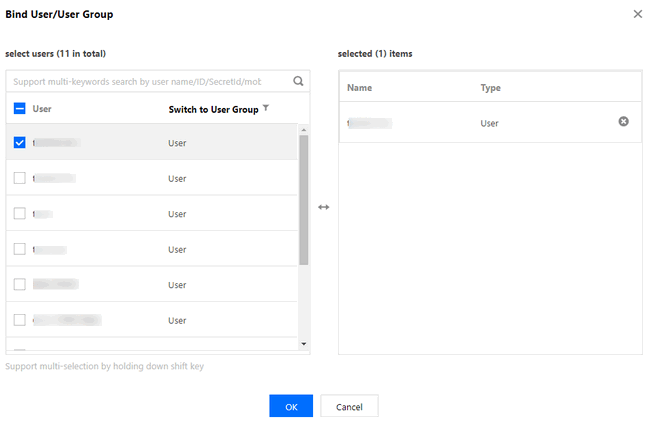
3. In the row of the sub-user requiring authorization, click Authorize under the Operation column.
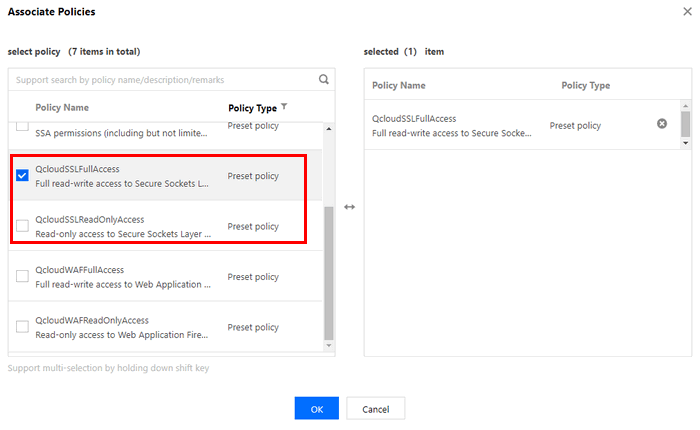
4. In the pop-up box, select either QcloudSSLFullAccess (full read and write access to SSL certificates) or QcloudSSLReadOnlyAccess (read-only access to SSL certificates), and click OK to confirm.