The content of this page has been automatically translated by AI. If you encounter any problems while reading, you can view the corresponding content in Chinese.

Switch Between Read-Write Nodes and Read-Only Nodes

Last updated: 2026-05-19 10:44:31

TencentDB for MySQL Cloud Disk Edition instances support switching between read-write nodes and read-only nodes, that is, primary-secondary switch. When an instance fails, read-only nodes are switched to read-write nodes to ensure system availability and data integrity. The above describes automatic switchover performed by the system in special circumstances such as failures. Additionally, you can perform manual switchover via the console. This document introduces read-write node switch for Cloud Disk Edition. For primary-secondary switch in two-node or three-node instances, see Primary-Secondary Switch.

Background

In enterprise applications, databases are often critical business systems. Once a database fails or goes down, it will severely impact business operations. Therefore, to ensure system availability and data integrity, it is necessary to adopt high availability solutions, such as primary-secondary switch. This allows rapid switching of read-only nodes under the instance to read-write nodes when a read-write node fails, avoiding business interruption and data loss.

Prerequisites

To create an instance of TencentDB for MySQL cloud disk edition, see Purchase Method.
The instance is running, and no other tasks are being executed.

Must-Knows

During a read-write node switch, a momentary disconnection lasting seconds may occur. It is recommended to perform the switchover operation during off-peak business hours and ensure the application has a reconnection mechanism.
After a read-write node switch, the instance connection address remains unchanged. The original read-write node becomes a read-only node, and applications automatically connect to the new read-write node (that is, the original read-only node).

Operation Steps

1. Log in to the TencentDB for MySQL console. In the instance list, click the Instance ID or Manage in the Operation column to go to the instance details page.
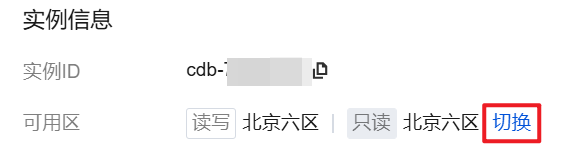
2. On the Instance Details > Instance Info > AZ page, click Switch.

Note:
You can also directly click More > Source/Replica Switch in the upper-right corner of the Instance Management page.

3. In the pop-up window, select the switch time, specify the node, check the precautions, and then click OK.

During maintenance time: Perform read-write node switch during the maintenance window. To modify the instance maintenance time, see Setting Instance Maintenance Time.
Switch Now: The read-write node switch will be performed immediately after the configuration is completed.
4. When the instance status changes from "Primary/Secondary Switching" to "Running", the switch is completed.