前提条件
操作步骤
步骤1:集成 TIMPush
拷贝目录 | 引入插件 |
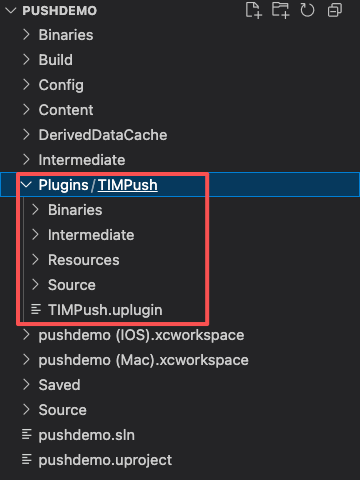 | 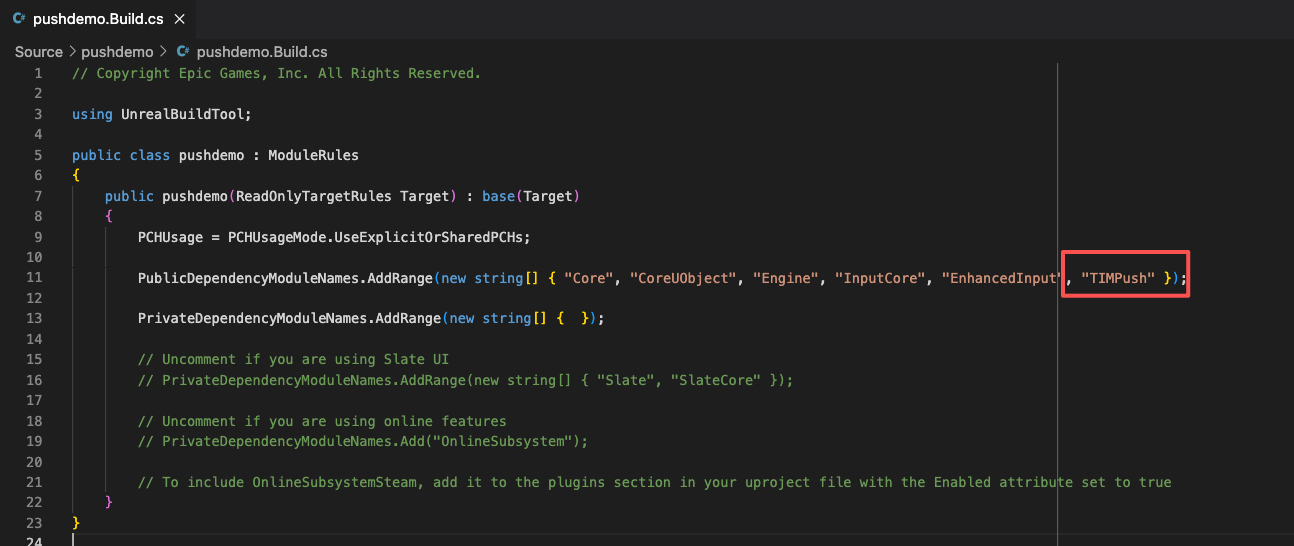 |
步骤2:推送参数配置
1. 请将您在 厂商配置 步骤中,获取到的 iOS APNs 推送证书, 上传至 腾讯云即时通信 IM 控制台。控制台会为您分配一个证书 ID,见下图:
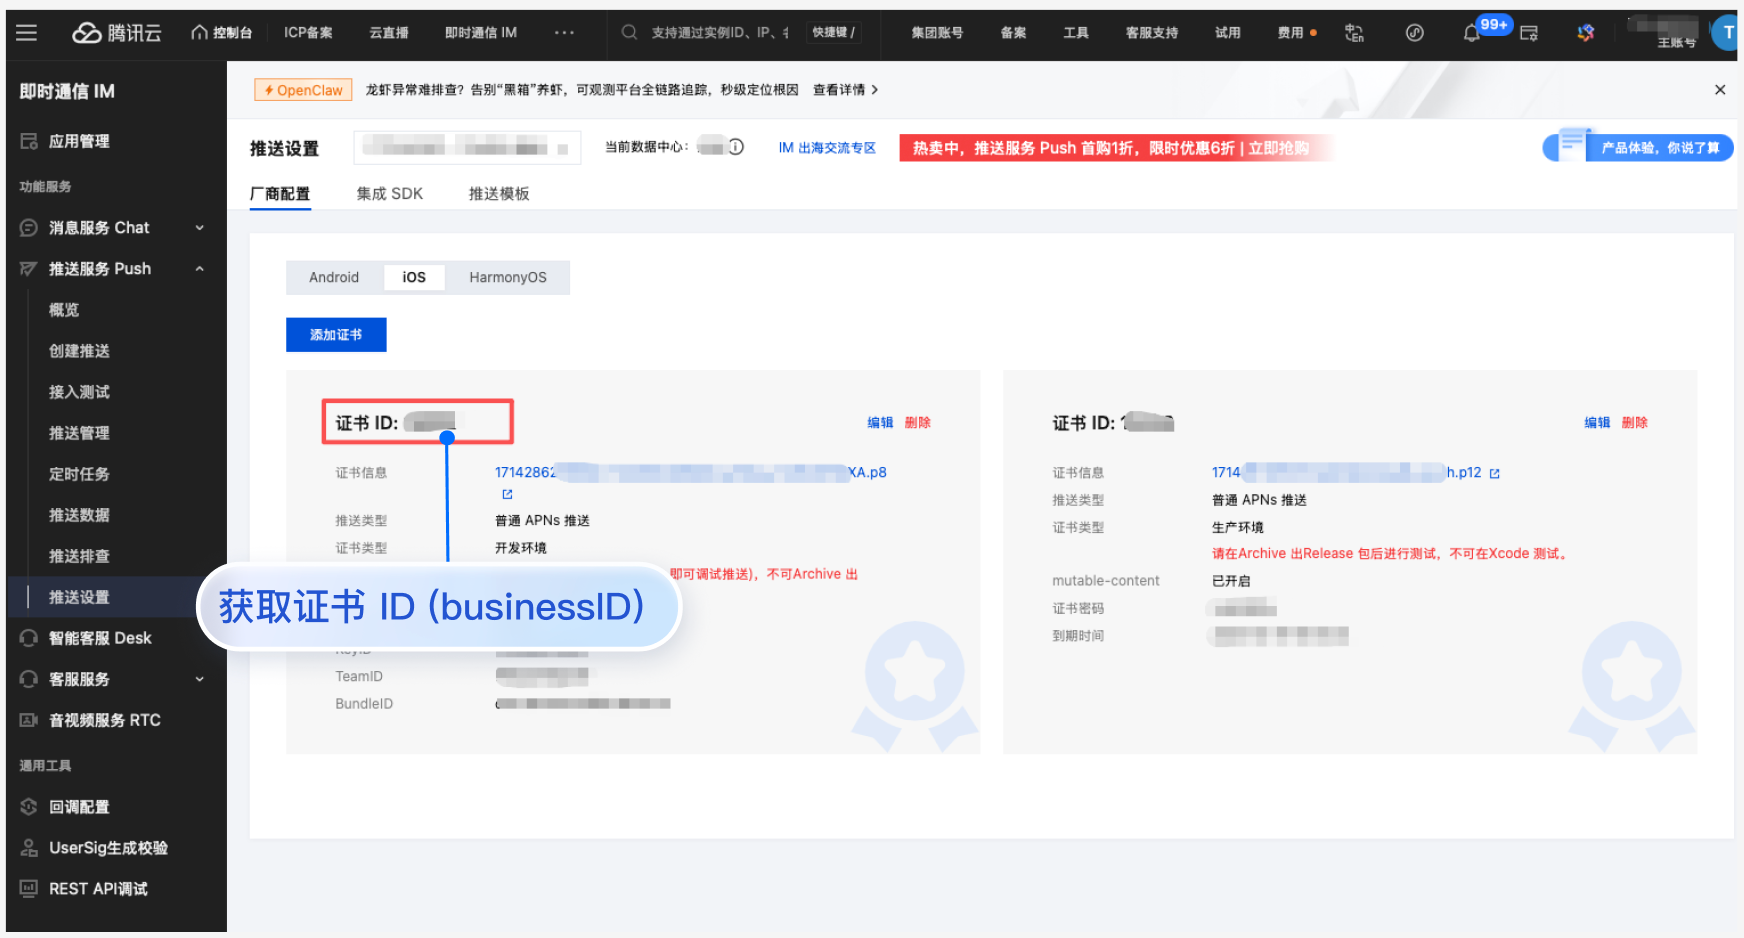
2. 设置
businessID:请在 UE4 Editor 中打开“项目设置”,搜索查找 Additional Plist Data 并将下面文本修改后复制进入文本框中,其中 YourBusinessID 是必填项,而 YourGroupID 是当您需要统计推送的抵达和点击数据时需要修改的值<key>businessID</key><string>YourBusinessID</string><key>TIMPushAppGroupID</key><string>YourGroupID</string>
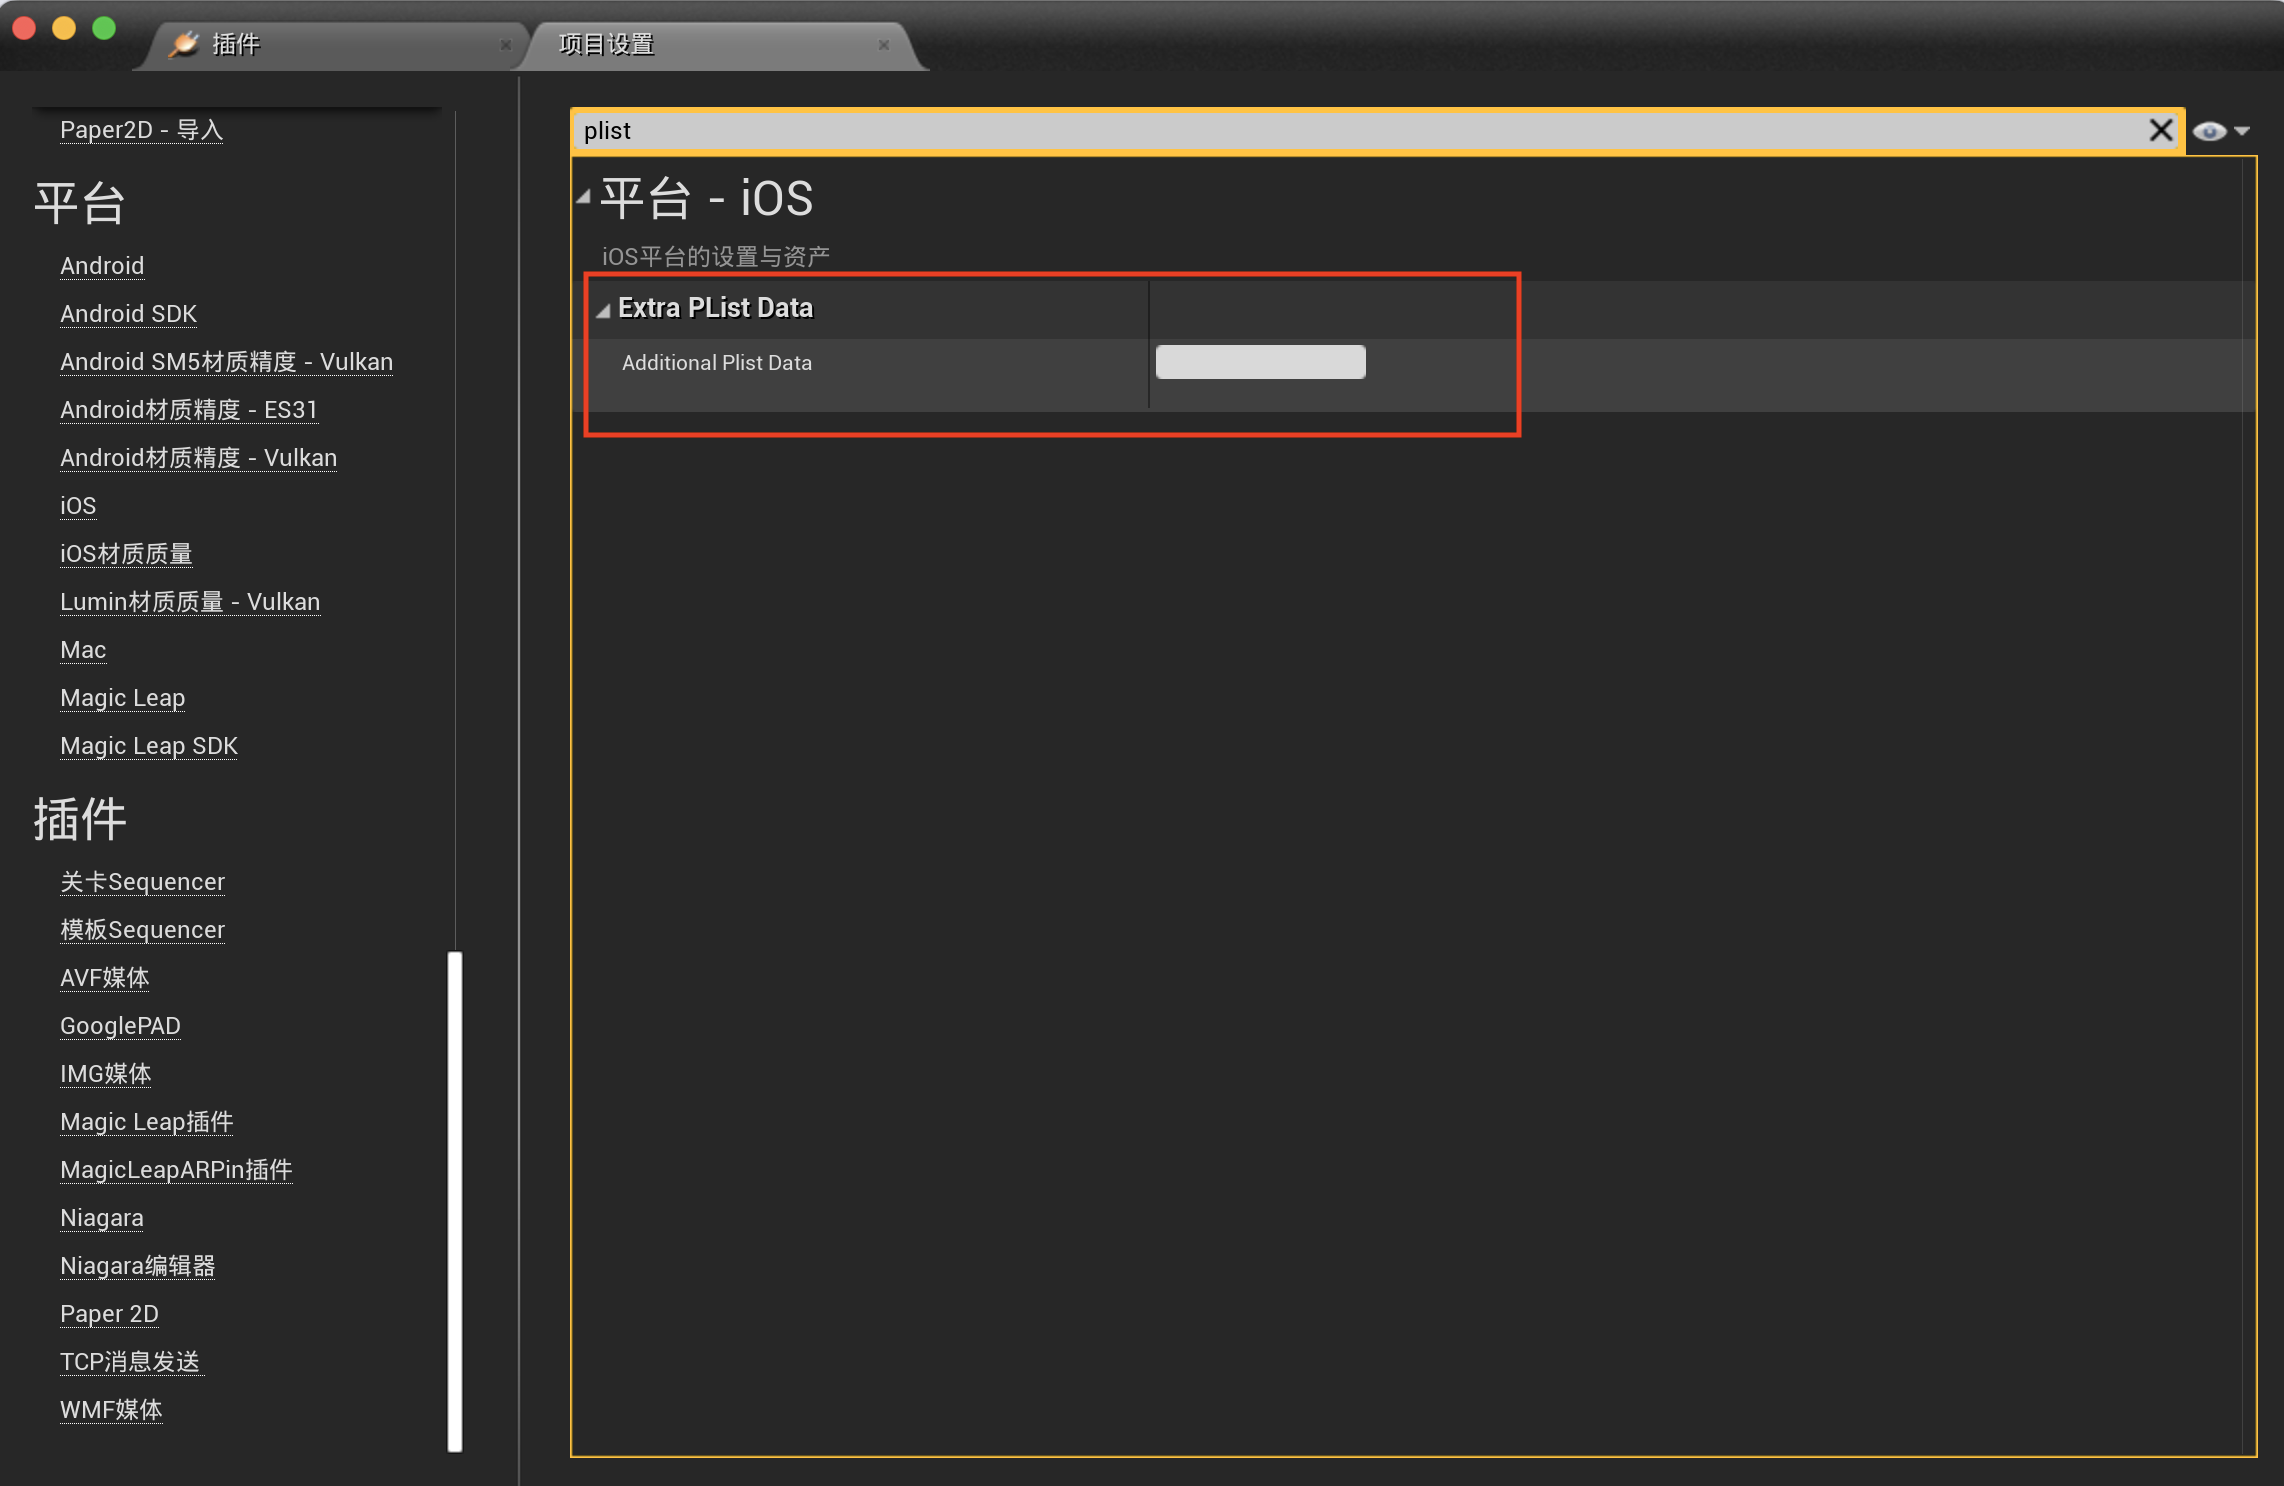
3. 开启远程推送能力。完成证书 ID 配置之后,您需要开启应用的 Push Notifications 能力:
如果您的 UE 引擎是从源代码自行编译构建的,您可以通过 “项目设置 > iOS 中勾选 Enable Remote Notifications Support” 来开启对应能力;
如果您的 UE 引擎是从 Epic Game 下载的,您可以通过打开 “
<proj_dir>/Config/DefaultEngine.ini” ,在脚本的 IOSRuntimeSettings 中添加:// Some code[/Script/IOSRuntimeSettings.IOSRuntimeSettings]bEnableRemoteNotificationsSupport=True
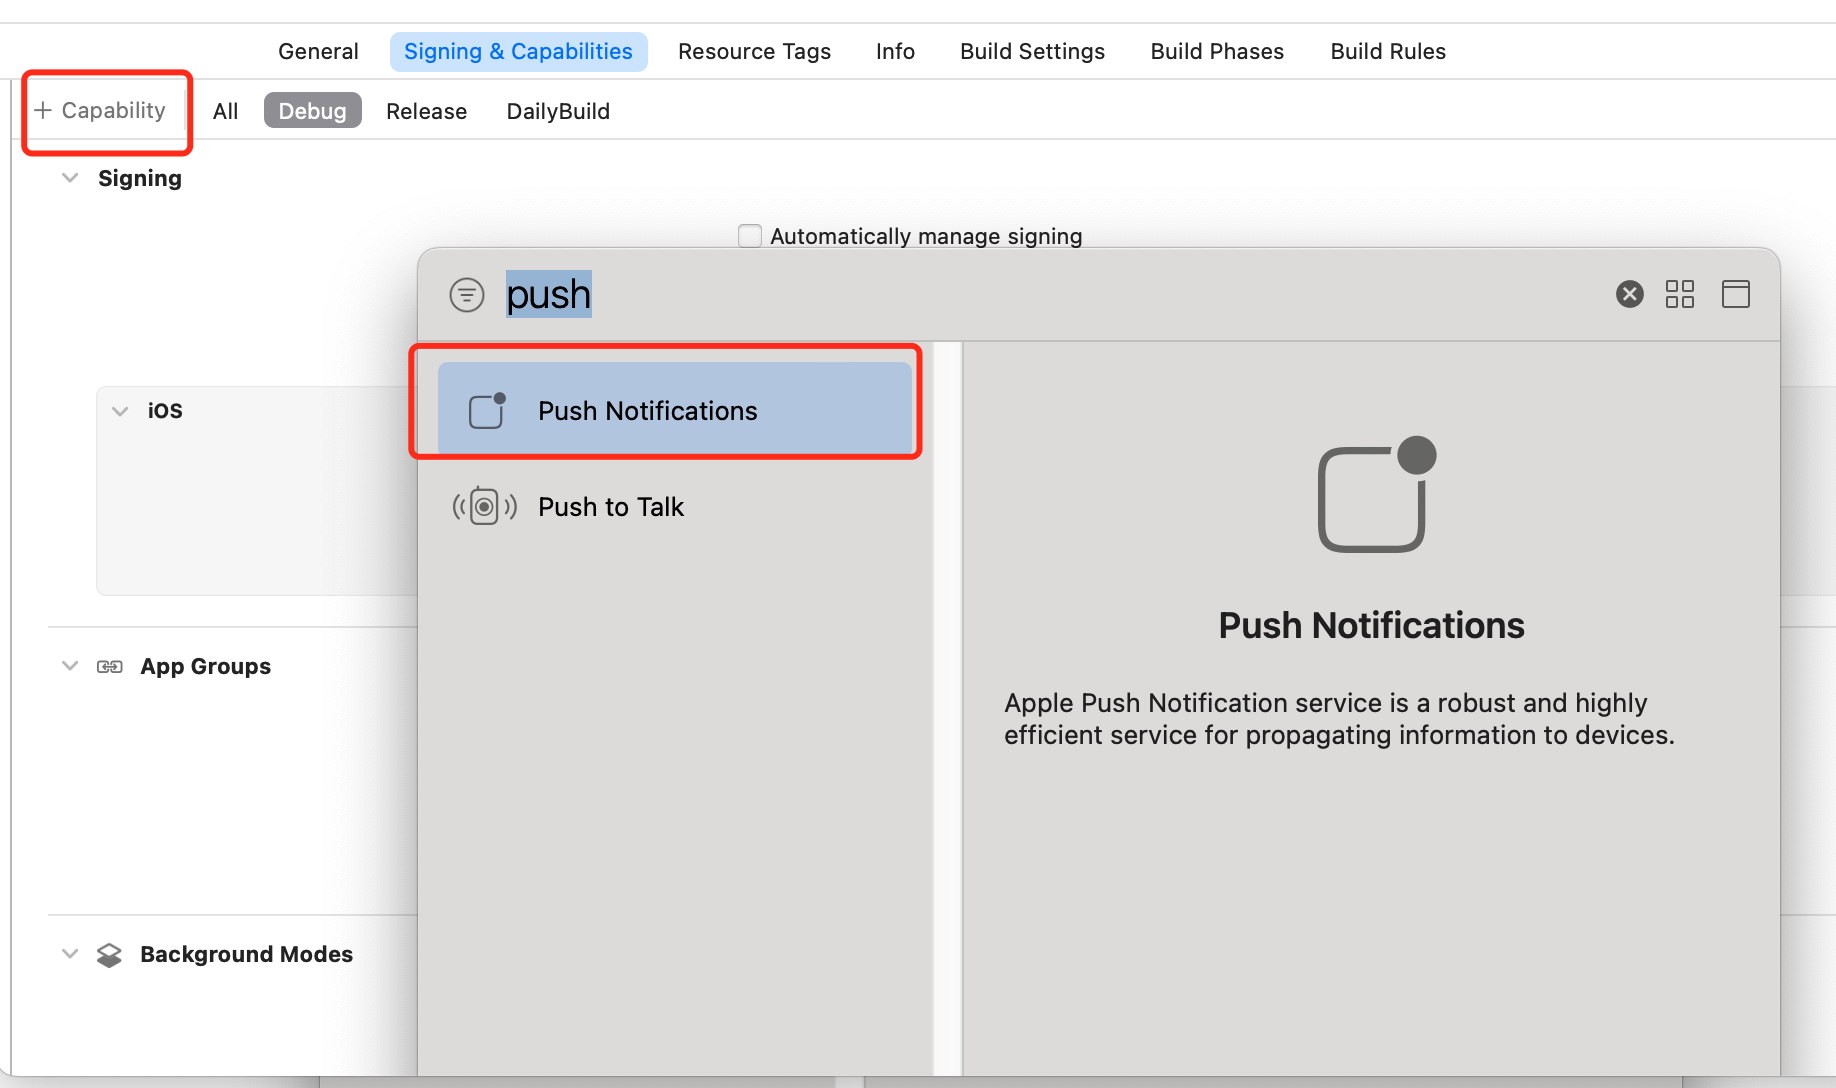
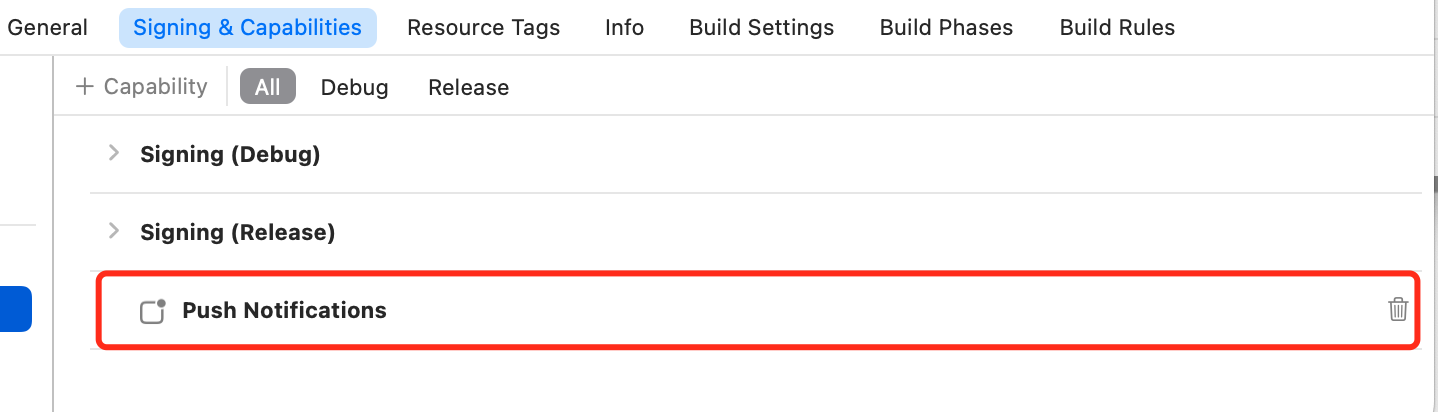
或者,您也可以选择在项目根目录中使用 Xcode 打开 UE 生成的 YourProject.xcworkspace,在 Project > Target 中,点击 Signing & Capabilities 选项,点击左上角 Capability,搜索添加 Push Notifications 能力到您的项目中
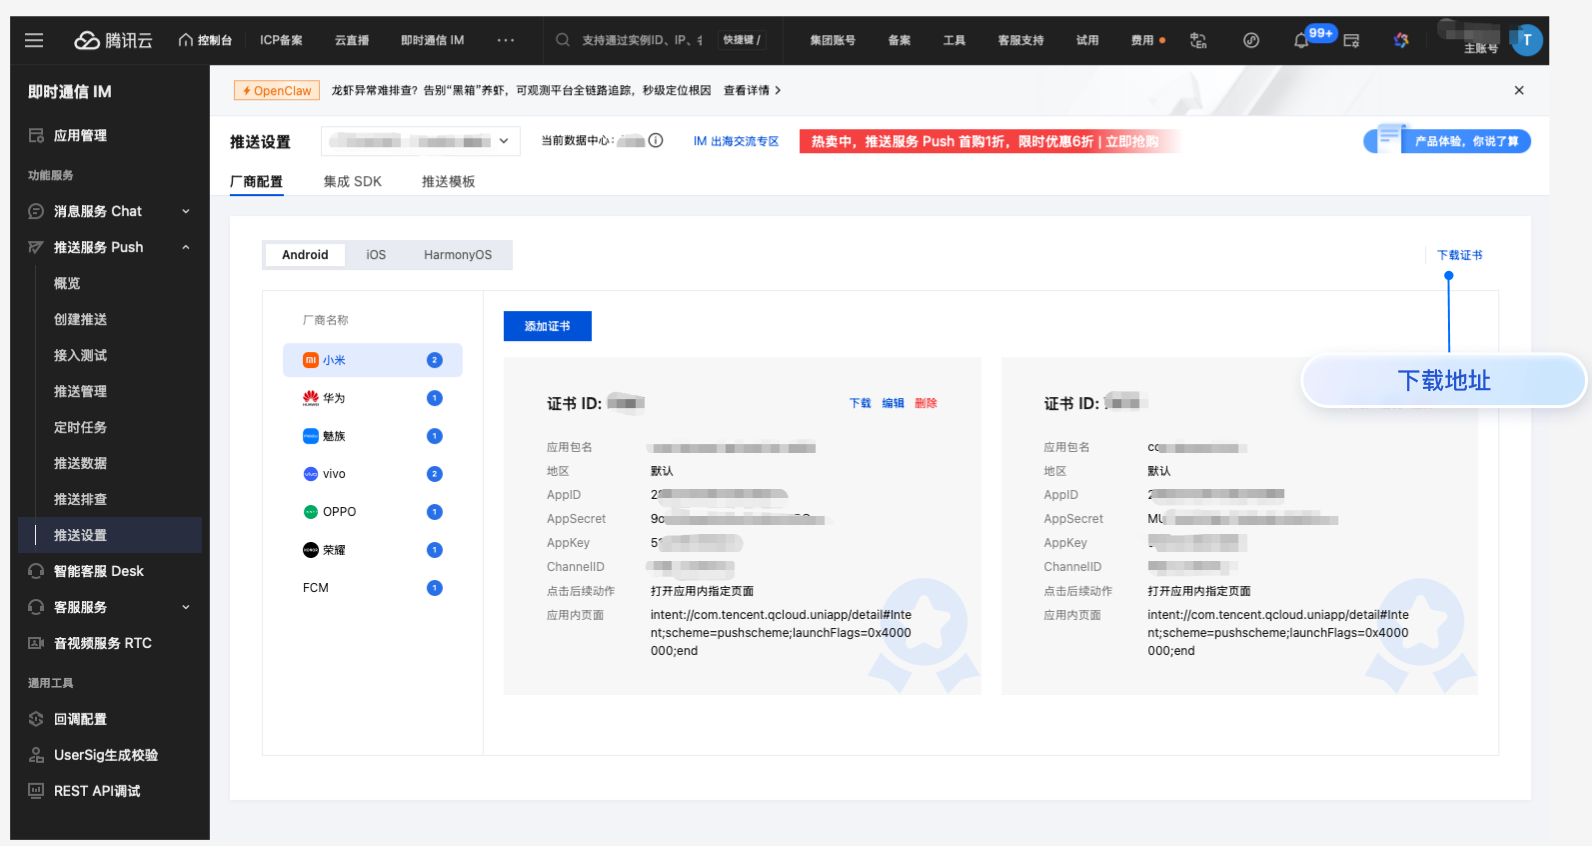
完成 厂商配置 后,在 腾讯云即时通信 IM 控制台 下载并添加配置文件到工程。将下载的
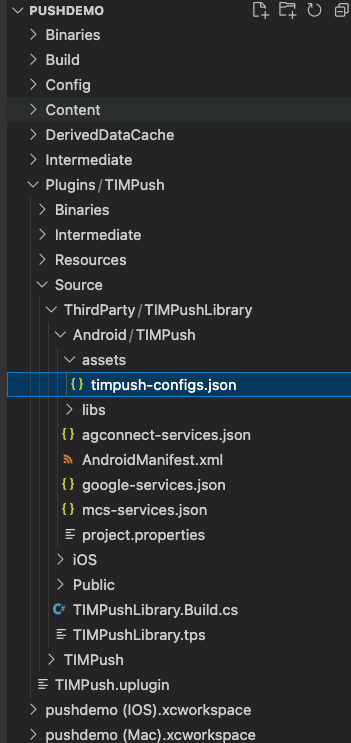
timpush-configs.json 文件添加到 TIMPush 的 Source/ThirdParty/TIMPushLibrary/Android/TIMPush/Assets 目录下。下载配置文件 | 拷贝路径 |
 |  |
步骤3:客户端厂商配置
iOS 端无需进行此步骤。
APL 相关配置 TIMPush 已配置好,只需要替换成应用自己的配置信息即可。TIMPush_APL.xml 路径在:
/Plugins/TIMPush/Source/TIMPush/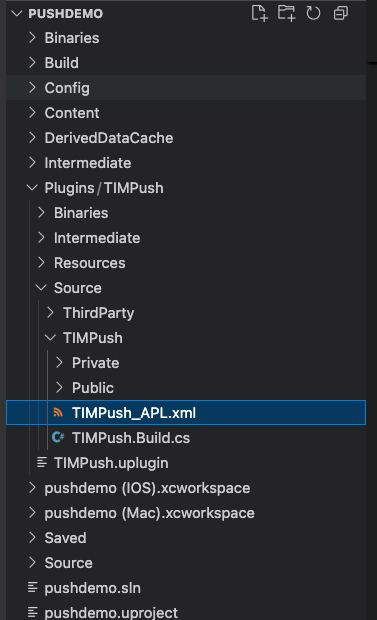
1. 推送包集成配置
<buildGradleAdditions><insert>dependencies {// 推送主包必须要集成implementation 'com.tencent.timpush:tpush:VERSION'// 按照需要集成对应厂商implementation 'com.tencent.timpush:huawei:VERSION'implementation 'com.tencent.timpush:xiaomi:VERSION'implementation 'com.tencent.timpush:oppo:VERSION'implementation 'com.tencent.timpush:vivo:VERSION'implementation 'com.tencent.timpush:honor:VERSION'implementation 'com.tencent.timpush:meizu:VERSION'implementation 'com.tencent.timpush:fcm:VERSION'}</insert></buildGradleAdditions>
2. vivo 和荣耀适配 (不接入该厂商不需要关注)
根据 vivo 和荣耀厂商接入指引,需要将 APPID 和 APPKEY 添加到配置文件中,否则会出现编译问题。
<buildGradleAdditions><insert>android {defaultConfig {manifestPlaceholders = ["VIVO_APPKEY" : "xxxxxx", // VIVO AppKey"VIVO_APPID" : "xxxxxx", // VIVO AppId"HONOR_APPID" : "xxxxxx" // Honor AppId]}}</insert></buildGradleAdditions>
3. 华为、荣耀和 Google FCM 适配
按照厂商方法,集成对应的 plugin 和 json 配置文件。
注意:
以下荣耀的适配仅 7.7.5283 及以上版本需要配置。
3.1 下载 json 配置文件,添加到插件 TIMPush 目录
Source/ThirdParty/TIMPushLibrary/Android/TIMPush/ 目录下。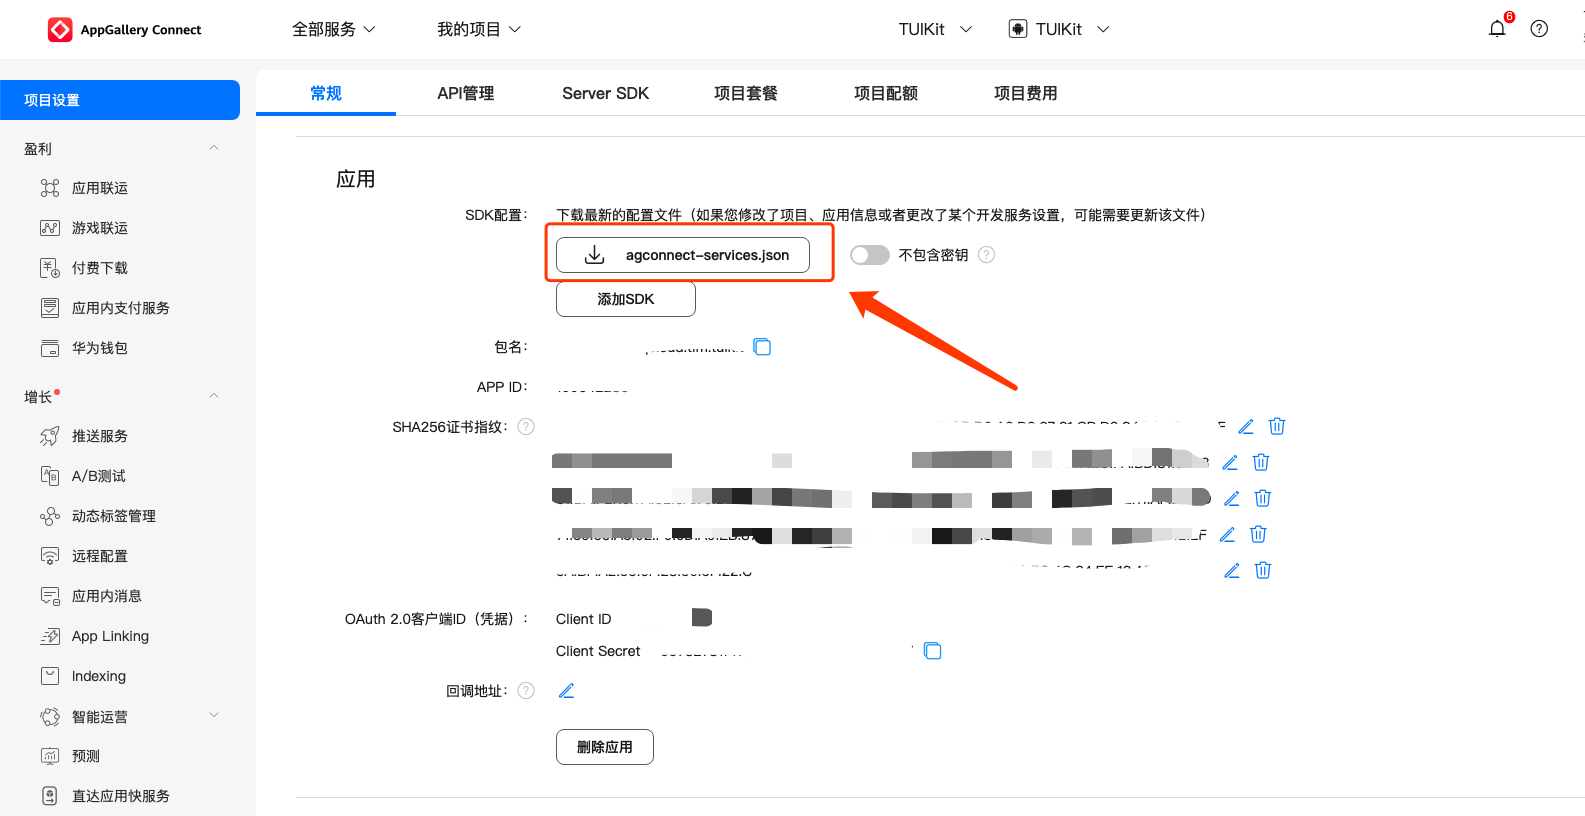
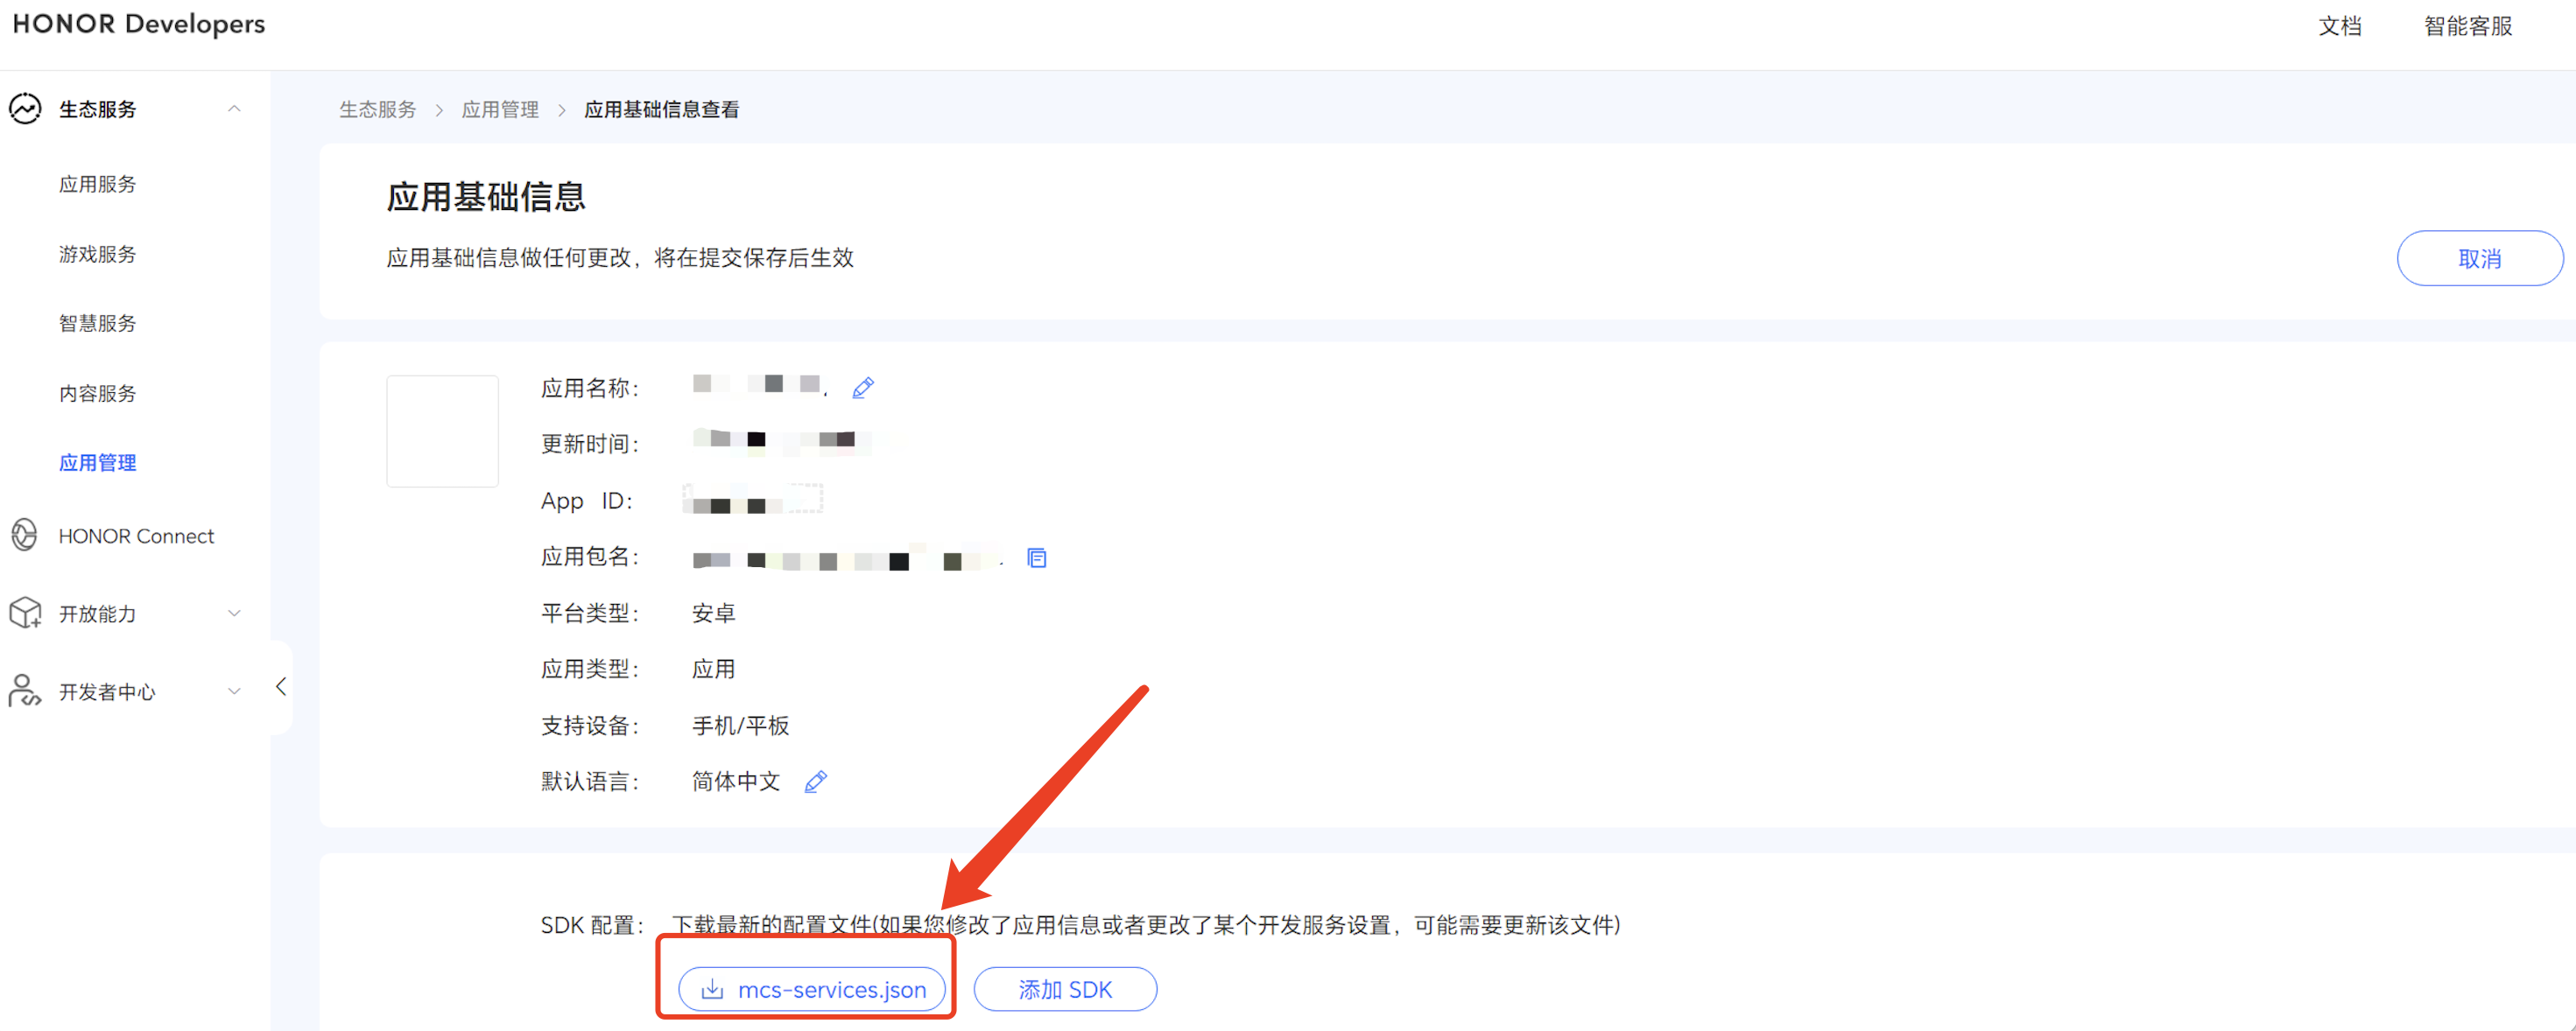
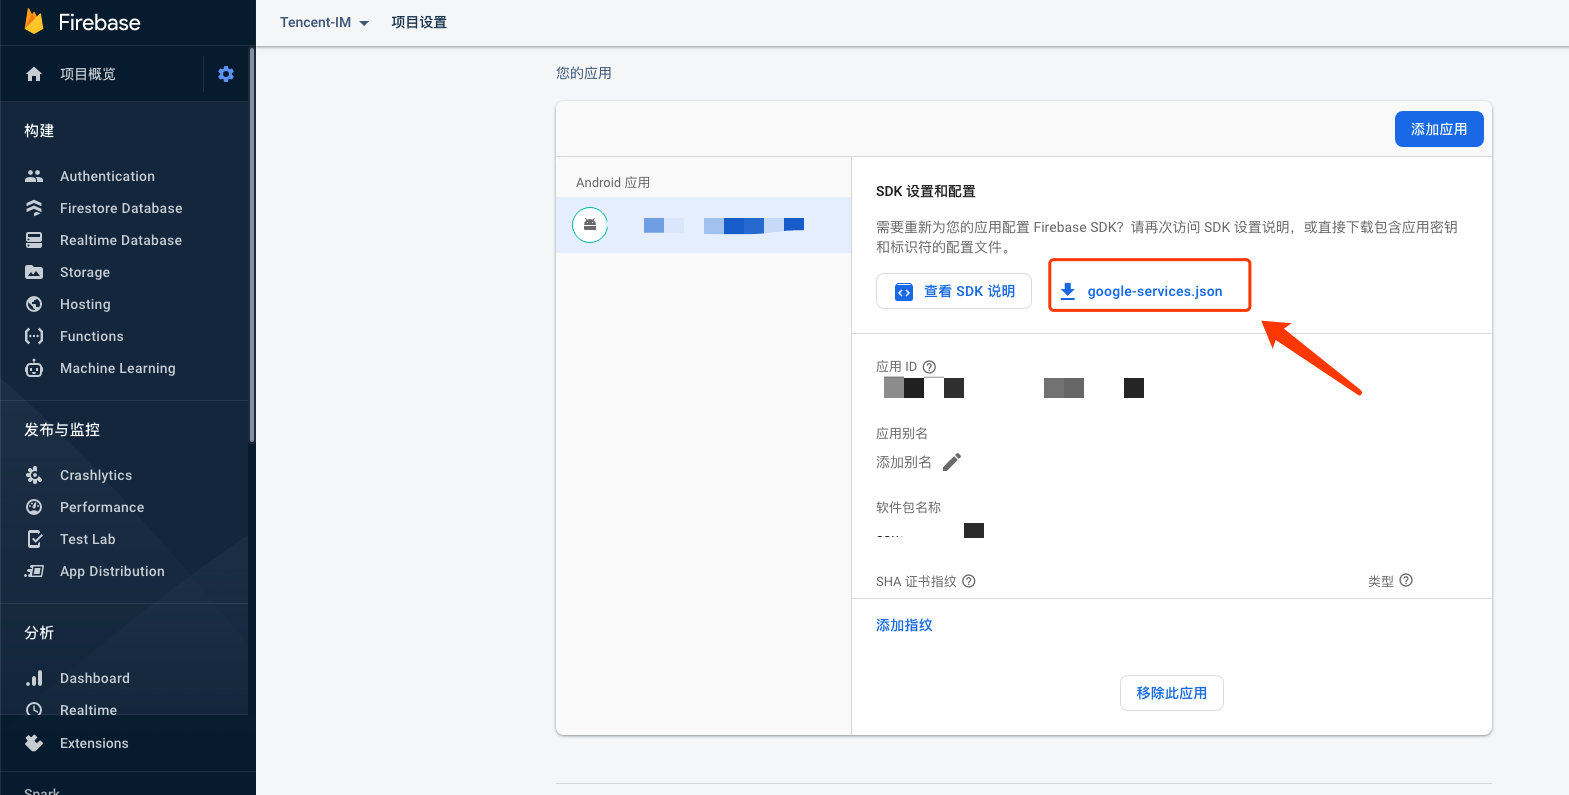
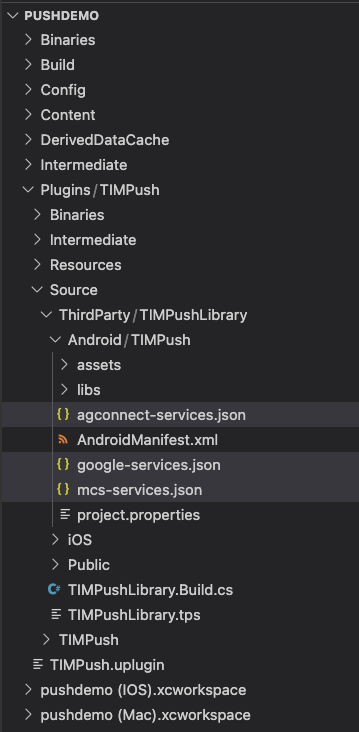
3.2 plugin 相关配置已配置好,可根据需求增减和适配版本。
<baseBuildGradleAdditions><insert>allprojects {repositories {mavenCentral()maven { url "https://mirrors.tencent.com/nexus/repository/maven-public/" }maven { url "https://mirrors.tencent.com/repository/maven/liteavsdk/" }maven { url 'https://developer.huawei.com/repo/' }maven { url 'https://mirrors.tencent.com/repository/maven/SensitiveScan' }maven { url 'https://developer.hihonor.com/repo' }}}</insert></baseBuildGradleAdditions><buildscriptGradleAdditions><insert>repositories {mavenCentral()maven { url "https://mirrors.tencent.com/nexus/repository/maven-public/" }maven { url "https://mirrors.tencent.com/repository/maven/liteavsdk/" }maven { url 'https://developer.huawei.com/repo/' }maven { url 'https://mirrors.tencent.com/repository/maven/SensitiveScan' }maven { url 'https://developer.hihonor.com/repo' }}dependencies {classpath 'com.google.gms:google-services:4.4.3' // FCM Pluginclasspath 'com.huawei.agconnect:agcp:1.9.1.300' // Huawei Pluginclasspath 'com.hihonor.mcs:asplugin:2.0.1.300' // Honor Plugin}</insert></buildscriptGradleAdditions><buildGradleAdditions><insert>apply plugin: 'com.google.gms.google-services' // FCM Pluginapply plugin: 'com.huawei.agconnect' // Huawei Pluginapply plugin: 'com.hihonor.mcs.asplugin' // Honor Plugin</insert></buildGradleAdditions>
步骤4:处理消息点击回调,并解析参数
如果您需要自定义解析收到的远程推送,您可按照如下方法实现:
class DemoPushListener: public PushListener {public:using OnRecvPushMessageCallback = std::function<void(const PushMessage &)>;using OnRevokePushMessageCallback = std::function<void(const FString &)>;using OnNotificationClickedCallback = std::function<void(const FString &)>;void SetCallback(OnRecvPushMessageCallback recv_cb, OnRevokePushMessageCallback revoke_cb, OnNotificationClickedCallback clicked_cb) {on_recv_message_callback_ = std::move(recv_cb);on_revoke_message_callback_ = std::move(revoke_cb);on_notification_clicked_callback_ = std::move(clicked_cb);}void OnRecvPushMessage(const PushMessage& message) override {if (on_recv_message_callback_) {on_recv_message_callback_(message);}}void OnRevokePushMessage(const FString& messageID) override {if (on_revoke_message_callback_) {on_revoke_message_callback_(messageID);}}void OnNotificationClicked(const FString& ext) override {if (on_notification_clicked_callback_) {on_notification_clicked_callback_(ext);}}private:OnRecvPushMessageCallback on_recv_message_callback_;OnRevokePushMessageCallback on_revoke_message_callback_;OnNotificationClickedCallback on_notification_clicked_callback_;};auto listener = new DemoPushListener();listener.SetCallback([](const PushMessage& message) {UE_LOG(LogTemp, Warning, TEXT("Push Called in OnRecvPushMessage. Message title: %s, desc: %s, ext: %s, id: %s"), *message.GetTitle(), *message.GetDesc(), *message.GetExt(), *message.GetMessageID());},[](const FString& messageID) {UE_LOG(LogTemp, Warning, TEXT("Push Called in OnRevokePushMessage. Message id: %s"), *messageID);},[](const FString& ext) {UE_LOG(LogTemp, Warning, TEXT("Push Called in OnNotificationClicked. Message ext: %s"), *ext);});PushManager::GetInstance()->AddPushListener(&listener);
注意:
1. 注册回调时机必须放在程序入口函数中。
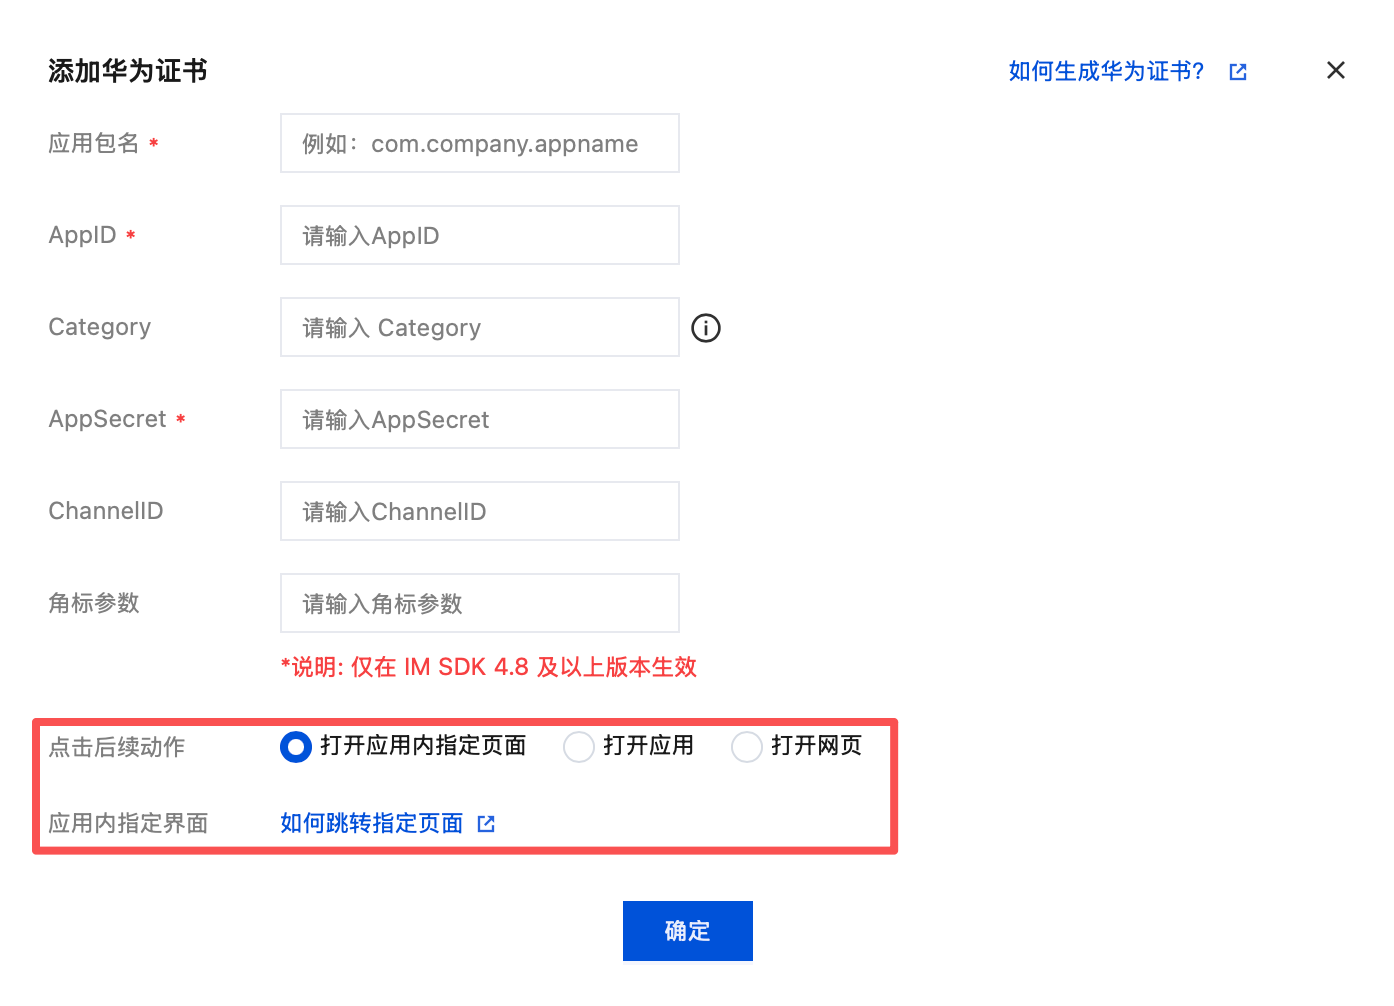
2. 控制台配置点击后续动作按如下配置,选择: 打开应用内指定界面,请勿修改使用默认值。
步骤5:注册推送插件
调用接口推送注册成功后,就可以收到离线推送通知了。
template <class T>class DemoPushValueCallback : public PushValueCallback<T> {public:using SuccessCallback = std::function<void(const T &)>;using ErrorCallback = std::function<void(int, const FString &)>;DemoPushValueCallback<T>() = default;~DemoPushValueCallback() override = default;void SetCallback(SuccessCallback success_cb, ErrorCallback error_cb) {success_callback_ = std::move(success_cb);error_callback_ = std::move(error_cb);}void OnSuccess(const T &value) override {if (success_callback_) {success_callback_(value);}}void OnError(int error_code, const FString &error_message) override {if (error_callback_) {error_callback_(error_code, error_message);}}private:SuccessCallback success_callback_;ErrorCallback error_callback_;};auto callback = new DemoPushValueCallback<FString>();callback->SetCallback([=](const FString &value) {UE_LOG(LogTemp, Warning, TEXT("Push succeed, device token is %s"), *value);delete callback;},[=](int error_code, const FString &error_message) {UE_LOG(LogTemp, Warning, TEXT("Push failed erro code: %d, desc: %s"), error_code, *error_message);delete callback;});PushManager::GetInstance()->RegisterPush(您的 sdkAppId, "您的 appKey", callback);
步骤6:消息推送触达统计
如果您需要统计 iOS 设备触达数据,请参考如下步骤:
1.1 在上文的推送参数配置章节中,将“YourGroupID”修改为自己的 App Group ID。
1.2 参考 iOS 配置消息触达统计 完成 App Group ID、Notification Service Extension 和 mutable-content 配置。
1.3 将项目根目录的 Plugins-TIMPush-Source-ThirdParty-TIMPushLibrary-iOS 路径中的两个 framework 压缩包解压缩,并在 Xcode 项目中将内部的 .framework 文件夹添加到您的 pushservice target 之中。
1.4 在 Notification Service Extension 的 -didReceiveNotificationRequest:withContentHandler: 方法中调用推送抵达率统计函数:
@implementation NotificationService- (void)didReceiveNotificationRequest:(UNNotificationRequest *)request withContentHandler:(void (^)(UNNotificationContent * _Nonnull))contentHandler {//appGroup 标识当前主 APP 和 Extension 之间共享的 APP Group,需要在主 APP 的 Capability 中配置 App Groups 能力。//格式为group + [主bundleID]+ key//如group.com.tencent.im.pushkeyNSString * appGroupID = kTIMPushAppGroupKey;__weak typeof(self) weakSelf = self;[TIMPushManager handleNotificationServiceRequest:request appGroupID:appGroupID callback:^(UNNotificationContent *content) {weakSelf.bestAttemptContent = [content mutableCopy];// Modify the notification content here...// self.bestAttemptContent.title = [NSString stringWithFormat:@"%@ [modified]", self.bestAttemptContent.title];weakSelf.contentHandler(weakSelf.bestAttemptContent);}];}@end
其余支持厂商不需要配置,FCM 暂不支持推送统计功能。


