The content of this page has been automatically translated by AI. If you encounter any problems while reading, you can view the corresponding content in Chinese.

Step 3: Creating a VPN Channel

Last updated: 2024-09-20 16:02:15

This document describes how to create a VPN tunnel. You can learn about VPN tunnel operations through the following video.


Operation Steps

1. Log in to the VPC console.
2. In the left-side menu, click VPN Connections > VPN Tunnel to enter the management page.
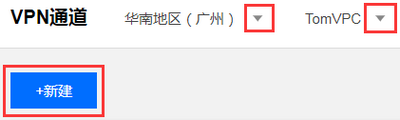
3. Select the corresponding Region and VPC, such as Guangzhou and TomVPC in the example, then click Create.

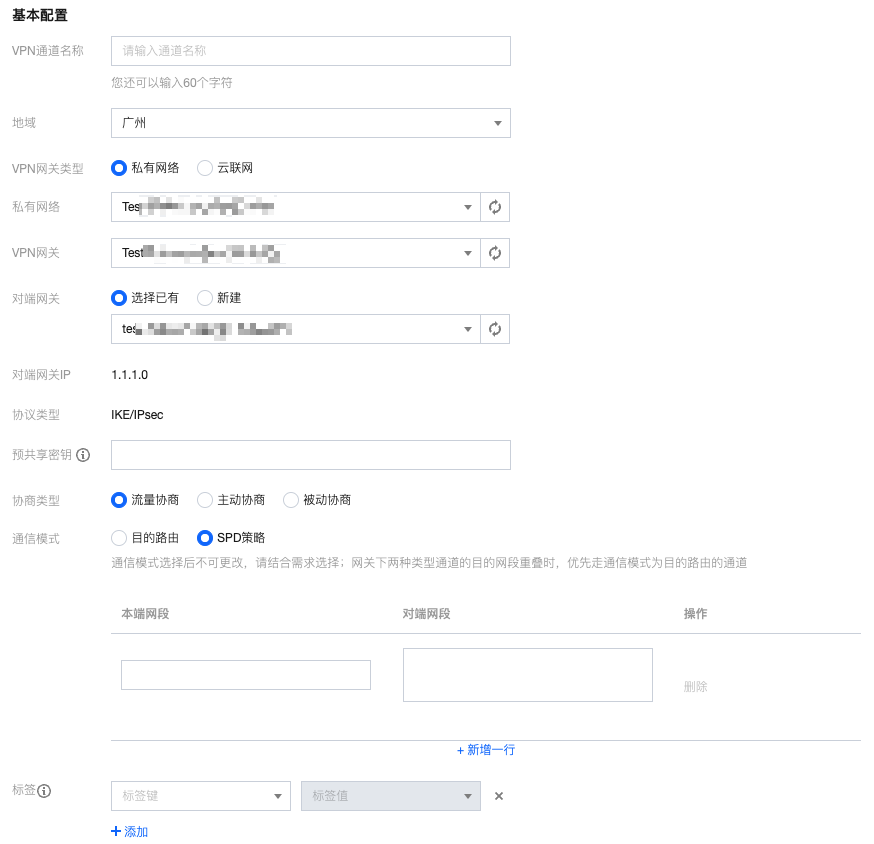
4. VPN tunnel basic parameter configuration. Basic configuration includes entering the tunnel name, selecting the gateway's region, network type, VPN gateway instance, peer gateway instance, pre-shared key, negotiation type, and communication mode. For the specific meaning of the parameters, please refer to Creating a VPN Tunnel. In this instance, the communication mode is SPD policy. The local network segment is subnet A's segment 192.168.1.0/24, and the remote network segment is 10.0.1.0/24.

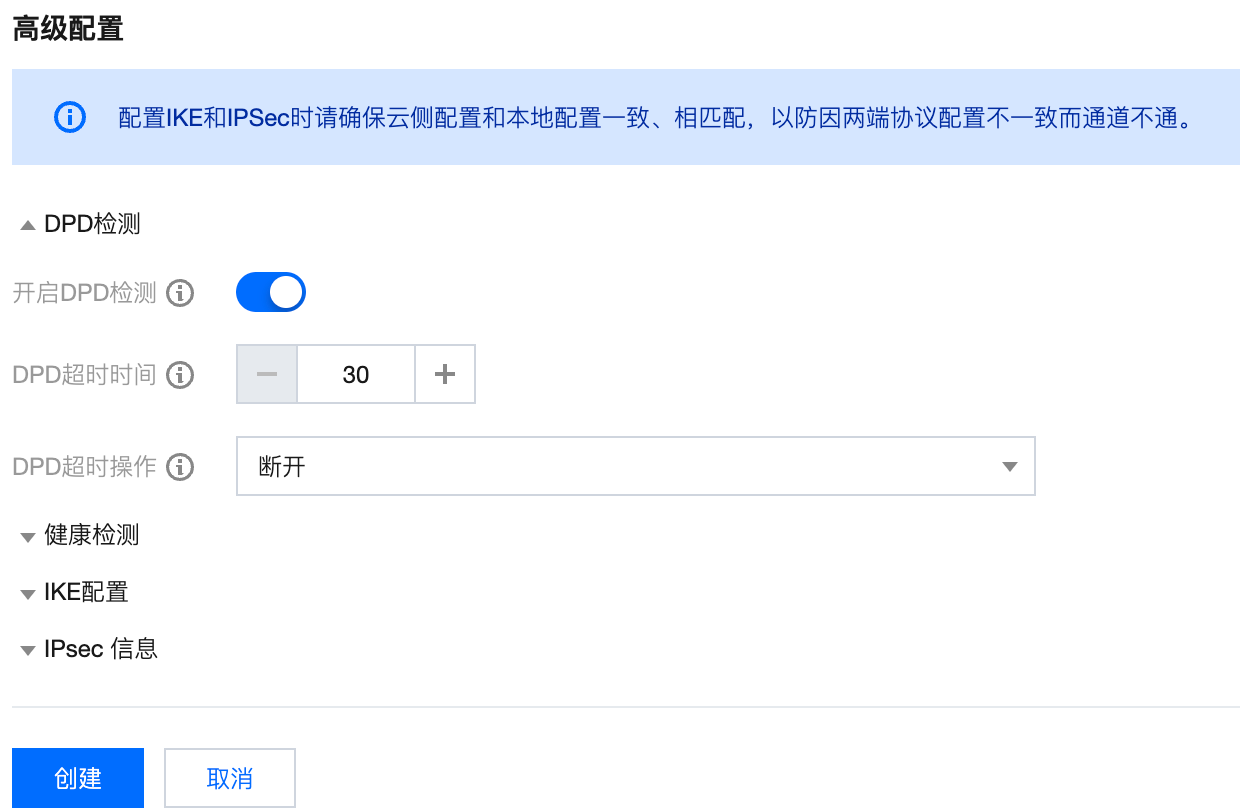
5. Configure the advanced settings. In this step, you can set the advanced parameters, including DPD, health check, IKE, and IPsec. In this example, the default parameter values are used.
Note:
Make sure that the settings of IKE and IPsec on the cloud side are the same as those on the local side. Otherwise, the tunnel fails due to inconsistent protocol configurations.

6. Check your configuration, then click Create. After creation, return to the VPN tunnel list page, click More, select to download the configuration file, and complete the download.