CKafka Connector supports the integration of various data sources, producing different types of data, which can be centrally managed and distributed to downstream offline/online processing platforms, creating a clear data pipeline.
This document describes the process of creating a COS data access task in the CKafka console.
2. Select Connector > Task List on the left sidebar, choose the region, and click Create Task.
3. Enter the task name, select Data Access as the task type, choose Object Storage (COS) as the data source type, and click Next.
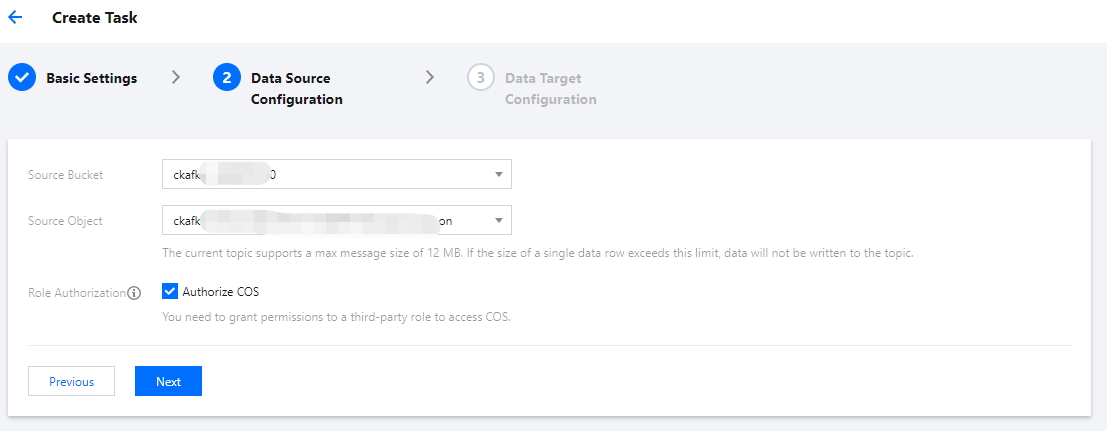
4. Enter the data source configuration information.
Source Bucket: Select the source data bucket.
Source Object: Select the source data object. The current topic supports a max message size of 12 MB. If the size of a single data row exceeds this limit, data will not be written to the topic.
Role Authorization: You need to grant permissions to a third-party role to access COS.
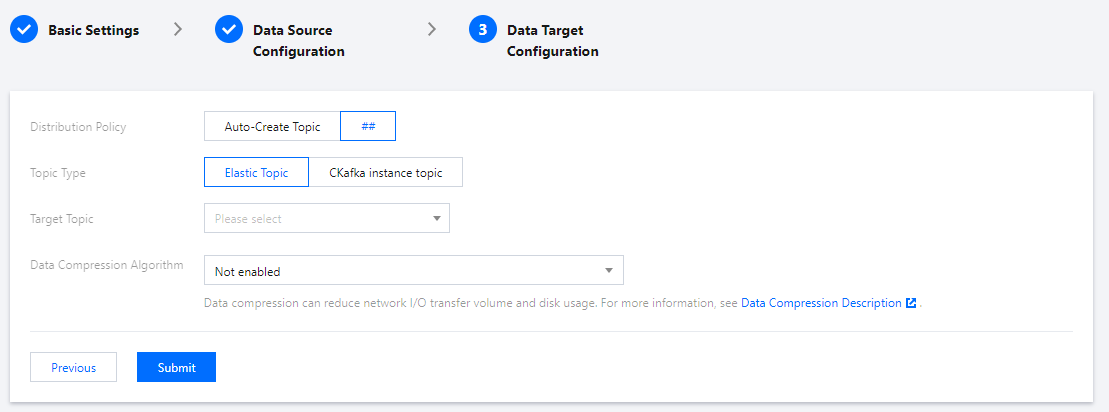
5. Click Next and select the data target topic.
Auto-Create Topic: You can choose between CKafka Instance Topic or Elastic Topic. If you select CKafka Instance Topic, you need to specify the target CKafka instance. It supports batch continuous naming or specifying pattern string naming. For more information, see Reference Document.
Select an existing Topic: You can choose either Elastic Topic or CKafka Instance Topic. When selecting a CKafka Instance Topic, ensure that the chosen topic has read/write permissions if the instance is configured with ACL policies.
6. Choose whether to enable data compression. Data compression can reduce network I/O transfer volume and disk usage. For more information, see Data Compression Description.
7. Click Submit, and you can see the newly created task in the task list. The creation progress can be viewed in the status bar.