本文档将为您介绍如何通过业务安全防护功能,对经过 WAF 的指定请求进行风险值评估,并通过威胁等级和风险类型标签帮助您对账号、用户行为及环境存在的风险进行辅助分析,实现快速拦截威胁请求,保护网站业务安全。
背景信息
业务安全防护对特定 URL 进行防护,通过账号信息提取、风险评估、对注册保护、登录保护及活动防刷等场景进行精准防护。通过和 WAF 基于 session 的 CC 防御功能、BOT 行为管理功能,共同构建 WAF 防爬、防刷及防御体系,为您的业务安全保驾护航。
新建规则
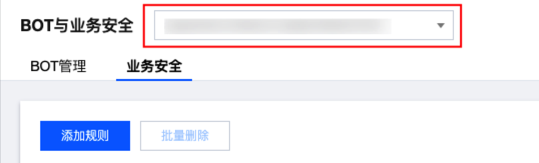
1. 登录 Web 应用防火墙控制台,在左侧导航栏中,选择 BOT 与业务安全 > 业务安全。
2. 在业务安全页面,左上角选择需要防护的域名,单击添加规则,进入添加业务安全策略页面。
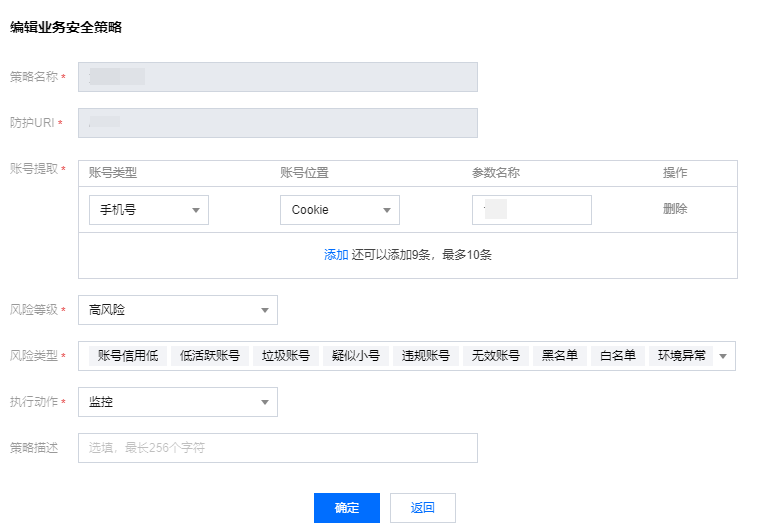
3. 在添加业务安全策略页面,填写相关字段,单击确定。
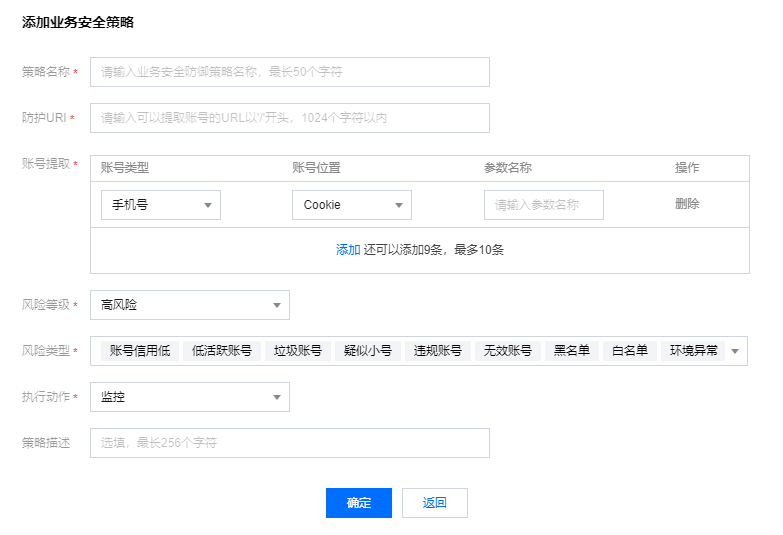
字段说明
策略名称:业务安全策略名称,最长50个字符,可以在攻击日志中按照策略名称进行搜索。
防护 URI:填写需要提取账号和防御的 URI,请填写准确的 URI。
账号提取:指定账号类型、账号位置及参数名称,一条策略中最多可以添加10个账号提取条件,业务请求满足其中一个匹配条件,即可完成账号提取。
账号类型:需要提取的类型信息,默认为手机号,支持:手机号、微信、QQ、手机号 MD5和其他,建议使用手机号作为账号取值,保障识别效果。
账号位置:账号在请求中所处的位置,默认为 Cookie,支持 Query_String 及 Body,您可根据实际情况确定账号位置。
参数名称:例如 mobile:170****0001,填写 mobile 即可。
风险等级:账号风险信誉等级,支持三类:无恶意、人工审核及高风险(建议),默认为高风险。此值可能为空,如果为空,将直接放行。
风险类型:此值可能为空,如果为空直接放行,默认为全部支持多选。
执行动作:触发防护策略后执行指定动作。策略优先级按照动作类型匹配生效,优先级为:监控>重定向>验证码>拦截,动作相同添加时间越晚优先级越高。
策略描述:策略描述信息,选填字段。
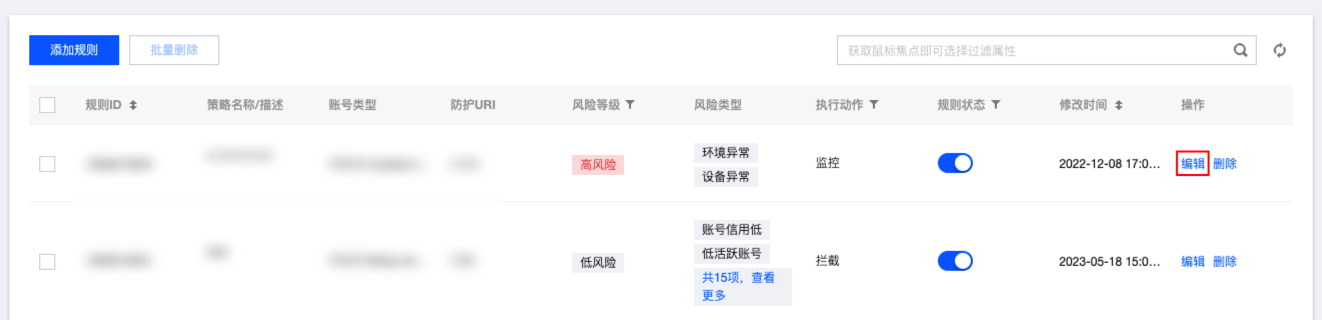
4. 添加完成的业务安全策略,可在业务安全页面进行查看。
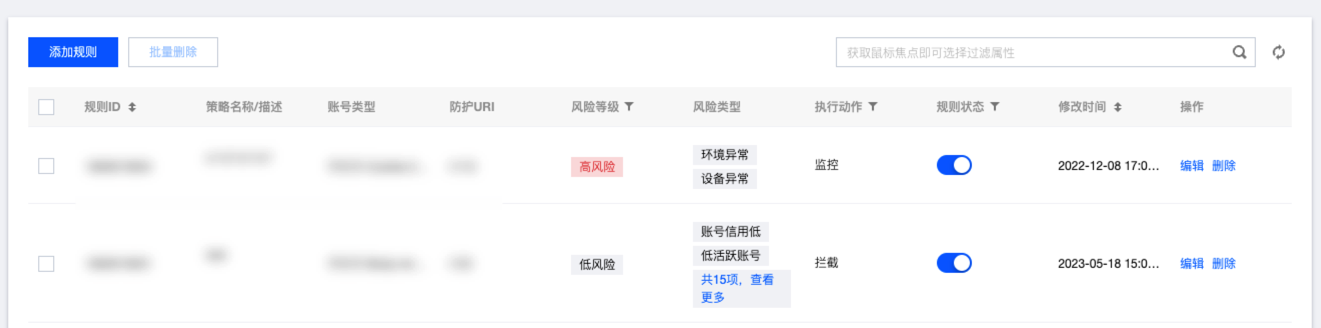
字段说明
规则 ID:防御策略 ID 标识,可以基于规则 ID 在 攻击日志 中进行搜索。
策略名称/描述:策略名称和描述信息,根据添加时定义的信息来显示。
账号类型:显示您配置的提取账号类型。
防护 URI:业务安全账号提取和威胁防御路径。
风险等级:账号信誉风险,根据您的配置结果进行展示。
风险类型:账号风险类型,根据您配置结果进行展示。
执行动作:触发配置策略之后,需要执行的动作。
规则状态:策略开关,默认开启。
修改时间:API 接口创建或者修改时间。
操作:当前支持编辑及删除操作,支持多选进行批量删除。
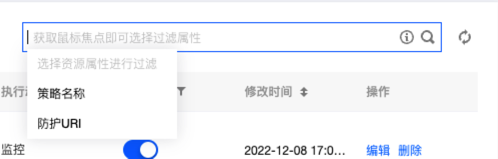
策略名称搜索:支持通过策略名称或者防护 URl 进行搜索。
编辑规则
1. 在 BOT 与业务安全 > 业务安全页面,左上角选择需要防护的域名。
2. 在业务安全页面,选择所需规则,单击编辑,弹出编辑业务安全策略弹窗。
3. 在编辑业务安全策略弹窗中,可修改账号提取、风险等级、风险类型、执行动作和策略描述,单击确定即可。
删除规则
1. 在 BOT 与业务安全 > 业务安全页面,左上角选择需要防护的域名。
2. 在业务安全页面,支持删除单个或多个规则,具体操作如下。
单个:选择所需规则,单击操作列的删除,弹出“确定删除”弹窗。
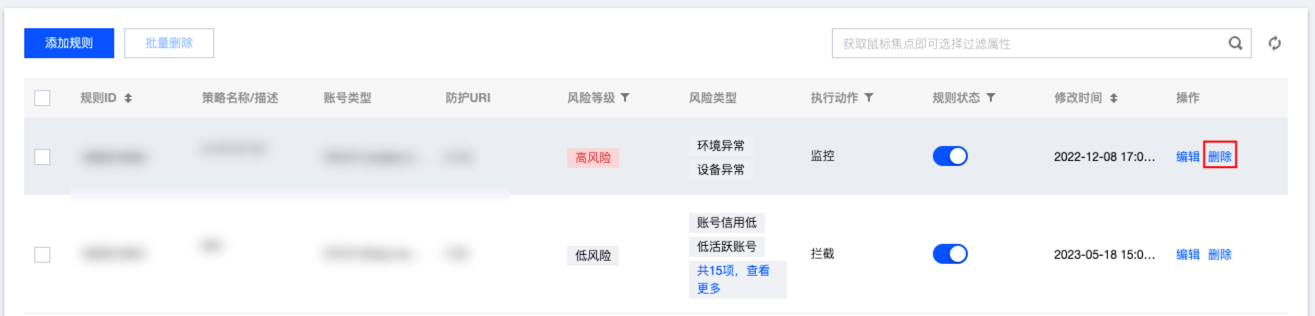
多个:选择多个规则,单击批量删除,弹出“确定删除”弹窗。

3. 在“确定删除”弹窗中,单击确认,即可删除规则。


