使用Github,Travis CI自动布署Hexo博客到Coding,OSChina服务器

使用Github,Travis CI自动布署Hexo博客到Coding,OSChina服务器

通常我们都是在本地用hexo deploy发布博客文章到远程的Pages服务器,可别忘记了我们是还需要提交代码的,所以是不是觉得有点麻烦还得分开两步进行操作。这时突然想起是否可用Travis CI工具来完成这个布署的操作呢?答案是肯定的,整体的流程大致如下:
- 在本地(又或者Github网站)上编辑文章
- 提交文章到Github服务器
- Travis CI收到通知,同步最新的Github代码,并执行用户自定义好的
Travis脚本生成静态博客 - 最终再把生成好的博客推送到指定的Pages服务器
只是这其中有点比较麻烦的问题就是如何保护我们的私钥,还好Travis CI已经为我们准备好啦,那么就开始我们的捣腾之旅吧。
准备Travis Client工具
准备Ruby环境
Ruby的安装请移步搜索引擎,在此只是提示下建议使用2.0以上的版本,另外就是注意更新gem的镜像地址: Ruby China 。
Travis CI账户
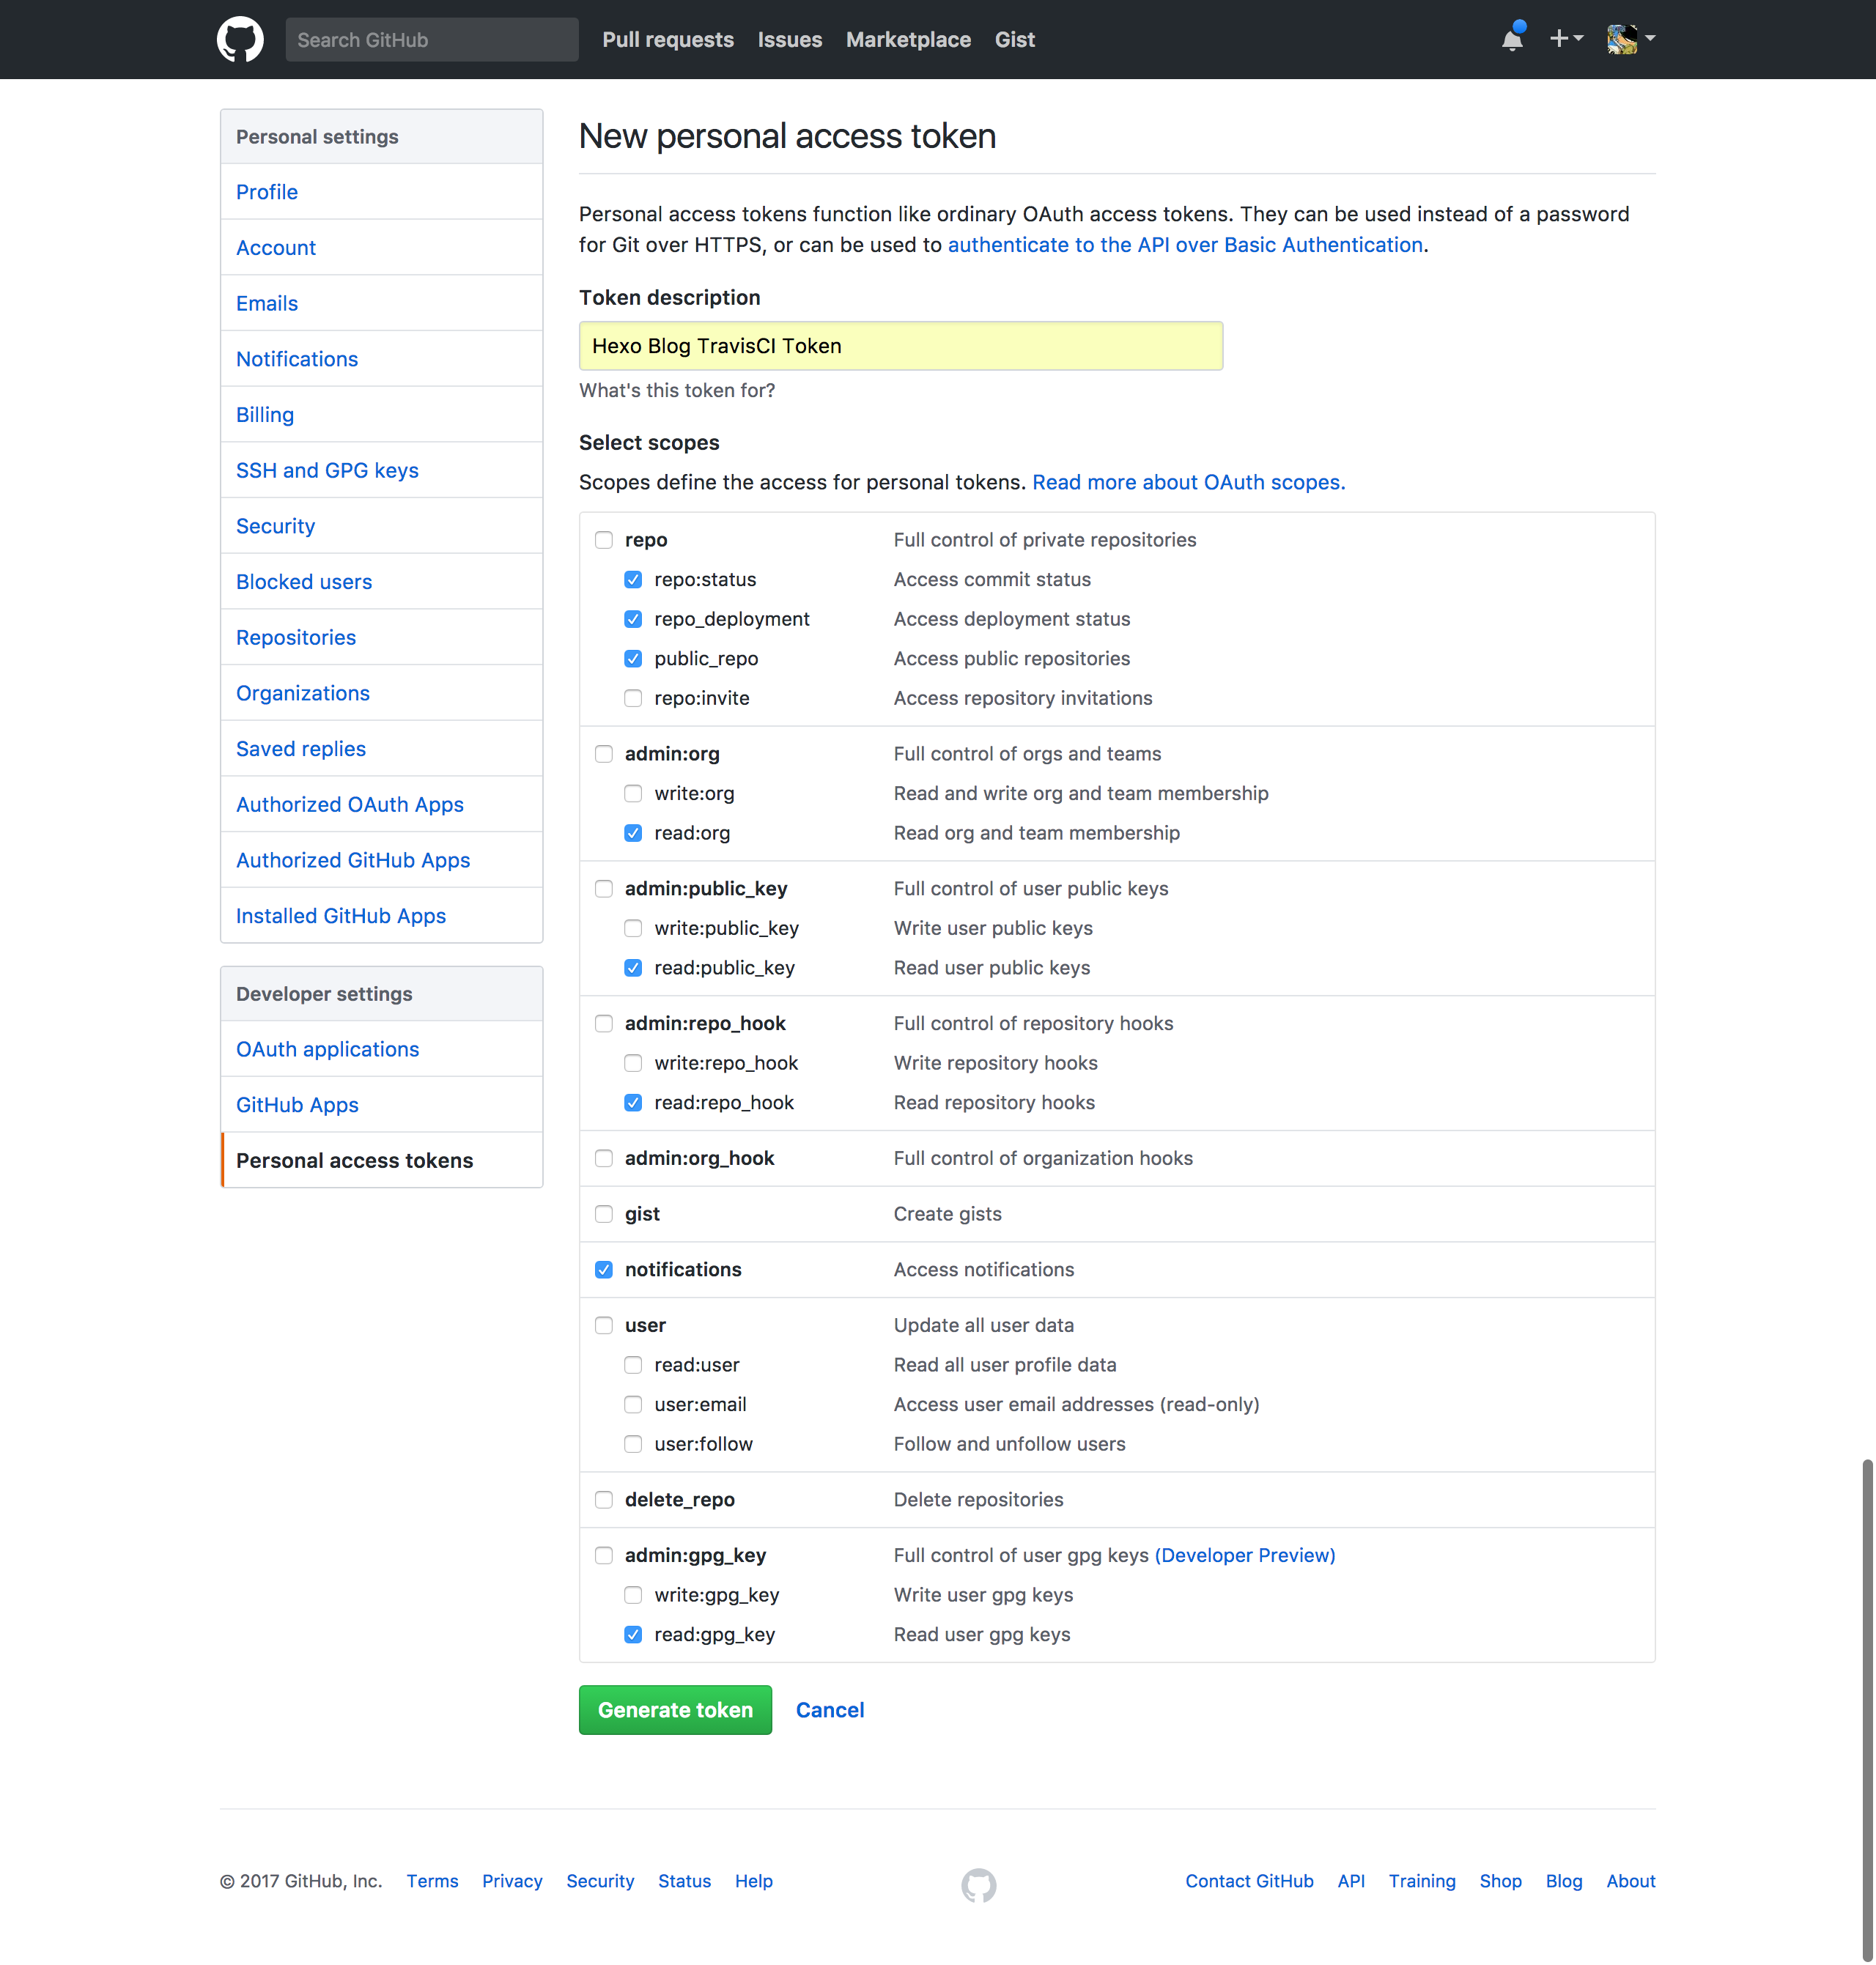
如有需要可以单独注册账号,建议直接使用Github Token登录即可。 接下来就是需要生成个Github Token,在Github的个设置面板中找到,或者是直接点击 Github Tokens 进行创建,如下图所示:
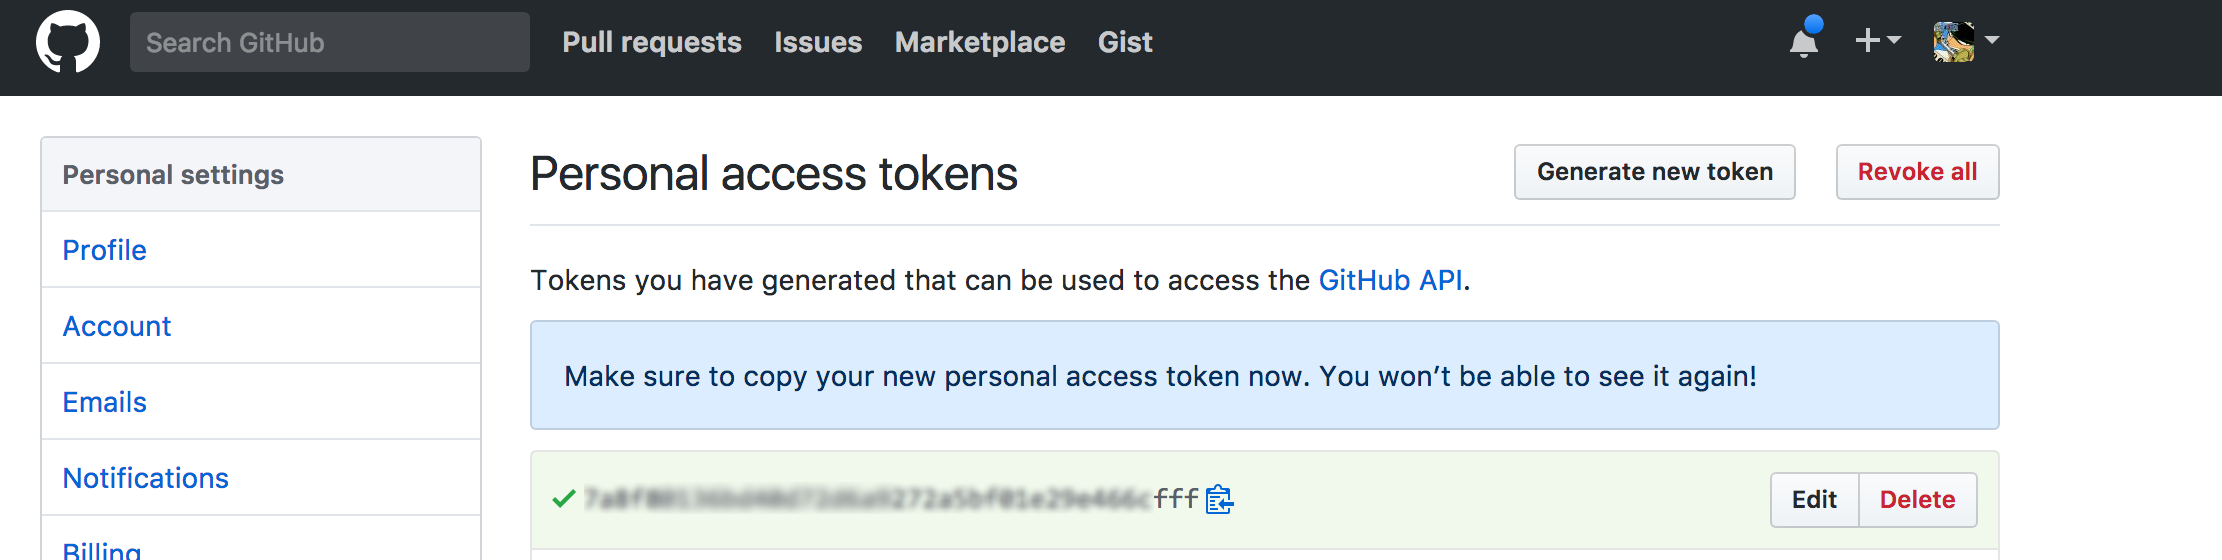
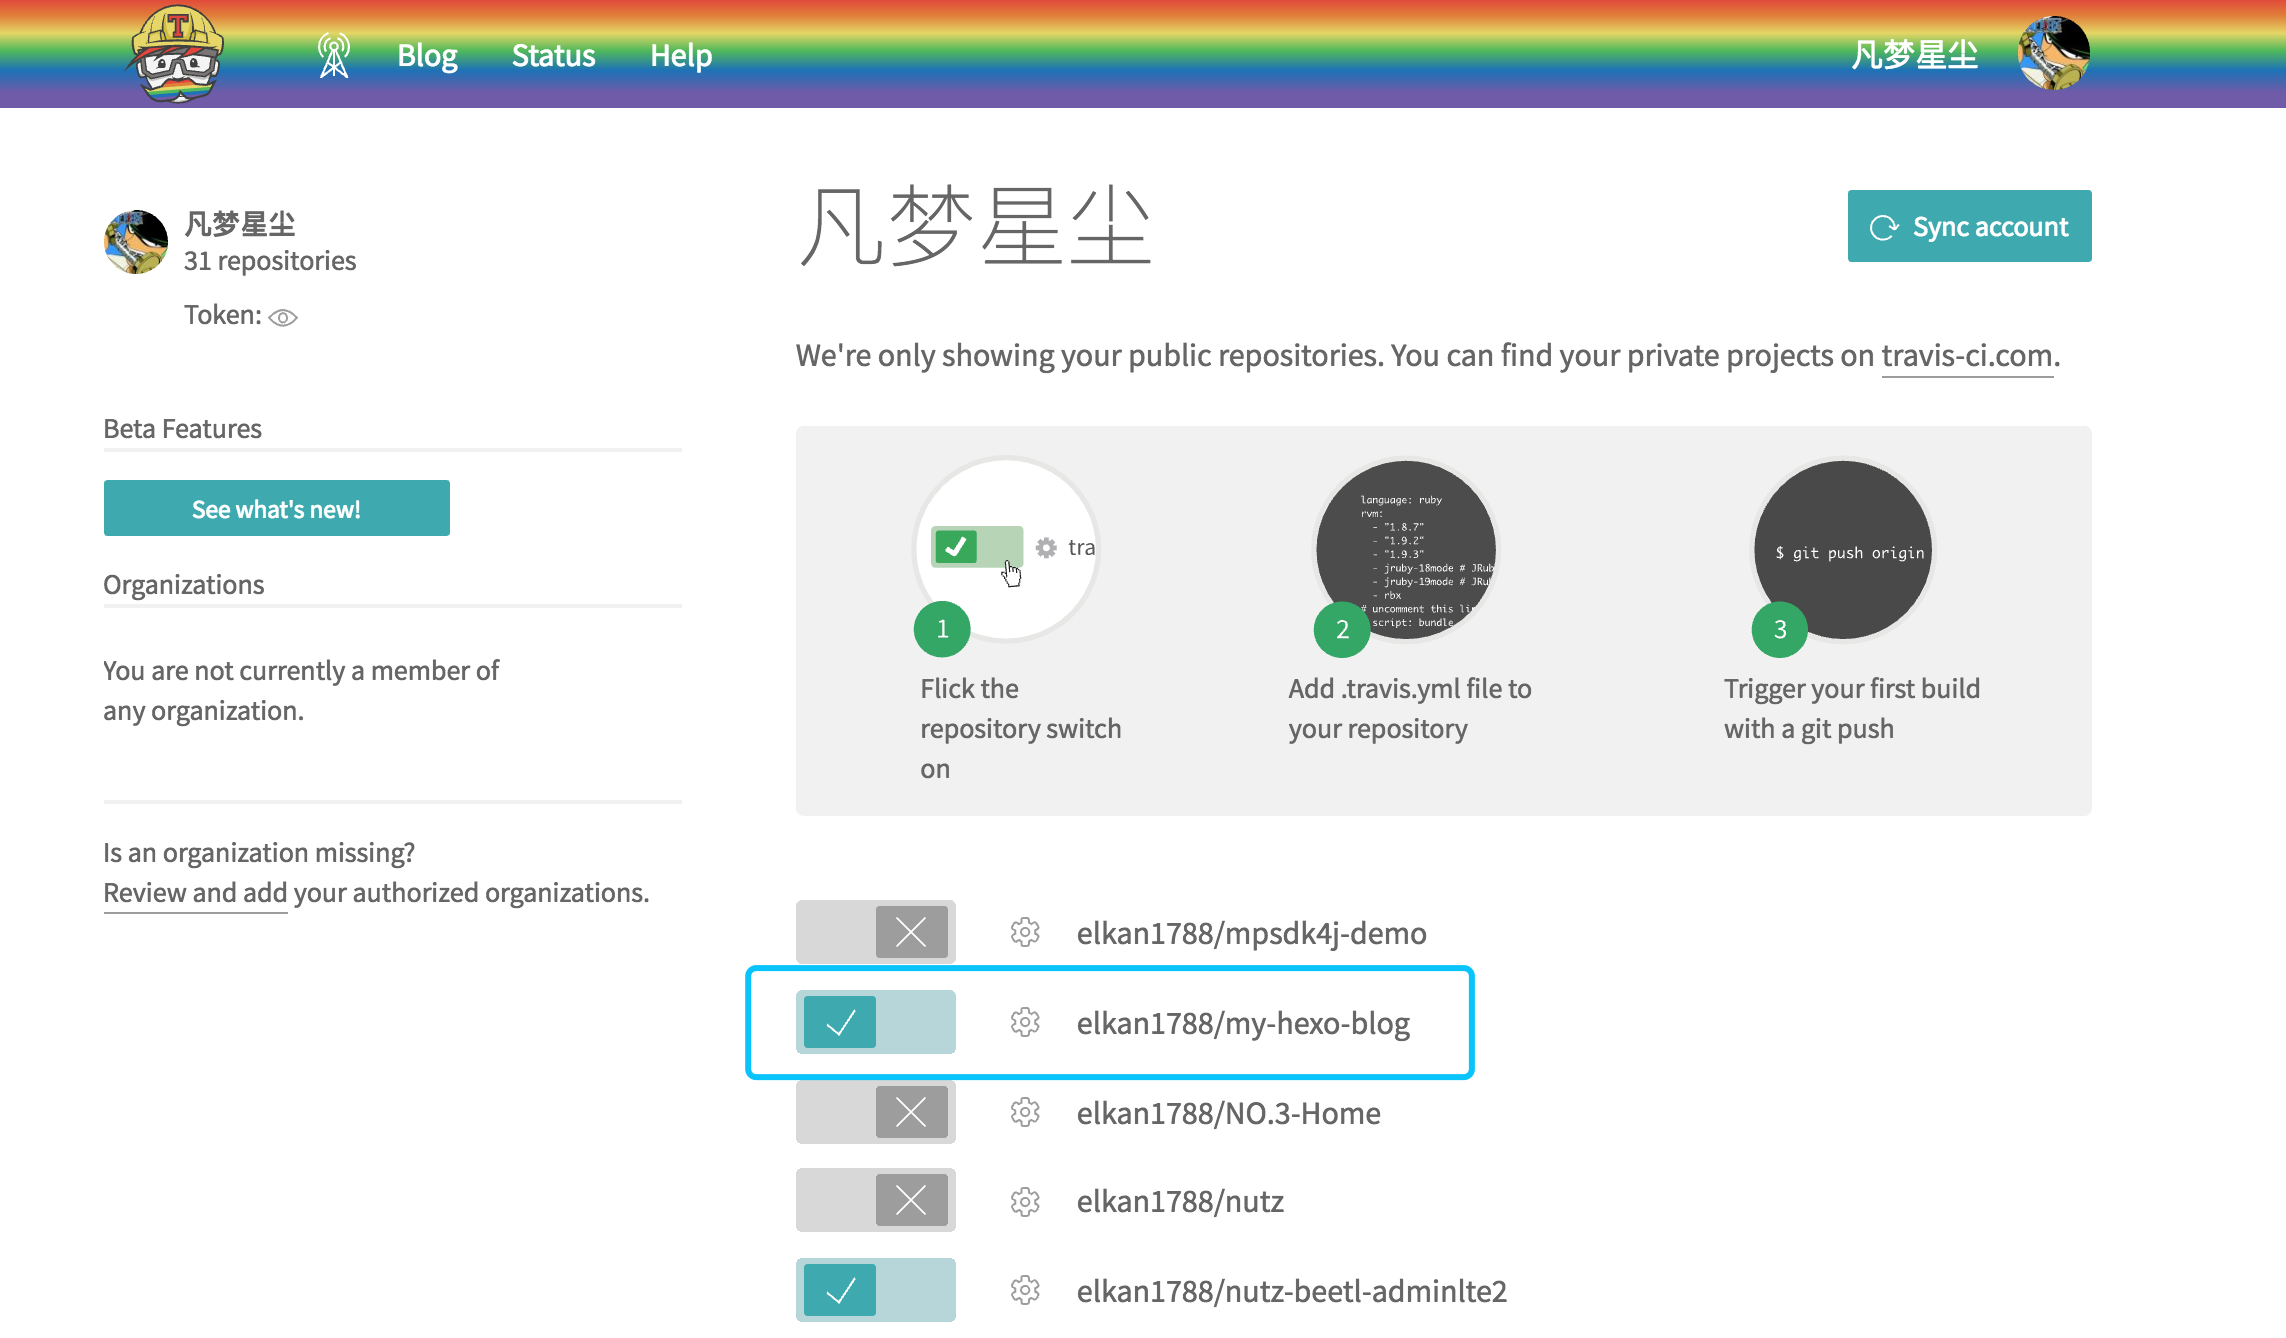
保存好刚刚创建的Token,然后使用Github授权登录Travis CI并跳转至控制面板 Travis Profile ,选择需要创建的项目(即你的博客项目)如下图所示
Travis Client安装
Travis Client安装非常的简单,命令如下:
1 | sudo gem install travis -v 1.8.8 --no-rdoc --no-ri |
|---|
安装成功后,使用如下命令检查,安装成功会有版本号的输出。
1 | travis version |
|---|
使用如下命令检验上一步所生成的Github Token,并登录Travis CI成功后会返回欢迎信息。
1 2 | travis login -g fb25xxxxxxxxxxx Successfully logged in as xxxx! |
|---|
SSH私钥加密
切换到博客的根据目录,创建一个名为.travis的目录,并把用于Coding和OSChina的私钥拷贝至此,使用如下的命令生成Travis能识别的加密文件:
1 2 3 4 5 6 7 8 9 10 11 12 13 14 15 | travis encrypt-file id_rsa Detected repository as elkan1788/my-hexo-blog, is this correct? |yes| yes encrypting id_rsa for elkan1788/my-hexo-blog storing result as id_rsa.enc storing secure env variables for decryption Please add the following to your build script (before_install stage in your .travis.yml, for instance): openssl aes-256-cbc -K $encrypted_c9744fe6174f_key -iv $encrypted_c9744fe6174f_iv -in id_rsa.enc -out id_rsa -d Pro Tip: You can add it automatically by running with --add. Make sure to add id_rsa.enc to the git repository. Make sure not to add id_rsa to the git repository. Commit all changes to your .travis.yml. |
|---|
加密成功后千万要记得要把id_rsa文件删除,并把如下的语句保存好,后续在布署脚本中用得上:
1 | openssl aes-256-cbc -K $encrypted_c9744fe6174f_key -iv $encrypted_c9744fe6174f_iv -in id_rsa.enc -out id_rsa -d |
|---|
准备Travis脚本
编写Travis脚本
Travis脚本使用的是yml语法,写起来并不难,注意空格的缩进就好。在博客根目录下创建名为.travis.yml的文件,内容参考如下:
1 2 3 4 5 6 7 8 9 10 11 12 13 14 15 16 17 18 19 20 21 22 23 24 25 26 27 28 29 30 31 32 33 34 35 36 37 38 39 40 | # Define language environment language: node_js # use root accout or not sudo: false # node js version node_js: stable # setting timezone before_install: - export TZ='Asia/Shanghai' # cache installed modules cache: apt: true directories: - node_modules # add pages server domain addons: ssh_known_hosts: - git.coding.net - git.oschina.net # auto deploy blog to pages server deploy: provider: script script: sh .travis/deploy.sh skip_cleanup: true on: branch: master # offical request dist: precise # which branch trigger branches: only: - master |
|---|
如果不确定所编写的脚本是否正确,可借助Travis CI进行校验,命令如下:
1 2 | travis lint .travis.yml Hooray, .travis.yml looks valid :) |
|---|
编辑deploy.sh脚本
接下来就是编写个发布博客文章到Pages服务器的脚本,主要的流程如下:
- 解密
SSH私钥,并输出到指定的目录 - 修改私钥的文件权限,启动
SSH Agent, 添加私钥 - 设置
Git配置,主要是用户名,邮箱地址 - 使用
Hexo命令->清理,生成,发布
脚本内容参考如下:
1 2 3 4 5 6 7 8 9 10 11 12 13 14 15 16 17 18 19 | #!/bin/bash # Decrypt the private SSH key openssl aes-256-cbc -K $encrypted_c9744fe6174f_key -iv $encrypted_c9744fe6174f_iv -in .travis/id_rsa.enc -out ~/.ssh/id_rsa -d # Set the permission of the private SSH key chmod 600 ~/.ssh/id_rsa # Start SSH agent eval $(ssh-agent) # Add the SSH private key to the system ssh-add ~/.ssh/id_rsa # Set Git config git config --global user.name "凡梦星尘" git config --global user.email elkan1788@gmail.com # Clean, generate and deploy to Pages server hexo clean && hexo g && hexo deploy |
|---|
发表文章
使用hexo new "article tittle"命令创建一篇文章,然后加入你想吐槽的观点,内容等保存,然后用git push命令推送代码到Github服务器,此时登录Travis CI便可以在对应的项目中看到"华丽"的日志输出如下图所示:
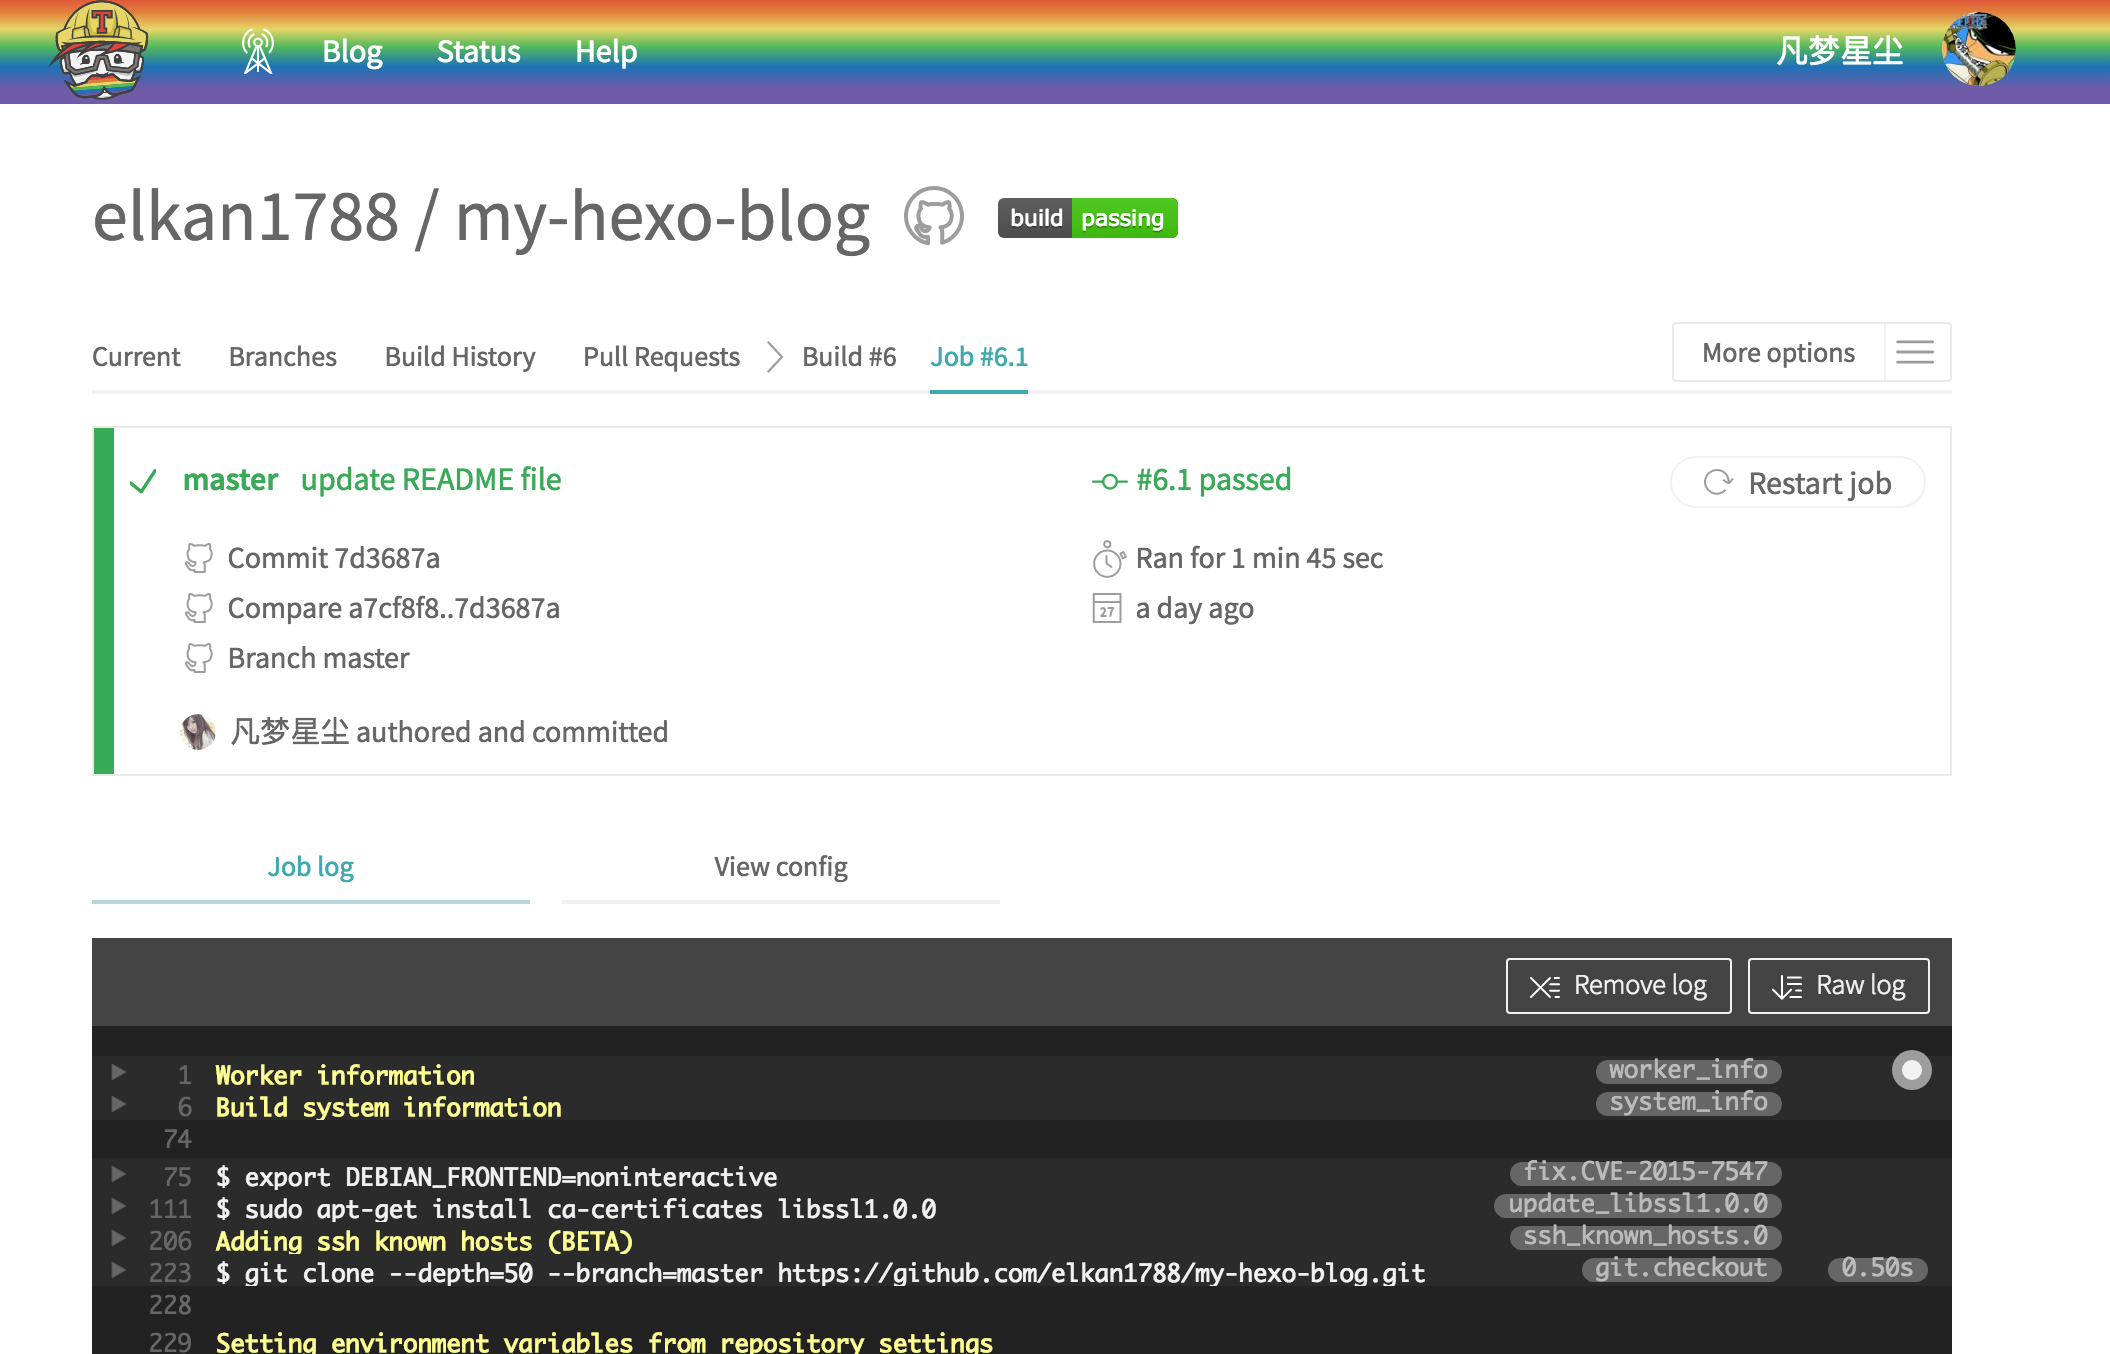
如果最后的结果是绿色,那么恭喜你,你的博客已经布署成功,赶紧去刷新页面瞅瞅。
至此所有的配置结束,怎么样,感觉是不是很炫,只要一个简单的git push命令即保存代码又搞定博客站点布署,如有问题欢迎吐槽。
参考:
腾讯云开发者
