用 JSAR 让天气"活"起来:我的 AR 天气可视化之旅
原创用 JSAR 让天气"活"起来:我的 AR 天气可视化之旅
原创用户11896519
发布于 2025-11-03 19:07:33
发布于 2025-11-03 19:07:33
用 JSAR 让天气"活"起来:我的 AR 天气可视化之旅
开篇碎碎念
作为一个经常看天气预报的人,我一直觉得传统天气 APP 虽然功能齐全,但总缺了点什么——那些数字和小图标确实能传达信息,但总感觉不够直观。
直到我接触了 Rokid 的 JSAR 框架,一个想法突然冒出来:能不能把天气数据变成眼前可以"看到"、"感受到"的 3D 场景?
于是就有了这个项目。现在我可以在虚拟空间里"站在"雨中、"走进"雪天,温度用颜色告诉我冷暖,湿度用环形光晕表现浓淡。这是一种全新的天气数据呈现方式。
关于 Rokid AR 眼镜
Rokid 是国内领先的 AR(增强现实)硬件厂商,其 AR 眼镜系列产品能够将虚拟内容叠加在真实世界之上。配合 Rokid 自研的 JSAR(JavaScript Spatial Application Runtime)框架,开发者可以使用熟悉的 Web 技术栈(JavaScript + Babylon.js)快速构建空间计算应用,无需学习复杂的 Unity 或 Unreal 引擎。
JSAR 的最大优势在于降低了 AR 开发门槛:传统 AR 开发需要掌握 C#、C++ 等语言,而 JSAR 让前端开发者也能轻松上手。更重要的是,开发过程中即使没有 AR 设备,也能通过浏览器预览和调试,极大提升了开发效率。
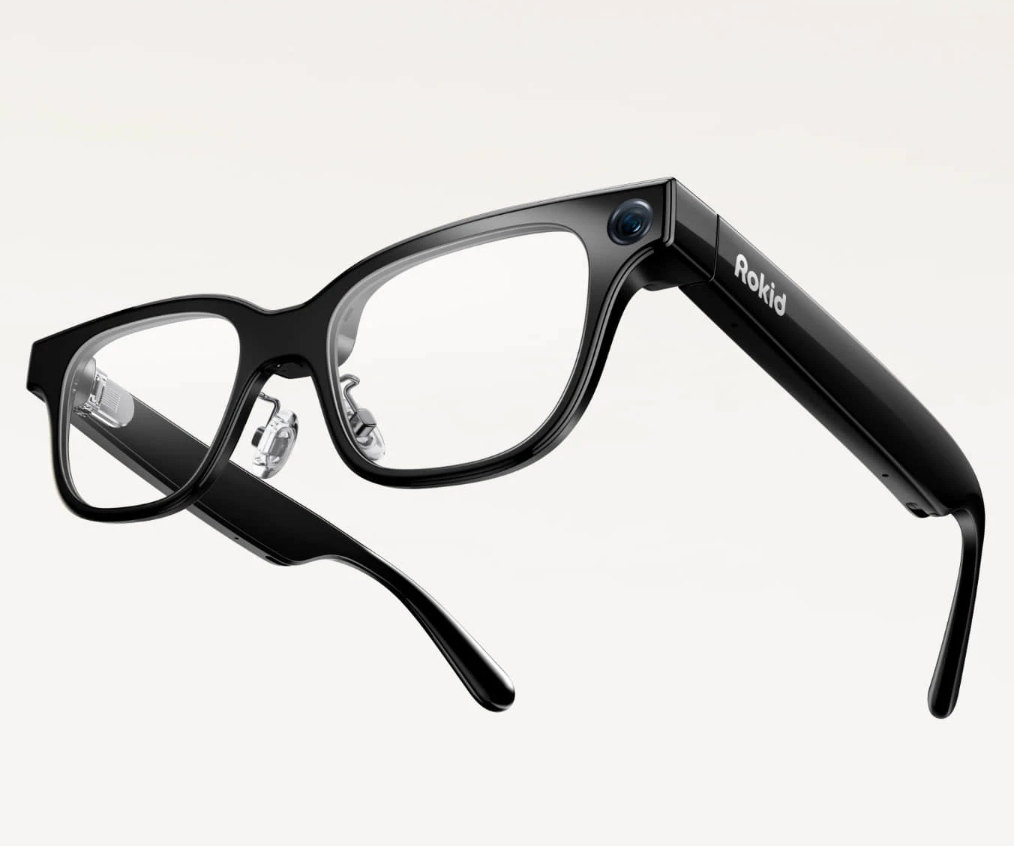
Rokid AR 眼镜 - 图片来源:Rokid 官网
灵感来源:为什么要重新发明天气 APP
传统天气应用的局限
传统天气应用主要通过数字和图标呈现信息:温度、湿度、风速等都是抽象的数值。虽然这些数据准确,但缺乏视觉反馈,不够直观。
如果天气可以"看见"呢?
我想要的天气预报是这样的:
🌡️ 温度 → 一根会变色的柱子,从蓝到红
💧 湿度 → 空气中的雾气浓度
💨 风速 → 真的看到风在吹
🌧️ 下雨 → 雨滴从天上落下来
Rokid AR + JSAR = 梦想成真!
技术选型:为什么是 JSAR?
老实说,刚开始我想用 Unity 做。但学了两天就放弃了——太复杂了!光是搭建 AR 环境就要配置一堆东西。
然后发现了 JSAR 这个宝藏框架:
优点一:Web 技术栈
不用学 C#,JavaScript 就行。我本来就是前端开发,直接上手。
优点二:Babylon.js 加持
内置了强大的 3D 引擎,粒子系统、光照、材质,应有尽有。
优点三:开发效率高
写个.xsml 文件,刷新浏览器就能看效果。不像 Unity 每次都要 Build 半天。
优点四:为 Rokid 定制
专门为 Rokid AR 眼镜优化的,性能有保证。
最重要的是:无脑上手,30 分钟就能跑出第一个 Demo。
动手实践:从零到完整系统
我的开发思路是"先跑起来,再慢慢完善"。所以把整个过程拆成了 5 个小步骤,每一步都能看到成果。这样不会中途放弃(笑)。
第一步:搭个舞台(10 分钟)
最基础的东西:地面、天空、灯光。就像舞台布景一样。
<xsml version="1.0">
  <head>
    <title>步骤1:基础场景</title>
    <script>
      const scene = spatialDocument.scene;

      // 设置相机 - 第一人称视角
      scene.activeCamera.position = new BABYLON.Vector3(0, 1.6, -12);
      scene.activeCamera.setTarget(new BABYLON.Vector3(0, 0.6, 0));

      // 添加光源
      const hemiLight = new BABYLON.HemisphericLight('hemiLight',
        new BABYLON.Vector3(0, 1, 0), scene);
      hemiLight.intensity = 0.6;

      const sunLight = new BABYLON.DirectionalLight('sunLight',
        new BABYLON.Vector3(-1, -2, -1), scene);
      sunLight.intensity = 0.8;

      // 创建地面
      const ground = BABYLON.MeshBuilder.CreateGround('ground',
        {width: 50, height: 50}, scene);
      const groundMaterial = new BABYLON.StandardMaterial('groundMat', scene);
      groundMaterial.diffuseColor = new BABYLON.Color3(0.3, 0.5, 0.3);
      ground.material = groundMaterial;

      // 设置背景色
      scene.clearColor = new BABYLON.Color4(0.5, 0.7, 1, 1);
    </script>
  </head>
  <space></space>
</xsml>
打开 VSCode,创建文件,粘贴代码,保存。然后用 JSAR 插件打开,就能看到一个简单的 3D 场景了。
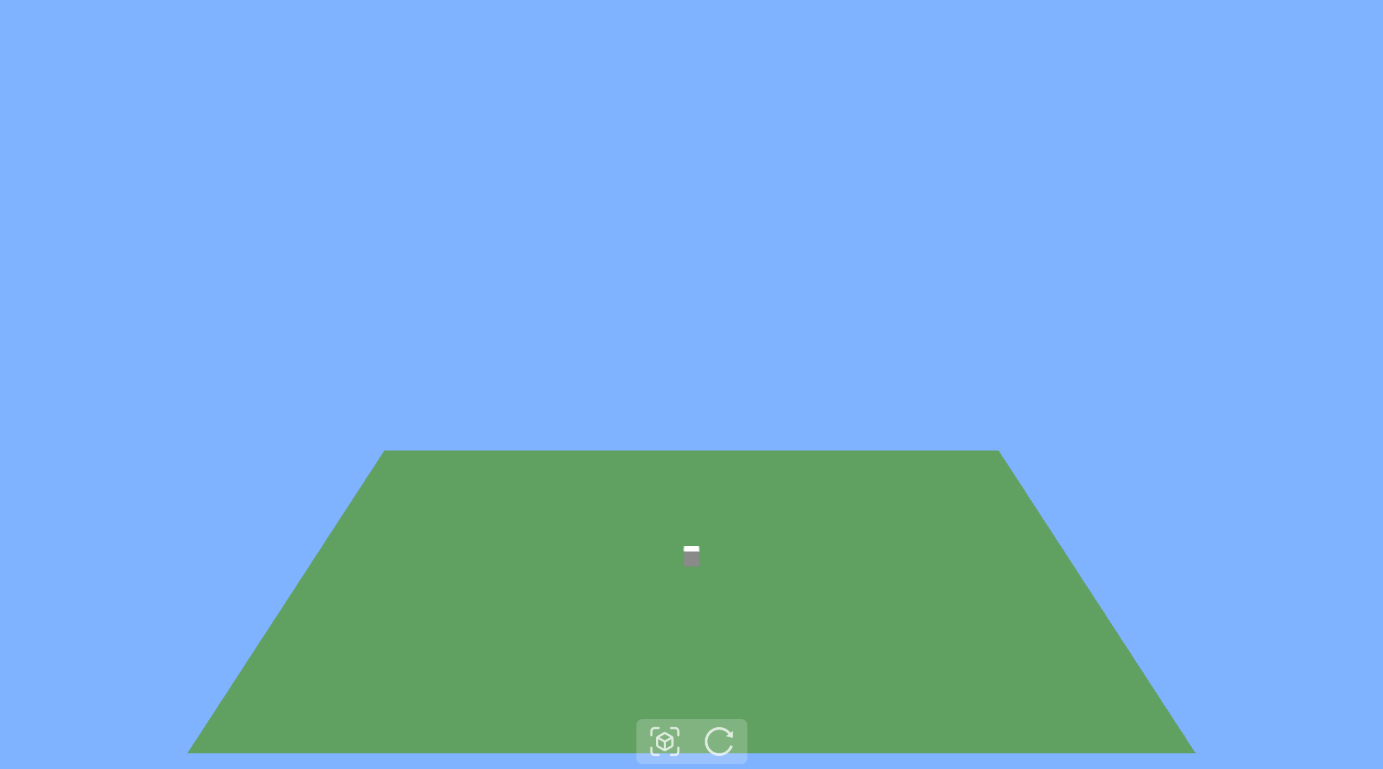
第一步效果:绿色地面 + 蓝色天空
收获:
- 了解了 XSML 的基本结构
- 知道怎么设置相机和光源
- 学会了创建基础几何体
代码在文末完整提供,这里先讲思路。
第二步:把数据画出来(20 分钟)
有了舞台,该上演员了。我选了三种最直观的数据呈现方式:
🌡️ 温度 = 彩色柱子
- 零下:蓝色(冰冷)
- 0-15°C:青色(寒冷)
- 15-25°C:绿色(舒适)
- 25-35°C:黄色(温热)
- 35°C 以上:红色(炎热)
柱子的高度也代表温度,一眼就能看出今天多热。
💧 湿度 = 旋转的环
湿度越高,环越亮、越不透明。就像空气中的水汽凝结成了光环。
💨 风速 = 飞舞的箭头
风速大,箭头就多;风速小,箭头就少。而且会左右飘动,模拟风吹的感觉。
<xsml version="1.0">
  <head>
    <title>步骤2:天气数据显示</title>
    <script>
      const scene = spatialDocument.scene;
      // ...(基础场景代码同步骤1)...

      // 天气数据
      const weatherData = {
        temperature: 25, humidity: 60, windSpeed: 12
      };

      // 温度颜色映射
      function getTemperatureColor(temp) {
        if (temp < 0) return new BABYLON.Color3(0, 0.5, 1);
        if (temp < 15) return new BABYLON.Color3(0, 1, 1);
        if (temp < 25) return new BABYLON.Color3(0, 1, 0);
        if (temp < 35) return new BABYLON.Color3(1, 1, 0);
        return new BABYLON.Color3(1, 0.3, 0);
      }

      // 创建温度柱体
      const tempBar = BABYLON.MeshBuilder.CreateCylinder('tempBar',
        {height: weatherData.temperature / 5, diameter: 1.5}, scene);
      tempBar.position = new BABYLON.Vector3(-4, 1.6, 0);
      const tempMaterial = new BABYLON.StandardMaterial('tempMat', scene);
      tempMaterial.diffuseColor = getTemperatureColor(weatherData.temperature);
      tempMaterial.emissiveColor = tempMaterial.diffuseColor.scale(0.3);
      tempBar.material = tempMaterial;

      // 创建湿度环(旋转动画)
      const humidityRing = BABYLON.MeshBuilder.CreateTorus('humidityRing',
        {diameter: 3, thickness: 0.4}, scene);
      humidityRing.position = new BABYLON.Vector3(0, 1.6, 0);
      scene.registerBeforeRender(() => {
        humidityRing.rotation.z += 0.01;
      });

      // 创建风速箭头(飘动动画)
      const arrows = [];
      for (let i = 0; i < Math.floor(weatherData.windSpeed / 3); i++) {
        const arrow = BABYLON.MeshBuilder.CreateCylinder(`arrow${i}`,
          {height: 2, diameterTop: 0, diameterBottom: 0.3}, scene);
        arrow.position = new BABYLON.Vector3(4, 1.6, 0);
        arrows.push(arrow);
      }
    </script>
  </head>
  <space></space>
</xsml>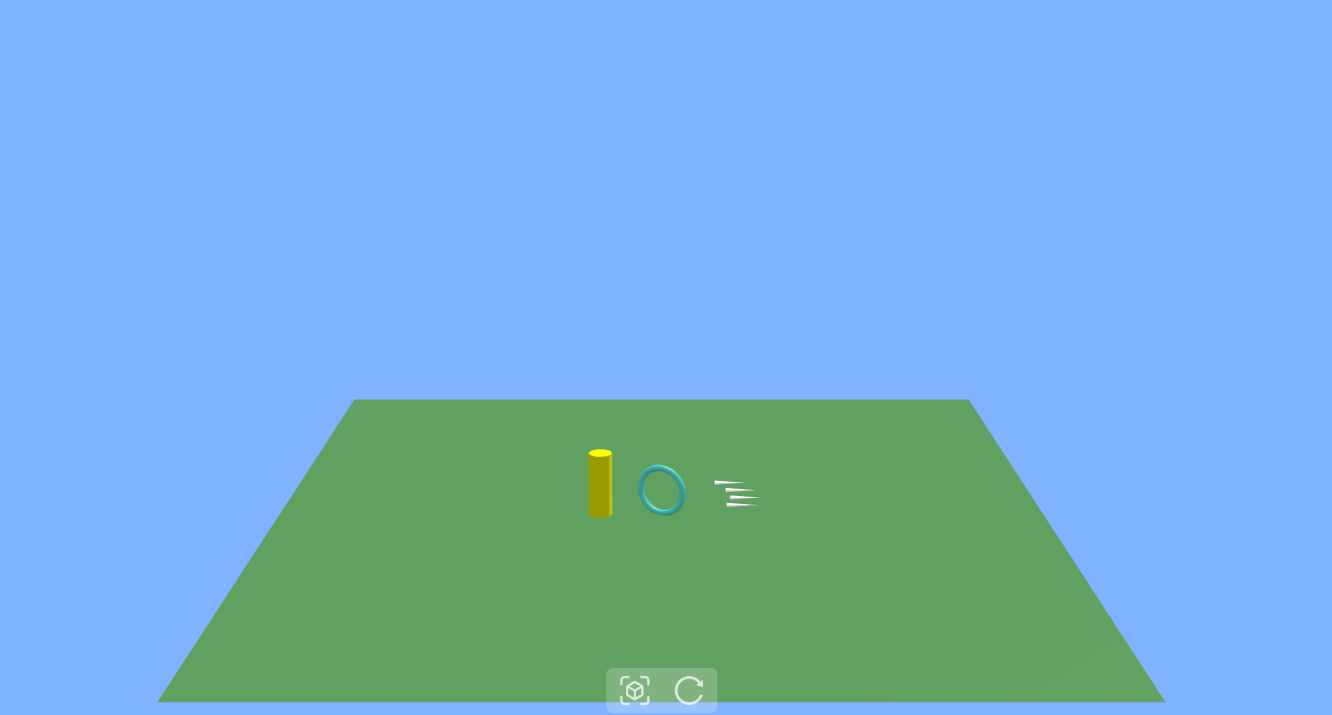
三种数据可视化元素
遇到的坑:
一开始温度柱子是白色的,怎么调都不对。后来发现是忘了设置 emissiveColor(自发光)。Babylon.js 里,如果想让物体在暗处也有颜色,必须加自发光。
material.diffuseColor = color;        // 基础颜色
material.emissiveColor = color.scale(0.3); // 自发光(重要!)
第三步:让天气"动"起来(30 分钟)
数据有了,但还是静态的。真正的挑战来了:粒子系统。
🌧️ 下雨效果
关键参数:
- 粒子数量:3000 个(太少不逼真,太多卡)
- 方向:向下(Y 轴负方向)
- 重力:-9.8(模拟真实重力)
- 速度:快(20-25)
- 颜色:淡蓝色半透明
<xsml version="1.0">
  <head>
    <title>步骤3:天气粒子效果</title>
    <script>
      const scene = spatialDocument.scene;
      // ...(基础场景代码同步骤1)...

      // 雨天粒子系统
      function createRainEffect() {
        const rain = new BABYLON.ParticleSystem('rain', 3000, scene);
        rain.particleTexture = new BABYLON.Texture(
          'https://playground.babylonjs.com/textures/flare.png', scene);
        rain.emitter = new BABYLON.Vector3(0, 15, 0);
        rain.minEmitBox = new BABYLON.Vector3(-15, 0, -15);
        rain.maxEmitBox = new BABYLON.Vector3(15, 0, 15);
        rain.color1 = new BABYLON.Color4(0.7, 0.7, 1, 0.8);
        rain.minSize = 0.05; rain.maxSize = 0.15;
        rain.direction1 = new BABYLON.Vector3(0, -20, 0);
        rain.gravity = new BABYLON.Vector3(0, -9.8, 0);
        rain.emitRate = 1000;
        rain.start();
        return rain;
      }

      // 雪天粒子系统
      function createSnowEffect() {
        const snow = new BABYLON.ParticleSystem('snow', 2000, scene);
        snow.particleTexture = new BABYLON.Texture(
          'https://playground.babylonjs.com/textures/flare.png', scene);
        snow.emitter = new BABYLON.Vector3(0, 15, 0);
        snow.color1 = new BABYLON.Color4(1, 1, 1, 1);
        snow.minSize = 0.1; snow.maxSize = 0.3;
        snow.direction1 = new BABYLON.Vector3(-2, -5, -2);
        snow.gravity = new BABYLON.Vector3(0, -2, 0);
        snow.emitRate = 500;
        snow.start();
        return snow;
      }

      // 切换天气效果
      window.setWeatherEffect = function(type) {
        if (currentParticleSystem) {
          currentParticleSystem.dispose();
        }
        currentParticleSystem = (type === 'rain') ? createRainEffect() :
                                (type === 'snow') ? createSnowEffect() : null;
      };
    </script>
  </head>
  <space></space>
</xsml>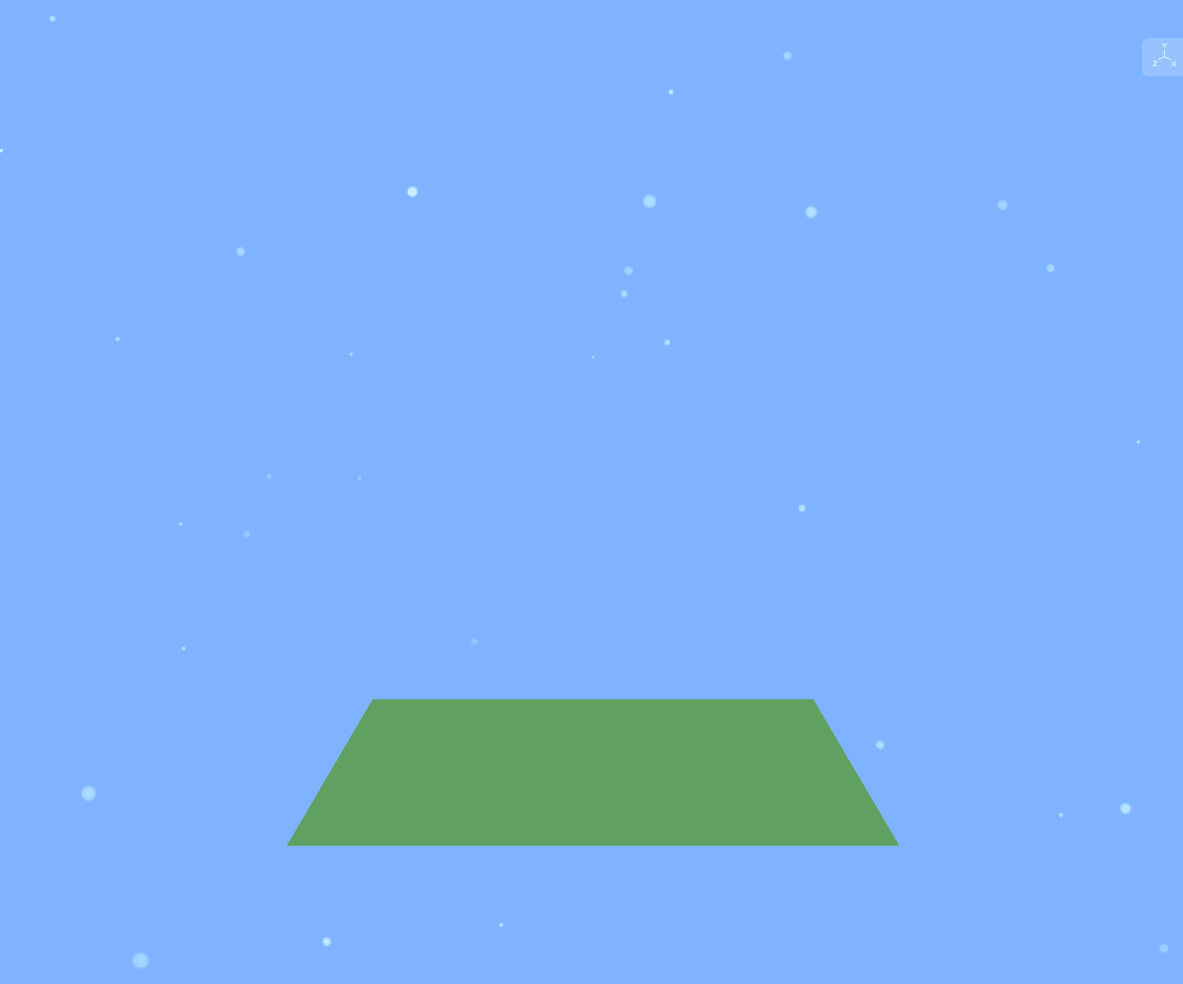
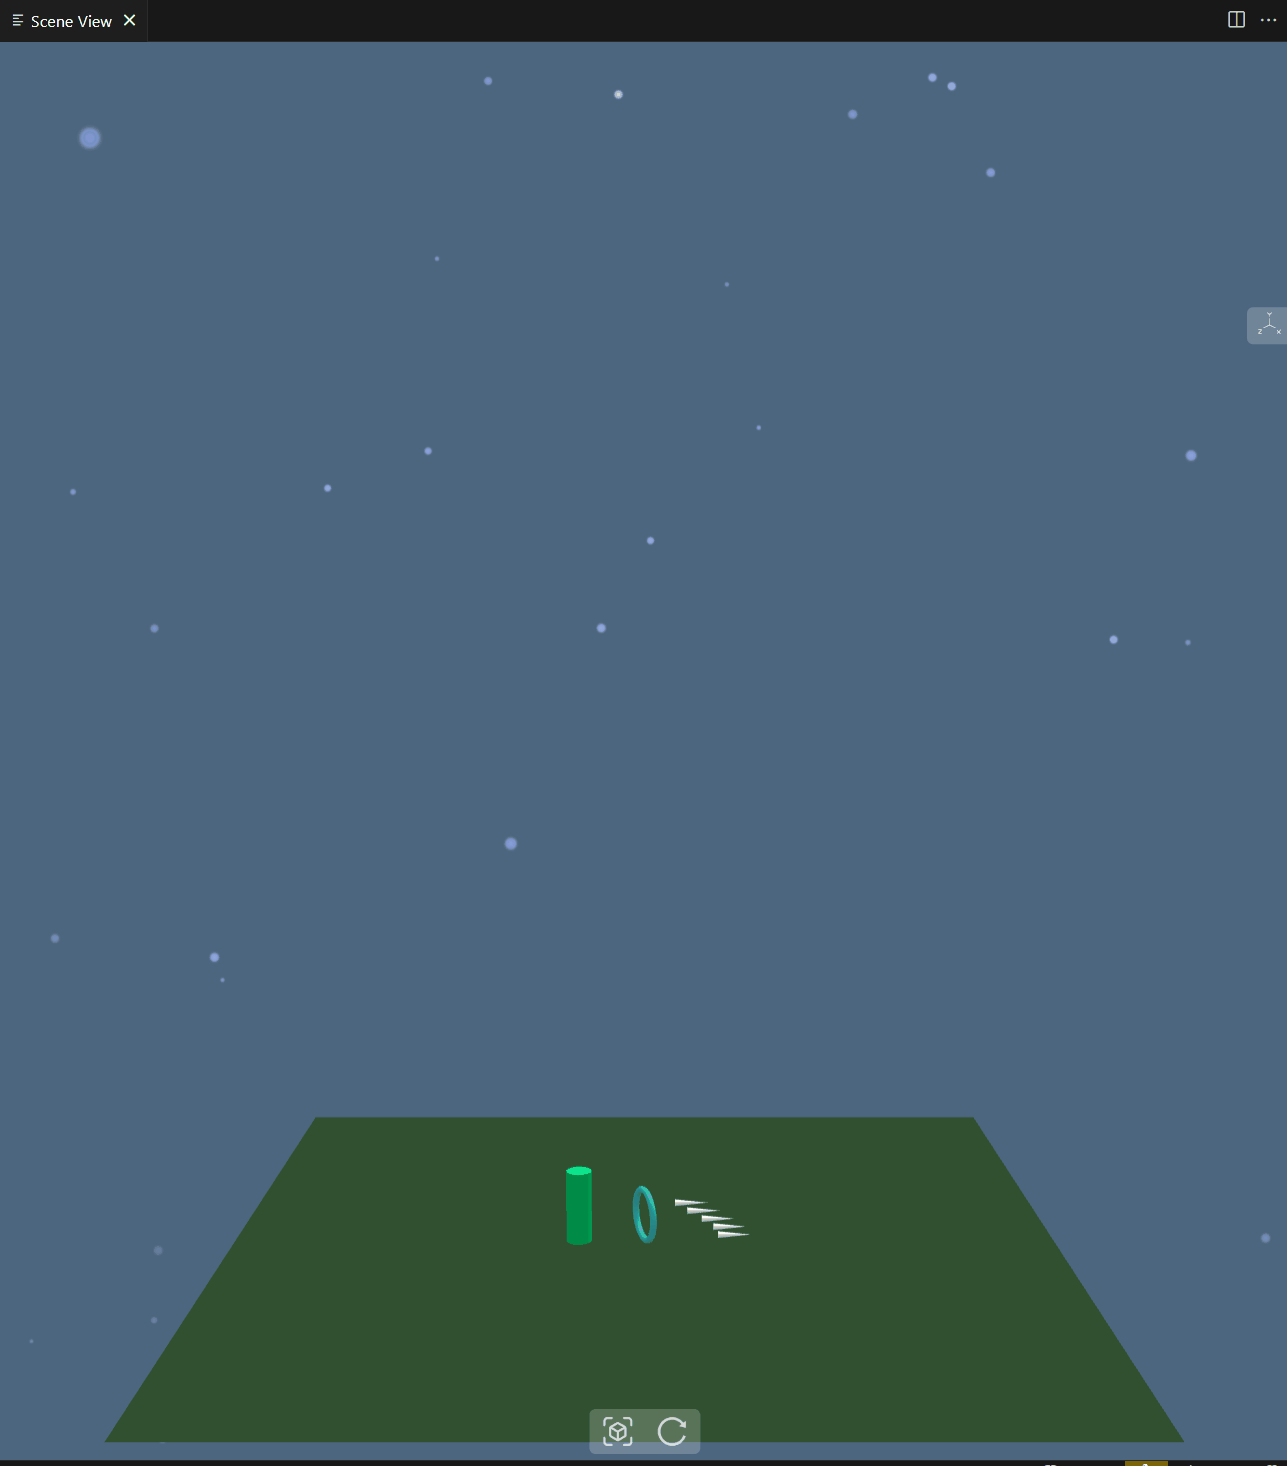
雨天效果:3000 个雨滴
❄️ 下雪效果
和雨的区别:
- 粒子更大(雪花比雨滴大)
- 速度更慢(飘落而不是砸落)
- 横向漂移(风吹的效果)
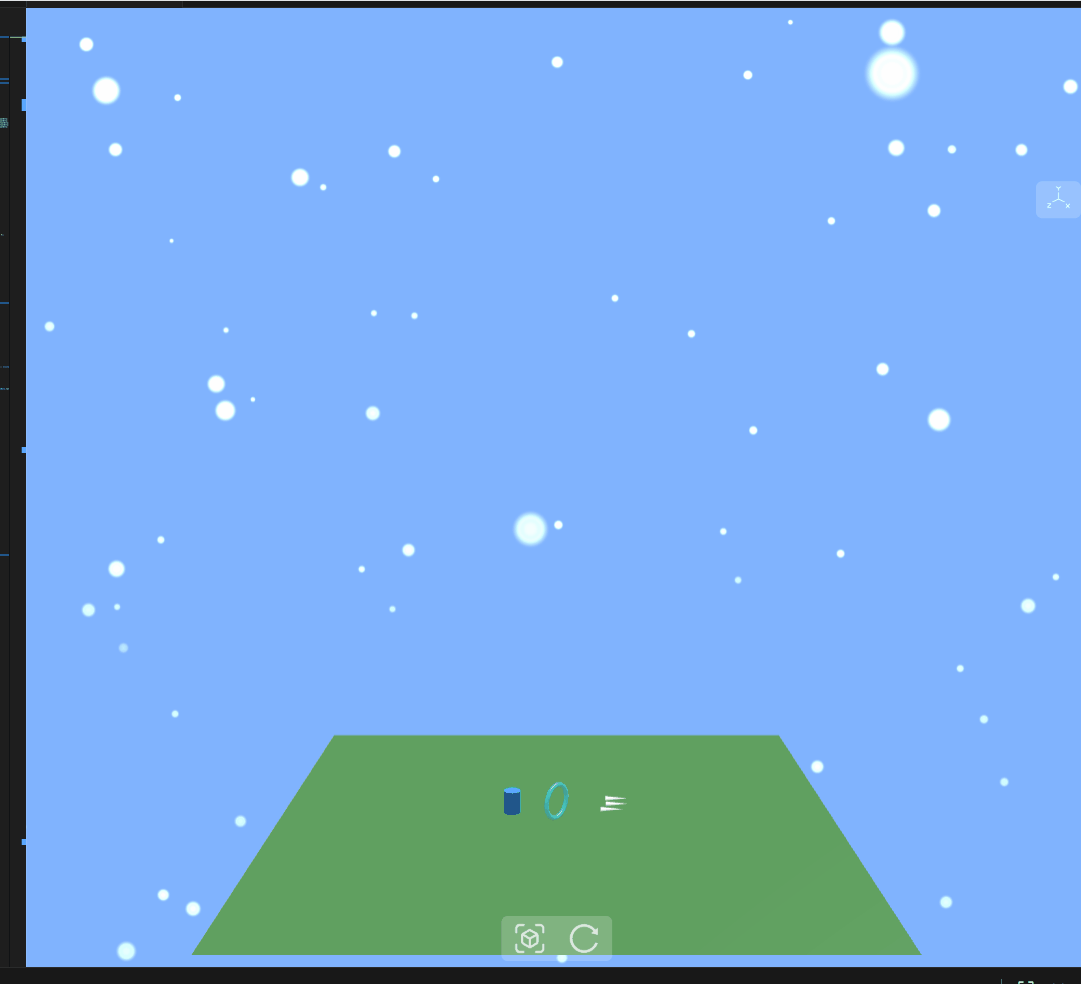
雪天效果:雪花飘飘
调试心得:
粒子系统最难的是调参数。我试了至少 20 种组合才找到满意的效果。建议:
- 先从官方 Demo 抄参数
- 一个一个改,看效果
- 记录下好的组合
第四步:加入多城市(15 分钟)
一个城市太单调,我加了 5 个有代表性的:
城市 | 天气 | 为什么选它 |
|---|---|---|
北京 | 晴天 | 首都,经常蓝天 |
上海 | 雨天 | 魔都,梅雨季 |
哈尔滨 | 雪天 | 冰城,必须雪 |
成都 | 多云 | 阴天之都 |
广州 | 雾霾 | 南方潮湿 |
<xsml version="1.0">
  <head>
    <title>步骤4:多城市数据</title>
    <script>
      const scene = spatialDocument.scene;
      // ...(基础场景代码同步骤1)...

      // 城市天气数据库
      const citiesData = [
        {name: '北京', weather: 'sunny', temperature: 25, humidity: 45, windSpeed: 12},
        {name: '上海', weather: 'rainy', temperature: 18, humidity: 85, windSpeed: 20},
        {name: '哈尔滨', weather: 'snow', temperature: -5, humidity: 70, windSpeed: 8},
        {name: '成都', weather: 'cloudy', temperature: 22, humidity: 65, windSpeed: 6},
        {name: '广州', weather: 'foggy', temperature: 28, humidity: 90, windSpeed: 4}
      ];

      let currentCityIndex = 0;

      // 更新场景显示(复用步骤2和步骤3的创建函数)
      function updateScene() {
        const cityData = citiesData[currentCityIndex];
        createTempBar(cityData.temperature);
        createHumidityRing(cityData.humidity);
        createWindArrows(cityData.windSpeed);
        createWeatherEffect(cityData.weather);
      }

      // 切换城市
      window.nextCity = function() {
        currentCityIndex = (currentCityIndex + 1) % citiesData.length;
        updateScene();
      };

      window.goToCity = function(index) {
        if (index >= 0 && index < citiesData.length) {
          currentCityIndex = index;
          updateScene();
        }
      };

      updateScene();
    </script>
  </head>
  <space></space>
</xsml>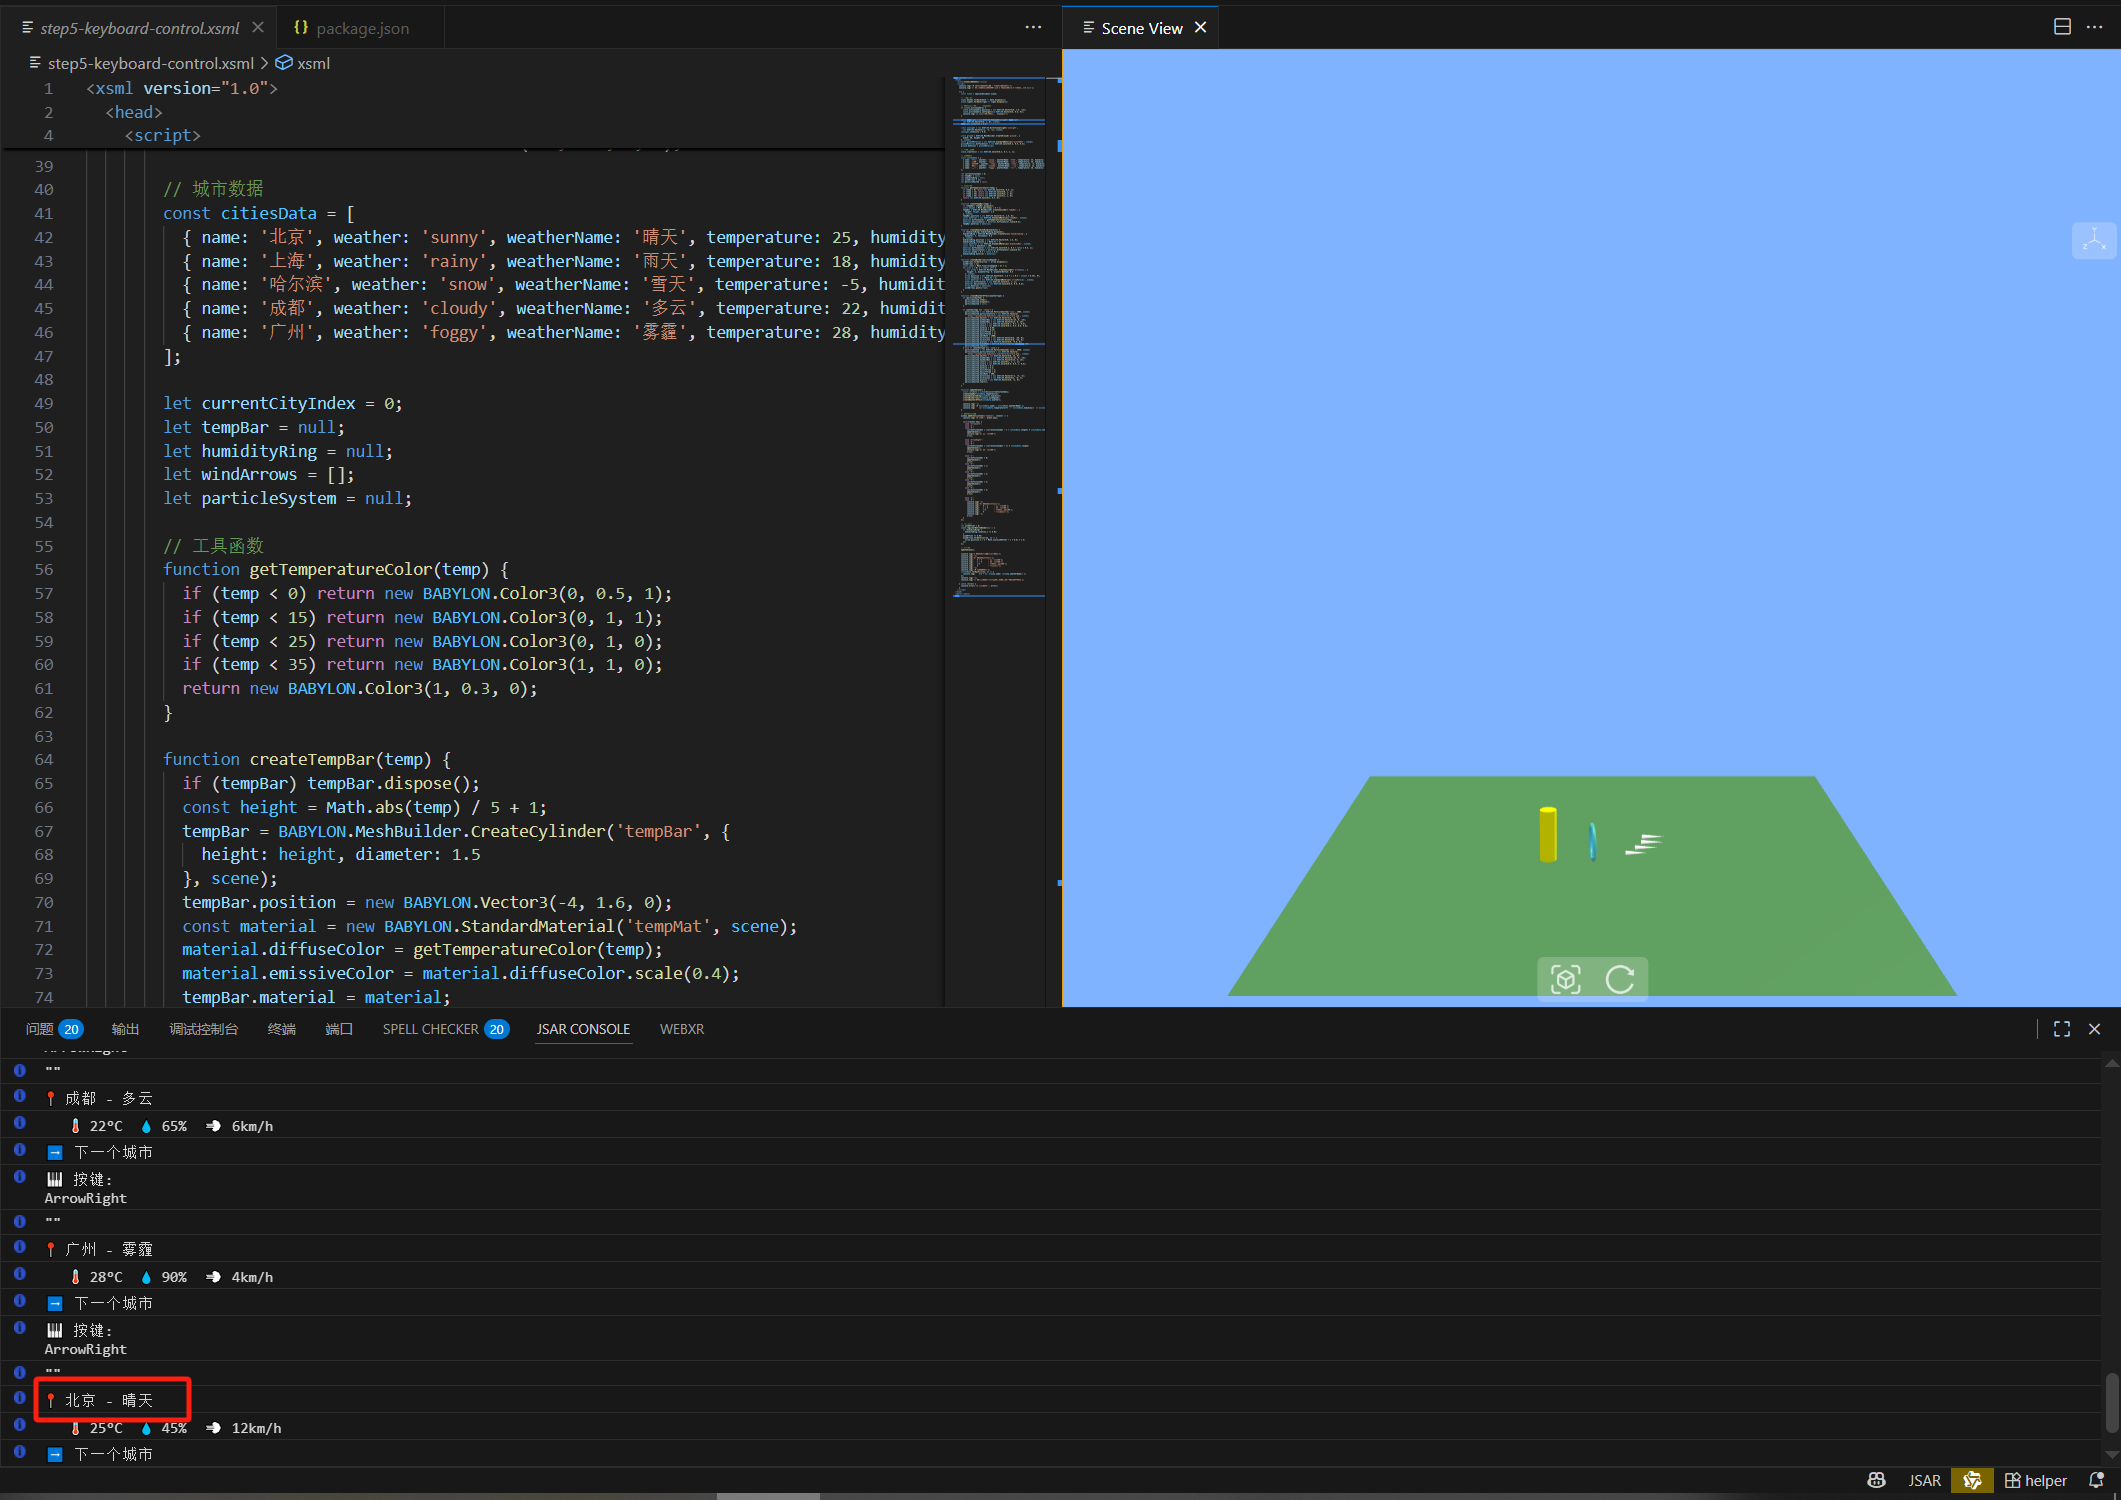
北京晴天:明亮干燥
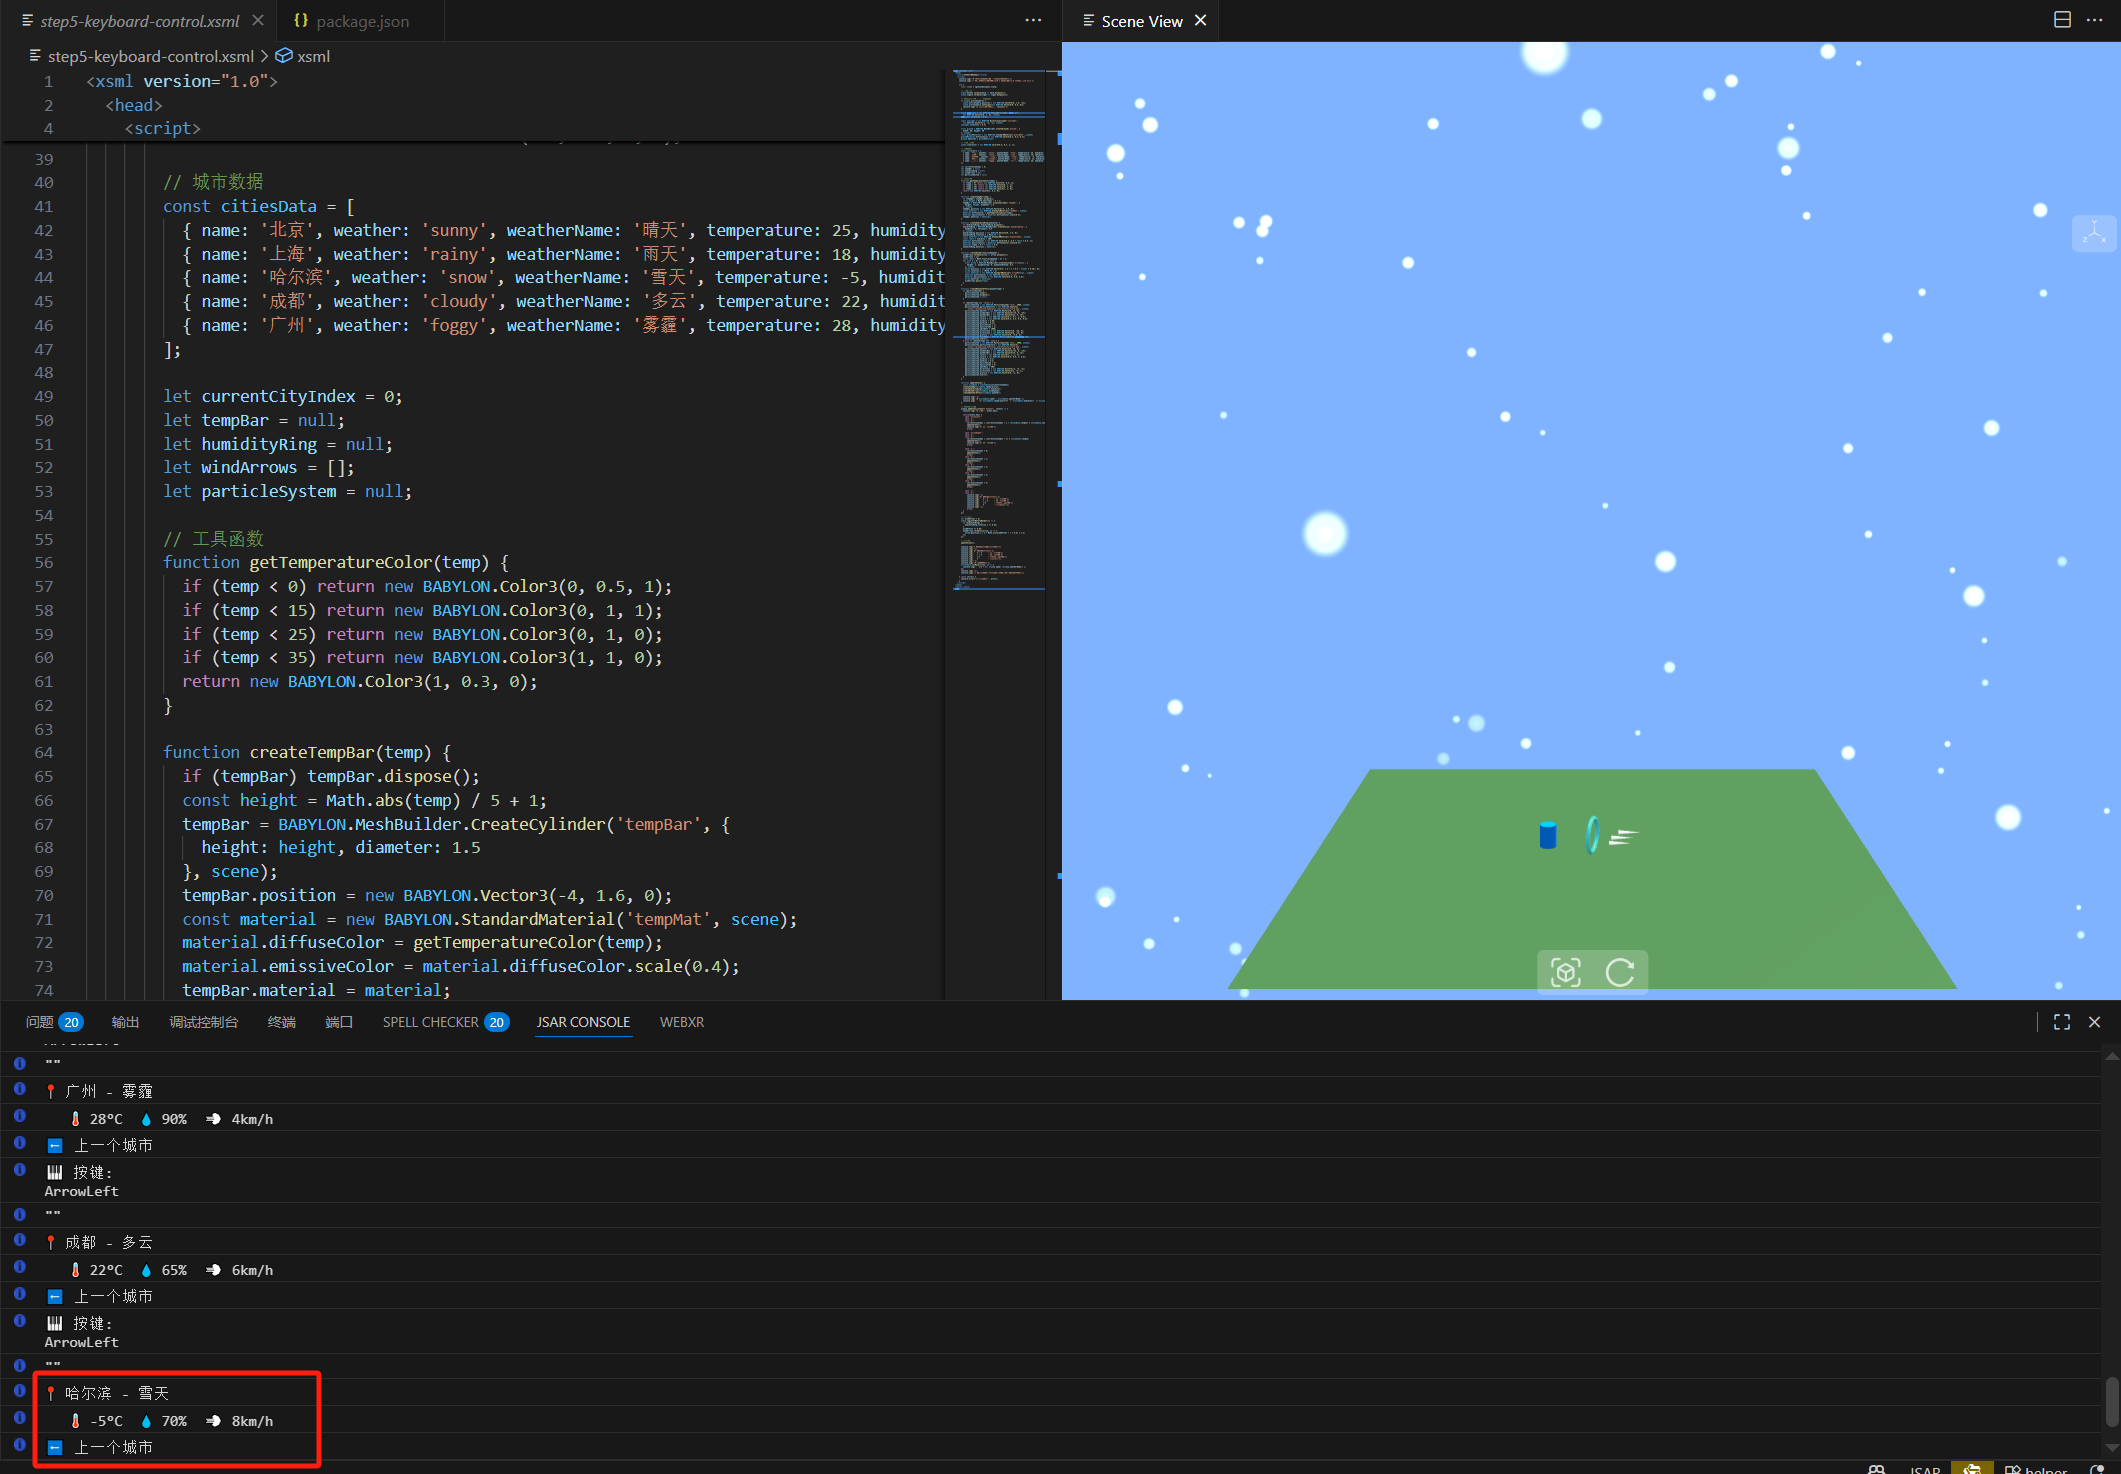
哈尔滨雪天:冰天雪地
第五步:键盘控制(关键!)
这一步最重要!因为我暂时没有 Rokid 眼镜,全靠键盘调试。
我设计了非常方便的快捷键:
← →  或  A D  → 切换城市
1 2 3 4 5     → 直接跳转
H → 显示帮助<xsml version="1.0">
<head>
<title>步骤5:键盘控制</title>
<script>
const scene = spatialDocument.scene;
// ...(基础场景代码 + 城市数据 + 创建函数,同步骤1-4)...
// 键盘控制系统
window.addEventListener('keydown', (event) => {
switch(event.key) {
case 'ArrowLeft':
case 'a':
case 'A':
currentCityIndex = (currentCityIndex - 1 + citiesData.length) % citiesData.length;
updateScene();
break;
case 'ArrowRight':
case 'd':
case 'D':
currentCityIndex = (currentCityIndex + 1) % citiesData.length;
updateScene();
break;
case '1': case '2': case '3': case '4': case '5':
currentCityIndex = parseInt(event.key) - 1;
updateScene();
break;
case 'h':
case 'H':
console.log('键盘控制:← → / A D 切换,1-5 跳转,H 帮助');
break;
}
});
// 动画循环
scene.registerBeforeRender(() => {
if (humidityRing) humidityRing.rotation.z += 0.01;
windArrows.forEach((arrow, i) => {
arrow.position.x = 4 + Math.sin(Date.now() * 0.001 + i * 0.6) * 1.5;
});
});
updateScene();
</script>
</head>
<space></space>
</xsml>关键设计:所有元素都放在视线高度(y=1.6),模拟戴上 AR 眼镜平视前方的效果!
- 左侧(x=-4):温度柱
- 中间(x=0):湿度环
- 右侧(x=4):风速箭头
这样即使没有 AR 眼镜,也能体验到真实的第一人称视角。
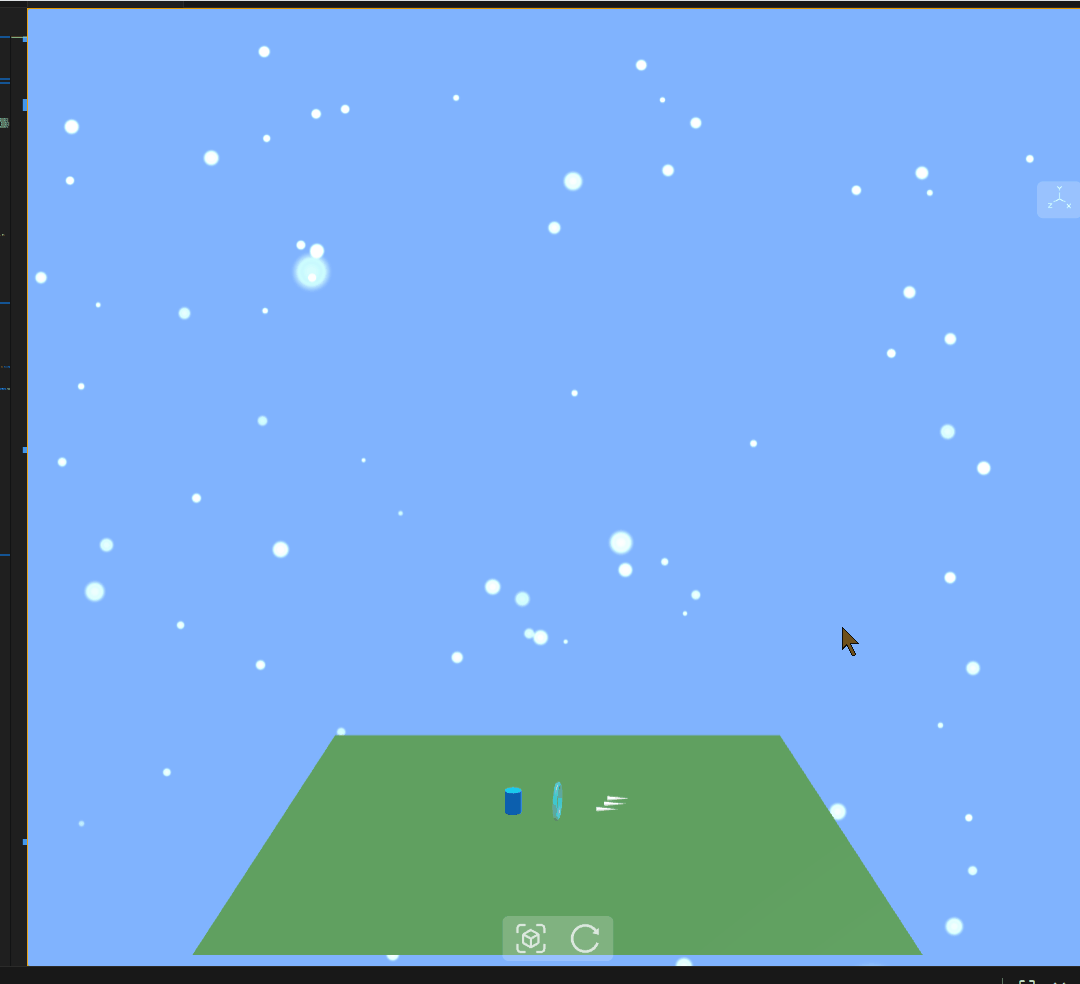
按键即可切换,超方便
调试技巧:
- 每次按键都会在控制台打印
🎹 按键: xxx,能看到是否接收到 - 每次切换都打印城市信息,方便观察
- 用 Emoji 让日志更好看(🌧️ 🌡️ 💧)
- 按 H 随时查看帮助
- 如果没反应,先点击页面!
完整版:集大成者
把所有功能整合到一起,再加点细节优化:
优化 1:根据天气调整光照
if (weather === 'rainy') {
  // 雨天:暗一点
  hemiLight.intensity = 0.3;
} else if (weather === 'sunny') {
  // 晴天:亮一点
  hemiLight.intensity = 0.8;
}
优化 2:动画更流畅
// 温度柱微微脉动
const pulse = Math.sin(time) * 0.03 + 1;
tempBar.scaling.x = pulse;
优化 3:清理内存
// 切换城市前销毁旧对象
if (oldParticleSystem) {
  oldParticleSystem.dispose(); // 很重要!
}**代码文件:weather-system.xsml**
<xsml version="1.0">
  <head>
    <title>3D天气可视化系统 - 完整版</title>
    <script>
      const scene = spatialDocument.scene;

      // 基础场景设置
      scene.activeCamera.position = new BABYLON.Vector3(0, 1.6, -12);
      scene.activeCamera.setTarget(new BABYLON.Vector3(0, 0.6, 0));

      const hemiLight = new BABYLON.HemisphericLight('hemiLight',
        new BABYLON.Vector3(0, 1, 0), scene);
      hemiLight.intensity = 0.6;

      const sunLight = new BABYLON.DirectionalLight('sunLight',
        new BABYLON.Vector3(-1, -2, -1), scene);
      sunLight.intensity = 0.8;

      const ground = BABYLON.MeshBuilder.CreateGround('ground',
        {width: 50, height: 50}, scene);
      const groundMaterial = new BABYLON.StandardMaterial('groundMat', scene);
      groundMaterial.diffuseColor = new BABYLON.Color3(0.3, 0.5, 0.3);
      ground.material = groundMaterial;

      scene.clearColor = new BABYLON.Color4(0.5, 0.7, 1, 1);

      // 城市天气数据库
      const citiesData = [
        {name: '北京', weather: 'sunny', weatherName: '晴天',
         temperature: 25, humidity: 45, windSpeed: 12, icon: '☀️'},
        {name: '上海', weather: 'rainy', weatherName: '雨天',
         temperature: 18, humidity: 85, windSpeed: 20, icon: '🌧️'},
        {name: '哈尔滨', weather: 'snow', weatherName: '雪天',
         temperature: -5, humidity: 70, windSpeed: 8, icon: '❄️'},
        {name: '成都', weather: 'cloudy', weatherName: '多云',
         temperature: 22, humidity: 65, windSpeed: 6, icon: '☁️'},
        {name: '广州', weather: 'foggy', weatherName: '雾霾',
         temperature: 28, humidity: 90, windSpeed: 4, icon: '🌫️'}
      ];

      let currentCityIndex = 0;
      let tempBar, humidityRing, windArrows = [], particleSystem;

      // 温度颜色映射
      function getTemperatureColor(temp) {
        if (temp < 0) return new BABYLON.Color3(0, 0.5, 1);
        if (temp < 10) return new BABYLON.Color3(0, 0.8, 1);
        if (temp < 20) return new BABYLON.Color3(0, 1, 0.5);
        if (temp < 30) return new BABYLON.Color3(0, 1, 0);
        if (temp < 35) return new BABYLON.Color3(1, 1, 0);
        return new BABYLON.Color3(1, 0.3, 0);
      }

      // 创建温度柱体
      function createTempBar(temp) {
        if (tempBar) tempBar.dispose();
        const height = Math.abs(temp) / 4 + 1;
        tempBar = BABYLON.MeshBuilder.CreateCylinder('tempBar',
          {height: height, diameter: 1.5}, scene);
        tempBar.position = new BABYLON.Vector3(-4, 1.6, 0);
        const material = new BABYLON.StandardMaterial('tempMat', scene);
        material.diffuseColor = getTemperatureColor(temp);
        material.emissiveColor = material.diffuseColor.scale(0.4);
        tempBar.material = material;
      }

      // 创建湿度环
      function createHumidityRing(humidity) {
        if (humidityRing) humidityRing.dispose();
        humidityRing = BABYLON.MeshBuilder.CreateTorus('humidityRing',
          {diameter: 3, thickness: 0.4}, scene);
        humidityRing.position = new BABYLON.Vector3(0, 1.6, 0);
        humidityRing.rotation.x = Math.PI / 2;
        const material = new BABYLON.StandardMaterial('humidityMat', scene);
        const ratio = humidity / 100;
        material.diffuseColor = new BABYLON.Color3(0.2, 0.5 + ratio * 0.5, 1);
        material.emissiveColor = material.diffuseColor.scale(0.5);
        material.alpha = 0.4 + ratio * 0.4;
        humidityRing.material = material;
      }

      // 创建风速箭头
      function createWindArrows(windSpeed) {
        windArrows.forEach(arrow => arrow.dispose());
        windArrows = [];
        const count = Math.max(1, Math.floor(windSpeed / 4));
        for (let i = 0; i < count; i++) {
          const arrow = BABYLON.MeshBuilder.CreateCylinder(`arrow${i}`,
            {height: 2, diameterTop: 0, diameterBottom: 0.4}, scene);
          arrow.position = new BABYLON.Vector3(4, 1.6 + i * 0.5 - (count * 0.25), 0);
          arrow.rotation.z = -Math.PI / 2;
          const material = new BABYLON.StandardMaterial(`arrowMat${i}`, scene);
          material.diffuseColor = new BABYLON.Color3(1, 1, 1);
          material.emissiveColor = new BABYLON.Color3(0.6, 0.6, 0.6);
          arrow.material = material;
          windArrows.push(arrow);
        }
      }

      // 创建天气粒子效果
      function createWeatherEffect(weatherType) {
        if (particleSystem) {
          particleSystem.stop();
          particleSystem.dispose();
        }

        if (weatherType === 'rainy') {
          particleSystem = new BABYLON.ParticleSystem('rain', 3500, scene);
          particleSystem.particleTexture = new BABYLON.Texture(
            'https://playground.babylonjs.com/textures/flare.png', scene);
          particleSystem.emitter = new BABYLON.Vector3(0, 15, 0);
          particleSystem.minEmitBox = new BABYLON.Vector3(-15, 0, -15);
          particleSystem.maxEmitBox = new BABYLON.Vector3(15, 0, 15);
          particleSystem.color1 = new BABYLON.Color4(0.7, 0.7, 1, 0.9);
          particleSystem.minSize = 0.05; particleSystem.maxSize = 0.18;
          particleSystem.emitRate = 1200;
          particleSystem.direction1 = new BABYLON.Vector3(-1, -22, -1);
          particleSystem.gravity = new BABYLON.Vector3(0, -12, 0);
          particleSystem.start();
        } else if (weatherType === 'snow') {
          particleSystem = new BABYLON.ParticleSystem('snow', 2500, scene);
          particleSystem.particleTexture = new BABYLON.Texture(
            'https://playground.babylonjs.com/textures/flare.png', scene);
          particleSystem.emitter = new BABYLON.Vector3(0, 15, 0);
          particleSystem.minEmitBox = new BABYLON.Vector3(-15, 0, -15);
          particleSystem.maxEmitBox = new BABYLON.Vector3(15, 0, 15);
          particleSystem.color1 = new BABYLON.Color4(1, 1, 1, 1);
          particleSystem.minSize = 0.12; particleSystem.maxSize = 0.35;
          particleSystem.emitRate = 600;
          particleSystem.direction1 = new BABYLON.Vector3(-2, -4, -2);
          particleSystem.gravity = new BABYLON.Vector3(0, -2.5, 0);
          particleSystem.start();
        } else if (weatherType === 'foggy' || weatherType === 'cloudy') {
          particleSystem = new BABYLON.ParticleSystem('fog', 800, scene);
          particleSystem.particleTexture = new BABYLON.Texture(
            'https://playground.babylonjs.com/textures/cloud.png', scene);
          particleSystem.emitter = new BABYLON.Vector3(0, 2, 0);
          particleSystem.minEmitBox = new BABYLON.Vector3(-10, -1, -10);
          particleSystem.maxEmitBox = new BABYLON.Vector3(10, 1, 10);
          particleSystem.color1 = new BABYLON.Color4(0.75, 0.75, 0.75, 0.35);
          particleSystem.minSize = 3; particleSystem.maxSize = 6;
          particleSystem.emitRate = 40;
          particleSystem.gravity = new BABYLON.Vector3(0, 0, 0);
          particleSystem.start();
        }
      }

      // 更新整个场景
      function updateScene() {
        const cityData = citiesData[currentCityIndex];
        createTempBar(cityData.temperature);
        createHumidityRing(cityData.humidity);
        createWindArrows(cityData.windSpeed);
        createWeatherEffect(cityData.weather);

        // 根据天气调整光照和背景色
        if (cityData.weather === 'rainy' || cityData.weather === 'foggy') {
          hemiLight.intensity = 0.3; sunLight.intensity = 0.4;
          scene.clearColor = new BABYLON.Color4(0.3, 0.4, 0.5, 1);
        } else if (cityData.weather === 'snow') {
          hemiLight.intensity = 0.5; sunLight.intensity = 0.5;
          scene.clearColor = new BABYLON.Color4(0.6, 0.7, 0.8, 1);
        } else {
          hemiLight.intensity = 0.6; sunLight.intensity = 0.8;
          scene.clearColor = new BABYLON.Color4(0.5, 0.7, 1, 1);
        }
      }

      // 键盘控制
      window.addEventListener('keydown', (event) => {
        switch(event.key) {
          case 'ArrowLeft': case 'a': case 'A':
            currentCityIndex = (currentCityIndex - 1 + citiesData.length) % citiesData.length;
            updateScene(); break;
          case 'ArrowRight': case 'd': case 'D':
            currentCityIndex = (currentCityIndex + 1) % citiesData.length;
            updateScene(); break;
          case '1': case '2': case '3': case '4': case '5':
            currentCityIndex = parseInt(event.key) - 1;
            updateScene(); break;
          case 'h': case 'H':
            console.log('键盘控制:← → / A D 切换,1-5 跳转,H 帮助');
            break;
        }
      });

      // 动画循环
      scene.registerBeforeRender(() => {
        if (humidityRing) humidityRing.rotation.z += 0.01;
        const time = Date.now() * 0.001;
        windArrows.forEach((arrow, i) => {
          arrow.position.x = 4 + Math.sin(time * 0.06 + i * 0.6) * 1.5;
        });
        if (tempBar) {
          const pulse = Math.sin(time) * 0.03 + 1;
          tempBar.scaling.x = pulse;
          tempBar.scaling.z = pulse;
        }
      });

      updateScene();
    </script>
  </head>
  <space></space>
</xsml>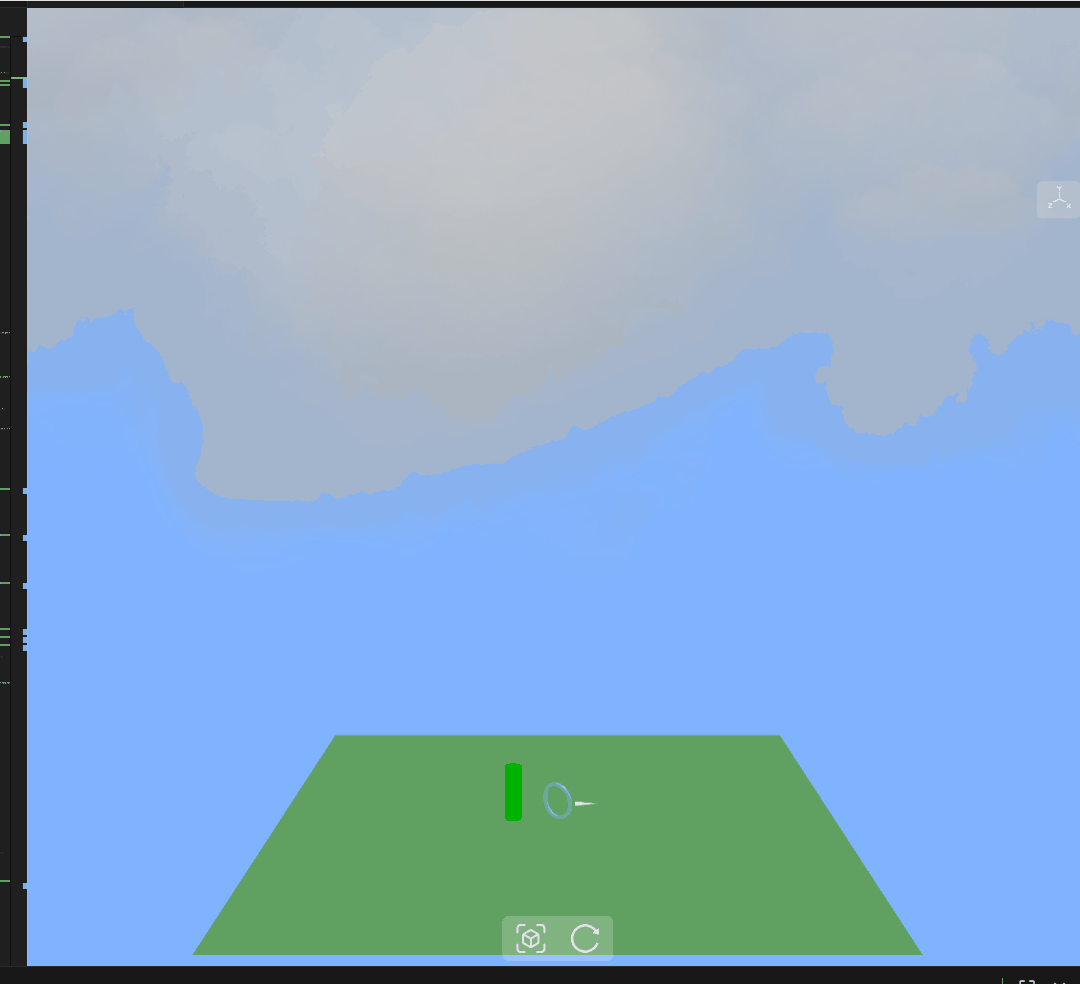
最终完整版
在 Rokid 眼镜上是什么体验?
虽然我现在还没有实体眼镜(已经下单了!),但根据文档和社区反馈,应该是这样的:
沉浸感
戴上眼镜后,天气效果会叠加在真实世界上。比如:
- 在办公室里,雨滴从天花板"落下来"
- 在户外,虚拟的雪花和真实的风景融合
- 温度柱就漂浮在你的桌子上
交互性
如果配合 Rokid 的手势识别:
- 挥手切换城市
- 捏合放大查看细节
- 语音控制"切换到北京"
实用性
想象这些场景:
- 早晨出门前:一眼看到今天的天气状况
- 旅行规划:对比不同城市的天气
- 新闻播报:主播身边展示立体天气
- 教育场景:给孩子讲解气象知识
踩过的坑 & 解决方案
坑 1:粒子不显示
现象:代码没报错,但看不到粒子。
原因:纹理加载失败。
解决:
// 加个加载监听
texture.onLoadObservable.add(() => {
  console.log('纹理加载成功!');
});
坑 2:键盘没反应
现象:按键没有任何响应。
原因:页面失去焦点了。
解决:点击一下页面,或者:
window.focus(); // 强制获取焦点坑 3:切换城市时卡顿
现象:第一次很流畅,后面越来越卡。
原因:没销毁旧对象,越积越多。
解决:
function cleanup() {
  if (oldMesh) oldMesh.dispose();
  if (oldParticle) oldParticle.dispose();
}
坑 4:温度柱颜色不对
现象:在黑暗环境下看不到颜色。
原因:只设置了 diffuseColor,没设置 emissiveColor。
解决:
material.emissiveColor = color.scale(0.4); // 加自发光性能优化心得
粒子数量控制
// 根据设备性能调整
const isMobile = /Mobile/.test(navigator.userAgent);
const count = isMobile ? 1500 : 3000;
按需加载
只在需要的时候创建粒子系统,不要一次性全创建。
材质复用
// 错误做法:每个箭头一个材质
for (let i = 0; i < 10; i++) {
  const mat = new Material(); // 浪费!
}

// 正确做法:共用一个材质
const sharedMat = new Material();
for (let i = 0; i < 10; i++) {
  arrow.material = sharedMat; // 高效!
}
总结与感想
技术收获
✅ 深入理解了 Babylon.js 粒子系统
✅ 掌握了 3D 数据可视化的设计思路
✅ 学会了 JSAR 的开发流程
✅ 熟悉了键盘交互的实现
开发体验
JSAR 真的很友好。作为一个前端开发者,我只用了一个周末就做出了这个项目。如果用 Unity,估计要学一个月。
粒子系统很好玩。调参数的过程就像画画,每改一个值都能看到不同的效果。虽然花时间,但很有成就感。
键盘控制是神器。没有 AR 设备也能完整开发,这点太重要了。不然每次调试都要戴眼镜,太累了。
给后来者的建议
- 从简单开始:先让代码跑起来,再慢慢加功能
- 多看文档:Babylon.js 文档很全,遇到问题先查文档
- 善用控制台:console.log 是最好的调试工具
- 参数多试:特别是粒子系统,没有完美公式,只能试
- 及时清理:记得 dispose(),不然内存泄漏
参考资料
- JSAR 官方文档:https://jsar.netlify.app/
- Babylon.js 粒子教程:https://doc.babylonjs.com/features/featuresDeepDive/particles
- Rokid 开发者社区:https://developer.rokid.com/
最后的话
这个项目花了我两个周末的时间,但我觉得很值得。不仅学到了新技术,还做出了一个自己真正想用的东西。
Rokid + JSAR 给了 Web 开发者进入 AR 领域的钥匙。不需要学 C++、C#,不需要搞 Unity、Unreal,用你熟悉的 JavaScript 就能做出酷炫的 AR 应用。这才是降低门槛!
如果你也对 AR 开发感兴趣,强烈推荐试试 JSAR。真的没那么难,一个周末就能入门。
期待看到更多有创意的 JSAR 应用!
原创声明:本文系作者授权腾讯云开发者社区发表,未经许可,不得转载。
如有侵权,请联系 cloudcommunity@tencent.com 删除。
原创声明:本文系作者授权腾讯云开发者社区发表,未经许可,不得转载。
如有侵权,请联系 cloudcommunity@tencent.com 删除。
评论
登录后参与评论
推荐阅读
目录

