如何使用OpenCV的rvecs和tvecs输出将相机坐标中的棋盘投影到OpenCV中的真实坐标?
情况
按照摄像机校准教程在OpenCV中的操作,我成功地使用cv.calibrateCamera获得了一个不失真的检查板图像
原始图像:(在我的计算机中命名为image.tif )
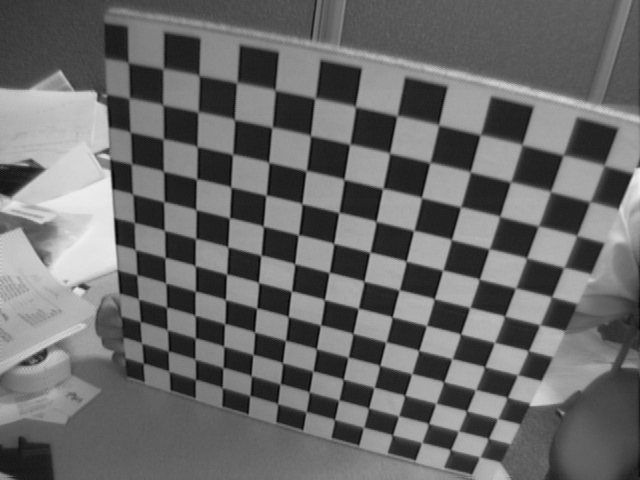
代码:
import numpy as np
import cv2 as cv
import matplotlib.pyplot as plt

# termination criteria
criteria = (cv.TERM_CRITERIA_EPS + cv.TERM_CRITERIA_MAX_ITER, 30, 0.001)
# prepare object points, like (0,0,0), (1,0,0), (2,0,0) ....,(6,5,0)
objp = np.zeros((12*13,3), np.float32)
objp[:,:2] = np.mgrid[0:12,0:13].T.reshape(-1,2)
# Arrays to store object points and image points from all the images.
objpoints = [] # 3d point in real world space
imgpoints = [] # 2d points in image plane.

img = cv.imread('image.tif')
gray = cv.cvtColor(img, cv.COLOR_BGR2GRAY)
# Find the chess board corners
ret, corners = cv.findChessboardCorners(gray, (12,13), None)
# If found, add object points, image points (after refining them)

if ret == True:
    objpoints.append(objp)
    corners2 = cv.cornerSubPix(gray,corners, (11,11), (-1,-1), criteria)
    imgpoints.append(corners)
    # Draw and display the corners
    cv.drawChessboardCorners(img, (12,13), corners2, ret)
    cv.imshow('img', img)
    cv.waitKey(2000)

cv.destroyAllWindows()

ret, mtx, dist, rvecs, tvecs = cv.calibrateCamera(objpoints, imgpoints, gray.shape[::-1], None, None)

#Plot undistorted
h,  w = img.shape[:2]
newcameramtx, roi = cv.getOptimalNewCameraMatrix(mtx, dist, (w,h), 1, (w,h))

dst = cv.undistort(img, mtx, dist, None, newcameramtx)
# crop the image
x, y, w, h = roi
dst = dst[y:y+h, x:x+w]
plt.figure()
plt.imshow(dst)
plt.savefig("undistorted.png", dpi = 300)
plt.close()
不失真图像:
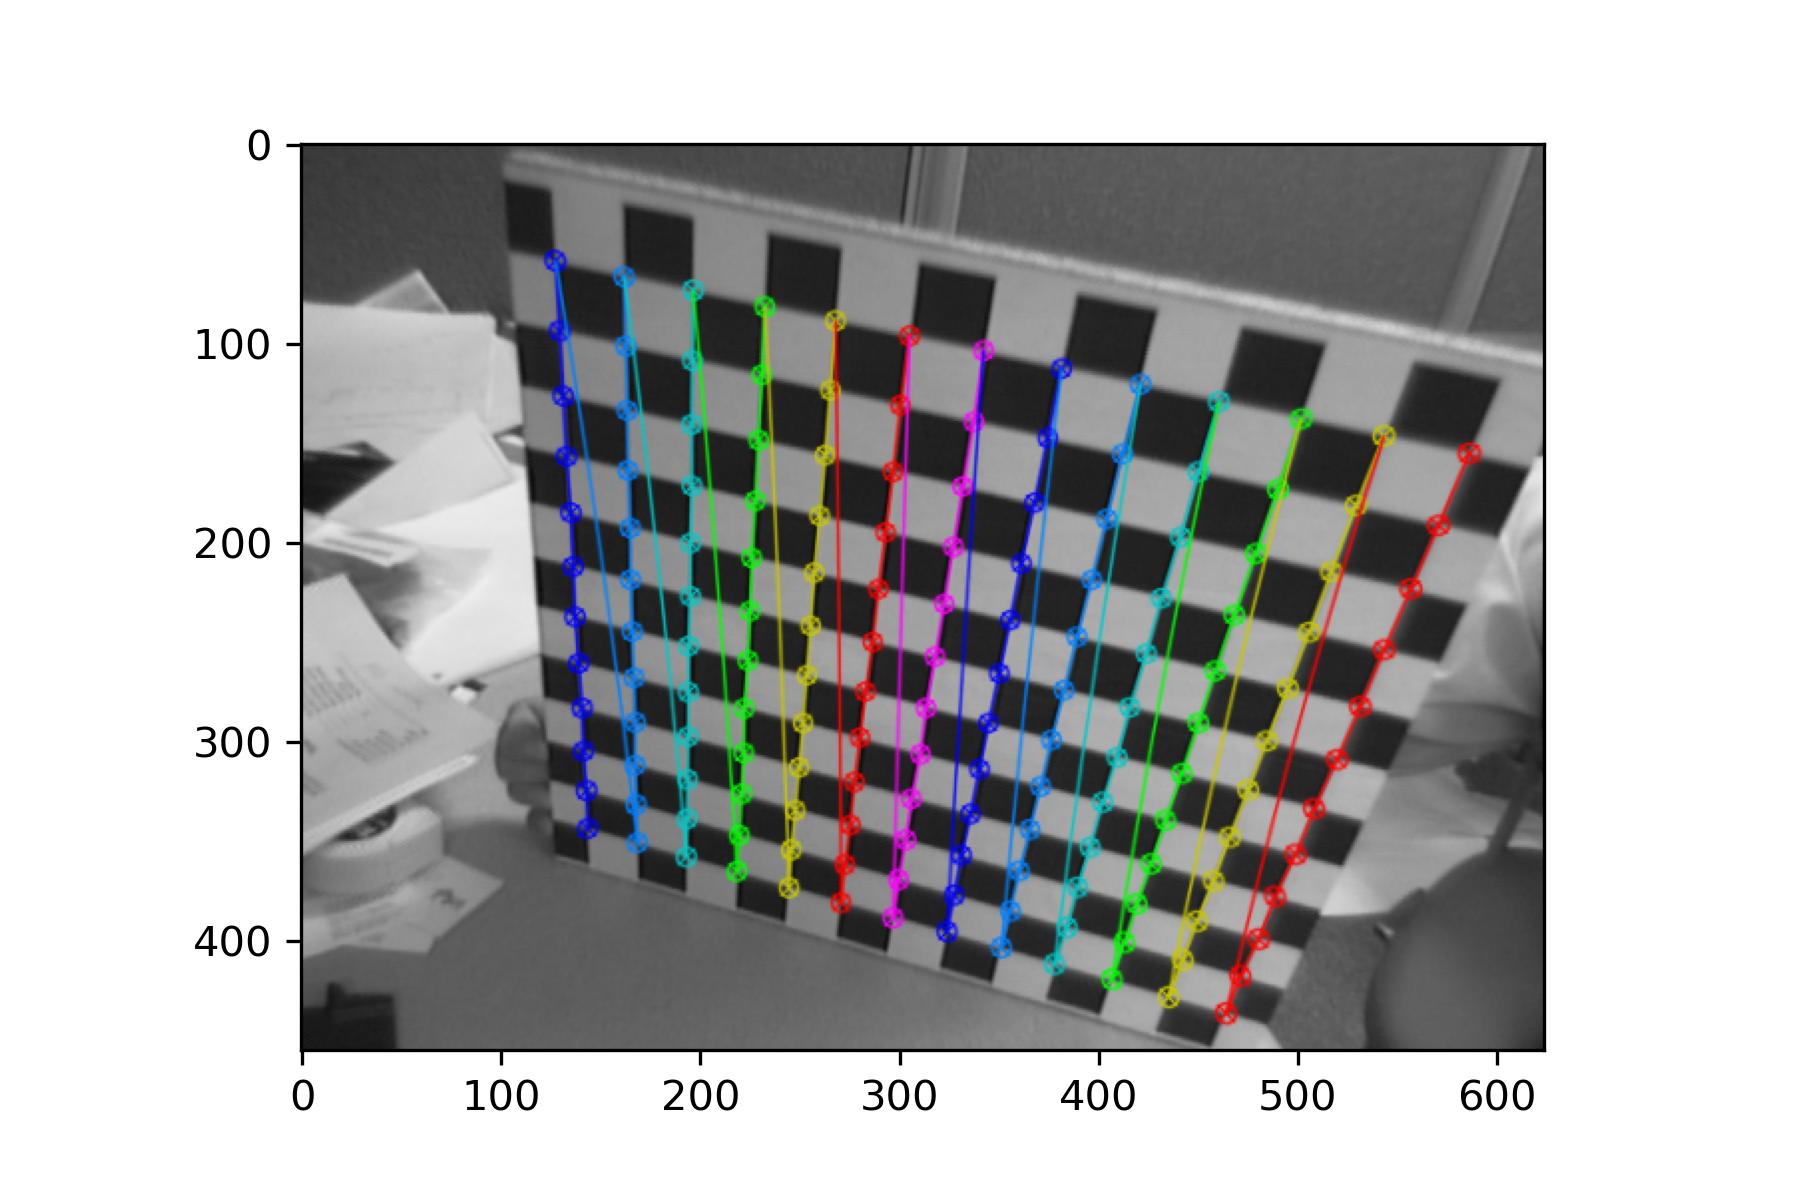
不失真的图像确实有直线。然而,为了测试校准过程,我想使用rvecs tvecs 和tvecs输出的 cv.calibrateCamera.进一步将图像转换成真实世界的坐标。来自文档
- rvecs:为每个模式视图(例如std::vector>)估计的旋转矢量的输出矢量(Rodrigues )。也就是说,每一个第一旋转矢量连同相应的第一转换矢量(见下一个输出参数描述)将校准模式从对象坐标空间(指定对象点)带到相机坐标空间。在更多的技术术语中,第一旋转和平移向量的元组实现了从物体坐标空间到摄像机坐标空间的基函数的转换。由于其对偶性,这个元组相当于标定图案相对于相机坐标空间的位置。。
- of :为每个模式视图估计翻译向量的输出向量,请参阅上面的参数描述。
问题:我如何处理这个问题?,如果答案包括输出转换图像的工作代码,那就太好了。
预期产出
我期望的图像应该如下所示,其中红色坐标对应于支票板的真实坐标(注意,此投影中的复选板是一个矩形):

我试过的
在@Christoph的评论之后,我找到了这个职位,其中他们解释了同形矩阵H,该矩阵将(棋盘的)三维真实世界坐标与2D图像坐标联系起来:
H = K [R1 R2 t]
其中K是摄像机标定矩阵,R1和R2是旋转矩阵的前两列,t是平移向量。
我试着从:
K我们已经把它作为来自cv.calibrateCamera的mtx了。- 将
R1和R2从rvecs转换成旋转矩阵(因为它在罗德里格斯分解中给出):cv.Rodrigues(rvecs[0])[0]。 t应该是tvecs。
为了计算从图像坐标到三维真实世界坐标的同形,我使用了H的逆。
最后,我使用cv.warpPerspective显示投影图像。
码
R = cv.Rodrigues(rvecs[0])[0]
tvec = tvecs[0].squeeze()
H = np.dot(mtx, np.concatenate((R[:,:2], tvec[:,None]), axis = 1) )/tvec[-1]
plt.imshow(cv.warpPerspective(dst, np.linalg.inv(H), (dst.shape[1], dst.shape[0])))
但这是行不通的,我发现以下图片:
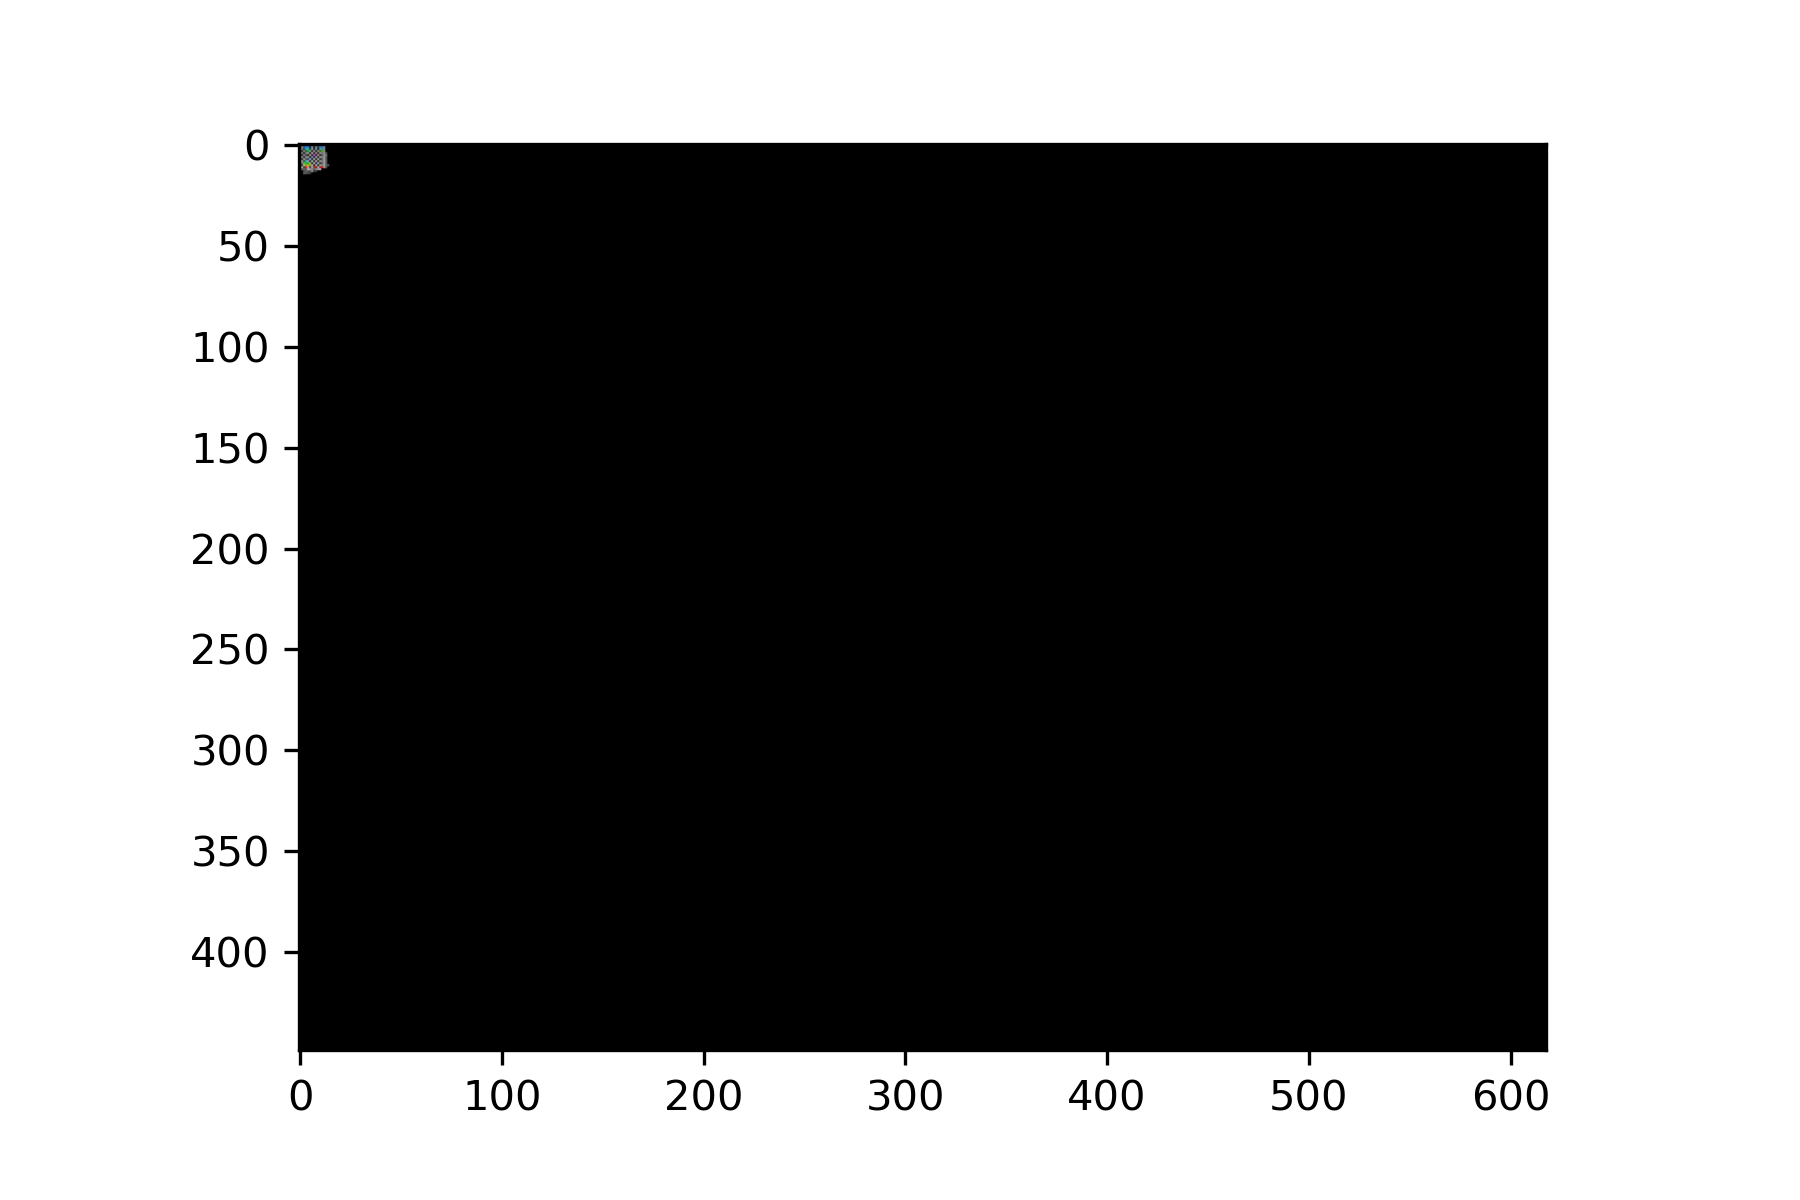
问题出在哪里?
相关问题:
回答 3
Stack Overflow用户
发布于 2022-07-25 10:14:21
最后,我没有用cv.calibrateCamera的输出来实现它,而是做了一些简单的事情,灵感来自@ answer的回答。万一能帮上忙,我就把它贴在这里。
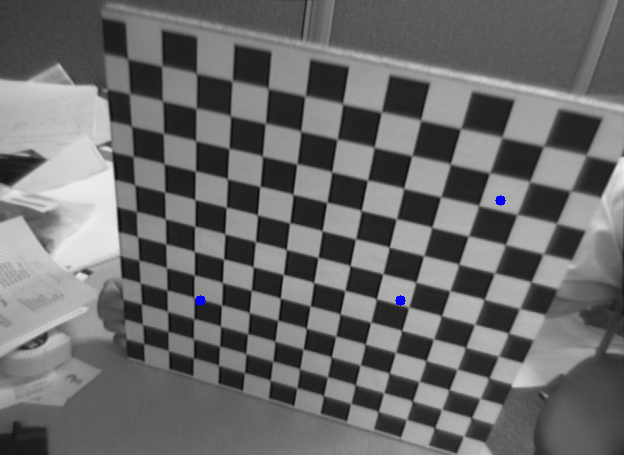
我将图像和图像中的一些数据点转换为棋盘参考框架给出的新坐标,只使用四角点。
输入:
undistorted.png
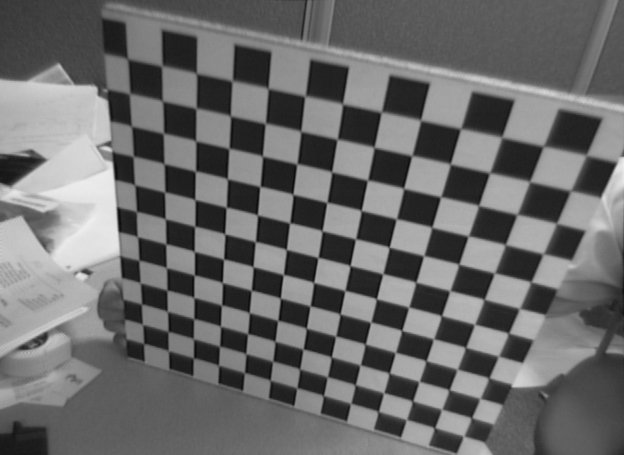
代码:
import numpy as np
import cv2 as cv

image = cv.imread('undistorted.png')

#Paint some points in blue
points = np.array([[200, 300], [400, 300], [500, 200]])
for i in range(len(points)):
    cv.circle(image, tuple(points[i].astype('int64')), radius=0, color=(255, 0, 0), thickness=10)
cv.imwrite('undistorted_withPoints.png', image)

#Put pixels of the chess corners: top left, top right, bottom right, bottom left.
cornerPoints = np.array([[127, 58], [587, 155], [464, 437], [144,344]], dtype='float32')

#Find base of the rectangle given by the chess corners
base = np.linalg.norm(cornerPoints[1] - cornerPoints[0] )

#Height has 11 squares while base has 12 squares.
height = base/12*11

#Define new corner points from base and height of the rectangle
new_cornerPoints = np.array([[0, 0], [int(base), 0], [int(base), int(height)], [0, int(height)]], dtype='float32')

#Calculate matrix to transform the perspective of the image
M = cv.getPerspectiveTransform(cornerPoints, new_cornerPoints)

new_image = cv.warpPerspective(image, M, (int(base), int(height)))

#Function to get data points in the new perspective from points in the image
def calculate_newPoints(points, M):
    new_points = np.einsum('kl, ...l->...k', M,  np.concatenate([points, np.broadcast_to(1, (*points.shape[:-1], 1)) ], axis = -1) )
    return new_points[...,:2] / new_points[...,2][...,None]

new_points = calculate_newPoints(points, M)

#Paint new data points in red
for i in range(len(new_points)):
    cv.circle(new_image, tuple(new_points[i].astype('int64')), radius=0, color=(0, 0, 255), thickness=5)

cv.imwrite('new_undistorted.png', new_image)
输出:
undistorted_withPoints.png
new_undistorted.png
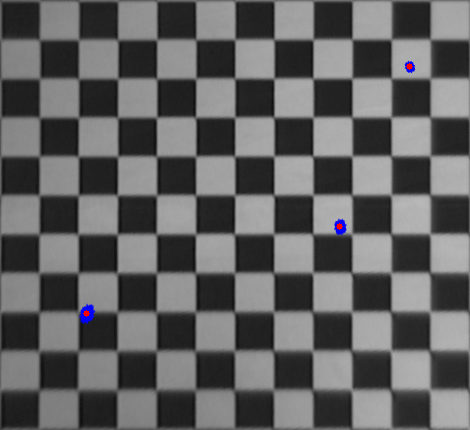
Explanation:
- 我在原始图片中画了一些数据点,我也想要转换。
- 使用另一个程序,我查找国际象棋角的像素(我跳过外层行和列)。
- 我计算由角定义的矩形的高度和基元。
- 我从矩形中定义棋盘坐标中的新角。
- 我计算矩阵M来做透视变换。
- 我根据cv.warpPerspective文档对图像和数据点进行转换

- 我将转换后的数据点绘制为红色。
Stack Overflow用户
发布于 2022-03-11 19:00:21
Stack Overflow用户
发布于 2022-03-16 18:36:41
概念
使用cv2.findChessboardCorners()方法检测棋盘的角。然后,为图像中每个角点的目标点定义一个数组。使用三角形翘曲技术将图像从棋盘角点扭曲到为目标位置定义的数组中的点。
“守则”
import cv2
import numpy as np

def triangles(points):
    points = np.where(points, points, 1)
    subdiv = cv2.Subdiv2D((*points.min(0), *points.max(0)))
    for pt in points:
        subdiv.insert(tuple(map(int, pt)))
    for pts in subdiv.getTriangleList().reshape(-1, 3, 2):
        yield [np.where(np.all(points == pt, 1))[0][0] for pt in pts]

def crop(img, pts):
    x, y, w, h = cv2.boundingRect(pts)
    img_cropped = img[y: y + h, x: x + w]
    pts[:, 0] -= x
    pts[:, 1] -= y
    return img_cropped, pts

def warp(img1, img2, pts1, pts2):
    img2 = img2.copy()
    for indices in triangles(pts1):
        img1_cropped, triangle1 = crop(img1, pts1[indices])
        img2_cropped, triangle2 = crop(img2, pts2[indices])
        transform = cv2.getAffineTransform(np.float32(triangle1), np.float32(triangle2))
        img2_warped = cv2.warpAffine(img1_cropped, transform, img2_cropped.shape[:2][::-1], None, cv2.INTER_LINEAR, cv2.BORDER_REFLECT_101)
        mask = np.zeros_like(img2_cropped)
        cv2.fillConvexPoly(mask, np.int32(triangle2), (1, 1, 1), 16, 0)
        img2_cropped *= 1 - mask
        img2_cropped += img2_warped * mask
    return img2

img = cv2.imread("image.png")
gray = cv2.cvtColor(img, cv2.COLOR_BGR2GRAY)
criteria = (cv2.TERM_CRITERIA_EPS + cv2.TERM_CRITERIA_MAX_ITER, 30, 0.001)
ret, corners = cv2.findChessboardCorners(gray, (12 ,13), None)
corners2 = cv2.cornerSubPix(gray, corners, (11, 11), (-1, -1), criteria)

x, y, w, h, r, c = 15, 40, 38, 38, 12, 13
pts1 = np.int32(corners2.squeeze())
arr2 = np.tile(np.arange(c), r).reshape((r, c))
arr1 = np.tile(np.arange(r), c).reshape((c, r))
arr = np.dstack((arr1[:, ::-1] * h + y, arr2.T * w + x))
pts2 = arr.reshape((r * c, 2))

cv2.imshow("result", warp(img, np.zeros_like(img), pts1, pts2))
cv2.waitKey(0)
输出量
这是输出图像:
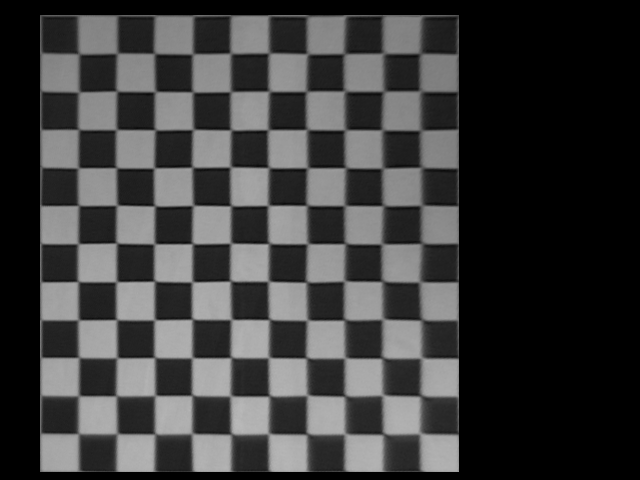
的输入图像:
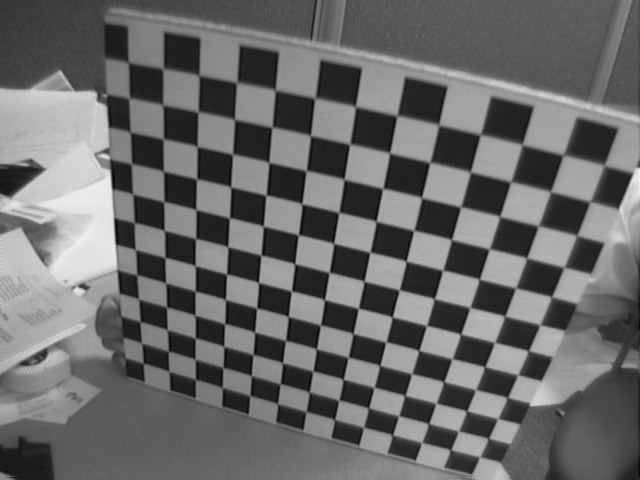
解释
- 导入必要的库:
import cv2
import numpy as np- 定义一个函数
triangles,该函数将接受一个坐标数组、points以及包含原始坐标数组区域的三角形数组的3个索引的生成列表:
def triangles(points):
    points = np.where(points, points, 1)
    subdiv = cv2.Subdiv2D((*points.min(0), *points.max(0)))
    for pt in points:
        subdiv.insert(tuple(map(int, pt)))
    for pts in subdiv.getTriangleList().reshape(-1, 3, 2):
yield [np.where(np.all(points == pt, 1))[0][0] for pt in pts]- 定义一个函数
crop,它将接受图像数组、img和三个坐标的数组pts。它将返回图像的一个矩形段,其大小仅足以与该三个点形成的三角形相适应,并将三个坐标的数组返回到图像的左上角:
def crop(img, pts):
    x, y, w, h = cv2.boundingRect(pts)
    img_cropped = img[y: y + h, x: x + w]
    pts[:, 0] -= x
    pts[:, 1] -= y
return img_cropped, pts- 定义一个函数
warp,它将接受两个图像数组,img1和img2,以及两个坐标数组pts1和pts2。它将使用在迭代第一个坐标数组的三角形之前定义的triangles函数,使用之前定义的crop函数在与三角形索引对应的坐标处裁剪两个图像,并使用cv2.warpAffine()方法在迭代的当前三角形处扭曲图像:
def warp(img1, img2, pts1, pts2):
    img2 = img2.copy()
    for indices in triangles(pts1):
        img1_cropped, triangle1 = crop(img1, pts1[indices])
        img2_cropped, triangle2 = crop(img2, pts2[indices])
        transform = cv2.getAffineTransform(np.float32(triangle1), np.float32(triangle2))
        img2_warped = cv2.warpAffine(img1_cropped, transform, img2_cropped.shape[:2][::-1], None, cv2.INTER_LINEAR, cv2.BORDER_REFLECT_101)
        mask = np.zeros_like(img2_cropped)
        cv2.fillConvexPoly(mask, np.int32(triangle2), (1, 1, 1), 16, 0)
        img2_cropped *= 1 - mask
        img2_cropped += img2_warped * mask
return img2- 读取变形棋盘的图像,将其转换为灰度,并检测棋盘的角:
img = cv2.imread("image.png")
gray = cv2.cvtColor(img, cv2.COLOR_BGR2GRAY)
criteria = (cv2.TERM_CRITERIA_EPS + cv2.TERM_CRITERIA_MAX_ITER, 30, 0.001)
ret, corners = cv2.findChessboardCorners(gray, (12 ,13), None)
corners2 = cv2.cornerSubPix(gray, corners, (11, 11), (-1, -1), criteria)- 为检测到的每个角定义目标点数组。如果将每个角与数组中的相应索引一起绘制,您将看到它们是按照以下顺序排列的:
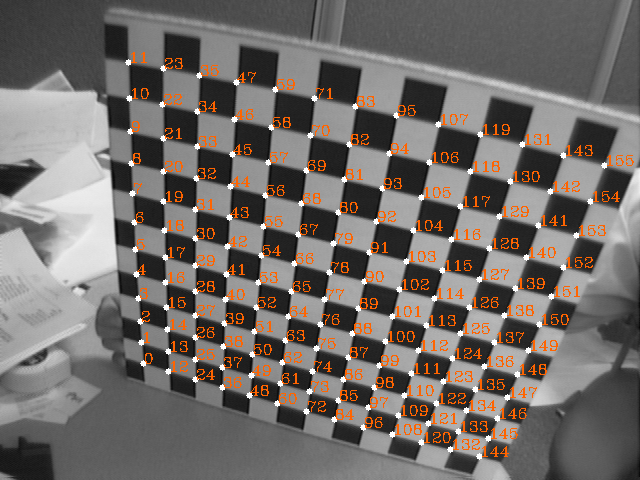
因此,我们的目标数组必须按照这个顺序排列,否则我们将得到不可读的结果。下面的x, y, w, h, r, c将是坐标的目标数组,即坐标的左上角x, y位置、每个方格的宽度和高度以及板中点数的行数和列数:
x, y, w, h, r, c = 15, 40, 38, 38, 12, 13
pts1 = np.int32(corners2.squeeze())
arr2 = np.tile(np.arange(c), r).reshape((r, c))
arr1 = np.tile(np.arange(r), c).reshape((c, r))
arr = np.dstack((arr1[:, ::-1] * h + y, arr2.T * w + x))
pts2 = arr.reshape((r * c, 2))- 最后,在空白图像上显示图像的扭曲部分:
cv2.imshow("result", warp(img, np.zeros_like(img), pts1, pts2))
cv2.waitKey(0)https://stackoverflow.com/questions/71443095
复制相似问题

