
用jimp着色图像
我使用jimp对文件夹中的png图像进行着色,但我得到的错误是:w和h必须是数字(第42行-- image.color函数)。这看起来应该是一个简单的操作,但我找到的解决方案非常复杂。看起来,jimp是最好的选择,但很明显,它有一些我不熟悉的怪癖。
const { jimpEvChange } = require('@jimp/core');
const { write } = require('jimp');
const { composite } = require('jimp');
const jimp = require('jimp');
var fs = require('fs');

// create an array of 6 colors and specify the colors
const colors = [
    ['green'],
    ['red'],
    ['blue'],
    ['yellow'],
    ['purple'],
    ['orange']
];

// call functions to colorize the images
var pngFiles = GetPNGs("ToColor/");
for (var i = 0; i < pngFiles.length; i++) {
    var image = new jimp(pngFiles[i]);
    Colorize(image, colors[i]);
    image.write(pngFiles[i]);
}


// get pngs from a folder "ToColor" and colorize them each using the colors array
function GetPNGs (folder) {
    var pngFiles = [];
    const newLocal = fs.readdirSync(folder);
    var files = newLocal;
    for (var i = 0; i < files.length; i++) {
        var file = files[i];
        if (file.split(".").pop() == "png") {
            pngFiles.push(folder + "/" + file);
        }
    }
    return pngFiles;
}

// colorize the images
function Colorize (image, color) {
    image.color([
        { apply: 'red', params: [color[0]] },
        { apply: 'green', params: [color[0]] },
        { apply: 'blue', params: [color[0]] }
    ]);
}

// loop through the images and colorize them
function ColorizeImages (pngs, colors) {
    for (var i = 0; i < pngs.length; i++) {
        var image = new jimp(pngs[i]);
        Colorize(image, colors[i]);
        image.write(pngs[i]);
    }
}
任何提示都将不胜感激。谢谢詹姆斯。
回答 1
Stack Overflow用户
发布于 2022-06-17 13:25:20
好吧,我试了一下,然后给出了一个例子:
请注意,这段代码需要位于一个扩展名为.mjs的文件中,因为我们使用的是import语句而不是require。您可以使用.mjs文件与普通.js文件完全相同的方式运行node index.mjs文件。如果您确实希望使用requires,请将导入更改为requires,并将文件命名为.js扩展名。
import jimp from "jimp";
import fs from "fs";

// I wanted to make this example to use async/await properly with Jimp
// So that's why we are using util.promisify to convert fs.readdir
// into a function named readDir, which we can await on
import util from "util";
const readDir = util.promisify(fs.readdir);

// Colors for mix operations
const colors = [
    {r: 0, g: 255, b: 154, a: 1},
    {r: 255, g: 40, b: 108, a: 1},
    {r: 26, g: 172, b: 255, a: 1},
    {r: 255, g: 190, b: 171, a: 1},
    {r: 255, g: 239, b: 117, a: 1},
    {r: 137, g: 91, b: 255, a: 1}
];

// Colorsnames for output file naming, these correspond to colors array
const colorNames = ['green', 'red', 'blue', 'orange', 'yellow', 'purple'];

// Define which color operations we want to do, using mix as an example
// https://www.npmjs.com/package/jimp#colour-manipulation
const operations = colors.map((c) => {
    return { apply: "mix", params: [c, 60 ]};
});

// Input and output folder names
const inputFolderName = "./ToColor";
const outputolderName = "./out";
const outputFileSuffix = "edited"; // Optional suffix for the output files

// We're using async/await, so must wrap top level code like this
// https://stackoverflow.com/questions/46515764/how-can-i-use-async-await-at-the-top-level
(async () => {

    // Get filenames of the png files in the specified folder
    let pngFileNames = await readDir(inputFolderName);

    // Optional filtering of only .png files
    pngFileNames = pngFileNames.filter((f) => f.includes(".png"));

    // Go through each file
    // Must use for...of loop here, because we have awaits inside the loop
    let i = 0;
    for (let fileName of pngFileNames) {

        // Optional output file name suffixing
        const outPutFileName = outputFileSuffix.length > 0 ? fileName.split('.').reduce((a, b) => `${a}_${outputFileSuffix}.${b}`) : fileName;

        // Make an actual Jimp image object from the file
        const jimpImage = await jimp.read(`${inputFolderName}/${fileName}`);

        // Make one new image per operation, so in total, we output colors.length * pngFileNames.length images
        let j = 0;
        for(let colorOperation of operations) {
            // Apply operation
            jimpImage.color([colorOperation]);

            // Write the edited image to out folder
            await jimpImage.writeAsync(`${outputolderName}/${colorNames[j]}_${outPutFileName}`);
            j++;
        }

        i++;
    }

})();
你的代码有很多问题。在读取实际图像方面存在一些问题,还有许多关于使用Jimp库的问题,但除非您希望我这样做,否则我不会全部查看它们。
你说得对,关于那些短篇文件,这是.太可怕了。特别是当你是JavaScript的新手的时候。
您最大的问题可能是如何尝试创建新的Jimp图像对象。文献资料说,使用new Jimp(...)是为了创建新的映像,这意味着如果您一开始没有图像,就会使用它。
但是,当您已经在某个文件夹中有您的图像并希望加载到使用Jimp进行编辑时,您需要使用jimp.read(...)。jimp.read是一个异步函数,这意味着即使图像尚未被读取,您的其余代码也将继续运行。出于这个原因,我们需要使用await jimp.read,您可以认为它就像“暂停”程序直到jimp.read实际读取了图像为止。
在图像被读取并且图像对象位于一个名为jimpImage的变量中之后,我们使用预定义的operations数组调用jimpImage.color(),在本例中我们使用的是mix。这个函数不是异步的,所以我们不需要await它。
最后,在对图像应用着色操作之后,使用writeAsync将图像保存到具有相同名称(和可选后缀)的指定输出文件夹中。这是一个异步函数,顾名思义,所以我们必须await它。
程序运行完毕后,可以在指定的输出文件夹中找到修改过的图像。
还请注意,Jimp将一些文档(特别是有关“颜色内容”的文档)委托给TinyColor Github页面,因为Jimp在遮罩下为某些与颜色相关的实用程序使用TinyColor。因此,如果您想知道是否可以使用“红色”而不是“# of 0000”,那么TinyColor文档就有了答案。
关于error: w and h must be numbers-error,最有可能的原因是您用var image = new jimp(pngFiles[i]);初始化了Jimp错误的图像。就像我说的,这是为了从头创建新的图像,我再次引用文献资料,它说如果您使用这个语法来创建新的图像,那么它是这样使用的(前两个参数是code和height,这两个参数在您的代码中没有给出):
new Jimp(256, 256, (err, image) => {
  // this image is 256 x 256, every pixel is set to 0x00000000
});
我给出了一个简单的示例,说明如何读取图像,对其应用一些操作,并将修改后的图像写回某个文件夹。剩下的就交给你了!
如果你有什么问题的话就问吧,我现在是个下流高手了。
下面是我使用的测试图像:

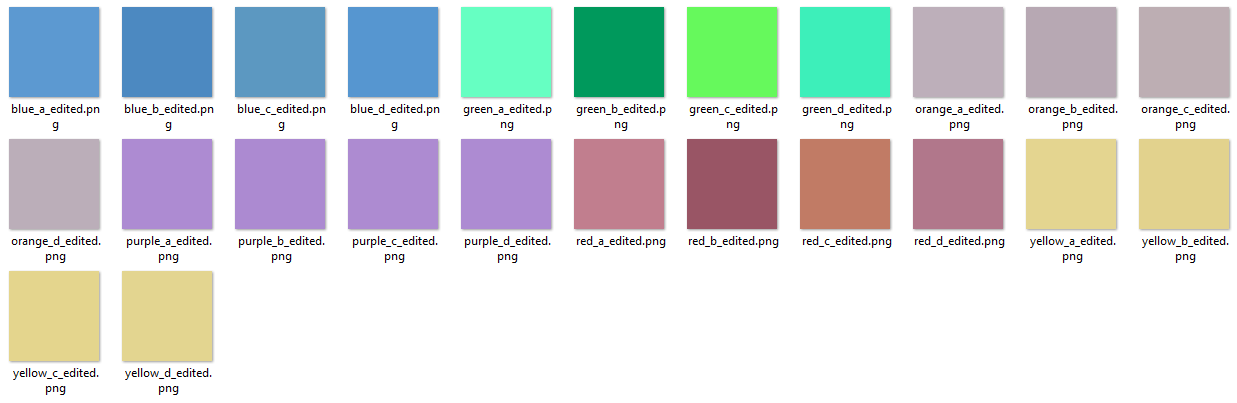
这就是程序输出的内容(记住,数量只有60,我们的基本图像有很强的颜色):
https://stackoverflow.com/questions/72614669
复制相似问题
腾讯云开发者
