
在资源服务器中获取用户信息
我已经配置了资源服务器,它根据auth服务器验证JWT令牌。在下面的代码中,您可以看到我的配置,它定义了issuer-uri (是来自Auth0的URI )。如果用户是通过Auth0在我的公共客户端上进行身份验证的,这个客户机将从Auth0接收JWT令牌。当我用令牌头调用资源服务器时,用户是被授权的,资源是可用的,但是SecurityContextHolder只包含从JWT解析的基本数据,而不包含关于用户的全部信息。我有可用的userinfo端点从Auth0提供用户名,图片,电子邮件等。
我的问题是,如果我可以在我的资源服务器中设置这个用户信息端点,可以自动获取这些信息,或者最好的方法是什么?我想要这些信息在SecurityContextHolder或至少用户的电子邮件和用户名。
@Bean
fun filterChain(http: HttpSecurity): SecurityFilterChain {
    http.authorizeRequests().anyRequest().permitAll()
        .and()
        .oauth2ResourceServer().jwt();
    return http.build()
}
和JWT译码器bean
@Bean
fun jwtDecoder(): JwtDecoder? {
    val jwtDecoder = JwtDecoders.fromOidcIssuerLocation<JwtDecoder>(issuer) as NimbusJwtDecoder
    val audienceValidator: OAuth2TokenValidator<Jwt> = AudienceValidator(audience)
    val withIssuer = JwtValidators.createDefaultWithIssuer(issuer)
    val withAudience: OAuth2TokenValidator<Jwt> = DelegatingOAuth2TokenValidator(withIssuer, audienceValidator)
    jwtDecoder.setJwtValidator(withAudience)
    return jwtDecoder
}文件application.properties
spring.security.oauth2.resourceserver.jwt.issuer-uri=my-domain.com
spring.security.oauth2.resourceserver.jwt.audience=my-audience
编辑这是从Auth0收到的JWT的有效负载
{
  "iss": "https://dev-abcdefgh.us.auth0.com/",
  "sub": "google-oauth2|353335637216442227159",
  "aud": [
    "my-audience",
    "https://dev-3ag8q43b.us.auth0.com/userinfo"
  ],
  "iat": 1663100248,
  "exp": 1663186648,
  "azp": "m01yBdKdQd5erBxriQde24ogfsdAsYvD",
  "scope": "openid profile email"
}回答 3
Stack Overflow用户
发布于 2022-09-24 16:38:01
在资源服务器上构建请求安全上下文时,不要调用用户终结点。
Auth0可以发出JWT访问令牌,并且JWT可以在资源服务器上解码/验证,而无需往返到授权服务器。
为每个资源服务器传入请求引入对授权服务器用户信息端点的调用将降低延迟(和效率)。
不要使用ID令牌作为访问令牌。
我是最坏的做法。授权-服务器为不同的用途发送不同类型的令牌:
- 访问令牌:被定位到资源服务器。这应该是非常短暂的(分钟),因此如果泄漏或撤销,后果是limited.Clients应
- 只需将其用作发送到右边的请求中的
BearerAuthorization标头即可。在不同受众的情况下,客户端必须维护不同的访问令牌(例如,一个用于“您的”API,另一个用于Google、Facebook或其他直接使用的API )。 - 不尝试解码访问令牌,它是授权服务器和资源服务器之间的契约,它们可以在任何时候决定更改格式(如果客户机希望“理解”该令牌,则破坏该格式)。
- 只需将其用作发送到右边的请求中的
- ID令牌:被定位到客户端。这种令牌的目的是通信经签名的用户数据。由于它通常寿命很长,如果用于访问控制,泄漏的后果可能是一个真正的问题。阅读前面链接的文章,有更多的原因,为什么不将其用于访问控制。
- 刷新令牌:使用时间长,只供客户端使用,并仅发送到授权服务器。授权-服务器应该小心地控制令牌的来源,刷新请求,客户端要非常小心地将这些令牌发送给谁(泄漏的后果可能是巨大的)。
将用户信息添加到访问令牌中。
在Auth0管理控制台中,转到Auth Pipeline -> Rules并单击Create添加如下规则:
function addEmailToAccessToken(user, context, callback) {
  context.accessToken['https://stackoverflow.com/user'] = user;
  return callback(null, user, context);
}等等!您现在在access中有了一个https://stackoverflow.com/user私有索赔。你可以(应该吗?)缩小到资源服务器中实际需要的用户属性 (例如,在@PreAuthorize表达式中访问的内容)。
使用JWT解码器配置资源服务器
既然用户数据以私有声明的形式出现在JWT访问令牌中,那么您在资源服务器上所要做的就是读取这个私有声明。使用JWT解码器的资源服务器的JwtAuthenticationToken -安全默认Authentication实现公开了所有的访问令牌声明.
通过不同的方式(安全表达式和内部@Controller方法)使用上述私有索赔的示例:
@SpringBootApplication
public class Auth0DemoApplication {

    public static void main(String[] args) {
        SpringApplication.run(Auth0DemoApplication.class, args);
    }

    @RestController
    @RequestMapping("/access-token-user-info")
    @PreAuthorize("isAuthenticated()")
    public static class DemoController {

        @GetMapping("/{nickname}")
        @PreAuthorize("#nickname eq authentication.tokenAttributes['https://stackoverflow.com/user']['nickname']")
        public Map<String, Object> getGreeting(@PathVariable String nickname, JwtAuthenticationToken auth) {
            return auth.getToken().getClaimAsMap("https://stackoverflow.com/user");
        }
    }

    @EnableWebSecurity
    @EnableGlobalMethodSecurity(prePostEnabled = true)
    public static class SecurityConf {
        @Bean
        public SecurityFilterChain filterChain(HttpSecurity http) throws Exception {

            http.oauth2ResourceServer().jwt();

            // Enable and configure CORS
            http.cors().configurationSource(corsConfigurationSource());

            // State-less session (state in access-token only)
            http.sessionManagement().sessionCreationPolicy(SessionCreationPolicy.STATELESS);

            // Disable CSRF because of state-less session-management
            http.csrf().disable();

            // Return 401 (unauthorized) instead of 403 (redirect to login) when authorization is missing or invalid
            http.exceptionHandling().authenticationEntryPoint((request, response, authException) -> {
                response.addHeader(HttpHeaders.WWW_AUTHENTICATE, "Basic realm=\"Restricted Content\"");
                response.sendError(HttpStatus.UNAUTHORIZED.value(), HttpStatus.UNAUTHORIZED.getReasonPhrase());
            });

            return http.build();
        }

        private CorsConfigurationSource corsConfigurationSource() {
            // Very permissive CORS config...
            final var configuration = new CorsConfiguration();
            configuration.setAllowedOrigins(Arrays.asList("*"));
            configuration.setAllowedMethods(Arrays.asList("*"));
            configuration.setAllowedHeaders(Arrays.asList("*"));
            configuration.setExposedHeaders(Arrays.asList("*"));

            // Limited to API routes (neither actuator nor Swagger-UI)
            final var source = new UrlBasedCorsConfigurationSource();
            source.registerCorsConfiguration("/access-token-user-info/**", configuration);

            return source;
        }
    }
}
只有这个属性:
spring.security.oauth2.resourceserver.jwt.issuer-uri=https://dev-ch4mpy.eu.auth0.com/还有那个波姆
<?xml version="1.0" encoding="UTF-8"?>
<project xmlns="http://maven.apache.org/POM/4.0.0" xmlns:xsi="http://www.w3.org/2001/XMLSchema-instance"
    xsi:schemaLocation="http://maven.apache.org/POM/4.0.0 https://maven.apache.org/xsd/maven-4.0.0.xsd">
    <modelVersion>4.0.0</modelVersion>
    <parent>
        <groupId>org.springframework.boot</groupId>
        <artifactId>spring-boot-starter-parent</artifactId>
        <version>2.7.4</version>
        <relativePath/> <!-- lookup parent from repository -->
    </parent>
    <groupId>com.c4soft</groupId>
    <artifactId>auth0-demo</artifactId>
    <version>0.0.1-SNAPSHOT</version>
    <name>auth0-demo</name>
    <description>Demo project for Spring Boot and Auth0 with user-data in access-token</description>
    <properties>
        <java.version>17</java.version>
    </properties>
    <dependencies>
        <dependency>
            <groupId>org.springframework.boot</groupId>
            <artifactId>spring-boot-starter-oauth2-resource-server</artifactId>
        </dependency>
        <dependency>
            <groupId>org.springframework.boot</groupId>
            <artifactId>spring-boot-starter-web</artifactId>
        </dependency>
    </dependencies>
</project>现在,使用Postman调用http://localhost:8080/access-token-user-info/ch4mp的输出(以及ch4mp的访问令牌):
{
    "clientID": "...",
    "email_verified": true,
    "roles": [
        "PLAYER"
    ],
    "created_at": "2021-08-16T21:03:02.086Z",
    "picture": "https://s.gravatar.com/avatar/....png",
    "global_client_id": "...",
    "identities": [
        {
            "isSocial": false,
            "provider": "auth0",
            "user_id": "...",
            "connection": "Username-Password-Authentication"
        }
    ],
    "updated_at": "2022-09-26T20:53:08.957Z",
    "user_id": "auth0|...",
    "permissions": [
        "solutions:manage"
    ],
    "name": "ch4mp@c4-soft.com",
    "nickname": "ch4mp",
    "_id": "...",
    "persistent": {},
    "email": "ch4mp@c4-soft.com",
    "last_password_reset": "2022-09-24T16:39:00.152Z"
}我再次提醒您,通过这个前3期(很短)教程,您会发现一些有用的提示,可以最大限度地利用刚才添加到access-tokens中的这个私有声明。
Stack Overflow用户
发布于 2022-09-15 02:33:53
我想要这些信息在SecurityContextHolder或至少用户的电子邮件和用户名。
您看到jwt令牌中的内容了吗?您在身份验证过程中添加了openid作用域吗?如果是这样的话,在您的auth服务器响应json主体中应该有一个IdToken,在IdToken jwt令牌中,有关于用户数据的各种信息,比如用户名和电子邮件。还可以通过向jwt令牌添加自定义声明来添加其他用户属性,在添加这些声明之后,您可以尝试通过SecurityContextHolder访问它。
Stack Overflow用户
发布于 2022-09-24 07:13:59
你必须做一些小小的改变才能让它发挥作用。
我会一步一步解释:
我已经创建了一个帐户,并在门户中注册了一个名为的常规web应用程序。
现在,我借助Auth0 client和Resource 通过Auth0提供的资源链接来安装Spring应用程序,这些链接如下所示。
现在,我将通过用例来解释。
我已经创建了一个Auth0 spring引导客户机(单独的项目)。
application.properties:
server:
  port: 3000
spring:
  security:
    oauth2:
      client:
        registration:
          auth0:
            client-id: <<id>>
            client-secret: <<secret>>
            scope:
              - openid
              - profile
              - email
        provider:
          auth0:
issuer-uri: https://<<name>>.us.auth0.com/注意:您可以从应用程序->中找到客户端id、客户端机密和颁发者uri ->,打开应用程序->设置.
现在,我需要提取包含用户信息的ID令牌,因此我创建了一个示例控制器,并使用OidcUser获取该令牌:
@RestController
public class Resource {

    @GetMapping("/token")
    public void profile(@AuthenticationPrincipal OidcUser oidcUser) {
        System.out.println(oidcUser.getIdToken().getTokenValue());
    }
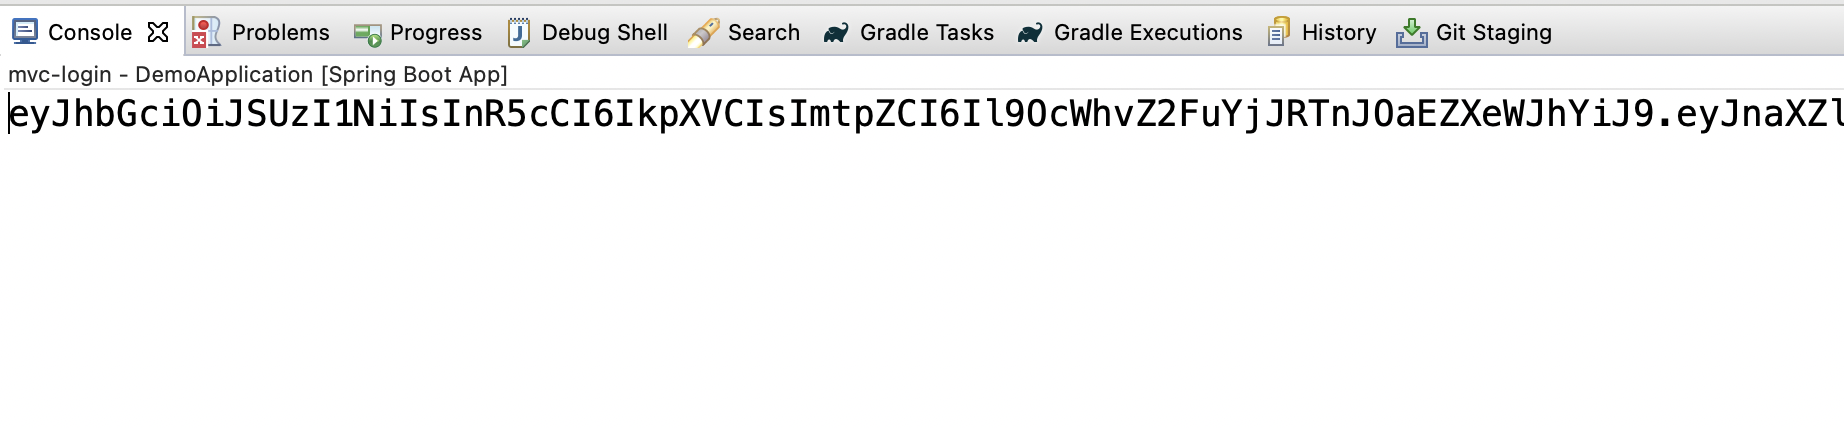
}一旦我运行服务器并将请求发送到/token,它将首先重定向到Auth0登录页面。我已经使用我的谷歌帐户登录和成功登录后,它打印ID JWT令牌。
注意:这个客户端项目只是展示我是如何获得ID令牌的。不要混淆资源服务器也是一个客户端。
现在,在资源服务器上,我创建了一个资源服务器Spring (单独的项目)。
application.properties:
server:
  port: 3010
auth0:
  audience: https://<<name>>.auth0.com/api/v2/
spring:
  security:
    oauth2:
      resourceserver:
        jwt:
          issuer-uri: https://<<name>>.us.auth0.com/
          audiences:
          - https://<<name>>.us.auth0.com/api/v2/
SecurityConfig (您不需要添加任何额外的验证器,即删除AudienceValidator):
@EnableWebSecurity
public class SecurityConfig {

    @Value("${spring.security.oauth2.resourceserver.jwt.issuer-uri}")
    private String issuer;

    @Bean
    public SecurityFilterChain filterChain(HttpSecurity http) throws Exception {
        http.authorizeRequests().anyRequest().permitAll().and().oauth2ResourceServer().jwt(jwt -> jwtDecoder());
        return http.build();
    }

    @Bean
    public JwtDecoder jwtDecoder() {
        NimbusJwtDecoder jwtDecoder = (NimbusJwtDecoder) JwtDecoders.fromOidcIssuerLocation(issuer);
        OAuth2TokenValidator<Jwt> withIssuer = JwtValidators.createDefaultWithIssuer(issuer);
        jwtDecoder.setJwtValidator(withIssuer);
        return jwtDecoder;
    }
}
演示我的案例的示例控制器:
@RestController
public class ProfileController {
@GetMapping("/profile")
public void profile() {
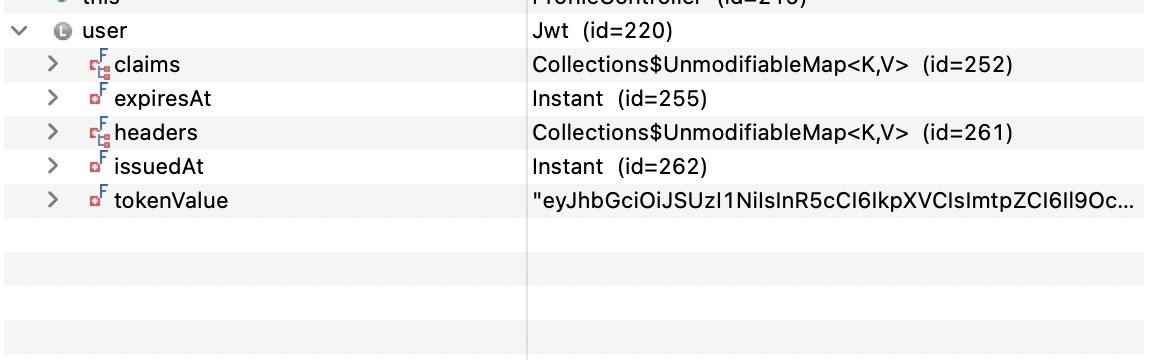
Jwt user = (Jwt) SecurityContextHolder.getContext().getAuthentication().getPrincipal();
System.out.println(user.getClaimAsString("email") + " " + user.getClaimAsString("name"));
}
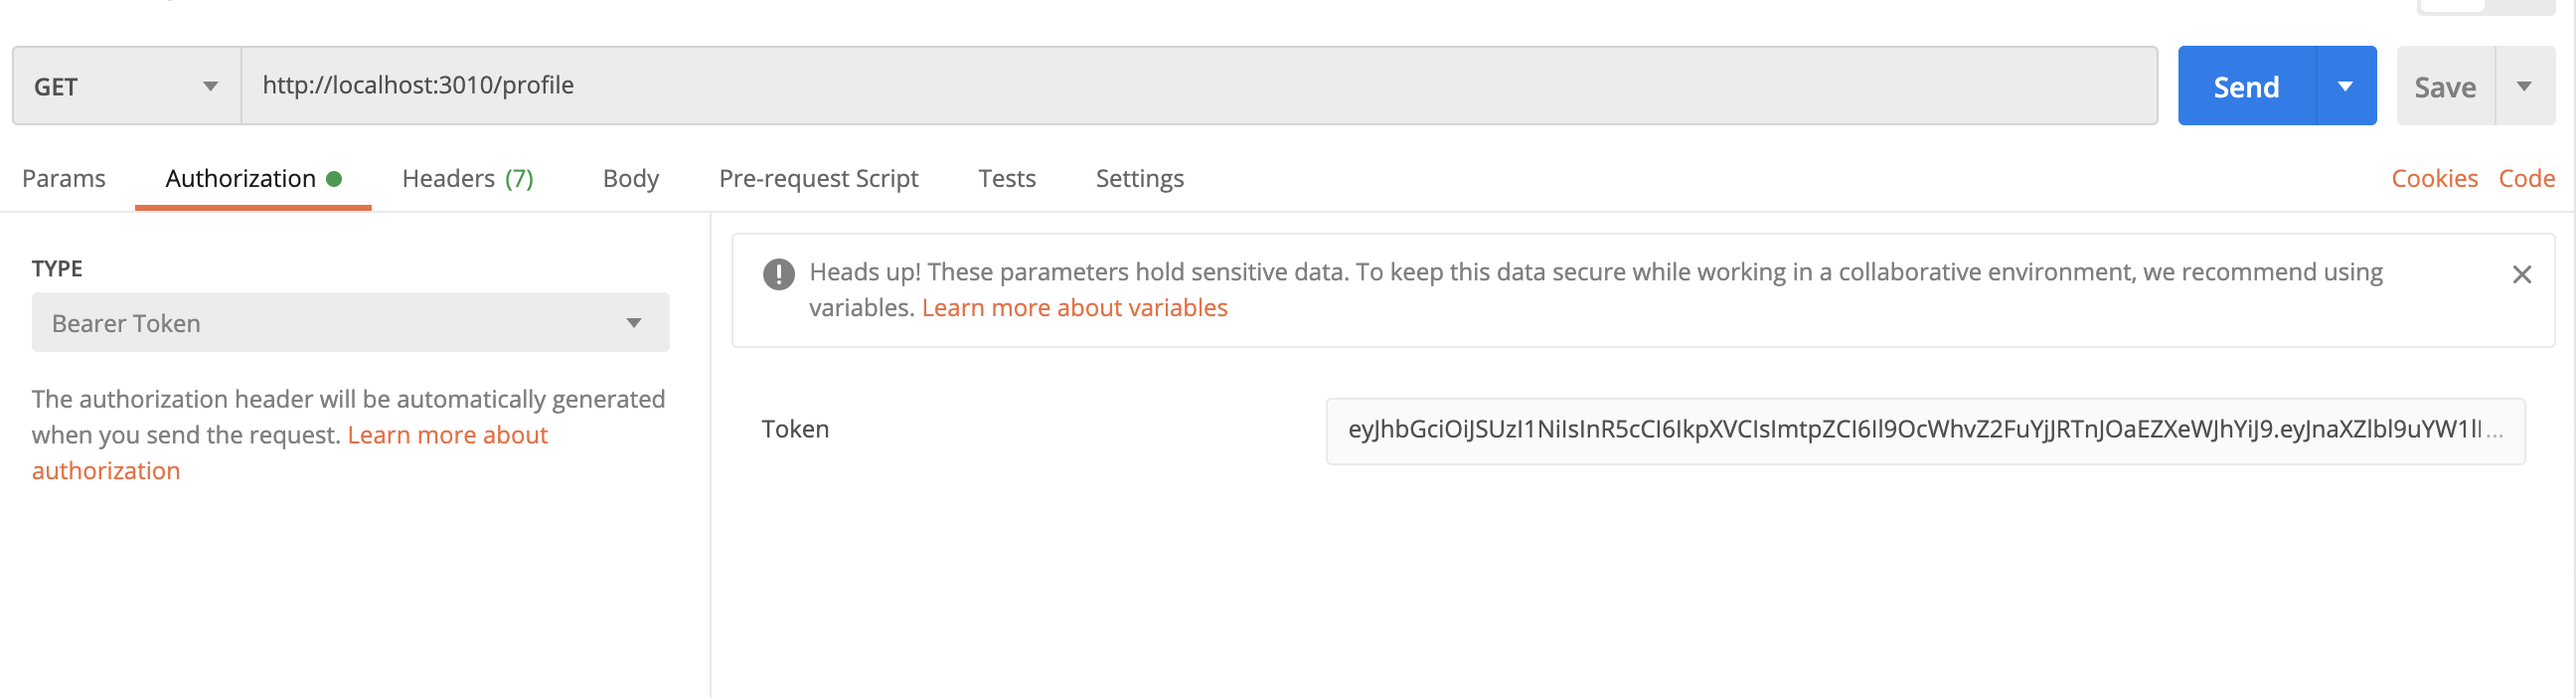
}一旦我运行了服务器,就可以使用/profile作为ID令牌来访问uri ,如下所示:
Security会自动使用这个Jwt,并在这个Jwt对象上设置Principal,您可以通过SecurityContextHolder提取它。
注意:在索赔图中,你有你所有的用户信息。
产出:

注意: ID令牌在任何情况下都不安全。它只能在您希望显示/获取用户配置文件数据的情况下使用,但是对于所有其他用例,应该避免使用它。
https://stackoverflow.com/questions/73722060
复制相似问题
腾讯云开发者
