
Tensorflow 2.0中带导向支撑的Gradcam的传递学习
在TF-2.0中,我使用梯度可视化和传递学习得到了一个错误。梯度可视化在不使用迁移学习的模型上工作。
当我运行我的代码时,我会得到错误:
    assert str(id(x)) in tensor_dict, 'Could not compute output ' + str(x)
AssertionError: Could not compute output Tensor("block5_conv3/Identity:0", shape=(None, 14, 14, 512), dtype=float32)
当我运行下面的代码时,会出错。我认为命名约定或将输入和输出从基本模型vgg16连接到我要添加的层有一个问题。真的很感谢你的帮助!
"""
Broken example when grad_model is created.
"""
!pip uninstall tensorflow
!pip install tensorflow==2.0.0
import cv2
import numpy as np
import tensorflow as tf
from tensorflow.keras import layers
import matplotlib.pyplot as plt

IMAGE_PATH = '/content/cat.3.jpg'
LAYER_NAME = 'block5_conv3'
model_layer = 'vgg16'
CAT_CLASS_INDEX = 281

imsize = (224,224,3)

img = tf.keras.preprocessing.image.load_img(IMAGE_PATH, target_size=(224, 224))
plt.figure()
plt.imshow(img)
img = tf.io.read_file(IMAGE_PATH)
img = tf.image.decode_jpeg(img)
img = tf.cast(img, dtype=tf.float32)
# img = tf.keras.preprocessing.image.img_to_array(img)
img = tf.image.resize(img, (224,224))
img = tf.reshape(img, (1, 224,224,3))

input = layers.Input(shape=(imsize[0], imsize[1], imsize[2]))
base_model = tf.keras.applications.VGG16(include_top=False, weights='imagenet',
                                          input_shape=(imsize[0], imsize[1], imsize[2]))
# base_model.trainable = False
flat = layers.Flatten()
dropped = layers.Dropout(0.5)
global_average_layer = tf.keras.layers.GlobalAveragePooling2D()

fc1 = layers.Dense(16, activation='relu', name='dense_1')
fc2 = layers.Dense(16, activation='relu', name='dense_2')
fc3 = layers.Dense(128, activation='relu', name='dense_3')
prediction = layers.Dense(2, activation='softmax', name='output')
for layr in base_model.layers:
    if ('block5' in layr.name):

        layr.trainable = True
    else:
        layr.trainable = False

x = base_model(input)
x = global_average_layer(x)
x = fc1(x)
x = fc2(x)
x = prediction(x)

model = tf.keras.models.Model(inputs = input, outputs = x)
model.compile(optimizer=tf.keras.optimizers.Adam(learning_rate=1e-4),
                  loss='binary_crossentropy',
                  metrics=['accuracy'])
代码的这一部分是错误所在。我不知道什么是正确的方式来标记输入和输出。
# Create a graph that outputs target convolution and output
grad_model = tf.keras.models.Model(inputs = [model.input, model.get_layer(model_layer).input],
                                   outputs=[model.get_layer(model_layer).get_layer(LAYER_NAME).output,
                                            model.output])

print(model.get_layer(model_layer).get_layer(LAYER_NAME).output)
# Get the score for target class

# Get the score for target class
with tf.GradientTape() as tape:
    conv_outputs, predictions = grad_model(img)
    loss = predictions[:, 1]
下面的部分是绘制梯度凸轮的热图。
print('Prediction shape:', predictions.get_shape())
# Extract filters and gradients
output = conv_outputs[0]
grads = tape.gradient(loss, conv_outputs)[0]
# Apply guided backpropagation
gate_f = tf.cast(output > 0, 'float32')
gate_r = tf.cast(grads > 0, 'float32')
guided_grads = gate_f * gate_r * grads
# Average gradients spatially
weights = tf.reduce_mean(guided_grads, axis=(0, 1))
# Build a ponderated map of filters according to gradients importance
cam = np.ones(output.shape[0:2], dtype=np.float32)
for index, w in enumerate(weights):
cam += w * output[:, :, index]
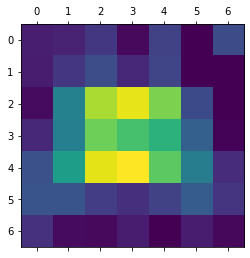
# Heatmap visualization
cam = cv2.resize(cam.numpy(), (224, 224))
cam = np.maximum(cam, 0)
heatmap = (cam - cam.min()) / (cam.max() - cam.min())
cam = cv2.applyColorMap(np.uint8(255 * heatmap), cv2.COLORMAP_JET)
output_image = cv2.addWeighted(cv2.cvtColor(img.astype('uint8'), cv2.COLOR_RGB2BGR), 0.5, cam, 1, 0)
plt.figure()
plt.imshow(output_image)
plt.show()我还向https://github.com/tensorflow/tensorflow/issues/37680的github上的tensorflow团队询问了这个问题。
回答 3
Stack Overflow用户
发布于 2020-04-13 21:10:50
我想通了。如果您设置了用自己的层扩展vgg16基本模型的模型,而不是像层一样将基本模型插入到新模型中,那么它就能工作了。首先建立模型并确保声明input_tensor。
inp = layers.Input(shape=(imsize[0], imsize[1], imsize[2]))
base_model = tf.keras.applications.VGG16(include_top=False, weights='imagenet', input_tensor=inp,
input_shape=(imsize[0], imsize[1], imsize[2]))这样,我们就不需要包括像x=base_model(inp)这样的行来显示我们想要输入的输入。这已经包含在tf.keras.applications.VGG16(...)中了。
不将这个vgg16基模型放入另一个模型中,通过向基本模型本身添加层来实现梯度凸轮就更容易了。我获取VGG16的最后一层的输出(顶部被移除),这是池层。
block5_pool = base_model.get_layer('block5_pool')
x = global_average_layer(block5_pool.output)
x = fc1(x)
x = prediction(x)

model = tf.keras.models.Model(inputs = inp, outputs = x)
model.compile(optimizer=tf.keras.optimizers.Adam(learning_rate=1e-4),
                  loss='binary_crossentropy',
metrics=['accuracy'])现在,我抓住这一层进行可视化,LAYER_NAME='block5_conv3'。
# Create a graph that outputs target convolution and output
grad_model = tf.keras.models.Model(inputs = [model.input],
                                   outputs=[model.output, model.get_layer(LAYER_NAME).output])

print(model.get_layer(LAYER_NAME).output)
# Get the score for target class

# Get the score for target class
with tf.GradientTape() as tape:
    predictions, conv_outputs = grad_model(img)
    loss = predictions[:, 1]
print('Prediction shape:', predictions.get_shape())
# Extract filters and gradients
output = conv_outputs[0]
grads = tape.gradient(loss, conv_outputs)[0]Stack Overflow用户
发布于 2020-04-29 21:49:45
我们(加上一些开发项目的团队成员)在实现Grad的代码中发现了类似的问题,这是我们在教程中发现的。
该代码不适用于由VGG19的基本模型加上在其之上添加的几个额外层组成的模型。问题是VGG19基模型是作为一个“层”插入到我们的模型中,而且显然GradCAM代码不知道如何处理它--我们得到了一个“图断开连接.”错误。然后,经过一些调试(由另一个团队成员执行,而不是由我执行),我们成功地修改了原始代码,使其工作在包含另一个模型的这种模型中。其思想是添加内部模型作为类GradCAM的额外参数。由于这可能对其他人有帮助,所以我在下面包括修改过的代码(我们还将GradCAM类重命名为My_GradCAM)。
class My_GradCAM:
    def __init__(self, model, classIdx, inner_model=None, layerName=None):
        self.model = model
        self.classIdx = classIdx
        self.inner_model = inner_model
        if self.inner_model == None:
            self.inner_model = model
        self.layerName = layerName
..。
        gradModel = tensorflow.keras.models.Model(inputs=[self.inner_model.inputs],
                  outputs=[self.inner_model.get_layer(self.layerName).output,
                  self.inner_model.output])
然后,可以通过添加内部模型作为额外的参数来实例化类,例如:
cam = My_GradCAM(model, None, inner_model=model.get_layer("vgg19"), layerName="block5_pool")我希望这能帮到你。
编辑:信任米尔莎·卢卡斯进行调试并找到解决方案。
Stack Overflow用户
发布于 2021-05-23 15:56:13
经过很大的努力,当你使用传递学习的时候,我简化了绘制热量图的方法。这是角星官方教程
我遇到的问题是,当我试图从我的模型中绘制热量图时,密度层只能被看作是我的模型中的功能层。因此,make_gradcam_heatmap无法确定功能层内部的层。如第五层所示。
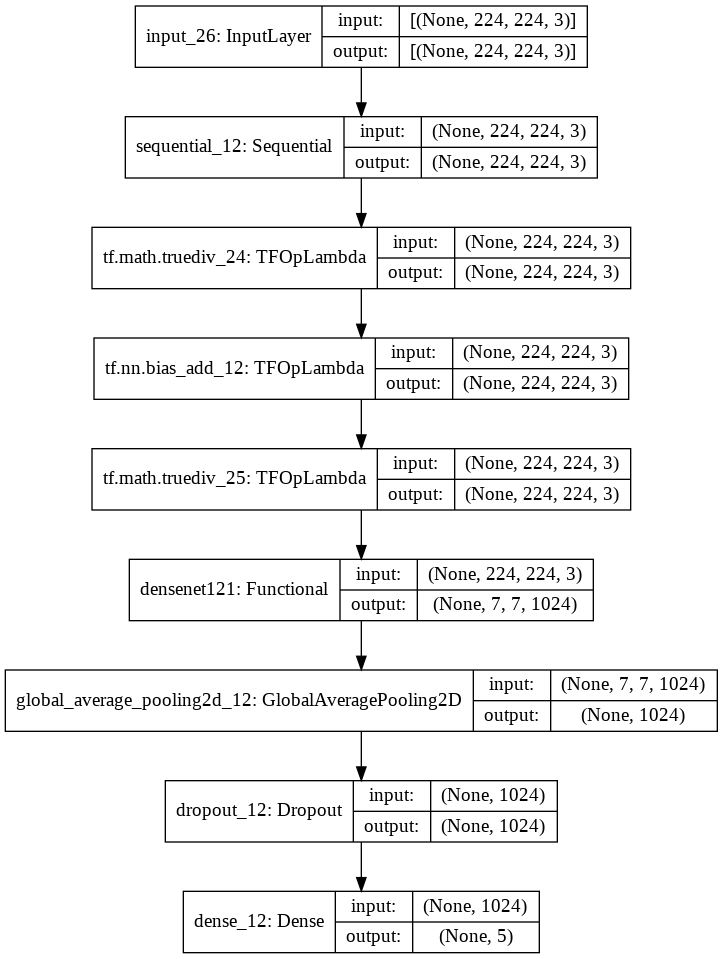
因此,为了模拟Keras正式文档,我只需要使用密度集作为可视化的模型。这是一个步骤
- 只从你的模型中取出模型 dense_model = dense_model.get_layer('densenet121')
- 将重从密集模型复制到新启动的模型。 tf.keras.Input(shape=(224,224,3)) model = model_builder(weights="imagenet",include_top=True,input_tensor=inputs),dense_layer in zip(model.layers1:,tf.keras.layers.GlobalAveragePooling2D()(relu.output) dense_model.layers1:):layer.set_weights(dense_layer.get_weights()) relu = model.get_layer('relu') x= tf.keras.layers.Dense(5)(x)模型=tf.keras.models.Model(输入=输入,输出=输出)
- 绘制热图 preprocess_input = keras.applications.densenet.preprocess_input img_array = preprocess_input(get_img_array(img_path,size=(224,224)
get_img_array、make_gradcam_heatmap和save_and_display_gradcam保持在静止状态。按照卡拉斯教程,那么你就可以走了。
https://stackoverflow.com/questions/60623869
复制相似问题
腾讯云开发者
