利用OpenCV图像处理从图像中去除背景文本和噪声
我有这些照片


为此,我要删除背景中的文本。只有captcha characters应该保留(即K6PwKA,YabVzu)。任务是稍后使用tesseract识别这些字符。
这是我尝试过的,但它并没有给出很好的准确性。
import cv2
import pytesseract

pytesseract.pytesseract.tesseract_cmd = r"C:\Users\HPO2KOR\AppData\Local\Tesseract-OCR\tesseract.exe"
img = cv2.imread("untitled.png")
gray_image = cv2.cvtColor(img, cv2.COLOR_BGR2GRAY)
gray_filtered = cv2.inRange(gray_image, 0, 75)
cv2.imwrite("cleaned.png", gray_filtered)
我怎样才能提高这种能力呢?
注意:,我尝试了我在这个问题上得到的所有建议,但没有一个对我有用。
编辑:根据Elias的说法,我尝试用photoshop找到卡普查文本的颜色,把它转换成灰度,结果显示它在100105之间。然后,我根据这个范围对图像进行阈值化。但我所得到的结果并没有得到令人满意的结果。
gray_filtered = cv2.inRange(gray_image, 100, 105)
cv2.imwrite("cleaned.png", gray_filtered)
gray_inv = ~gray_filtered
cv2.imwrite("cleaned.png", gray_inv)
data = pytesseract.image_to_string(gray_inv, lang='eng')
产出:
'KEP wKA'结果:

编辑2 :
def get_text(img_name):
    lower = (100, 100, 100)
    upper = (104, 104, 104)
    img = cv2.imread(img_name)
    img_rgb_inrange = cv2.inRange(img, lower, upper)
    neg_rgb_image = ~img_rgb_inrange
    cv2.imwrite('neg_img_rgb_inrange.png', neg_rgb_image)
    data = pytesseract.image_to_string(neg_rgb_image, lang='eng')
    return data
给予:

文本为
GXuMuUZ有什么办法让它软化一点吗?
回答 3
Stack Overflow用户
发布于 2020-02-25 23:17:16
以下是纠正扭曲文本的两种潜在方法和方法:
方法#1:形态学运算+轮廓滤波
- 获得二值图像。 负载图像,灰鳞,然后是Otsu阈值。
- 删除文本轮廓。用
cv2.getStructuringElement()创建一个矩形内核,然后执行形态运算消除噪声。 - 过滤和消除小噪音。 寻找轮廓和过滤器使用等高线面积去除小颗粒。用
cv2.drawContours()填充等高线,有效地去除了噪声。 - 执行OCR.我们倒置图像,然后应用轻微的高斯模糊。然后,我们使用青蒿琥酯和
--psm 6配置选项进行OCR,将图像作为单个文本块来处理。查看特斯拉提高质量以获得改进检测的其他方法,并查看其他设置的Pytesseract配置选项。
输入图像->二值->形状开度


等高线区域滤波->反演->应用模糊技术获得结果


OCR结果
YabVzu代码
import cv2
import pytesseract
import numpy as np

pytesseract.pytesseract.tesseract_cmd = r"C:\Program Files\Tesseract-OCR\tesseract.exe"

# Load image, grayscale, Otsu's threshold
image = cv2.imread('2.png')
gray = cv2.cvtColor(image, cv2.COLOR_BGR2GRAY)
thresh = cv2.threshold(gray, 0, 255, cv2.THRESH_BINARY_INV + cv2.THRESH_OTSU)[1]

# Morph open to remove noise
kernel = cv2.getStructuringElement(cv2.MORPH_RECT, (2,2))
opening = cv2.morphologyEx(thresh, cv2.MORPH_OPEN, kernel, iterations=1)

# Find contours and remove small noise
cnts = cv2.findContours(opening, cv2.RETR_EXTERNAL, cv2.CHAIN_APPROX_SIMPLE)
cnts = cnts[0] if len(cnts) == 2 else cnts[1]
for c in cnts:
    area = cv2.contourArea(c)
    if area < 50:
        cv2.drawContours(opening, [c], -1, 0, -1)

# Invert and apply slight Gaussian blur
result = 255 - opening
result = cv2.GaussianBlur(result, (3,3), 0)

# Perform OCR
data = pytesseract.image_to_string(result, lang='eng', config='--psm 6')
print(data)

cv2.imshow('thresh', thresh)
cv2.imshow('opening', opening)
cv2.imshow('result', result)
cv2.waitKey() 方法#2:颜色分割
通过观察到所要提取的文本与图像中的噪声有明显的对比度,我们可以使用颜色阈值来分离文本。其思想是转换为HSV格式,然后颜色阈值,以获得一个掩码使用较低/较高的颜色范围。从是我们使用相同的过程到OCR与Pytesseract。
输入图像->掩模->结果


代码
import cv2
import pytesseract
import numpy as np

pytesseract.pytesseract.tesseract_cmd = r"C:\Program Files\Tesseract-OCR\tesseract.exe"

# Load image, convert to HSV, color threshold to get mask
image = cv2.imread('2.png')
hsv = cv2.cvtColor(image, cv2.COLOR_BGR2HSV)
lower = np.array([0, 0, 0])
upper = np.array([100, 175, 110])
mask = cv2.inRange(hsv, lower, upper)

# Invert image and OCR
invert = 255 - mask
data = pytesseract.image_to_string(invert, lang='eng', config='--psm 6')
print(data)

cv2.imshow('mask', mask)
cv2.imshow('invert', invert)
cv2.waitKey()
校正失真文本
当图像是水平的时候,OCR工作得最好。为了确保文本是OCR的理想格式,我们可以执行透视图转换。在去除所有的噪声以隔离文本后,我们可以执行一个形状接近,将单个文本轮廓组合成一个单独的轮廓。从这里,我们可以使用cv2.minAreaRect找到旋转的包围框,然后使用imutils.perspective.four_point_transform执行四点透视变换。继续清洁面膜,这是结果:
掩模->形态闭合->检测旋转包围盒->结果


与另一个图像一起输出


更新后的代码以包含透视图转换
import cv2
import pytesseract
import numpy as np
from imutils.perspective import four_point_transform

pytesseract.pytesseract.tesseract_cmd = r"C:\Program Files\Tesseract-OCR\tesseract.exe"

# Load image, convert to HSV, color threshold to get mask
image = cv2.imread('1.png')
hsv = cv2.cvtColor(image, cv2.COLOR_BGR2HSV)
lower = np.array([0, 0, 0])
upper = np.array([100, 175, 110])
mask = cv2.inRange(hsv, lower, upper)

# Morph close to connect individual text into a single contour
kernel = cv2.getStructuringElement(cv2.MORPH_RECT, (5,5))
close = cv2.morphologyEx(mask, cv2.MORPH_CLOSE, kernel, iterations=3)

# Find rotated bounding box then perspective transform
cnts = cv2.findContours(close, cv2.RETR_EXTERNAL, cv2.CHAIN_APPROX_SIMPLE)
cnts = cnts[0] if len(cnts) == 2 else cnts[1]
rect = cv2.minAreaRect(cnts[0])
box = cv2.boxPoints(rect)
box = np.int0(box)
cv2.drawContours(image,[box],0,(36,255,12),2)
warped = four_point_transform(255 - mask, box.reshape(4, 2))

# OCR
data = pytesseract.image_to_string(warped, lang='eng', config='--psm 6')
print(data)

cv2.imshow('mask', mask)
cv2.imshow('close', close)
cv2.imshow('warped', warped)
cv2.imshow('image', image)
cv2.waitKey()注意:颜色阈值范围是使用这个HSV阈值脚本确定的。
import cv2
import numpy as np

def nothing(x):
    pass

# Load image
image = cv2.imread('2.png')

# Create a window
cv2.namedWindow('image')

# Create trackbars for color change
# Hue is from 0-179 for Opencv
cv2.createTrackbar('HMin', 'image', 0, 179, nothing)
cv2.createTrackbar('SMin', 'image', 0, 255, nothing)
cv2.createTrackbar('VMin', 'image', 0, 255, nothing)
cv2.createTrackbar('HMax', 'image', 0, 179, nothing)
cv2.createTrackbar('SMax', 'image', 0, 255, nothing)
cv2.createTrackbar('VMax', 'image', 0, 255, nothing)

# Set default value for Max HSV trackbars
cv2.setTrackbarPos('HMax', 'image', 179)
cv2.setTrackbarPos('SMax', 'image', 255)
cv2.setTrackbarPos('VMax', 'image', 255)

# Initialize HSV min/max values
hMin = sMin = vMin = hMax = sMax = vMax = 0
phMin = psMin = pvMin = phMax = psMax = pvMax = 0

while(1):
    # Get current positions of all trackbars
    hMin = cv2.getTrackbarPos('HMin', 'image')
    sMin = cv2.getTrackbarPos('SMin', 'image')
    vMin = cv2.getTrackbarPos('VMin', 'image')
    hMax = cv2.getTrackbarPos('HMax', 'image')
    sMax = cv2.getTrackbarPos('SMax', 'image')
    vMax = cv2.getTrackbarPos('VMax', 'image')

    # Set minimum and maximum HSV values to display
    lower = np.array([hMin, sMin, vMin])
    upper = np.array([hMax, sMax, vMax])

    # Convert to HSV format and color threshold
    hsv = cv2.cvtColor(image, cv2.COLOR_BGR2HSV)
    mask = cv2.inRange(hsv, lower, upper)
    result = cv2.bitwise_and(image, image, mask=mask)

    # Print if there is a change in HSV value
    if((phMin != hMin) | (psMin != sMin) | (pvMin != vMin) | (phMax != hMax) | (psMax != sMax) | (pvMax != vMax) ):
        print("(hMin = %d , sMin = %d, vMin = %d), (hMax = %d , sMax = %d, vMax = %d)" % (hMin , sMin , vMin, hMax, sMax , vMax))
        phMin = hMin
        psMin = sMin
        pvMin = vMin
        phMax = hMax
        psMax = sMax
        pvMax = vMax

    # Display result image
    cv2.imshow('image', result)
    if cv2.waitKey(10) & 0xFF == ord('q'):
        break

cv2.destroyAllWindows()Stack Overflow用户
发布于 2020-02-25 15:53:27
您的代码会产生比这更好的结果。在这里,我根据直方图upperb值和lowerb值设置了一个阈值,并设置了一个阈值。按ESC按钮获取下一个图像。
这段代码不必要地复杂,需要以各种方式进行优化。可以重新排序代码以跳过某些步骤。我保留了它,因为有些部分可能会帮助其他人。通过保持轮廓面积在一定阈值以上,可以消除现有的一些噪声。欢迎对其他降噪方法提出任何建议。
类似的更容易获得4个角点的透视转换代码可以在这里找到,
代码描述:
- 原始图像
- 中值滤波器(去噪和ROI识别)
- OTSU Thresholding
- 倒置图像
- 使用倒置黑白图像作为掩蔽,以保留原始图像的大部分ROI部分
- 最大等高线的扩张
- 通过绘制原始图像中的矩形和角点来标记ROI
- 调整ROI并提取它
- 中值滤波器
- OTSU Thresholding
- 掩模反转图像
- 屏蔽直图像,以进一步消除文本中的大部分噪声。
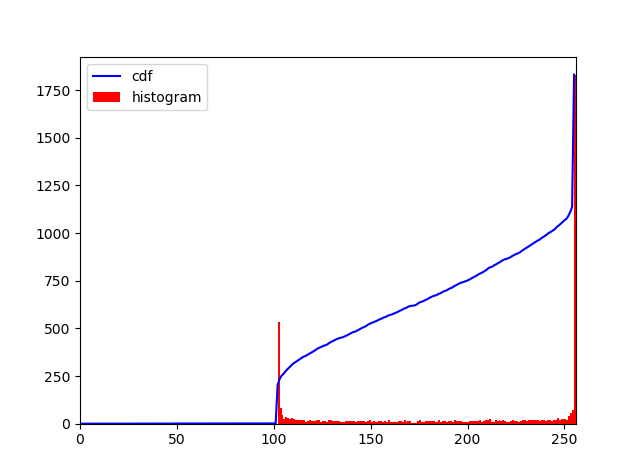
- 如上文所述,在范围内使用直方图cdf中的较低和较高的值,以进一步降低噪声。
- 也许在这一步中侵蚀图像会产生一些可以接受的结果。相反,在这里,该图像再次膨胀,并用作掩码,以获得较少的噪音ROI从透视转换图像。
代码:
## Press ESC button to get next image

import cv2
import cv2 as cv
import numpy as np


frame = cv2.imread('extra/c1.png')
#frame = cv2.imread('extra/c2.png')


## keeping a copy of original
print(frame.shape)
original_frame = frame.copy()
original_frame2 = frame.copy()


## Show the original image
winName = 'Original'
cv.namedWindow(winName, cv.WINDOW_NORMAL)
#cv.resizeWindow(winName, 800, 800)
cv.imshow(winName, frame)
cv.waitKey(0)


## Apply median blur
frame = cv2.medianBlur(frame,9)


## Show the original image
winName = 'Median Blur'
cv.namedWindow(winName, cv.WINDOW_NORMAL)
#cv.resizeWindow(winName, 800, 800)
cv.imshow(winName, frame)
cv.waitKey(0)


#kernel = np.ones((5,5),np.uint8)
#frame = cv2.dilate(frame,kernel,iterations = 1)


# Otsu's thresholding
frame = cv2.cvtColor(frame, cv2.COLOR_BGR2GRAY)
ret2,thresh_n = cv.threshold(frame,0,255,cv.THRESH_BINARY+cv.THRESH_OTSU)
frame = thresh_n


## Show the original image
winName = 'Otsu Thresholding'
cv.namedWindow(winName, cv.WINDOW_NORMAL)
#cv.resizeWindow(winName, 800, 800)
cv.imshow(winName, frame)
cv.waitKey(0)


## invert color
frame = cv2.bitwise_not(frame)

## Show the original image
winName = 'Invert Image'
cv.namedWindow(winName, cv.WINDOW_NORMAL)
#cv.resizeWindow(winName, 800, 800)
cv.imshow(winName, frame)
cv.waitKey(0)


## Dilate image
kernel = np.ones((5,5),np.uint8)
frame = cv2.dilate(frame,kernel,iterations = 1)


##
## Show the original image
winName = 'SUB'
cv.namedWindow(winName, cv.WINDOW_NORMAL)
#cv.resizeWindow(winName, 800, 800)
img_gray = cv2.cvtColor(original_frame, cv2.COLOR_BGR2GRAY)
cv.imshow(winName, img_gray & frame)
cv.waitKey(0)


## Show the original image
winName = 'Dilate Image'
cv.namedWindow(winName, cv.WINDOW_NORMAL)
#cv.resizeWindow(winName, 800, 800)
cv.imshow(winName, frame)
cv.waitKey(0)


## Get largest contour from contours
contours, hierarchy = cv2.findContours(frame, cv2.RETR_TREE, cv2.CHAIN_APPROX_SIMPLE)


## Get minimum area rectangle and corner points
rect = cv2.minAreaRect(max(contours, key = cv2.contourArea))
print(rect)
box = cv2.boxPoints(rect)
print(box)


## Sorted points by x and y
## Not used in this code
print(sorted(box , key=lambda k: [k[0], k[1]]))


## draw anchor points on corner
frame = original_frame.copy()
z = 6
for b in box:
    cv2.circle(frame, tuple(b), z, 255, -1)


## show original image with corners
box2 = np.int0(box)
cv2.drawContours(frame,[box2],0,(0,0,255), 2)
cv2.imshow('Detected Corners',frame)
cv2.waitKey(0)
cv2.destroyAllWindows()


## https://stackoverflow.com/questions/11627362/how-to-straighten-a-rotated-rectangle-area-of-an-image-using-opencv-in-python
def subimage(image, center, theta, width, height):
   shape = ( image.shape[1], image.shape[0] ) # cv2.warpAffine expects shape in (length, height)

   matrix = cv2.getRotationMatrix2D( center=center, angle=theta, scale=1 )
   image = cv2.warpAffine( src=image, M=matrix, dsize=shape )

   x = int(center[0] - width / 2)
   y = int(center[1] - height / 2)

   image = image[ y:y+height, x:x+width ]

   return image


## Show the original image
winName = 'Dilate Image'
cv.namedWindow(winName, cv.WINDOW_NORMAL)
#cv.resizeWindow(winName, 800, 800)


## use the calculated rectangle attributes to rotate and extract it
frame = subimage(original_frame, center=rect[0], theta=int(rect[2]), width=int(rect[1][0]), height=int(rect[1][1]))
original_frame = frame.copy()
cv.imshow(winName, frame)
cv.waitKey(0)

perspective_transformed_image = frame.copy()


## Apply median blur
frame = cv2.medianBlur(frame,11)


## Show the original image
winName = 'Median Blur'
cv.namedWindow(winName, cv.WINDOW_NORMAL)
#cv.resizeWindow(winName, 800, 800)
cv.imshow(winName, frame)
cv.waitKey(0)


#kernel = np.ones((5,5),np.uint8)
#frame = cv2.dilate(frame,kernel,iterations = 1)


# Otsu's thresholding
frame = cv2.cvtColor(frame, cv2.COLOR_BGR2GRAY)
ret2,thresh_n = cv.threshold(frame,0,255,cv.THRESH_BINARY+cv.THRESH_OTSU)
frame = thresh_n


## Show the original image
winName = 'Otsu Thresholding'
cv.namedWindow(winName, cv.WINDOW_NORMAL)
#cv.resizeWindow(winName, 800, 800)
cv.imshow(winName, frame)
cv.waitKey(0)


## invert color
frame = cv2.bitwise_not(frame)

## Show the original image
winName = 'Invert Image'
cv.namedWindow(winName, cv.WINDOW_NORMAL)
#cv.resizeWindow(winName, 800, 800)
cv.imshow(winName, frame)
cv.waitKey(0)


## Dilate image
kernel = np.ones((5,5),np.uint8)
frame = cv2.dilate(frame,kernel,iterations = 1)

##
## Show the original image
winName = 'SUB'
cv.namedWindow(winName, cv.WINDOW_NORMAL)
#cv.resizeWindow(winName, 800, 800)
img_gray = cv2.cvtColor(original_frame, cv2.COLOR_BGR2GRAY)
frame = img_gray & frame
frame[np.where(frame==0)] = 255
cv.imshow(winName, frame)
cv.waitKey(0)


hist,bins = np.histogram(frame.flatten(),256,[0,256])

cdf = hist.cumsum()
cdf_normalized = cdf * hist.max()/ cdf.max()
print(cdf)
print(cdf_normalized)
hist_image = frame.copy()


## two decresing range algorithm
low_index = -1
for i in range(0, 256):
   if cdf[i] > 0:
      low_index = i
      break
print(low_index)

tol = 0
tol_limit = 20
broken_index = -1
past_val = cdf[low_index] - cdf[low_index + 1]
for i in range(low_index + 1, 255):
   cur_val = cdf[i] - cdf[i+1]
   if tol > tol_limit:
      broken_index = i
      break
   if cur_val < past_val:
      tol += 1
   past_val = cur_val

print(broken_index)


##
lower = min(frame.flatten())
upper = max(frame.flatten())
print(min(frame.flatten()))
print(max(frame.flatten()))

#img_rgb_inrange = cv2.inRange(frame_HSV, np.array([lower,lower,lower]), np.array([upper,upper,upper]))
img_rgb_inrange = cv2.inRange(frame, (low_index), (broken_index))
neg_rgb_image = ~img_rgb_inrange
## Show the original image
winName = 'Final'
cv.namedWindow(winName, cv.WINDOW_NORMAL)
#cv.resizeWindow(winName, 800, 800)
cv.imshow(winName, neg_rgb_image)
cv.waitKey(0)


kernel = np.ones((3,3),np.uint8)
frame = cv2.erode(neg_rgb_image,kernel,iterations = 1)
winName = 'Final Dilate'
cv.namedWindow(winName, cv.WINDOW_NORMAL)
#cv.resizeWindow(winName, 800, 800)
cv.imshow(winName, frame)
cv.waitKey(0)


##
winName = 'Final Subtracted'
cv.namedWindow(winName, cv.WINDOW_NORMAL)
img2 = np.zeros_like(perspective_transformed_image)
img2[:,:,0] = frame
img2[:,:,1] = frame
img2[:,:,2] = frame
frame = img2
cv.imshow(winName, perspective_transformed_image | frame)
cv.waitKey(0)


##
import matplotlib.pyplot as plt
plt.plot(cdf_normalized, color = 'b')
plt.hist(hist_image.flatten(),256,[0,256], color = 'r')
plt.xlim([0,256])
plt.legend(('cdf','histogram'), loc = 'upper left')
plt.show()
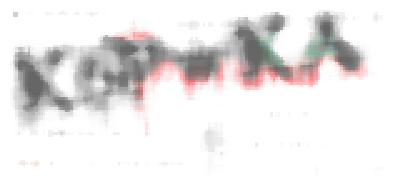
1.中值滤波器:
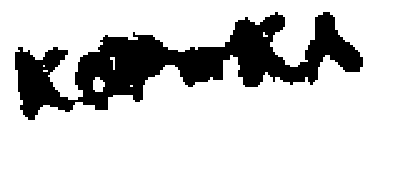
2. OTSU阈值:
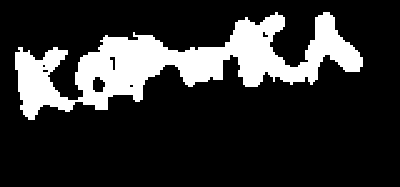
3.倒置:
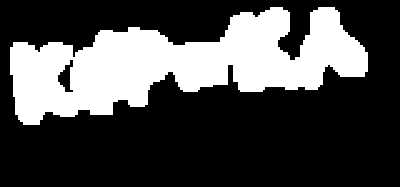
4.倒置图像扩张:
5.掩蔽提取:

6.变换的ROI点:

7.透视校正图像:

8.中值模糊:

9. OTSU阈值:

10.倒置图像:

11. ROI提取:

12.夹紧:

13.扩张:

14.最终ROI:

15.第11步图像的直方图图:
Stack Overflow用户
发布于 2020-02-25 09:30:17
没试过,但这可能管用。步骤1:使用ps找出captcha字符的颜色。例如,"YabVzu“是(128,128),
步骤2:使用枕头的方法getdata()/getcolor(),它将返回包含每个像素颜色的序列。
然后,我们将序列中的每一项投影到原来的captcha图像。
因此,我们知道图像中每个像素的位置。
第三步:找到颜色最接近于(128,128,128)的所有像素。您可以设置一个阈值来控制准确度。此步骤返回另一个序列。让我们将其注释为Seq a
第四步:生成一幅与原始图片高度和宽度完全相同的图片。将Seq a中的每一个像素绘制在图片中的极高位置上。在这里,我们将得到一个干净的训练项目。
步骤5:使用Keras 项目来破解代码。裂变率应在72%以上。
https://stackoverflow.com/questions/60145306
复制相似问题

