
裁剪到只有有效像素后,重新映射鱼眼(等距)立体矫正?
我有两个摄像机水平偏移,并获得了它们的标定参数(相机矩阵和失真系数,以及它们之间的转换)在针孔-等距模型下(畸变系数k1, k2, k3, k4)。
我想使用openCVs cv.fisheye.stereoRectify为每台相机创建新的投影矩阵,我可以将这些投影矩阵输入到cv.fisheye.initUndistortRectifyMap中,然后输入到cv.remap中,以纠正和消除每幅图像的失真。
不幸的是,即使balance参数在fisheye.stereoRectify中设置为0,remaped图像仍然有黑色像素在其中弯曲。我想要裁剪每一幅图像,这样在任何一个不失真的相机图像中都不存在无效的像素。
我看到标准的cv.stereoRectify函数有一个alpha参数,它就是这样做的。但是cv.fisheye.stereoRectify似乎没有这个参数。因此,我想复制它的特性。
cv.stereoRectify似乎使用了拉坦失真模型(失真参数k1, k2, p1, p2),所以我认为我不能很容易地交换函数,因为我没有p1和p2。
下面是我管道中的片段:
R1, R2, P1, P2, Q = cv2.fisheye.stereoRectify(mtx_right, dist_right,
                                              mtx_left, dist_left,
                                              (960,1280), R, tvec,
                                              flags=cv2.CALIB_ZERO_DISPARITY,
                                              balance= 0.0, fov_scale=1)

map1_right, map2_right = cv2.fisheye.initUndistortRectifyMap(mtx_right, dist_right,
                                                             R1, P1[0:3, 0:3],
                                                             (1280, 960), cv2.CV_16SC2)

map1_left, map2_left = cv2.fisheye.initUndistortRectifyMap(mtx_left, dist_left,
                                                           R2, P2[0:3, 0:3],
                                                           (1280, 960), cv2.CV_16SC2)

undistorted_right = cv2.remap(img_rgb_right, map1_right, map2_right,
                             interpolation=cv2.INTER_LINEAR,
                             borderMode=cv2.BORDER_CONSTANT)
undistorted_left = cv2.remap(img_rgb_left, map1_left, map2_left,
                            interpolation=cv2.INTER_LINEAR,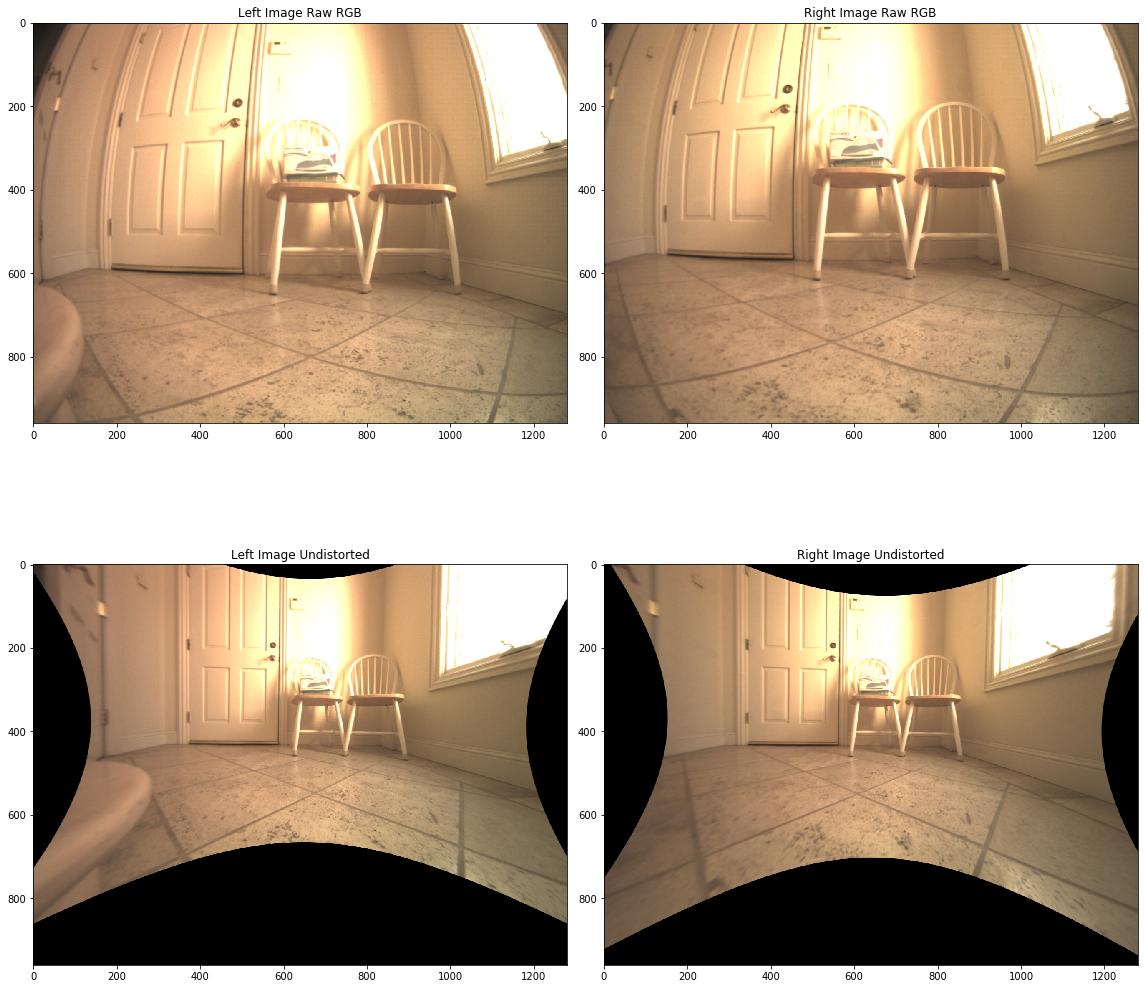
borderMode=cv2.BORDER_CONSTANT)是否有一种简单的方法可以获得alpha在传统cv.stereoRectify中生成的功能?balance=0看起来很接近,但并没有完全切断无效像素。
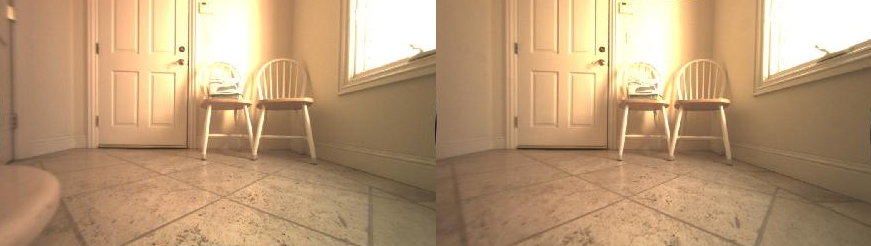
当前输出(balance=0.5放大一点)
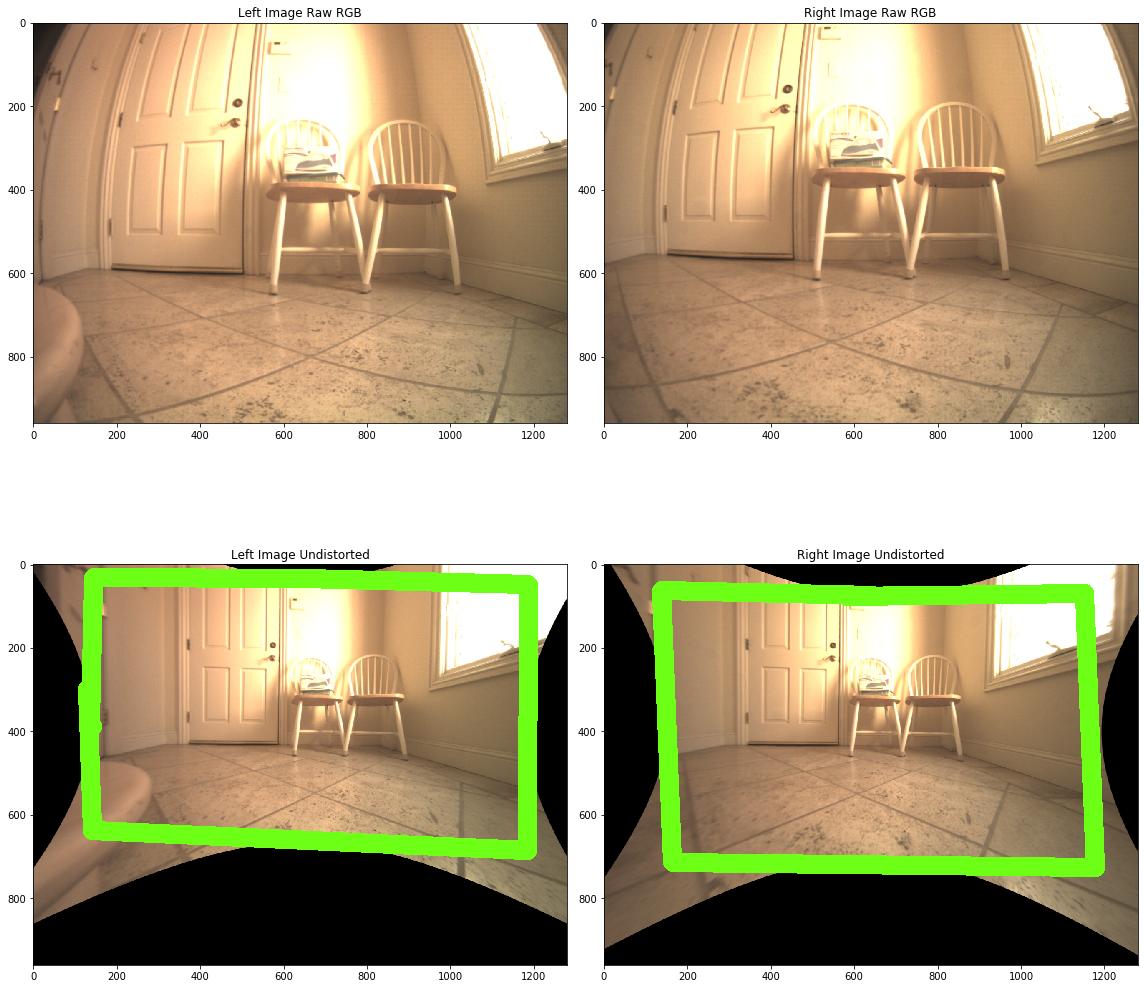
这两幅图像的目标都是只显示绿色框中的内容(如果不清楚,则在这两种图像上的维数相同,以具有较小的有效像素矩形者为准):
回答 2
Stack Overflow用户
发布于 2019-10-13 03:00:04
下面是我如何使用-trim在Imagemagick中完成这一任务。我注意到,-trim可以跟踪修剪后左上角相对于修剪前的位置的偏移量(通过离开+重新页面,从而清除几何信息)。因此,我修剪每一个图像,并让它保持跟踪。然后,我将剪裁后的图像分别放在黑色背景中,然后并排附加两个结果,然后再对黑色进行裁剪。
由于没有提供原件,所以我从提供的图片中删除了图像。
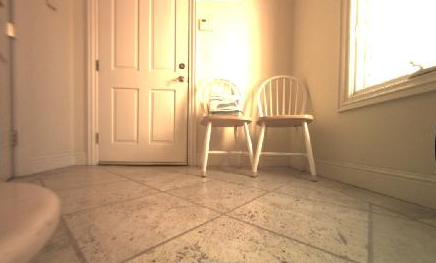
左图:
右图:
magick left.png -format "%wx%h" -write info: -fuzz 15% -trim \
-fuzz 5% -define trim:percent-background=0 \
-define trim:background-color=black -trim left_im_trim.png

magick right.png -format "%wx%h" -write info: -fuzz 15% -trim \
-fuzz 5% -define trim:percent-background=0 \
-define trim:background-color=black -trim right_im_trim.png


magick \
\( left_im_trim.png -set page "%wx+0+%Y" -background black -flatten \)  \
\( right_im_trim.png -set page "%wx+0+%Y" -background black -flatten \) \
-background black +append \
-define trim:percent-background=0 \
-define trim:background-color=black \
-trim +repage left_right_trim_append.png
左修剪:
右修剪:
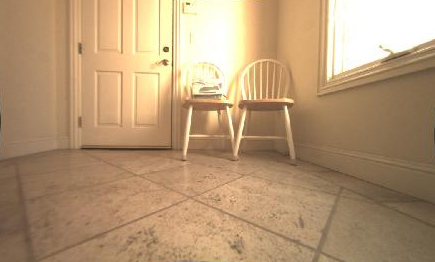
重新附加和修剪:
我把上面的三个命令分开了,这样就可以看到结果了。但它们都可以合并成一个长的命令行。
Stack Overflow用户
发布于 2020-11-20 13:32:07
正确的方法是简单地将alpha值设置为0.0。在OpenCV文档中:alpha=0是指对校正后的图像进行缩放和移位,以便只看到有效的像素(校正后没有黑区)。
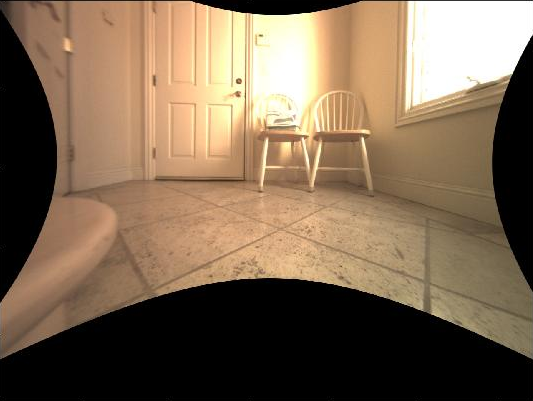
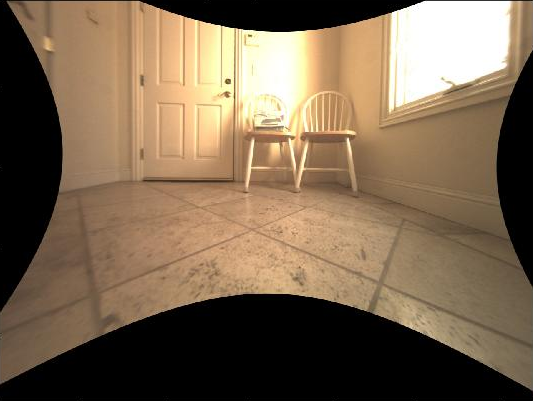
或者,您也可以为此实现自己的算法,比如:
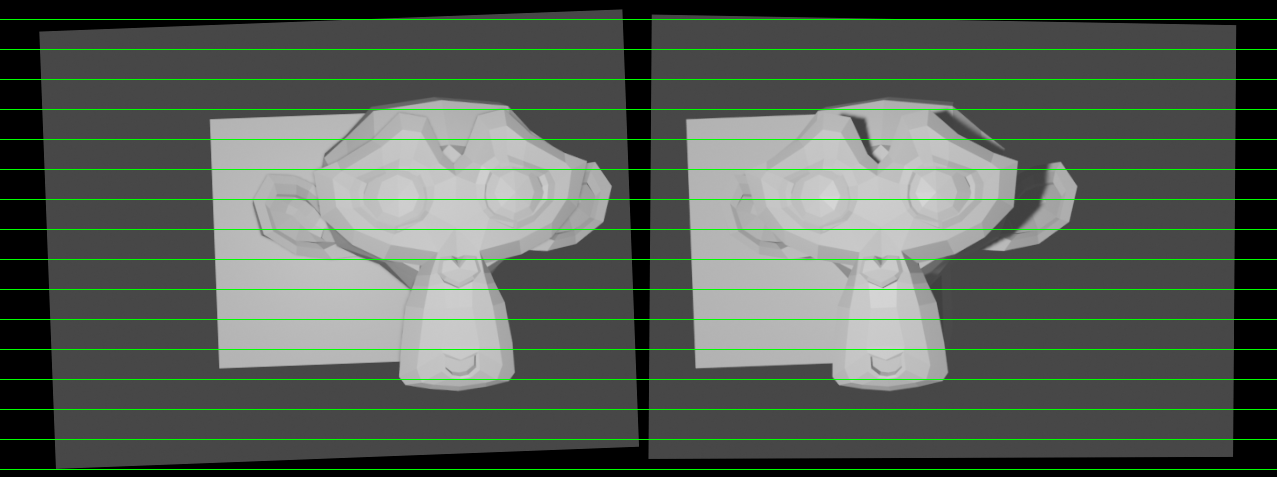
假设我有这两幅图像,经过校正后(绿线只是为了直观地检查纠正是否正确):
R1, R2, P1, P2, Q, roi1, roi2 = \
        cv2.stereoRectify(cameraMatrix1=k_1,
                          distCoeffs1=dist_coeff,
                          cameraMatrix2=k_2,
                          distCoeffs2=dist_coeff,
                          imageSize=(width, height),
                          R=r_stereo,
                          T=t_stereo,
                          flags=cv2.CALIB_ZERO_DISPARITY,
                          alpha=1.0
                          )

map1x, map1y = cv2.initUndistortRectifyMap(
    cameraMatrix=k_1,
    distCoeffs=dist_coeff,
    R=R1,
    newCameraMatrix=P1,
    size=(width, height),
    m1type=cv2.CV_32FC1)

map2x, map2y = cv2.initUndistortRectifyMap(
    cameraMatrix=k_2,
    distCoeffs=dist_coeff,
    R=R2,
    newCameraMatrix=P2,
    size=(width, height),
    m1type=cv2.CV_32FC1)

im_1_rect = cv2.remap(im_1, map1x, map1y, cv2.INTER_LINEAR)
im_2_rect = cv2.remap(im_2, map2x, map2y, cv2.INTER_LINEAR)

result = np.hstack((im_1_rect, im_2_rect))
for tmp_col in range(20, height, 30):
    result = cv2.line(result, (0, tmp_col), (int(2.0 * width), tmp_col), (0, 255, 0), 1)

cv2.imshow("rectified image", result)
cv2.waitKey(0)
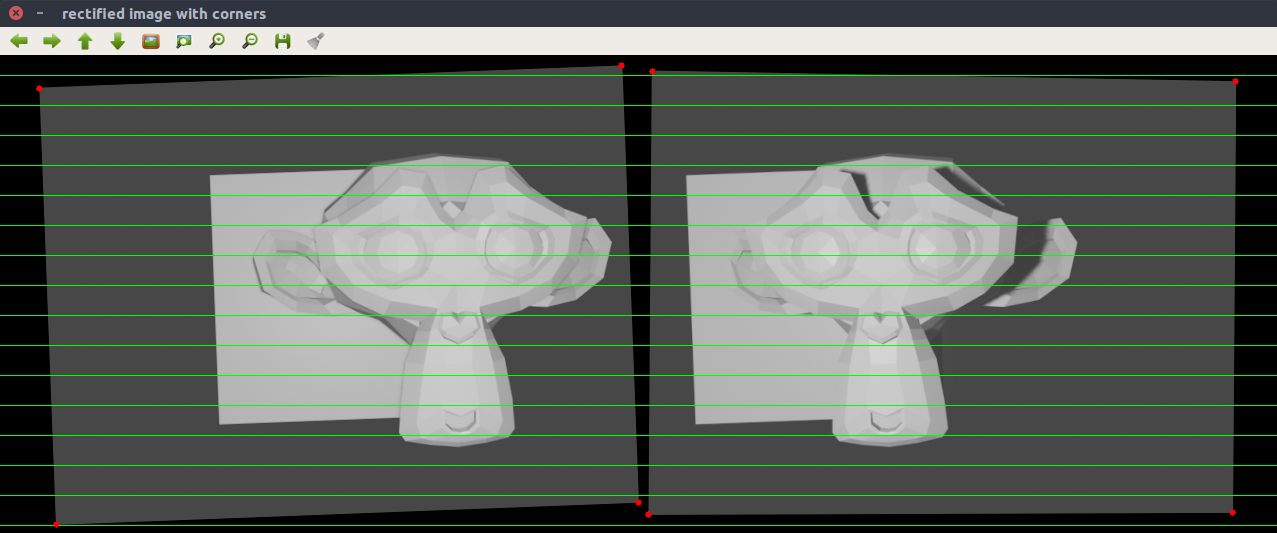
诀窍是将图像边界上的点投影到校正后的图像,然后检查投影的u和v坐标。例如,在这里,我将向您展示如何将原始图像的角投影到经过校正的图像(用红色绘制):
pts = np.array([[[0, 0]], [[width - 1, 0]], [[0, height - 1]], [[width - 1, height - 1]]], dtype=np.float64)
pts_transformed_l = cv2.undistortPoints(pts, k_1, dist_coeff, R=R1, P=P1)
pts_transformed_r = cv2.undistortPoints(pts, k_2, dist_coeff, R=R2, P=P2)
for pt in pts_transformed_l:
    u, v = pt[0]
    result = cv2.circle(result, (int(round(u)), int(round(v))), 3, (0, 0, 255), -1)
for pt in pts_transformed_r:
    u, v = pt[0]
    u += 640
    result = cv2.circle(result, (int(round(u)), int(round(v))), 3, (0, 0, 255), -1)
cv2.imshow("rectified image with corners", result)
cv2.waitKey(0)
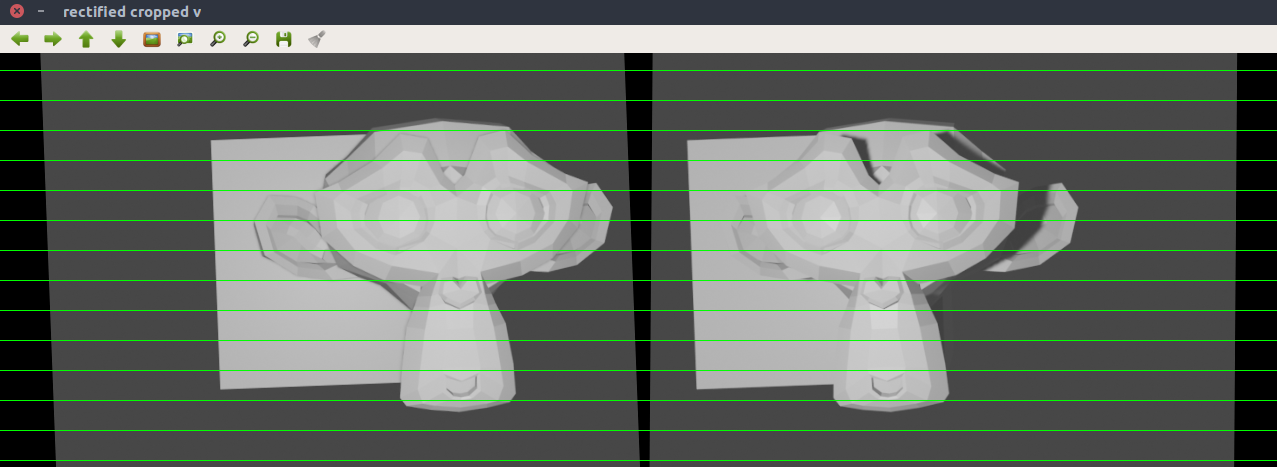
让我们从裁剪高度开始。为了做到这一点,我们将顶部和底部的点扭曲到每一个校正过的图像上。我们需要顶部最大的v和底部最小的v。注意,现在我们需要考虑顶部(0, 0), (0, 1), ... (width-1, 0)的所有点,因为校正后的图像通常有弯曲的边界。换句话说,我们基本上希望在这个图像中找到红色点中最大的v和蓝色点中最小的v:

""" crop in the v direction """
pts_top_list = []
pts_bot_list = []
for i in range(width):
    pt_tmp = [[i, 0]]
    pts_top_list.append(pt_tmp)
    pt_tmp = [[i, height]]
    pts_bot_list.append(pt_tmp)
pts_top = np.asarray(pts_top_list, dtype=np.float64)
pts_bot = np.asarray(pts_bot_list, dtype=np.float64)

# top part - larger v
v_top = 0
## rectified image 1
pts_transformed_l = cv2.undistortPoints(pts_top, k_1, dist_coeff, R=R1, P=P1)
for pt in pts_transformed_l:
    _, v = pt[0]
    if math.ceil(v) > v_top:
        v_top = math.ceil(v)
## rectified image 2
pts_transformed_r = cv2.undistortPoints(pts_top, k_2, dist_coeff, R=R2, P=P2)
for pt in pts_transformed_r:
    _, v = pt[0]
    if math.ceil(v) > v_top:
        v_top = math.ceil(v)

# bottom part - smaller v
v_bot = height
## rectified image 1
pts_transformed_l = cv2.undistortPoints(pts_bot, k_1, dist_coeff, R=R1, P=P1)
for pt in pts_transformed_l:
    _, v = pt[0]
    if int(v) < v_bot:
        v_bot = int(v)
## rectified image 2
pts_transformed_r = cv2.undistortPoints(pts_bot, k_2, dist_coeff, R=R2, P=P2)
for pt in pts_transformed_r:
    _, v = pt[0]
    if int(v) < v_bot:
        v_bot = int(v)

result_cropped_v = result[v_top:v_bot, :]
cv2.imshow("rectified cropped v", result_cropped_v)
cv2.waitKey(0)
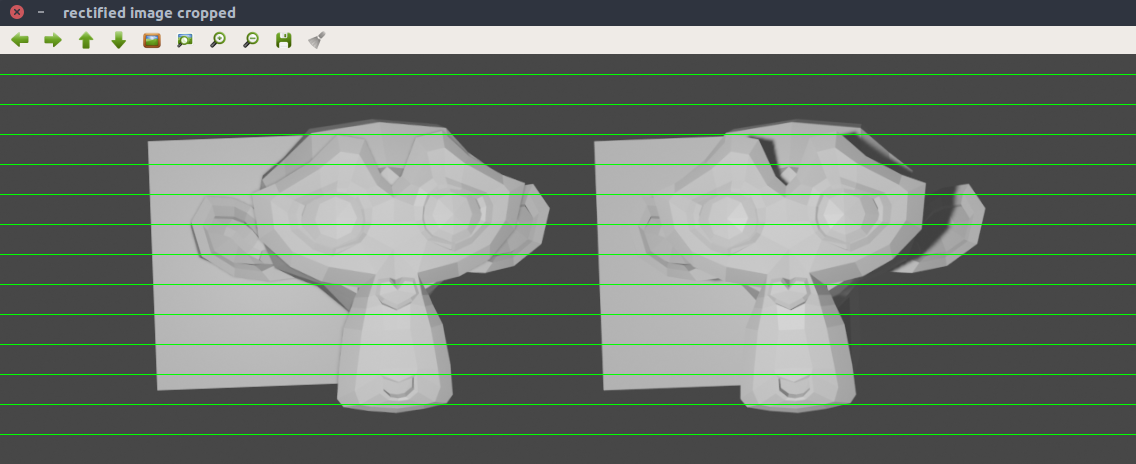
您可以在u方向应用同样的方法。只是要小心,如果你在u裁剪和你估计的差距,你将需要考虑到这一点,然后估计深度!
""" crop in the u direction (for both images) """
pts_left_list = []
pts_rght_list = []
for i in range(width):
    pt_tmp = [[0, i]]
    pts_left_list.append(pt_tmp)
    pt_tmp = [[width, i]]
    pts_rght_list.append(pt_tmp)
pts_left = np.asarray(pts_left_list, dtype=np.float64)
pts_rght = np.asarray(pts_rght_list, dtype=np.float64)

# rectified image 1
## left part - larger u
u_left_1 = 0
pts_transformed_l = cv2.undistortPoints(pts_left, k_1, dist_coeff, R=R1, P=P1)
for pt in pts_transformed_l:
    u, _ = pt[0]
    if math.ceil(u) > u_left_1:
        u_left_1 = math.ceil(u)
## right part - smaller u
u_right_1 = width
pts_transformed_r = cv2.undistortPoints(pts_rght, k_1, dist_coeff, R=R1, P=P1)
for pt in pts_transformed_r:
    u, _ = pt[0]
    if int(u) < u_right_1:
        u_right_1 = int(u)

# rectified image 2
## left part - larger u
u_left_2 = 0
pts_transformed_l = cv2.undistortPoints(pts_left, k_2, dist_coeff, R=R2, P=P2)
for pt in pts_transformed_l:
    u, _ = pt[0]
    if math.ceil(u) > u_left_2:
        u_left_2 = math.ceil(u)
## right part - smaller u
u_right_2 = width
pts_transformed_r = cv2.undistortPoints(pts_rght, k_2, dist_coeff, R=R2, P=P2)
for pt in pts_transformed_r:
    u, _ = pt[0]
    if int(u) < u_right_2:
        u_right_2 = int(u)

im_1_rect_cropped = im_1_rect[v_top:v_bot, u_left_1:u_right_1]
im_2_rect_cropped = im_2_rect[v_top:v_bot, u_left_2:u_right_2]
result_cropped = np.hstack((im_1_rect_cropped, im_2_rect_cropped))
for tmp_col in range(20, height, 30):
    result = cv2.line(result_cropped, (0, tmp_col), (int(2.0 * width), tmp_col), (0, 255, 0), 1)
cv2.imshow("rectified image cropped", result_cropped)
cv2.waitKey(0)
https://stackoverflow.com/questions/58349762
复制相似问题
腾讯云开发者
