
UIImage内容模式aspectFit和底部
UIImage内容模式aspectFit和底部
提问于 2020-04-10 14:58:43
是否可以同时将我的contentMode UIImage设置为.scaleAspectFit和.bottom?
我现在的形象是这样的:

UIImageView:
let nightSky: UIImageView = {
    let v = UIImageView()
    v.image = UIImage(named: "nightSky")
    v.translatesAutoresizingMaskIntoConstraints = false
    v.contentMode = .scaleAspectFit
    return v
}()
约束:
nightSky.centerXAnchor.constraint(equalTo: view.centerXAnchor).isActive = true
        nightSky.centerYAnchor.constraint(equalTo: view.centerYAnchor, constant: -120).isActive = true
        nightSky.leadingAnchor.constraint(equalTo: view.leadingAnchor, constant: 30).isActive = true
nightSky.trailingAnchor.constraint(equalTo: view.trailingAnchor, constant: -30).isActive = true回答 2
Stack Overflow用户
回答已采纳
发布于 2020-04-10 18:20:38
下面是一个自定义类,它允许方面匹配和对齐属性。
它被标记为@IBDesignable,所以您可以在Storyboard / Interface中看到它。
@IBInspectable属性是:
- Image
- Horizontal Alignment
- Vertical Alignment
- Aspect Fill
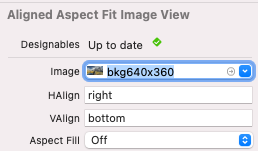
选择图像,就像选择普通UIImageView一样。
HAlign的有效值为“左”、“中心”、“右”或默认值为空(中间)。
VAlign的有效值是“顶部”、“中心”、“底部”或默认值为空白(中间)。
“方面填充”是On或Off (真/假)。如果是真的,图像将被缩放到Aspect Fill而不是Aspect Fit。
@IBDesignable
class AlignedAspectFitImageView: UIView {

    enum HorizontalAlignment: String {
        case left, center, right
    }

    enum VerticalAlignment: String {
        case top, center, bottom
    }

    private var theImageView: UIImageView = {
        let v = UIImageView()
        return v
    }()

    @IBInspectable var image: UIImage? {
        get { return theImageView.image }
        set {
            theImageView.image = newValue
            setNeedsLayout()
        }
    }

    @IBInspectable var hAlign: String = "center" {
        willSet {
            // Ensure user enters a valid alignment name while making it lowercase.
            if let newAlign = HorizontalAlignment(rawValue: newValue.lowercased()) {
                horizontalAlignment = newAlign
            }
        }
    }

    @IBInspectable var vAlign: String = "center" {
        willSet {
            // Ensure user enters a valid alignment name while making it lowercase.
            if let newAlign = VerticalAlignment(rawValue: newValue.lowercased()) {
                verticalAlignment = newAlign
            }
        }
    }

    @IBInspectable var aspectFill: Bool = false {
        didSet {
            setNeedsLayout()
        }
    }

    var horizontalAlignment: HorizontalAlignment = .center
    var verticalAlignment: VerticalAlignment = .center

    override init(frame: CGRect) {
        super.init(frame: frame)
        commonInit()
    }
    required init?(coder: NSCoder) {
        super.init(coder: coder)
        commonInit()
    }
    override func prepareForInterfaceBuilder() {
        super.prepareForInterfaceBuilder()
        commonInit()
    }
    func commonInit() -> Void {
        clipsToBounds = true
        addSubview(theImageView)
    }

    override func layoutSubviews() {
        super.layoutSubviews()
        guard let img = theImageView.image else {
            return
        }

        var newRect = bounds

        let viewRatio = bounds.size.width / bounds.size.height
        let imgRatio = img.size.width / img.size.height

        // if view ratio is equal to image ratio, we can fill the frame
        if viewRatio == imgRatio {
            theImageView.frame = newRect
            return
        }

        // otherwise, calculate the desired frame

        var calcMode: Int = 1
        if aspectFill {
            calcMode = imgRatio > 1.0 ? 1 : 2
        } else {
            calcMode = imgRatio < 1.0 ? 1 : 2
        }

        if calcMode == 1 {
            // image is taller than wide
            let heightFactor = bounds.size.height / img.size.height
            let w = img.size.width * heightFactor
            newRect.size.width = w
            switch horizontalAlignment {
            case .center:
                newRect.origin.x = (bounds.size.width - w) * 0.5
            case .right:
                newRect.origin.x = bounds.size.width - w
            default: break  // left align - no changes needed
            }
        } else {
            // image is wider than tall
            let widthFactor = bounds.size.width / img.size.width
            let h = img.size.height * widthFactor
            newRect.size.height = h
            switch verticalAlignment {
            case .center:
                newRect.origin.y = (bounds.size.height - h) * 0.5
            case .bottom:
                newRect.origin.y = bounds.size.height - h
            default: break  // top align - no changes needed
            }
        }

        theImageView.frame = newRect
    }
}
使用此图像:

以下是240 x 240 AlignedAspectFitImageView的外观,背景颜色设置为黄色(因此我们可以看到框架):
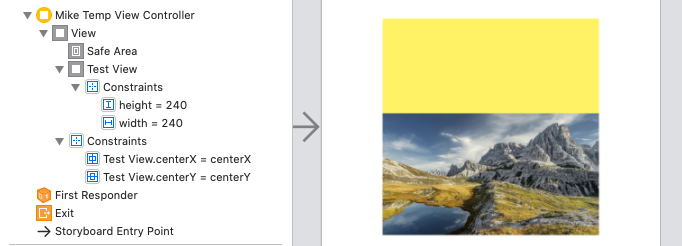
属性也可以通过代码进行设置。例如:
override func viewDidLoad() {
super.viewDidLoad()
let testImageView = AlignedAspectFitImageView()
testImageView.image = UIImage(named: "bkg640x360")
testImageView.verticalAlignment = .bottom
view.addSubview(testImageView)
// set frame / constraints / etc
testImageView.frame = CGRect(x: 40, y: 40, width: 240, height: 240)
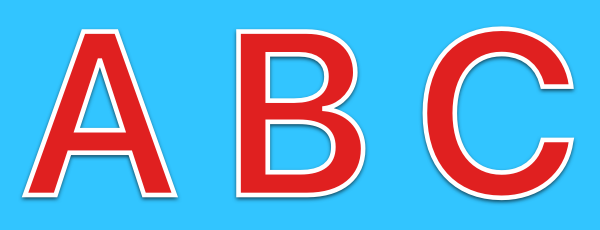
}显示“方面填充”和“方面适合”之间的区别。
使用此图像:
我们用Aspect Fill: Off和VAlign: bottom得到了这个结果。
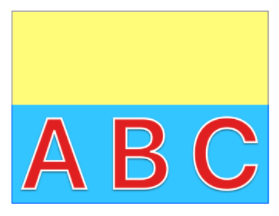
然后用Aspect Fill: On和HAlign: right得出这个结果
Stack Overflow用户
发布于 2021-08-02 15:55:54
将UIImageView's顶部布局约束优先级设置为最低(即250个),它将为您处理它。
页面原文内容由Stack Overflow提供。腾讯云小微IT领域专用引擎提供翻译支持
原文链接:
https://stackoverflow.com/questions/61142986
复制相关文章
相似问题
腾讯云开发者
