
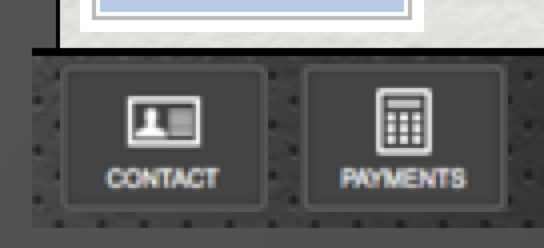
iOS中的自定义按钮,带有圆角笔划、图标和标签

我想用代码重新创建这个按钮,这样它是一个可重用的对象,并且您可以设置最小的宽度、高度,或者它延伸到适合图标和标签。在整个应用程序中,我们将在几个方面重用按钮,它将包括一个薄的圆角笔画,一个背景色,一个图标(反PNG)和一个标签。我们希望使背景颜色,和笔画颜色可配置,以便我们可以切换按钮打开/关闭。
编辑:几乎可以工作的代码,但文本标签块是白色的,需要调整大小的图像,以适应框架和两者的中心。
自定义按钮代码:
#import "CustomButton.h"

@implementation CustomButton

- (id)initWithFrame:(CGRect)frame image:(NSString *)image title:(NSString *)title background:(UIColor *)background border:(UIColor *)border
{
    self = [super initWithFrame:frame];
    if (self)
    {
        self = [UIButton buttonWithType:UIButtonTypeCustom];
        CALayer *layer = [self layer];

        self.contentVerticalAlignment = UIControlContentVerticalAlignmentBottom;
        self.contentHorizontalAlignment = UIControlContentHorizontalAlignmentCenter;

        // background
        if (background) {
            layer.backgroundColor = (__bridge CGColorRef)(background);
        } else {
            layer.backgroundColor = [[UIColor darkGrayColor] CGColor];
        }

        // border
        if (border) {
            layer.borderColor = (__bridge CGColorRef) (border);
        } else {
            layer.borderColor = [[UIColor lightGrayColor] CGColor];
        }
        layer.cornerRadius = 2.0f;
        layer.borderWidth = 0.5f;

        // icon
        UIImageView *imageView = [[UIImageView alloc] initWithImage:[UIImage imageNamed:image]];
                                  [self addSubview:imageView];

        // text label
        UILabel *titleLabel = [[UILabel alloc] initWithFrame:CGRectMake(0, 25, 55, 15)];
        titleLabel.font = [[UIFont alloc] fontWithSize:7.00];
                                titleLabel.text = title;
                                [self addSubview:titleLabel];

        [self setFrame:frame];
    }
    return self;
}

@end
编辑:上面更新的代码块和got按钮将使用viewController中各自视图中的以下代码显示:
CGRect buttonFrame = CGRectMake(125, 3, 52, 37);
CustomButton *btnNearby = [[CustomButton alloc] initWithFrame:buttonFrame image:@"map.png" title:@"NEARBY" background:nil border:nil];
[myCustomView addSubview:btnNearby];
出现自定义按钮,但仍未正确格式化。

下面是一个应该出现在按钮中心的示例图标(白色PNG w/ trans)。

所需功能摘要:
( 1)可重用按钮2)可以具有最小宽度/高度或覆盖以匹配标签宽度和图像高度+标签3)具有可配置的笔画颜色4)上面的按钮图标与笔画+图标+标签+背景色5相匹配)可以更改边框颜色以切换/关闭
回答 2
Stack Overflow用户
发布于 2012-09-17 23:52:58
我能够解决这个问题,我相信它可以进一步完善,但按钮现在出现了所需的问题。请参阅最终结果的快照,并希望下面的代码能够帮助他人。
工作截图:

工作代码:
CustomButton.h
#import <UIKit/UIKit.h>
#import <QuartzCore/QuartzCore.h>

@interface CustomButton : UIButton
- (id)initWithFrame:(CGRect)frame image:(NSString *)image title:(NSString *)title background:(UIColor *)background border:(UIColor *)border;
@end
CustomButton.m
#import "CustomButton.h"

@implementation CustomButton

- (id)initWithFrame:(CGRect)frame image:(NSString *)image title:(NSString *)title background:(UIColor *)background border:(UIColor *)border
{
    self = [super initWithFrame:frame];
    if (self)
    {
        self = [UIButton buttonWithType:UIButtonTypeCustom];
        CALayer *layer = [self layer];

        // background
        if (background) {
            layer.backgroundColor = (__bridge CGColorRef)(background);
        } else {
            layer.backgroundColor = [[UIColor darkGrayColor] CGColor];
        }

        // border
        if (border) {
            layer.borderColor = (__bridge CGColorRef)(border);
        } else {
            layer.borderColor = [[UIColor lightGrayColor] CGColor];
        }
        layer.cornerRadius = 2.0f;
        layer.borderWidth = 0.5f;

        // icon
        UIImageView *imageView = [[UIImageView alloc] initWithFrame:CGRectMake(14,3,20,19)];
        imageView.image = [UIImage imageNamed:image];
        imageView.contentMode  = UIViewContentModeScaleAspectFit;
        [self addSubview:imageView];

        // text label
        UILabel *titleLabel = [[UILabel alloc] initWithFrame:CGRectMake(0, 20, 50, 14)];
        titleLabel.opaque = NO;
        titleLabel.numberOfLines = 1;
        titleLabel.textAlignment = UITextAlignmentCenter;
        titleLabel.font = [UIFont systemFontOfSize:7.00];
        titleLabel.textColor = [UIColor whiteColor];
        titleLabel.backgroundColor = [UIColor clearColor];
        titleLabel.text = title;
        [self addSubview:titleLabel];

        [self setFrame:frame];
    }
    return self;
}

@end
实例化了具有视图控制器的UIImage层的按钮:
// Add custom button to image view background layer
CGRect buttonFrame = CGRectMake(125, 3, 50, 35);
CustomButton *btnNearby = [[CustomButton alloc] initWithFrame:buttonFrame image:@"map.png" title:@"NEARBY" background:nil border:nil];
[myCustomView addSubview:btnNearby];Stack Overflow用户
发布于 2012-09-17 18:11:12
你可以试试这样的方法:
#import <QuartzCore/QuartzCore.h>

@implementation CustomButton

- (id)initWithFrame:(CGRect)frame andImageName:(NSString*)filename ofType:(NSString*)type
{
    self = [super initWithFrame:frame];
    if (self)
    {
        self = [UIButton buttonWithType:UIButtonTypeCustom];
        CALayer *layer = [self layer];
        layer.borderColor = [[UIColor blueColor] CGColor];
        layer.cornerRadius = 4.0f;
        layer.borderWidth = 2.0f;

        UIImage* img = [[UIImage alloc] initWithContentsOfFile:[[NSBundle mainBundle] pathForResource:filename ofType:type]];
        UIImageView* imgView = [[UIImageView alloc] initWithImage:img];
        [imgView setFrame:CGRectMake(0, 0, img.size.width, img.size.height)];
        [self addSubview:imgView];

        [self setFrame:frame];
    }
    return self;
}

- (void)switchColor
{
    CALayer *layer = [self layer];

    if(buttonIsOn)
        layer.borderColor = [[UIColor blueColor] CGColor];
    else
        layer.borderColor = [[UIColor grayColor] CGColor];
}

@end
每次你使用这个按钮,只需使用:
CustomButton* cusButton = [[CustomButton alloc] initWithFrame:someFrame];
为了改变笔画颜色,只需在switchColor的目标方法的第一行中调用cusButton,就可以了。
https://stackoverflow.com/questions/12464806
复制相似问题
腾讯云开发者
