
可拖动对象和画布循环
我有三个问题。第一个问题是最重要的,但我很感激能得到其他问题的答案。
第一个问题,请看这个小摆弄:https://jsfiddle.net/owLdgrdq/10
//copia nariz
$(document).on('click', '#add-nariz', function(){
    var a = $('#add-nariz');
  var src = a.attr('src');
  var elem = $('<img class="objetos" src="' + src + '" width="30px" height="30px" style="positon: relative;" />');
  $('#fotoAlterada').append(elem);
  elem.draggable();
});
//copia bolinha azul
$(document).on('click', '#add-bb', function(){
    var a = $('#add-bb');
  var src = a.find('img:first').attr('src');
  var elem = $('<img class="objetos" src="' + src + '" width="30px" height="30px" style="positon: relative;" />');
  $('#fotoAlterada').append(elem);
  elem.draggable();
});

$(document).on('click', '#salvaImagem', function(){

  var m = $('#foto');
  var totX = parseInt(m.css('width'));
  var totY = parseInt(m.css('height'));
  var c = document.getElementById('myCanvas');
  c.width = totX;
  c.height = totY;
  var ctx = c.getContext('2d');
  alert(totX + '\n' + totY);

  var base = document.getElementById('foto');
  ctx.drawImage(base,0,0,totX,totY,0,0,totX,totY);

  var posicoes = [];
  $(".objetos").each(function(){
    var img = $(this);
    x = parseInt(img.css("left"))+totX;
    y = parseInt(img.css("top"))+totY;
    altura = parseInt(img.css("width"));
    largura = parseInt(img.css("height"));
    posicoes.push([
     x,
     y,
     largura,
     altura
    ]);
  });
  alert( JSON.stringify(posicoes));
  var j;
  var numAderecos = posicoes.length;
  for(j = 0; j < numAderecos; j++){
    ctx.drawImage(base,posicoes[j][0],posicoes[j][1],posicoes[j][2],posicoes[j][3]);
  }

});
我有一些图标(Adicionar:)我想添加到照片中(Editar:)。当用户单击图标时,会在照片旁边创建一个副本。更多的点击复制更多的副本。这些副本是可拖的。用户选择对象的位置并单击要保存的按钮("Salvar Mudan as“)。这个按钮可以复制原来的照片,上面有新的对象(在画布中)。
在JS代码的最后,我将小照片(与原始照片相同)作为添加到画布中的小对象,但仅仅是因为我不知道如何复制添加的每个对象。我怎么能这么做?
第二个问题,当点击按钮时,在画布上的位置是不一样的,它们是向下拉一点(也是左)。如果我在CSS代码中添加填充和利润率0 0px,为什么会发生这种情况?
第三个问题,变量'base‘我使用$('#foto')来获得id,但我不能在画布参数中使用它。当我使用document.getElementById('foto')时,我可以。他们之间有什么不同?
-编辑--编辑--
我的目标是通过cordova/phonegap开发一个移动应用程序。用户必须能够从设备上获得一张照片,或者用摄像头自拍(已经可以了)。当获取图片/照片时,窗口上会出现一些新的对象,如皇冠鼻子、彩色帽子和其他愚蠢的东西(可以,只需更改style="display: none;“将显示),当用户单击这些东西时,他们会在照片底部复制一个副本,这些副本必须是可拖动的(这也很好)。然后,通过jQuery,我获得了所有拖动对象在照片中的位置,用户单击一个按钮"Salvar Mudan as“(”保存更改“),这个操作将照片加上对象复制到画布区域(这就是我制作应用程序的方式)。之后,用户点击另一个按钮(在画布中),通过whatsapp、facebook、电子邮件和任何其他设备可以实现的方式共享修改后的图像。
回答 2
Stack Overflow用户
发布于 2016-01-15 03:30:52
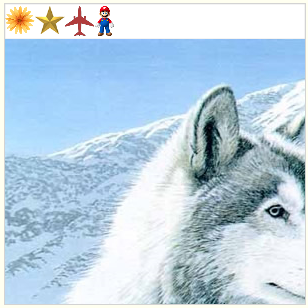
这里是使用画布将图标附加到图像的另一种方式
- 在html5画布的顶部划出一个工具栏区域,并用您想要的图标填充它。
- 将目标图像置于工具栏下面。
- 听鼠标事件。
- 允许用户将工具栏上的图标显示在下面的图像上。
- 当用户通过释放鼠标“丢弃”拖动图标时,在放置的位置创建拖动图标的副本。
这里是带注释的代码和演示::
var canvas=document.getElementById("canvas");
var ctx=canvas.getContext("2d");
var cw=canvas.width;
var ch=canvas.height;
function reOffset(){
  var BB=canvas.getBoundingClientRect();
  offsetX=BB.left;
  offsetY=BB.top;
}
var offsetX,offsetY;
reOffset();
window.onscroll=function(e){ reOffset(); }
window.onresize=function(e){ reOffset(); }

var isDown=false;
var startX,startY;

ctx.lineWidth=0.50;
ctx.strokeStyle='lightgray';
ctx.fillStyle='white';

// vars for icons, etc
var tbar={width:cw,height:35}
var tw=30;
var th=30;
var dragging=null;
var dropped=[];
var icons=[
  {name:'Flower',x:tw*0,y:2,url:'https://dl.dropboxusercontent.com/u/139992952/multple/flower.png'},
  {name:'Star',x:tw*1,y:2,url:'https://dl.dropboxusercontent.com/u/139992952/multple/star.png'},
  {name:'Plane',x:tw*2,y:2,url:'https://dl.dropboxusercontent.com/u/139992952/multple/plane2.png'},
  {name:'Mario',x:tw*3,y:2,url:'https://dl.dropboxusercontent.com/u/139992952/multple/marioStanding.png'},
];
  var thumbs=[];
var mainImg=new Image();
mainImg.crossOrigin='anonymous';
mainImg.onload=start;
mainImg.src='https://dl.dropboxusercontent.com/u/139992952/multple/husky.jpg';
var imgCount=icons.length+1;
for(var i=0;i<icons.length;i++){
  var icon=icons[i];
  icon.index=i;
  icon.img=new Image();
  icon.img.crossOrigin='anonymous';
  icon.img.onload=start;
  icon.img.src=icon.url;
}

// start is called when each image is fully loaded
function start(){
  // wait for all images to load
  if(--imgCount>0){return;}
  // create
  for(var i=0;i<icons.length;i++){
    var icon=icons[i];
    thumbs.push(thumb(icon.img,tw,th));
  }
  // draw the toolbar & image
  draw();
  // listen for mouse events
  $("#canvas").mousedown(function(e){handleMouseDown(e);});
  $("#canvas").mousemove(function(e){handleMouseMove(e);});
  $("#canvas").mouseup(function(e){handleMouseUpOut(e);});
  $("#canvas").mouseout(function(e){handleMouseUpOut(e);});
}

// create thumbnails for each image (to be used as icons in the toolbar)
function thumb(img,w,h){
  var iw=img.width;
  var ih=img.height;
  var s=Math.min((w/iw),(h/ih))
  var c=document.createElement('canvas');
  c.width=iw*s;
  c.height=ih*s;
  c.getContext('2d').drawImage(img,0,0,iw,ih,0,0,iw*s,ih*s);
  return(c);
}

// draw the toolbar, image & any clone thumbnails added to the image
function draw(){
  ctx.clearRect(0,0,cw,ch);
  ctx.fillRect(0,0,cw,tbar.height);
  ctx.strokeRect(0,0,cw,tbar.height);
  ctx.drawImage(mainImg,0,tbar.height);
  for(var i=0;i<icons.length;i++){
    var icon=icons[i];
    ctx.drawImage(thumbs[icon.index],icon.x,icon.y);
  }
  for(var i=0;i<dropped.length;i++){
    var icon=dropped[i];
    ctx.drawImage(thumbs[icon.thumbIndex],icon.x,icon.y);
  }
  if(dragging){
    ctx.drawImage(thumbs[dragging.thumbIndex],dragging.x,dragging.y);
  }
}

//
function handleMouseDown(e){
  // tell the browser we're handling this event
  e.preventDefault();
  e.stopPropagation();
  // get the mouse position
  startX=parseInt(e.clientX-offsetX);
  startY=parseInt(e.clientY-offsetY);
  // hit test the toolbar icons and any dropped icons
  var mx=startX;
  var my=startY;
  // hit test toolbar icons
  if(mx>0 && mx<tw*icons.length && my>2 && my<2+tw){
    var icon=icons[parseInt(mx/tw)];
    dragging={thumbIndex:icon.index,x:icon.x,y:icon.y};
    dragging.source='icons';
    return;
  }
  // hit test dropped icons
  for(var i=0;i<dropped.length;i++){
    var icon=dropped[i];
    if(mx>icon.x && mx<icon.x+tw && my>icon.y && my<icon.y+th){
      dragging=dropped[i];
      dragging.source='dropped';
      dragging.droppedIndex=i;
      return;
    }
  }
}

// Add any
function handleMouseUpOut(e){
  if(!dragging){return;}
  // tell the browser we're handling this event
  e.preventDefault();
  e.stopPropagation();
  //
  mouseX=parseInt(e.clientX-offsetX);
  mouseY=parseInt(e.clientY-offsetY);
  // add the icon to its dropped position
  if(dragging.source=='icons'){
    if(dragging.y>tbar.height){
      dropped.push(dragging);
    }
    // remove the dropped icon if it's back in the toolbar
  }else if(dragging.y<tbar.height){
    dropped.splice(dragging.droppedIndex,1);
  }
  // clear dragging
  dragging=null;
  // redraw
  draw();
}

// move any icon that's being dragged
function handleMouseMove(e){
  if(!dragging){return;}
  // tell the browser we're handling this event
  e.preventDefault();
  e.stopPropagation();
  // get mouse position
  mouseX=parseInt(e.clientX-offsetX);
  mouseY=parseInt(e.clientY-offsetY);
  // move the dragged icon by the distance the mouse
  // has moved since the last mousemove event
  var dx=mouseX-startX;
  var dy=mouseY-startY;
  startX=mouseX;
  startY=mouseY;
  dragging.x+=dx;
  dragging.y+=dy;
  // redraw
  draw();
}

// save just the image with dropped icons
$('#save').click(function(){
  var c=document.createElement('canvas');
  c.width=cw;
  c.height=ch-tbar.height;
  c.getContext('2d').drawImage(canvas,0,tbar.height,cw,ch-tbar.height,0,0,c.width,c.height);
  var img=new Image();
  img.onload=function(){
    document.body.appendChild(img);
  }
  img.src=c.toDataURL();
});body{ background-color: ivory; }
#canvas{border:1px solid lightgray; }<script src="https://ajax.googleapis.com/ajax/libs/jquery/1.9.1/jquery.min.js"></script>
<button id='save'>Save</button>
<h4>Drag from top toolbar & icon will be drop-copied<br>Drag dropped icons around image<br>Drag dropped icon back to toolbar to delete.</h4>
<canvas id="canvas" width=300 height=300></canvas>
Stack Overflow用户
发布于 2016-01-13 18:51:20
这有点难理解,但我怀疑您是在询问如何将所有现有的DOM映像组合到单个画布上下文中。为此,您可能希望查看2dCanvas上的globalCompositeOperation属性:
合成教程 -不同类型的工作方式的基本大纲
还有第三个问题:$('#foto')返回jquery对象,document.getElementById返回DOM对象。要获得实际的DOM元素,您可以执行如下操作:var theEl = $('#foto')[0]
https://stackoverflow.com/questions/34773602
复制相似问题
腾讯云开发者
