如何在键盘上方添加按钮
如何在键盘上方添加按钮
提问于 2017-01-04 09:49:50
如何在应用程序中添加键盘上方的按钮?当您长时间按下UITextView中的文本时,如何添加“选择”和“选择全部”?
回答 5
Stack Overflow用户
回答已采纳
发布于 2017-01-04 10:33:41
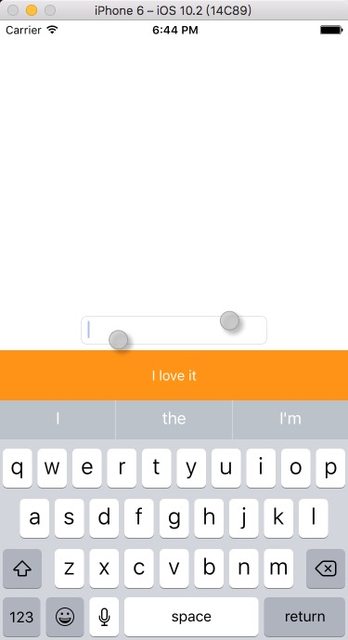
第一个问题,您可以将textField的inputAccessoryView设置为自定义视图,这可以自定义键盘的标题。
结果:

你可以像下面这样做;
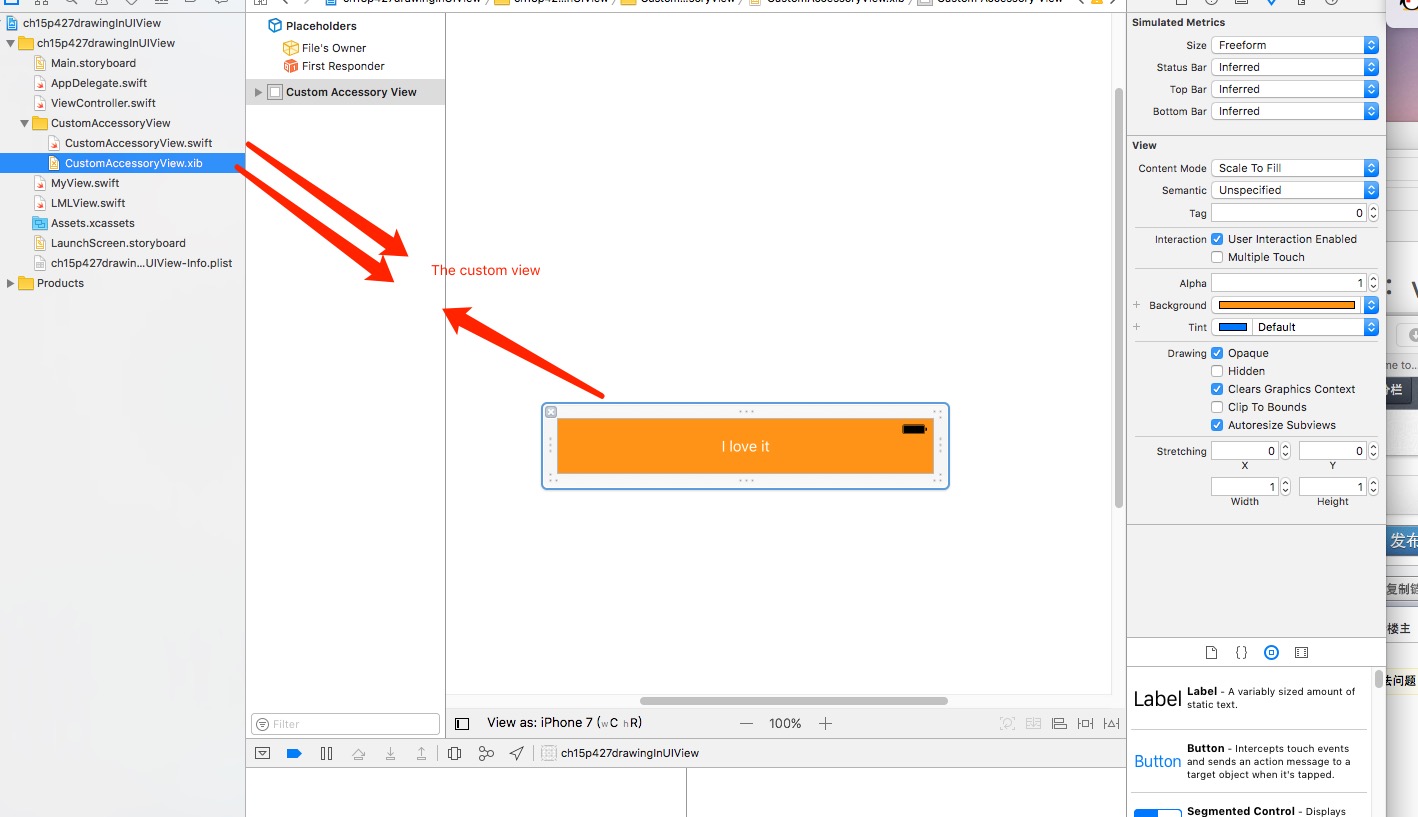
首先,您应该实例要在键盘上方添加的视图。

class ViewController : UIViewController {

@IBOutlet weak var textField: UITextField!
override func viewDidLoad() {
    super.viewDidLoad()

textField.inputAccessoryView = Bundle.main.loadNibNamed("CustomAccessoryView", owner: self, options: nil)?.first as! UIView?在CustomAccessoryView中,可以设置按钮的操作:
import UIKit

class CustomAccessoryView: UIView {

    @IBAction func clickLoveButton(_ sender: UIButton) {

        print("Love button clicked")
    }
}Stack Overflow用户
发布于 2017-01-04 10:52:02
我建议为您的toolbar UITextField的accessoryView属性创建一个accessoryView。
这样做的目的是在textfield第一次显示之前添加一次这个toolbar。因此,我们将delegate分配给self,并使用我们的实现重写textFieldShouldBeginEditing委托调用以添加accessoryView。
下面是一个简单的例子,您如何实现它:
import UIKit

class ViewController: UIViewController {
    // your `UITextfield` instance
    // Don't forget to attach it from the IB or create it programmaticly
    @IBOutlet weak var textField: UITextField!

    override func viewDidLoad() {
        super.viewDidLoad()
        // Assign the delegate to self
        textField.delegate = self
    }
}

// MARK: Create extension to conform to UITextfieldDelegate
extension ViewController: UITextFieldDelegate {
    func textFieldShouldBeginEditing(_ textField: UITextField) -> Bool {
        setupTextFieldsAccessoryView()
        return true
    }

    func setupTextFieldsAccessoryView() {
        guard textField.inputAccessoryView == nil else {
            print("textfields accessory view already set up")
            return
        }

        // Create toolBar
        let toolBar: UIToolbar = UIToolbar(frame:CGRect(x: 0, y: 0, width: UIScreen.main.bounds.size.width, height: 44))
        toolBar.barStyle = UIBarStyle.black
        toolBar.isTranslucent = false

        // Add buttons as `UIBarButtonItem` to toolbar
        // First add some space to the left hand side, so your button is not on the edge of the screen
        let flexsibleSpace: UIBarButtonItem = UIBarButtonItem(barButtonSystemItem: UIBarButtonSystemItem.flexibleSpace, target: nil, action: nil) // flexible space to add left end side

        // Create your first visible button
        let doneButton: UIBarButtonItem = UIBarButtonItem(barButtonSystemItem: UIBarButtonSystemItem.done, target: self, action: #selector(didPressDoneButton))
        // Note, that we declared the `didPressDoneButton` to be called, when Done button has been pressed
        toolBar.items = [flexsibleSpace, doneButton]

        // Assing toolbar as inputAccessoryView
        textField.inputAccessoryView = toolBar
    }

    func didPressDoneButton(button: UIButton) {
        // Button has been pressed
        // Process the containment of the textfield or whatever

        // Hide keyboard
        textField.resignFirstResponder()
    }
}
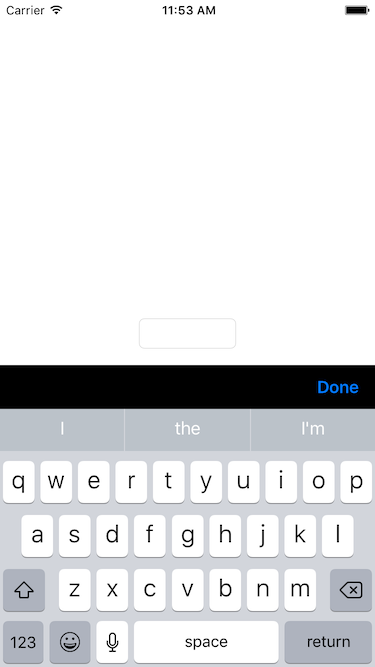
这应该是您的输出:

Stack Overflow用户
发布于 2019-07-15 09:58:51
您必须使用文本字段的inputAccessoryView。
您可以将下面的代码片段放在viewDidLoad()中:
 override func viewDidLoad() {
    super.viewDidLoad()
      let button = UIButton(frame: CGRect(x: 0, y: 0, width: view.frame.size.width, height: 60))
      button.backgroundColor = UIColor.blue
      button.setTitle("NEXT", for: .normal)
      button.setTitleColor(UIColor.white, for: .normal)
      button.addTarget(self, action: #selector(self. yourButton), for: .touchUpInside)
      numtextField.inputAccessoryView = button

 }

 @objc func nextButton()
 {
      print("do something")
}页面原文内容由Stack Overflow提供。腾讯云小微IT领域专用引擎提供翻译支持
原文链接:
https://stackoverflow.com/questions/41460754
复制相关文章
相似问题

