
基于彩色python的对象包围框
我试图在这张图片中的每一个物体上画一个边框,我用文档编写了这段代码。
import cv2 as cv2
import os
import numpy as np


img = cv2.imread('1 (2).png')
img = cv2.cvtColor(img, cv2.COLOR_BGR2GRAY);
ret,thresh = cv2.threshold(img,127,255,0)
im2,contours,hierarchy = cv2.findContours(thresh, 1, 2)
for item in range(len(contours)):
    cnt = contours[item]
    if len(cnt)>20:
        print(len(cnt))
        M = cv2.moments(cnt)
        cx = int(M['m10']/M['m00'])
        cy = int(M['m01']/M['m00'])
        x,y,w,h = cv2.boundingRect(cnt)
        cv2.rectangle(img,(x,y),(x+w,y+h),(0,255,0),2)
        cv2.imshow('image',img)
        cv2.waitKey(0)
        cv2.destroyAllWindows()
结果只有一个对象,
当我将该行中的值127更改为该行中的200时,ret,thresh = cv2.threshold(img,127,255,0)得到了不同的对象。

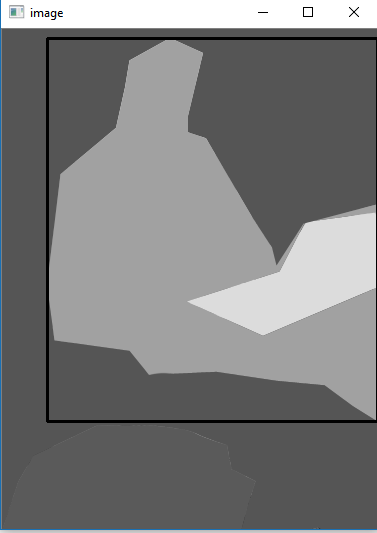
这是原图
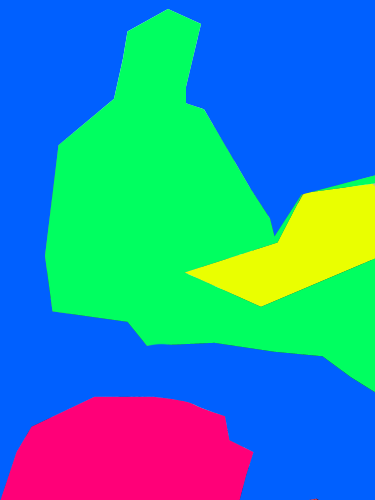
问题是如何检测所有对象一次?
回答 2
Stack Overflow用户
发布于 2018-05-01 14:45:29
这种方法相当简单。我们从转换到HSV开始,只抓取色调通道。
image_hsv = cv2.cvtColor(image, cv2.COLOR_BGR2HSV)
h,_,_ = cv2.split(image_hsv)接下来,我们找到主要的色调--首先使用numpy.bincount计算每个色调的出现次数(我们flatten的色调通道图像使其成为一维的):
bins = np.bincount(h.flatten())然后使用numpy.where找出哪些比较常见
MIN_PIXEL_CNT_PCT = (1.0/20.0)
peaks = np.where(bins > (h.size * MIN_PIXEL_CNT_PCT))[0]
既然我们已经识别了所有的主要色调,我们就可以反复处理图像,找出它们各自对应的区域:
for i, peak in enumerate(peaks):我们首先创建一个掩码,它选择这个色调的所有像素(cv2.inRange ),然后从输入的BGR图像(cv2.bitwise_and )中提取相应的部分。
mask = cv2.inRange(h, peak, peak)
blob = cv2.bitwise_and(image, image, mask=mask)接下来,我们找出这个色调的所有连续区域的等值线(cv2.findContours ),这样我们就可以单独地处理它们。
_, contours, _ = cv2.findContours(mask, cv2.RETR_EXTERNAL, cv2.CHAIN_APPROX_SIMPLE)现在,对于每个已识别的连续区域
for j, contour in enumerate(contours):我们确定包围框(cv2.boundingRect ),并通过填充白色的等高线多边形(numpy.zeros_like和cv2.drawContours)创建对应于此轮廓的掩码。
bbox = cv2.boundingRect(contour)
contour_mask = np.zeros_like(mask)
cv2.drawContours(contour_mask, contours, j, 255, -1)
然后,我们可以只增加与边框对应的ROI。
region = blob.copy()[bbox[1]:bbox[1]+bbox[3],bbox[0]:bbox[0]+bbox[2]]
region_mask = contour_mask[bbox[1]:bbox[1]+bbox[3],bbox[0]:bbox[0]+bbox[2]]
region_masked = cv2.bitwise_and(region, region, mask=region_mask)或者可视化(cv2.rectangle是包围框:
result = cv2.bitwise_and(blob, blob, mask=contour_mask)
top_left, bottom_right = (bbox[0], bbox[1]), (bbox[0]+bbox[2], bbox[1]+bbox[3])
cv2.rectangle(result, top_left, bottom_right, (255, 255, 255), 2)
或者做你想做的任何其他处理。
完整脚本
import cv2
import numpy as np

# Minimum percentage of pixels of same hue to consider dominant colour
MIN_PIXEL_CNT_PCT = (1.0/20.0)

image = cv2.imread('colourblobs.png')
if image is None:
    print("Failed to load iamge.")
    exit(-1)

image_hsv = cv2.cvtColor(image, cv2.COLOR_BGR2HSV)
# We're only interested in the hue
h,_,_ = cv2.split(image_hsv)
# Let's count the number of occurrences of each hue
bins = np.bincount(h.flatten())
# And then find the dominant hues
peaks = np.where(bins > (h.size * MIN_PIXEL_CNT_PCT))[0]

# Now let's find the shape matching each dominant hue
for i, peak in enumerate(peaks):
    # First we create a mask selecting all the pixels of this hue
    mask = cv2.inRange(h, peak, peak)
    # And use it to extract the corresponding part of the original colour image
    blob = cv2.bitwise_and(image, image, mask=mask)

    _, contours, _ = cv2.findContours(mask, cv2.RETR_EXTERNAL, cv2.CHAIN_APPROX_SIMPLE)

    for j, contour in enumerate(contours):
        bbox = cv2.boundingRect(contour)
        # Create a mask for this contour
        contour_mask = np.zeros_like(mask)
        cv2.drawContours(contour_mask, contours, j, 255, -1)

        print "Found hue %d in region %s." % (peak, bbox)
        # Extract and save the area of the contour
        region = blob.copy()[bbox[1]:bbox[1]+bbox[3],bbox[0]:bbox[0]+bbox[2]]
        region_mask = contour_mask[bbox[1]:bbox[1]+bbox[3],bbox[0]:bbox[0]+bbox[2]]
        region_masked = cv2.bitwise_and(region, region, mask=region_mask)
        file_name_section = "colourblobs-%d-hue_%03d-region_%d-section.png" % (i, peak, j)
        cv2.imwrite(file_name_section, region_masked)
        print " * wrote '%s'" % file_name_section

        # Extract the pixels belonging to this contour
        result = cv2.bitwise_and(blob, blob, mask=contour_mask)
        # And draw a bounding box
        top_left, bottom_right = (bbox[0], bbox[1]), (bbox[0]+bbox[2], bbox[1]+bbox[3])
        cv2.rectangle(result, top_left, bottom_right, (255, 255, 255), 2)
        file_name_bbox = "colourblobs-%d-hue_%03d-region_%d-bbox.png" % (i, peak, j)
        cv2.imwrite(file_name_bbox, result)
        print " * wrote '%s'" % file_name_bbox
控制台输出
Found hue 32 in region (186, 184, 189, 122).
* wrote 'colourblobs-0-hue_032-region_0-section.png'
* wrote 'colourblobs-0-hue_032-region_0-bbox.png'
Found hue 71 in region (300, 197, 1, 1).
* wrote 'colourblobs-1-hue_071-region_0-section.png'
* wrote 'colourblobs-1-hue_071-region_0-bbox.png'
Found hue 71 in region (301, 195, 1, 1).
* wrote 'colourblobs-1-hue_071-region_1-section.png'
* wrote 'colourblobs-1-hue_071-region_1-bbox.png'
Found hue 71 in region (319, 190, 1, 1).
* wrote 'colourblobs-1-hue_071-region_2-section.png'
* wrote 'colourblobs-1-hue_071-region_2-bbox.png'
Found hue 71 in region (323, 176, 52, 14).
* wrote 'colourblobs-1-hue_071-region_3-section.png'
* wrote 'colourblobs-1-hue_071-region_3-bbox.png'
Found hue 71 in region (45, 10, 330, 381).
* wrote 'colourblobs-1-hue_071-region_4-section.png'
* wrote 'colourblobs-1-hue_071-region_4-bbox.png'
Found hue 109 in region (0, 0, 375, 500).
* wrote 'colourblobs-2-hue_109-region_0-section.png'
* wrote 'colourblobs-2-hue_109-region_0-bbox.png'
Found hue 166 in region (1, 397, 252, 103).
* wrote 'colourblobs-3-hue_166-region_0-section.png'
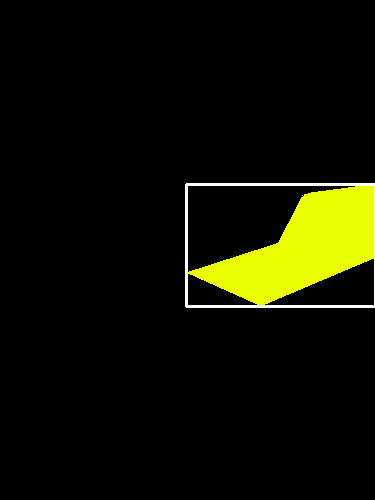
* wrote 'colourblobs-3-hue_166-region_0-bbox.png'示例输出图像
黄色边框:
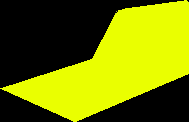
黄色提取区域:
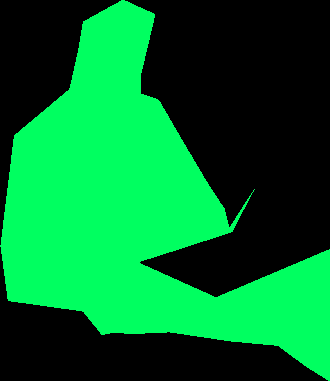
最大的绿色边框(还有其他几个不相交的小区域):
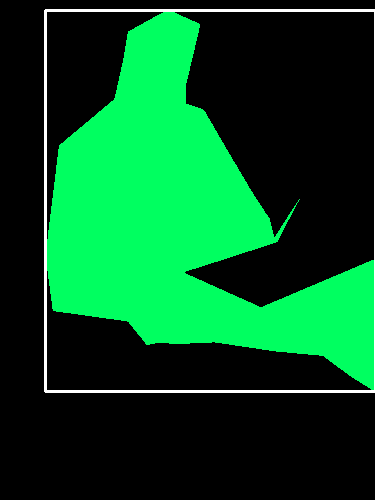
...and对应的提取区域:
Stack Overflow用户
发布于 2018-04-28 11:31:48
第一步是理解您的算法是什么doing...specifically这个函数:ret,thresh = cv2.threshold(img,127,255,0)
值127是0到255之间的灰度值。阈值函数将127到0以下的像素值和127到255以上的像素值进行更改。
对于您的彩色图像,绿色blob和黄色blob的灰度输出都在127以上,因此这两个输出都更改为255,因此这两个输出都由findContours()方法捕获。
您可以在imshow对象上运行thresh来准确地了解正在发生的事情。
现在,当您将127替换为200时,只有黄色blob的灰度值在200以上,因此只有该blob在thresh Mat中才能看到。
要同时检测“所有对象”,请进一步使用threshold方法进行实验,并使用imshow对thresh对象进行研究。
https://stackoverflow.com/questions/50051916
复制相似问题
腾讯云开发者

Copyright © 2013 - 2026 Tencent Cloud. All Rights Reserved. 腾讯云 版权所有
深圳市腾讯计算机系统有限公司 ICP备案/许可证号:粤B2-20090059 ![]() 粤公网安备44030502008569号
粤公网安备44030502008569号
腾讯云计算(北京)有限责任公司 京ICP证150476号 | 京ICP备11018762号