2. Select Instance Management from the left navigation bar, navigate to the "Instance Management" page, and click on Create.
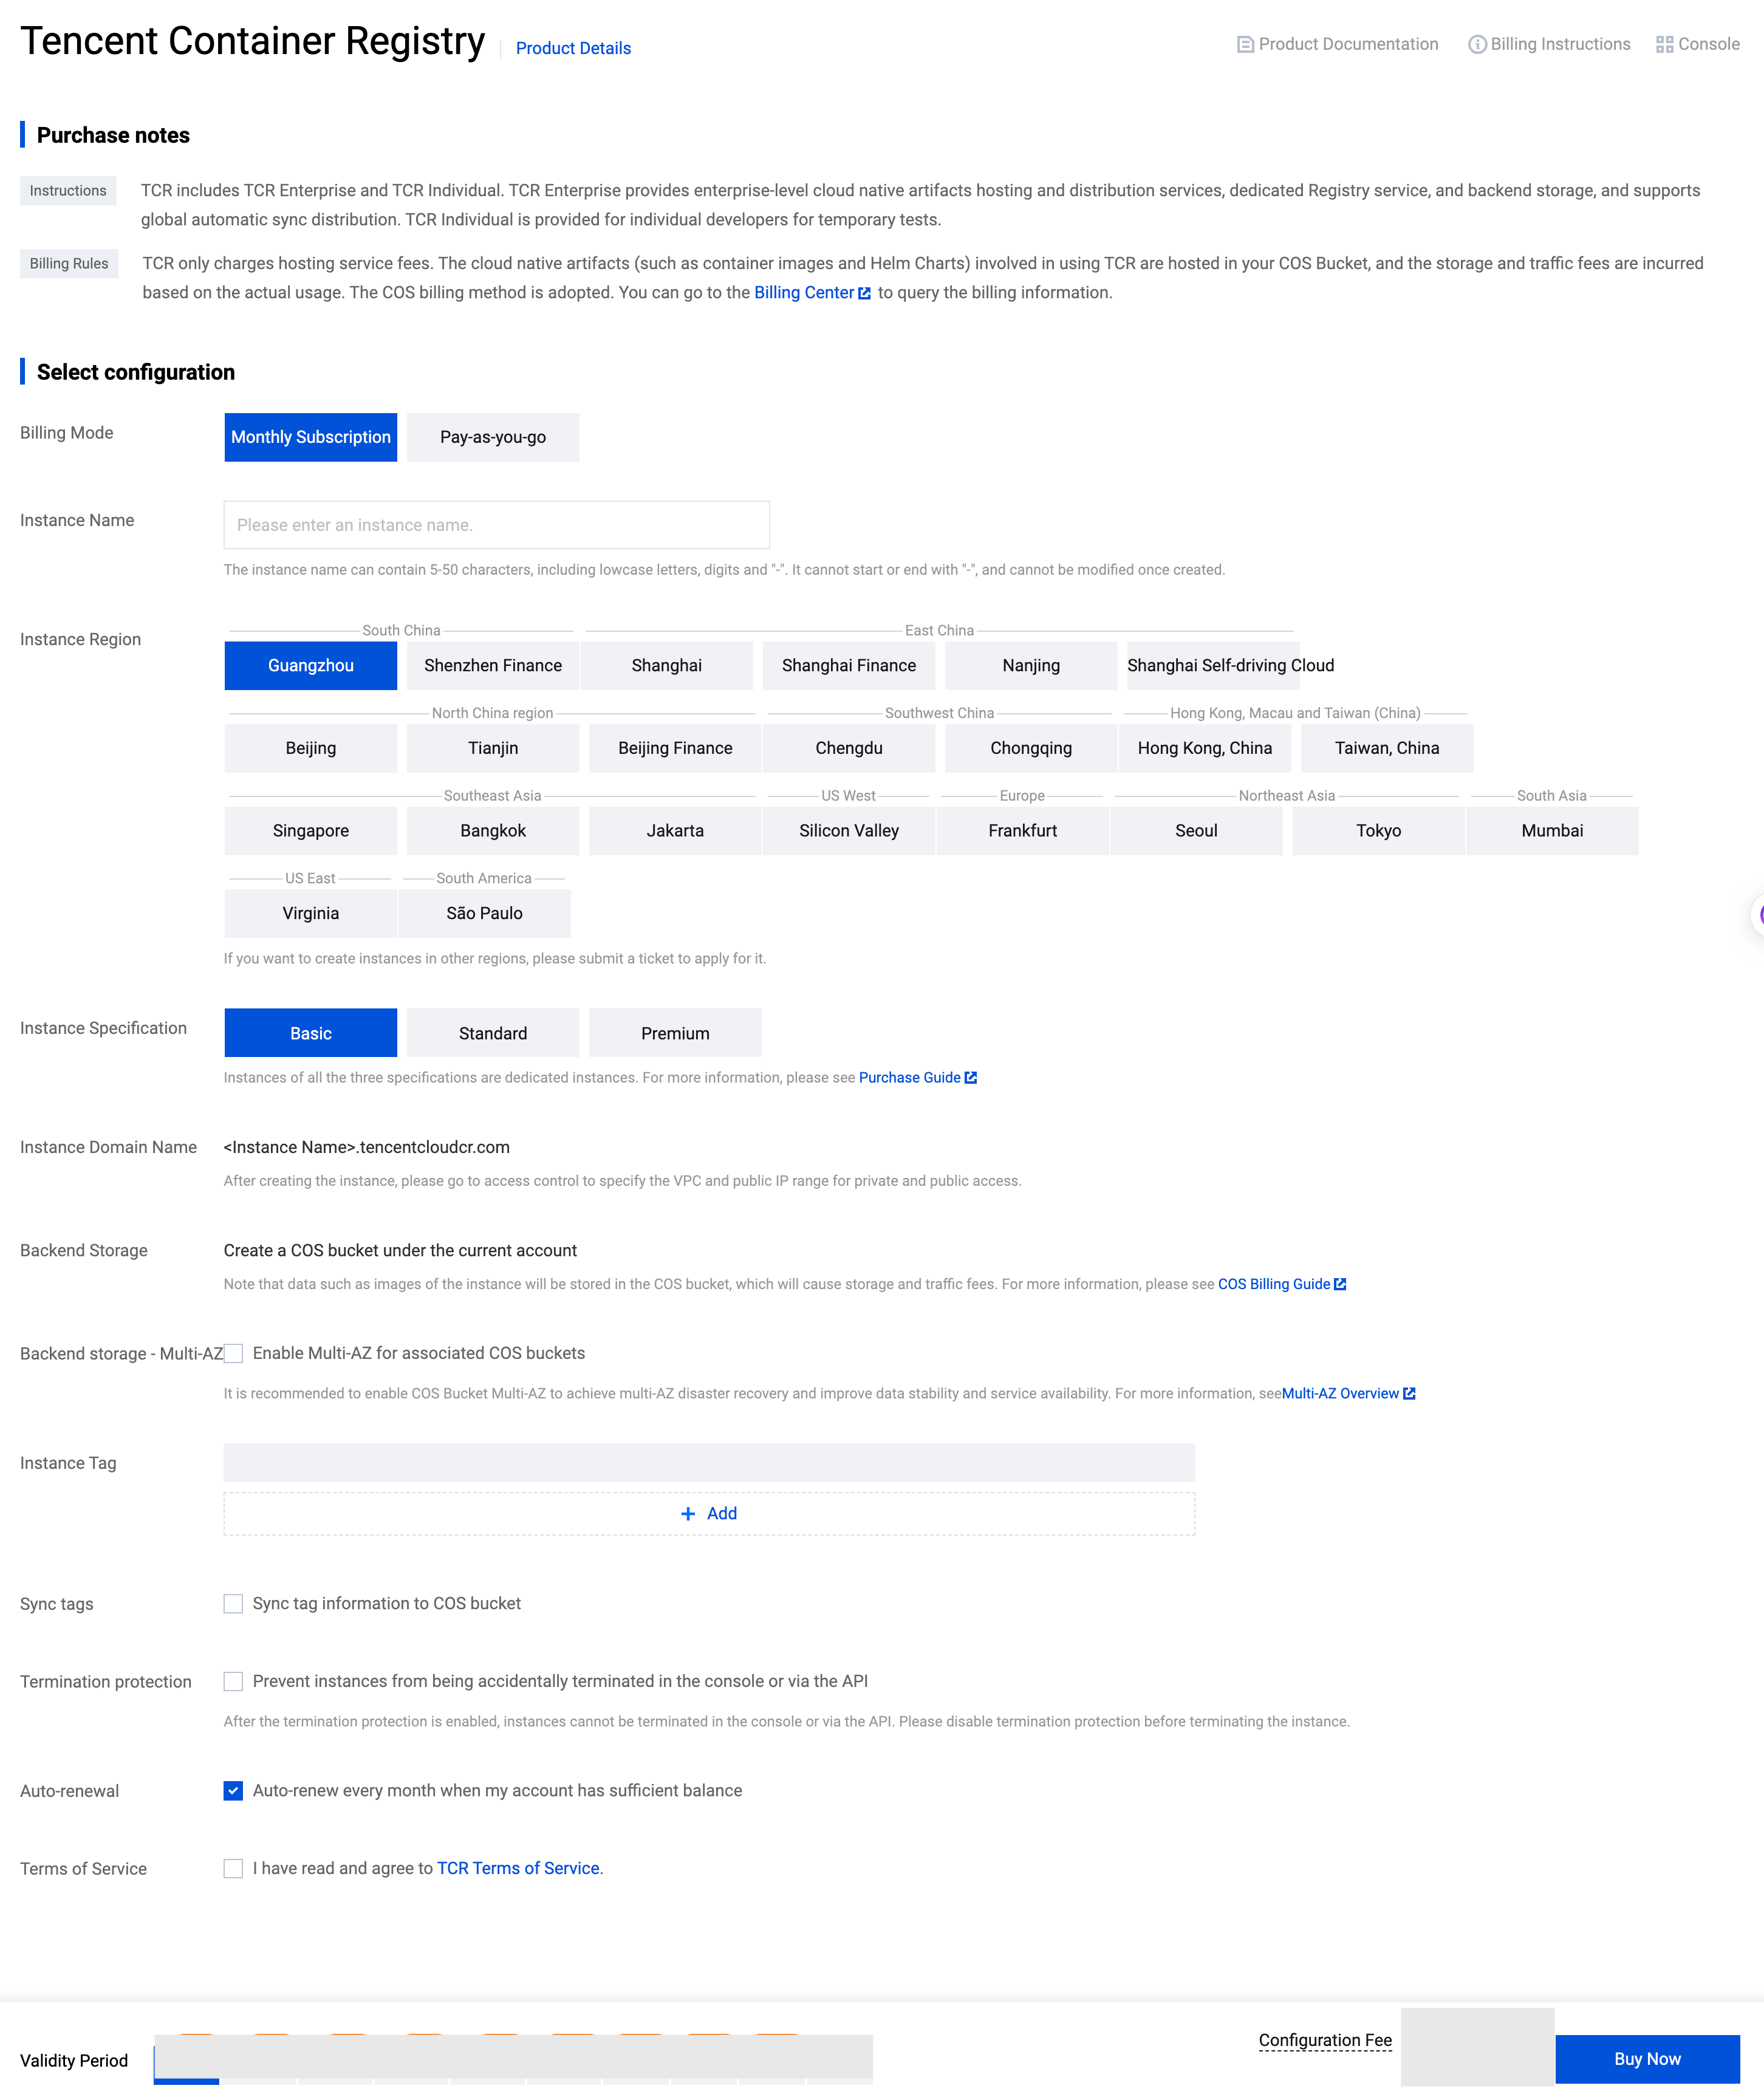
3. In the "Container Registry Purchase Page", refer to the following information to purchase an instance, as shown in the figure below:
Billing Mode: Tencent Container Registry (TCR) offers two billing methods: annual/monthly subscription and pay-as-you-go. For more information, see the Billing Overview of TCR.
Instance Name: Enter a custom instance name. The name must be globally unique and cannot be identical with an existing instance name of your own or another user. This name is used as the access domain name of this TCR instance. The name cannot be modified after the instance is purchased. We recommend that you use an abbreviation that combines the company name and instance region or project as the instance name.
Instance Region: Select a region where you want to deploy the instance. The region cannot be modified after the instance is purchased. Select the region based on the location of the container cluster resources.
Instance Specification: Select the instance specifications that you want to purchase. Different instance specifications have different instance performance levels and quotas. Make your choices based on the specification comparison on the page.
Instance Domain Name: The instance domain name that is automatically generated. Its prefix is the same as the instance name. The instance domain name cannot be modified after the instance is purchased. This domain name is used when you run the docker login command to log in to the instance.
Backend Storage: When purchasing an instance, a Tencent Cloud Object Storage (COS) bucket will be automatically purchased and associated with your account. The instance's images and other data will be stored in this bucket, incurring storage and traffic fees. For details, see COS Billing Guide. After purchasing the instance, you can view the bucket in the COS console. Avoid accidentally deleting the bucket, as the images and other data hosted in the instance will be irretrievable.
Backend Storage - Multi-AZ Feature: Optionally enable the associated COS bucket's Multi-AZ feature. It is recommended to enable the COS bucket Multi-AZ feature for multi-Availability Zone disaster recovery, higher data reliability, and service availability. However, this results in relatively higher storage capacity costs. For more information, refer to Object Storage COS Official Documentation - Multi-AZ Feature Overview.
Instance Tag: Bind the newly created instance to a Tencent Cloud tag. You can also bind and edit tags on the instance details page after purchasing the instance.
4. Read and consent to the TCR Service Agreement.
Enterprise Edition instances are billed differently based on their region and specifications. Confirm the selected specifications and configuration fees after configuring the basic information.
5. After checking the selected option, click Buy Now to purchase the enterprise edition instance you have selected and configured.
6. You can view the instance purchase progress on the "Instance Management" page. If the instance status changes to "Running", the instance was successfully purchased and is running properly.
Note
If the instance purchase takes an unusually long time or the status displayed is abnormal, you can contact us online.
Creating via API
You can also create an instance using the CreateInstance interface. For more information, refer to the Create Instance API documentation.
Supports and Limits
If you choose to purchase an Enterprise Edition instance using the pay-as-you-go billing mode, fees will be generated hourly after the instance is created, with the specific amount displayed on the purchase page. You can visit the Billing Center to check the fees generated by this service. If you have any questions about the charges, please contact us online.