使用场景
注意:
功能实现
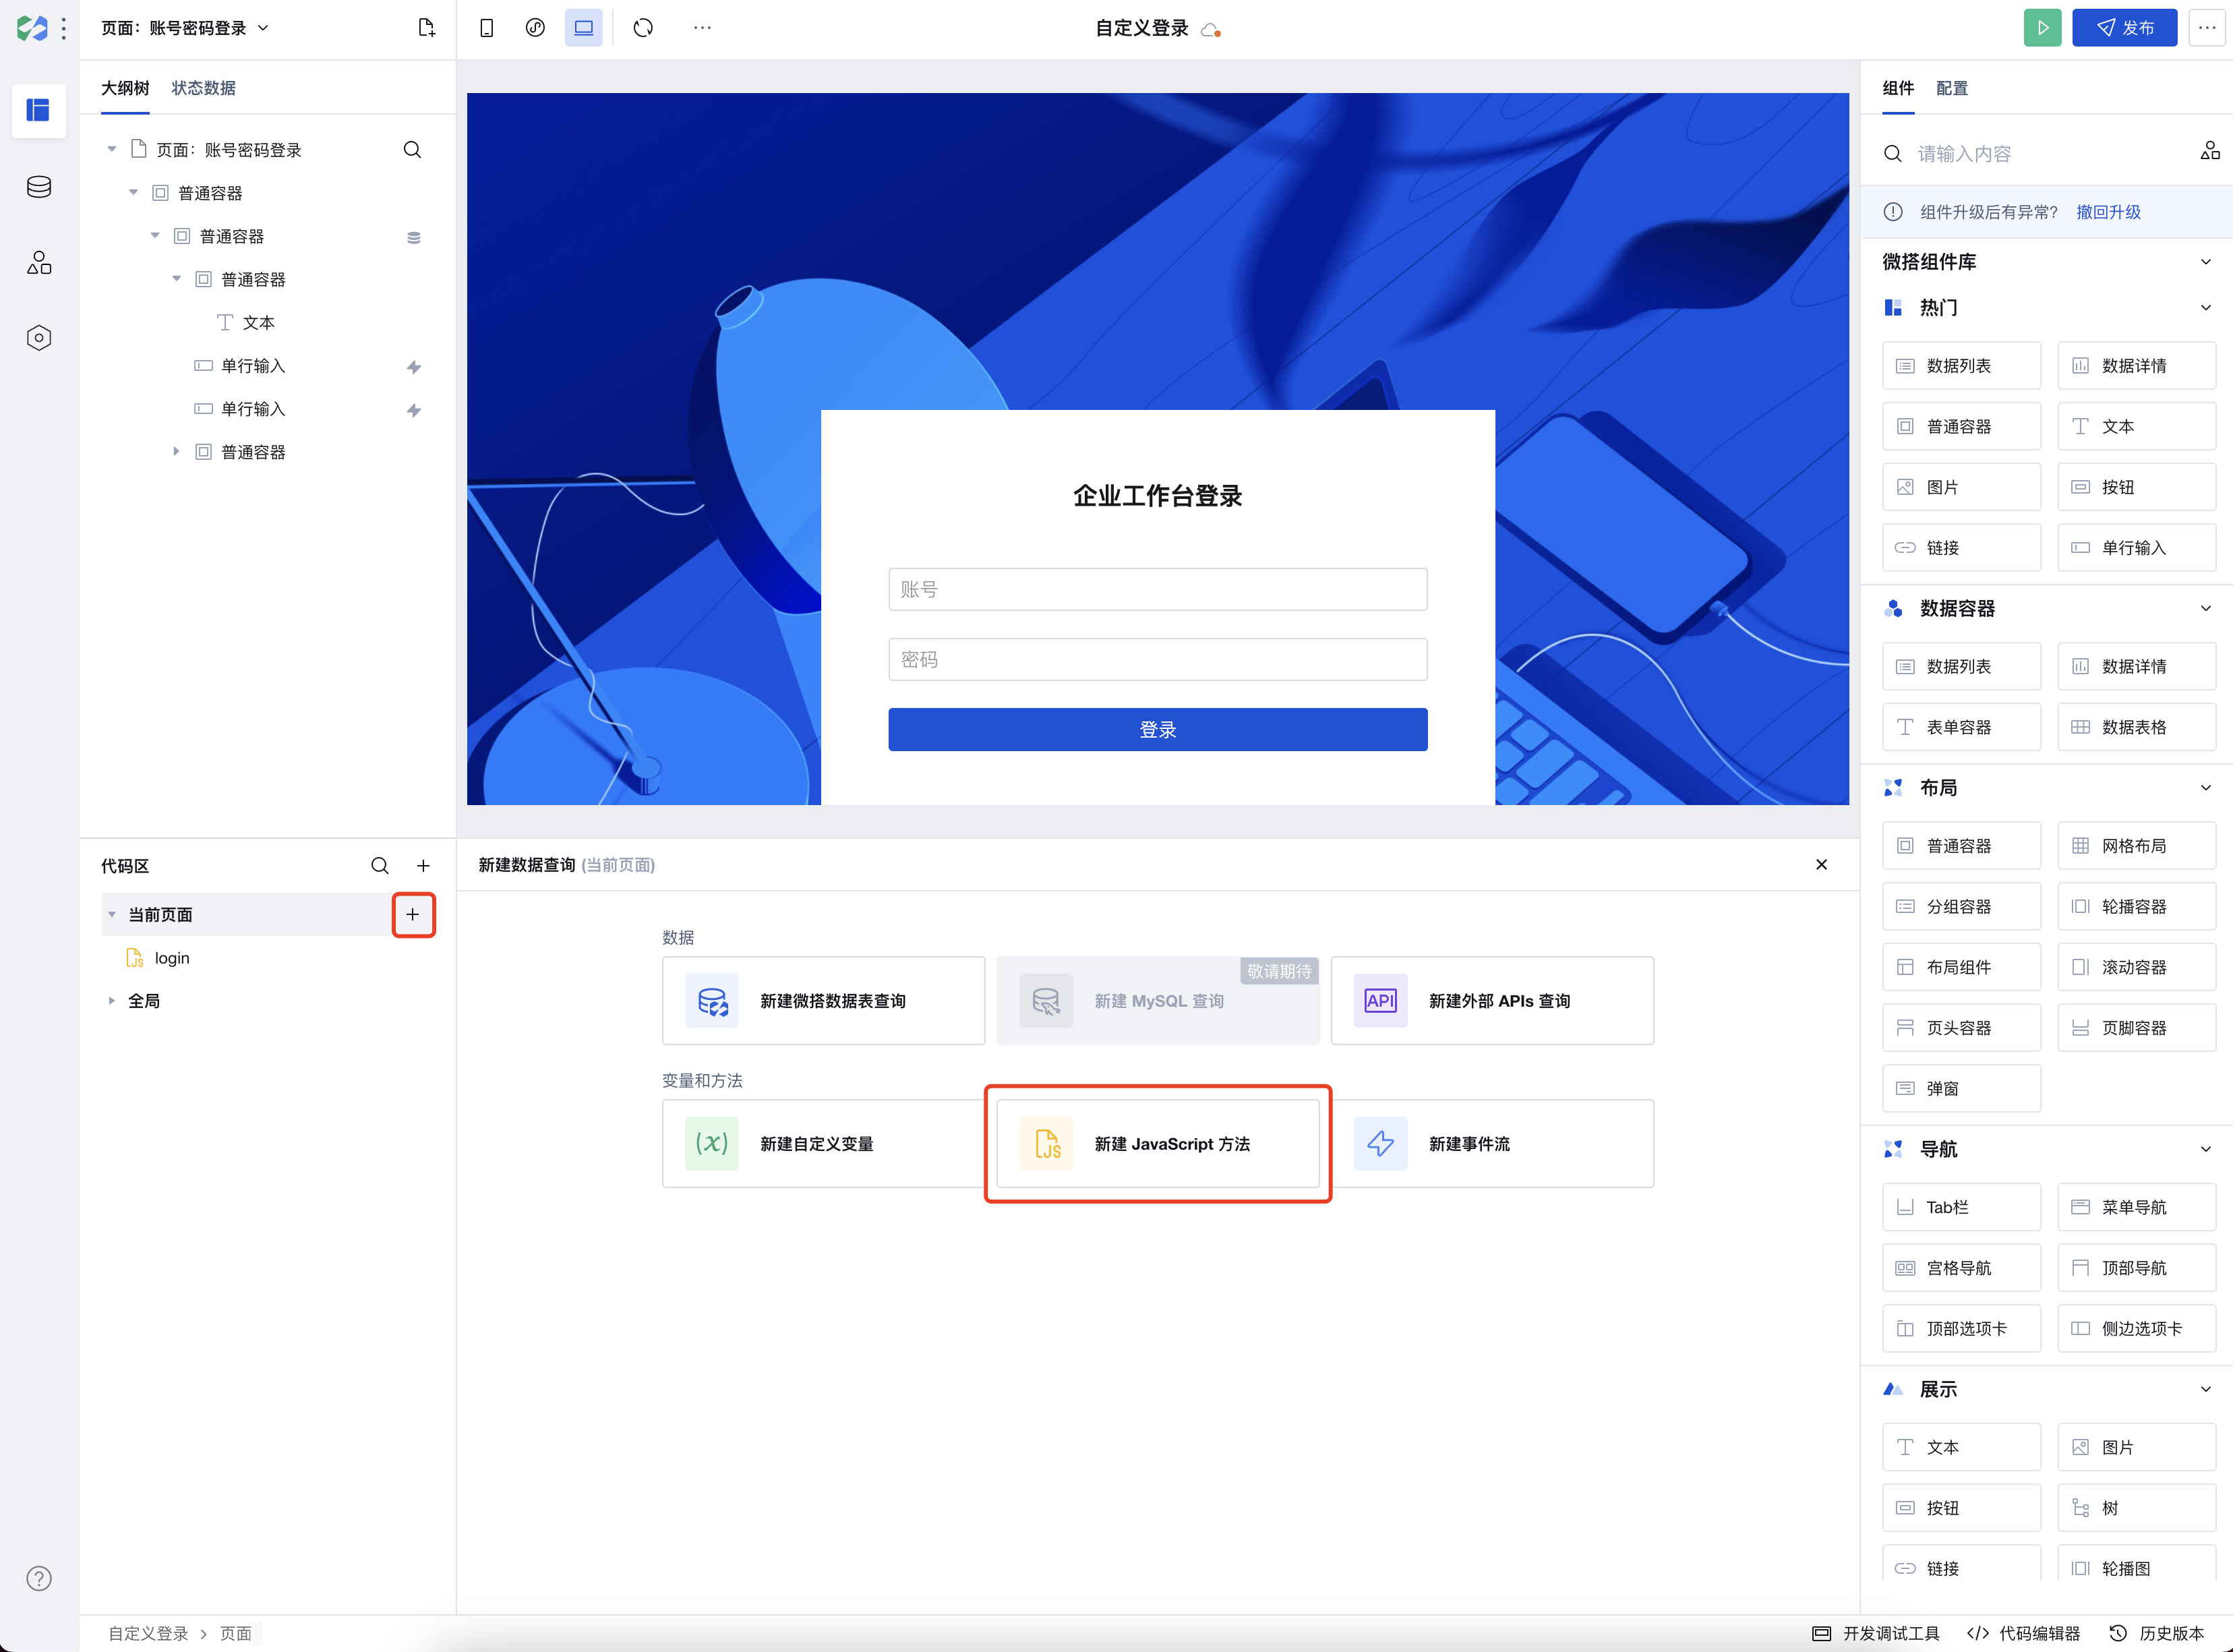
账号密码登录
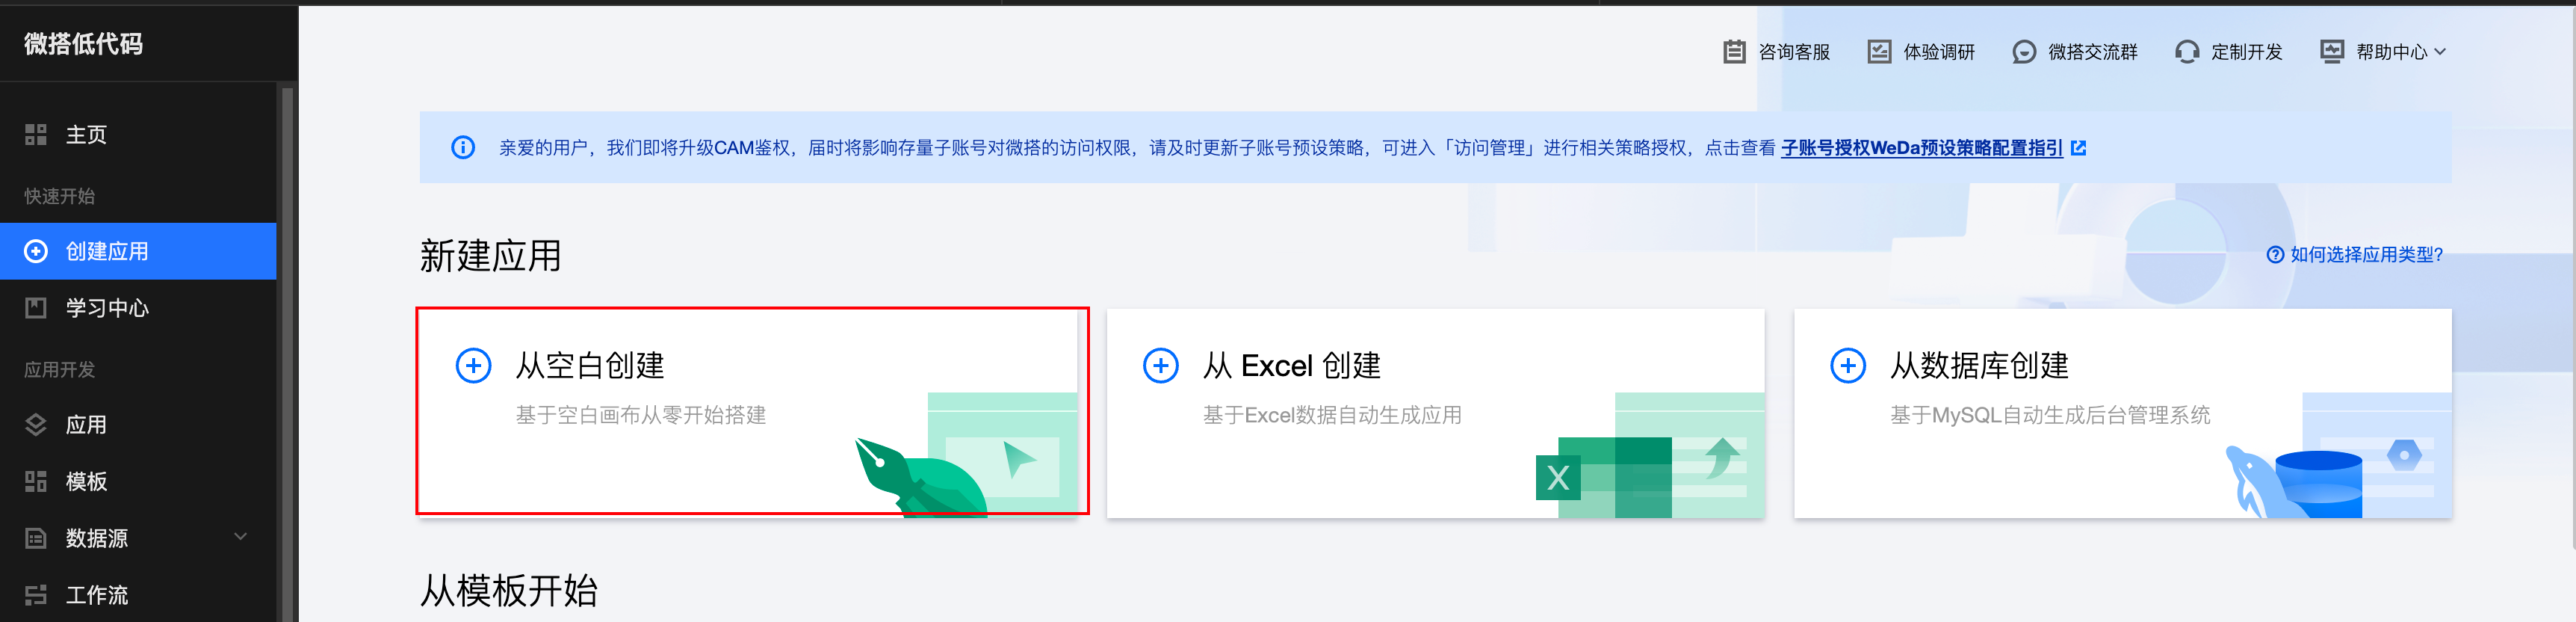
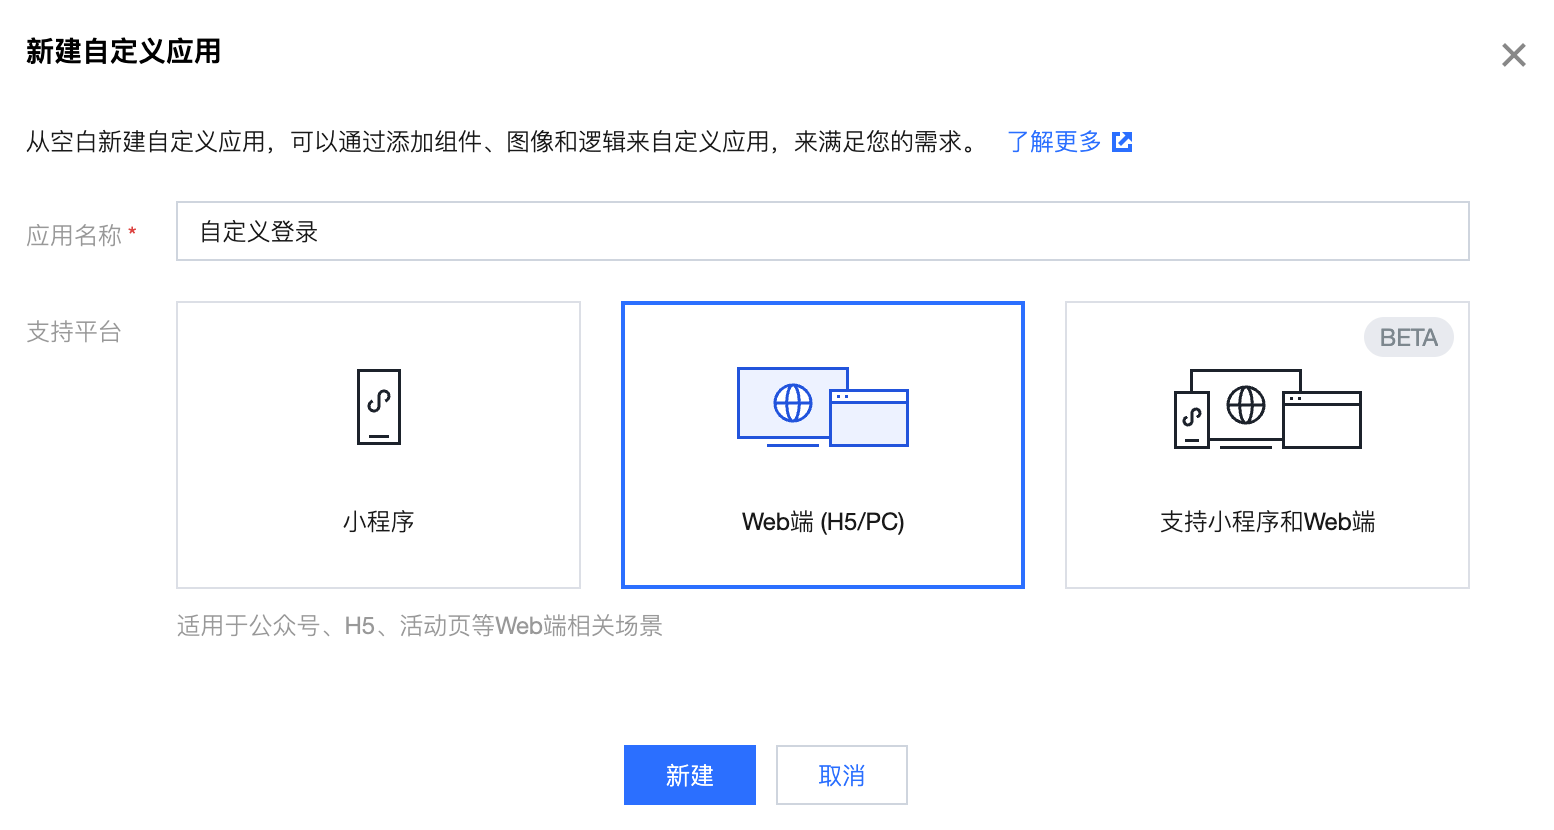
步骤1:创建自定义应用
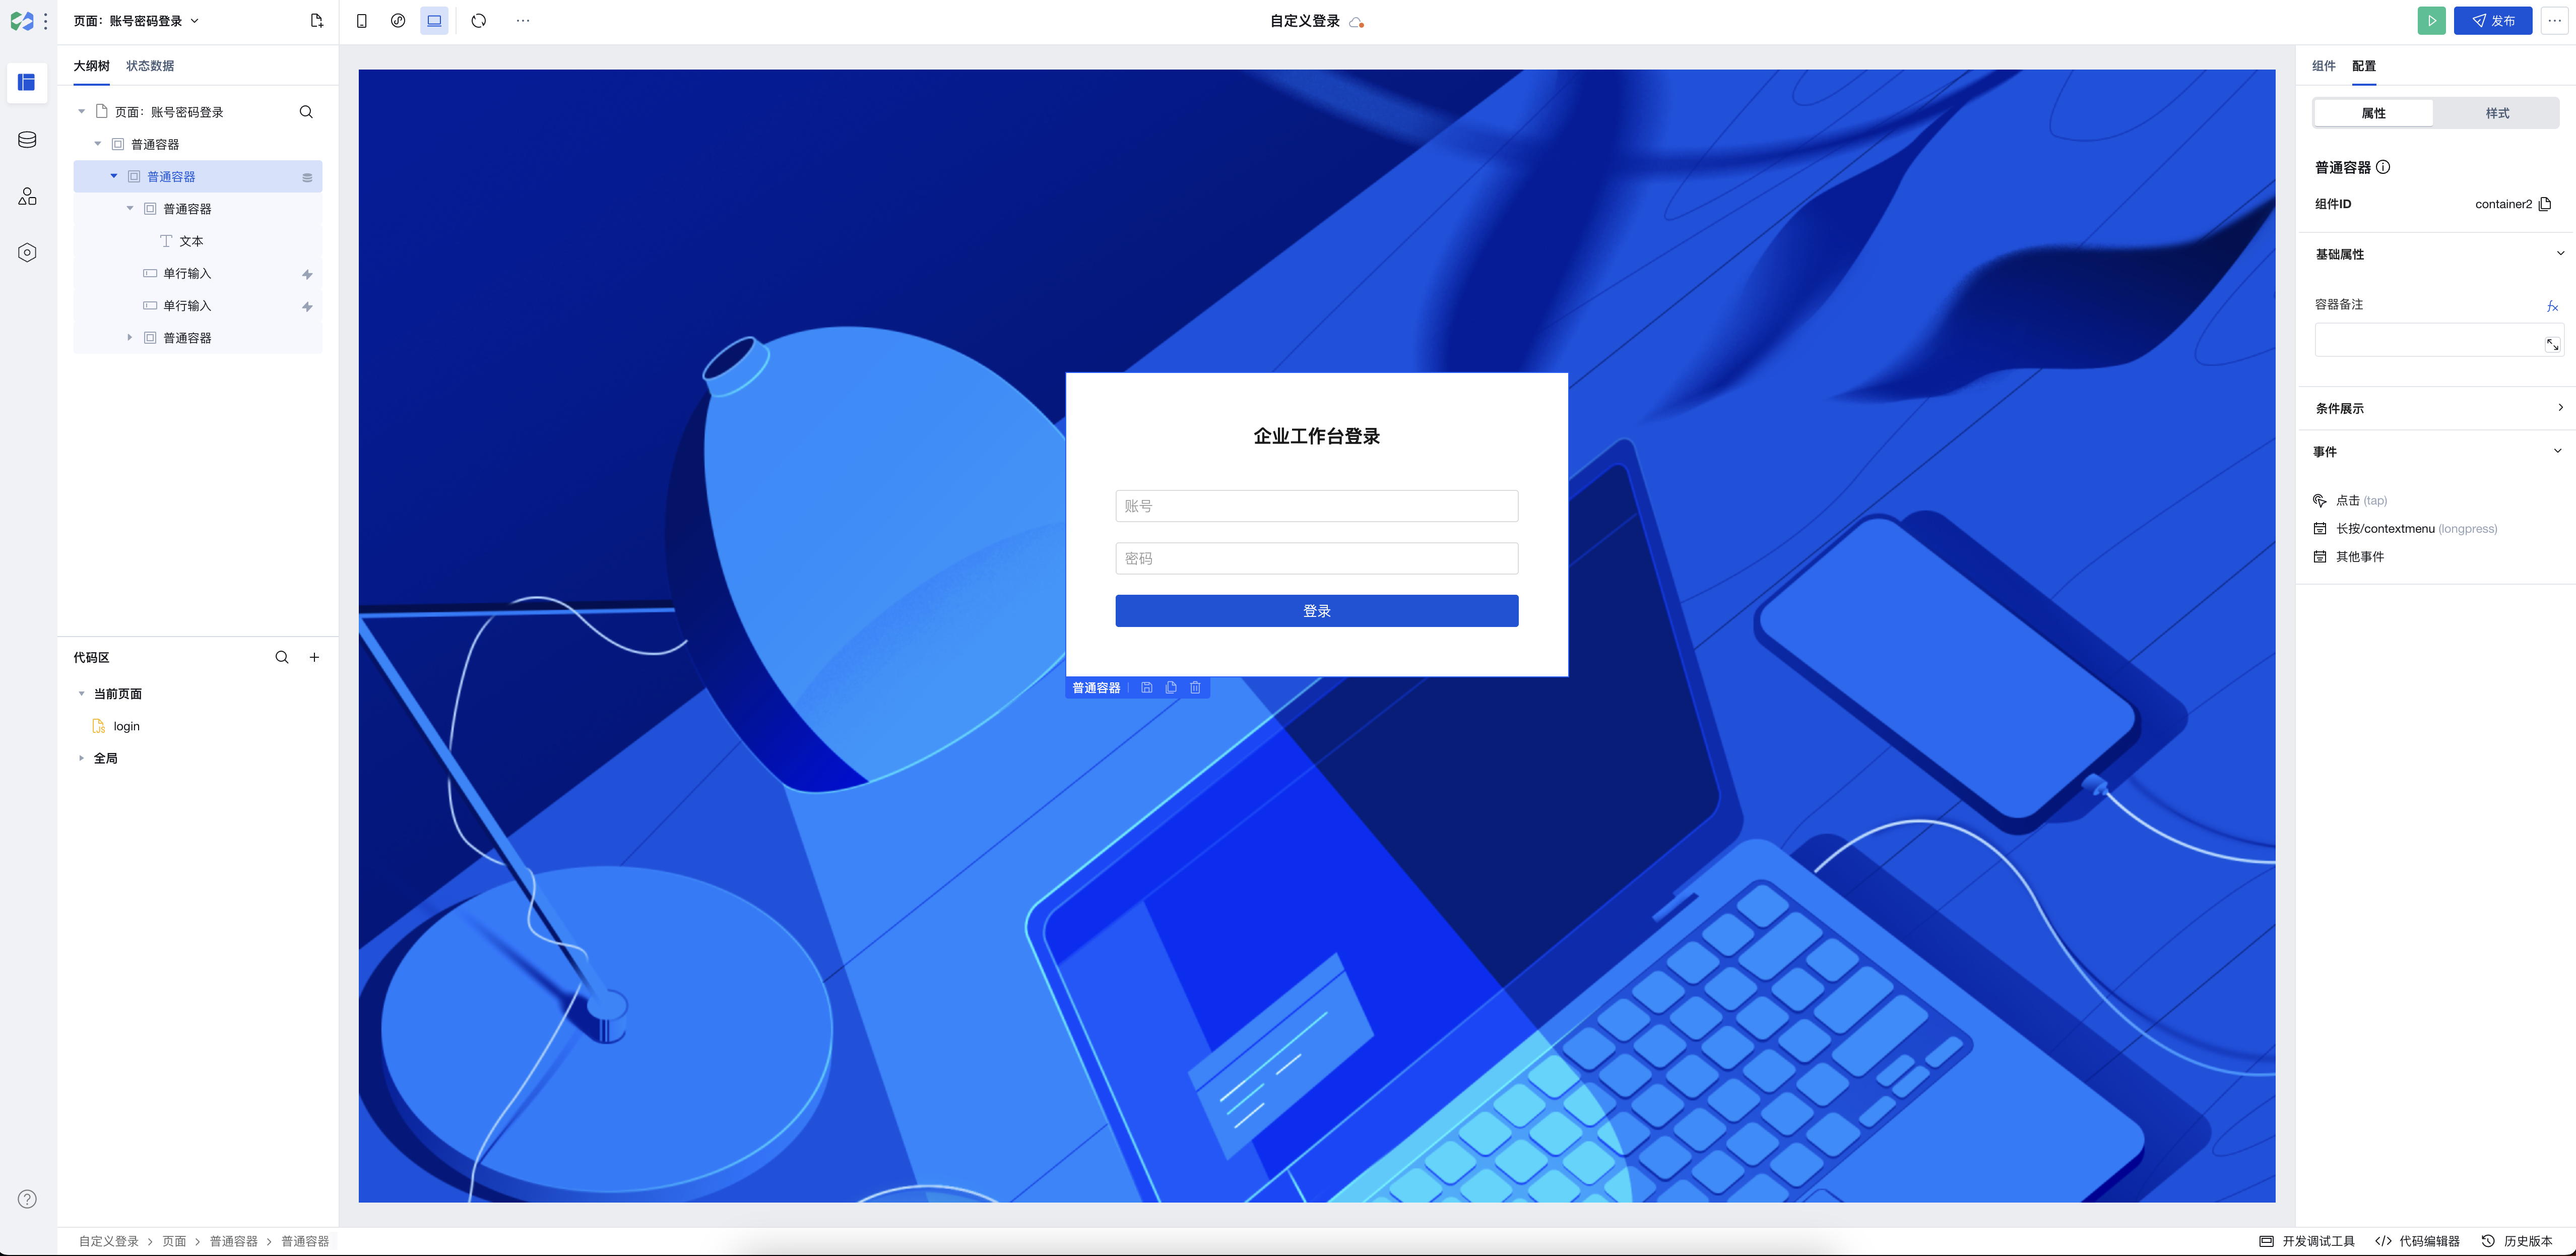
步骤2:创建一个应用页面
创建一个符合自身需求的登录页面。
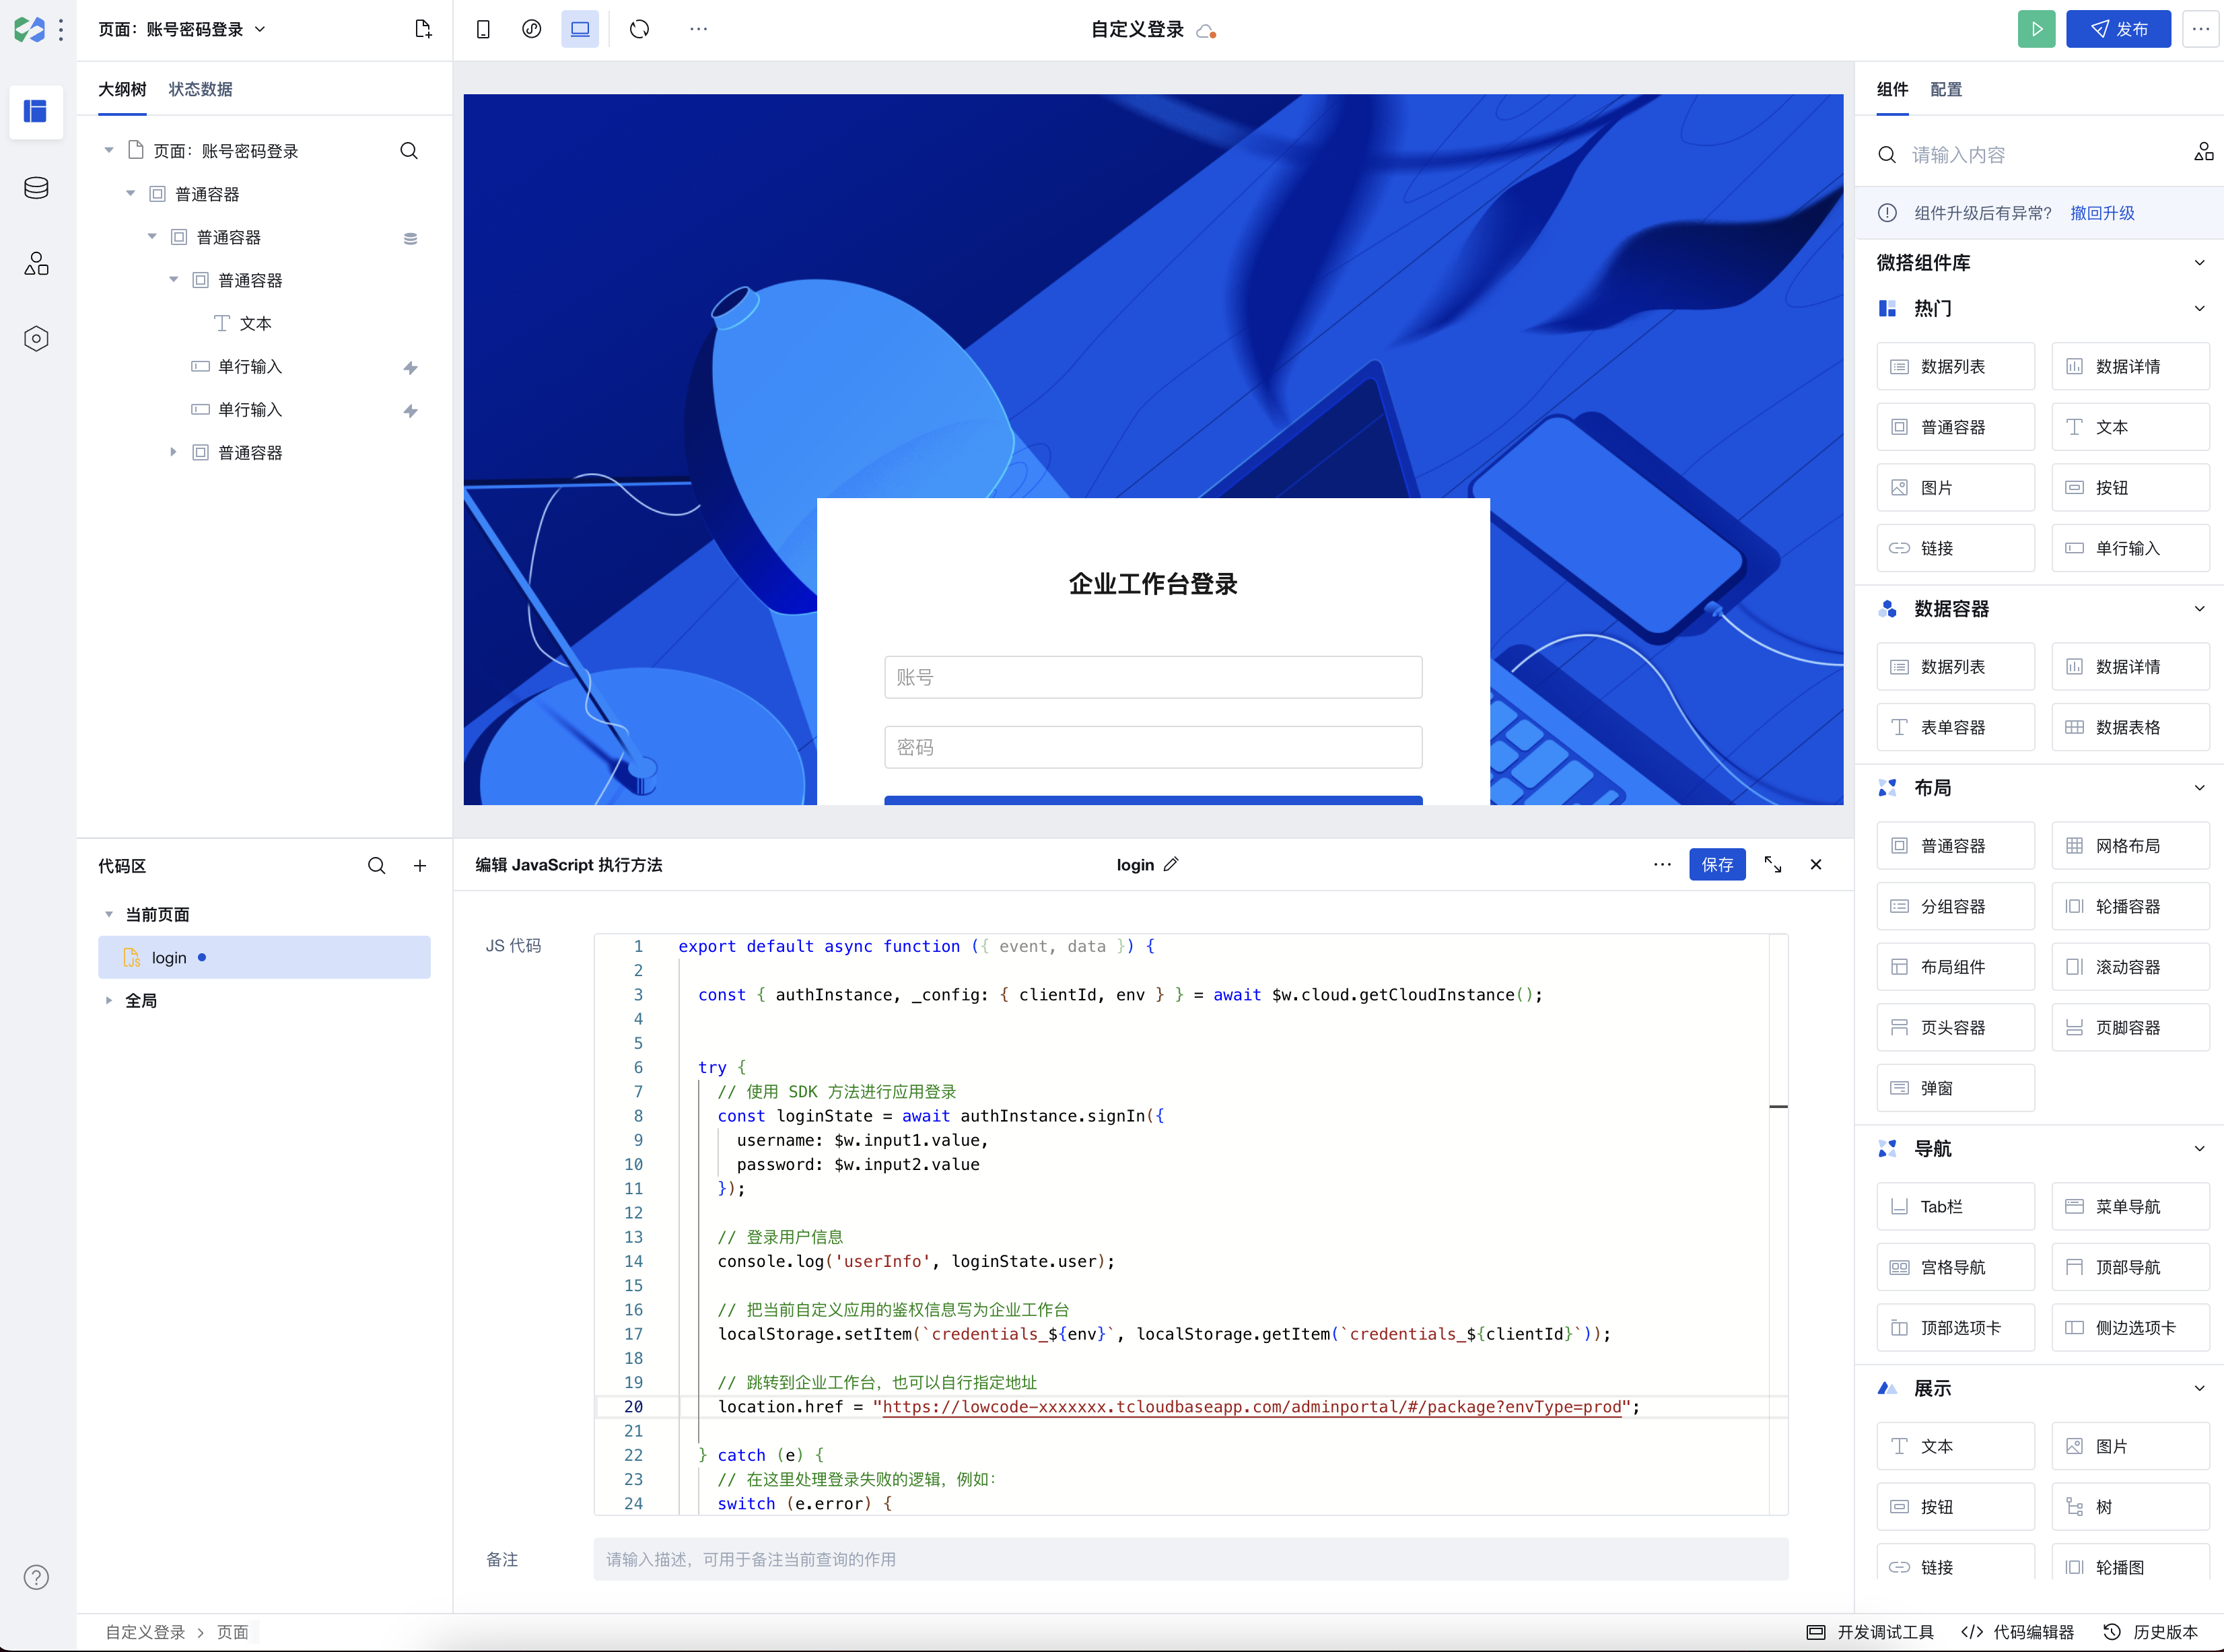
步骤3:新建 JavaScript 方法
在编辑器左下角代码区的当前页面分类下单击 + 号,在弹出层中选择新建 JavaScript 方法。

export default async function ({ event, data }) {const { authInstance, _config: { clientId, env } } = await $w.cloud.getCloudInstance();try {// 使用 SDK 方法进行应用登录const loginState = await authInstance.signIn({username: $w.input1.value, // 这里为账号输入框组件的 idpassword: $w.input2.value // 这里为密码输入框组件的 id});// 登录用户信息console.log('userInfo', loginState.user);// 把当前自定义应用的鉴权信息写为企业工作台localStorage.setItem(`credentials_${env}`, localStorage.getItem(`credentials_${clientId}`));// 跳转到企业工作台,也可以自行指定地址location.href = "https://lowcode-xxxxxxx.tcloudbaseapp.com/adminportal/#/package?envType=prod";} catch (e) {// 在这里处理登录失败的逻辑,例如:switch (e.error) {// 账号不存在case 'not_found':console.error(e.error_description)break;// 密码错误case 'invalid_password':console.error(e.error_description)break;// 参数不全case 'invalid_argument':console.error(e.error_description)break;default:console.error(e);}}}
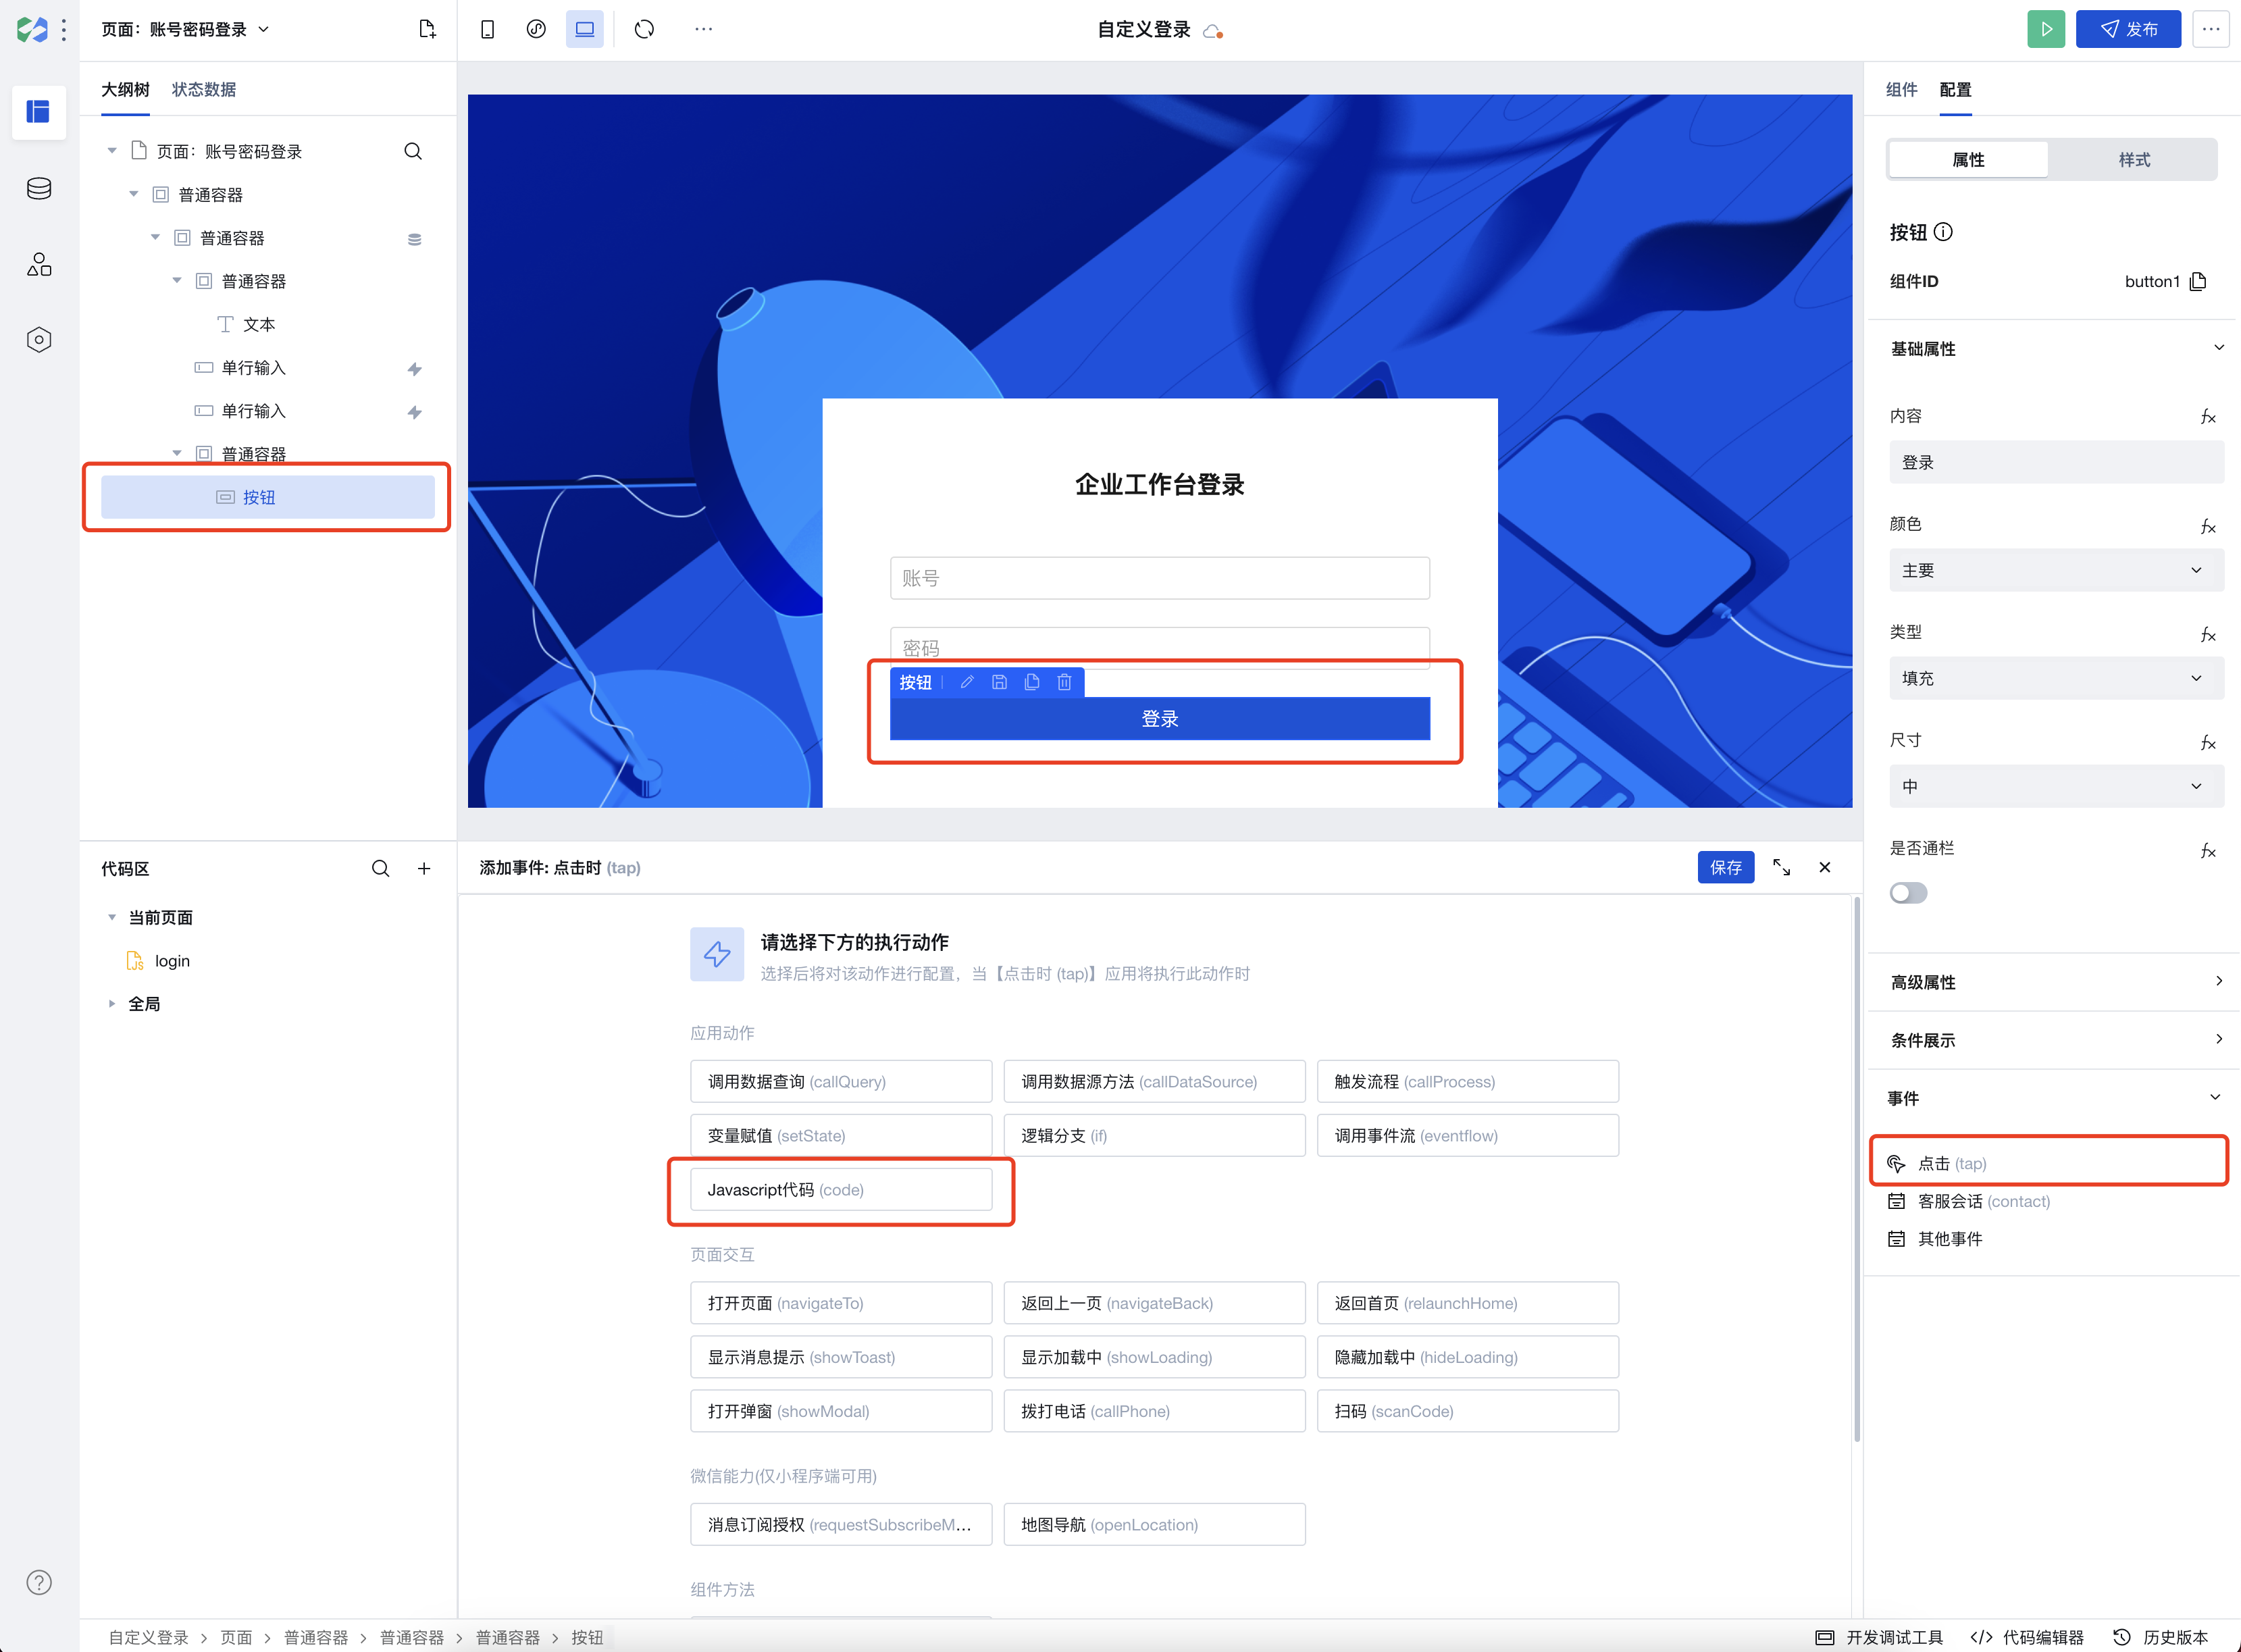
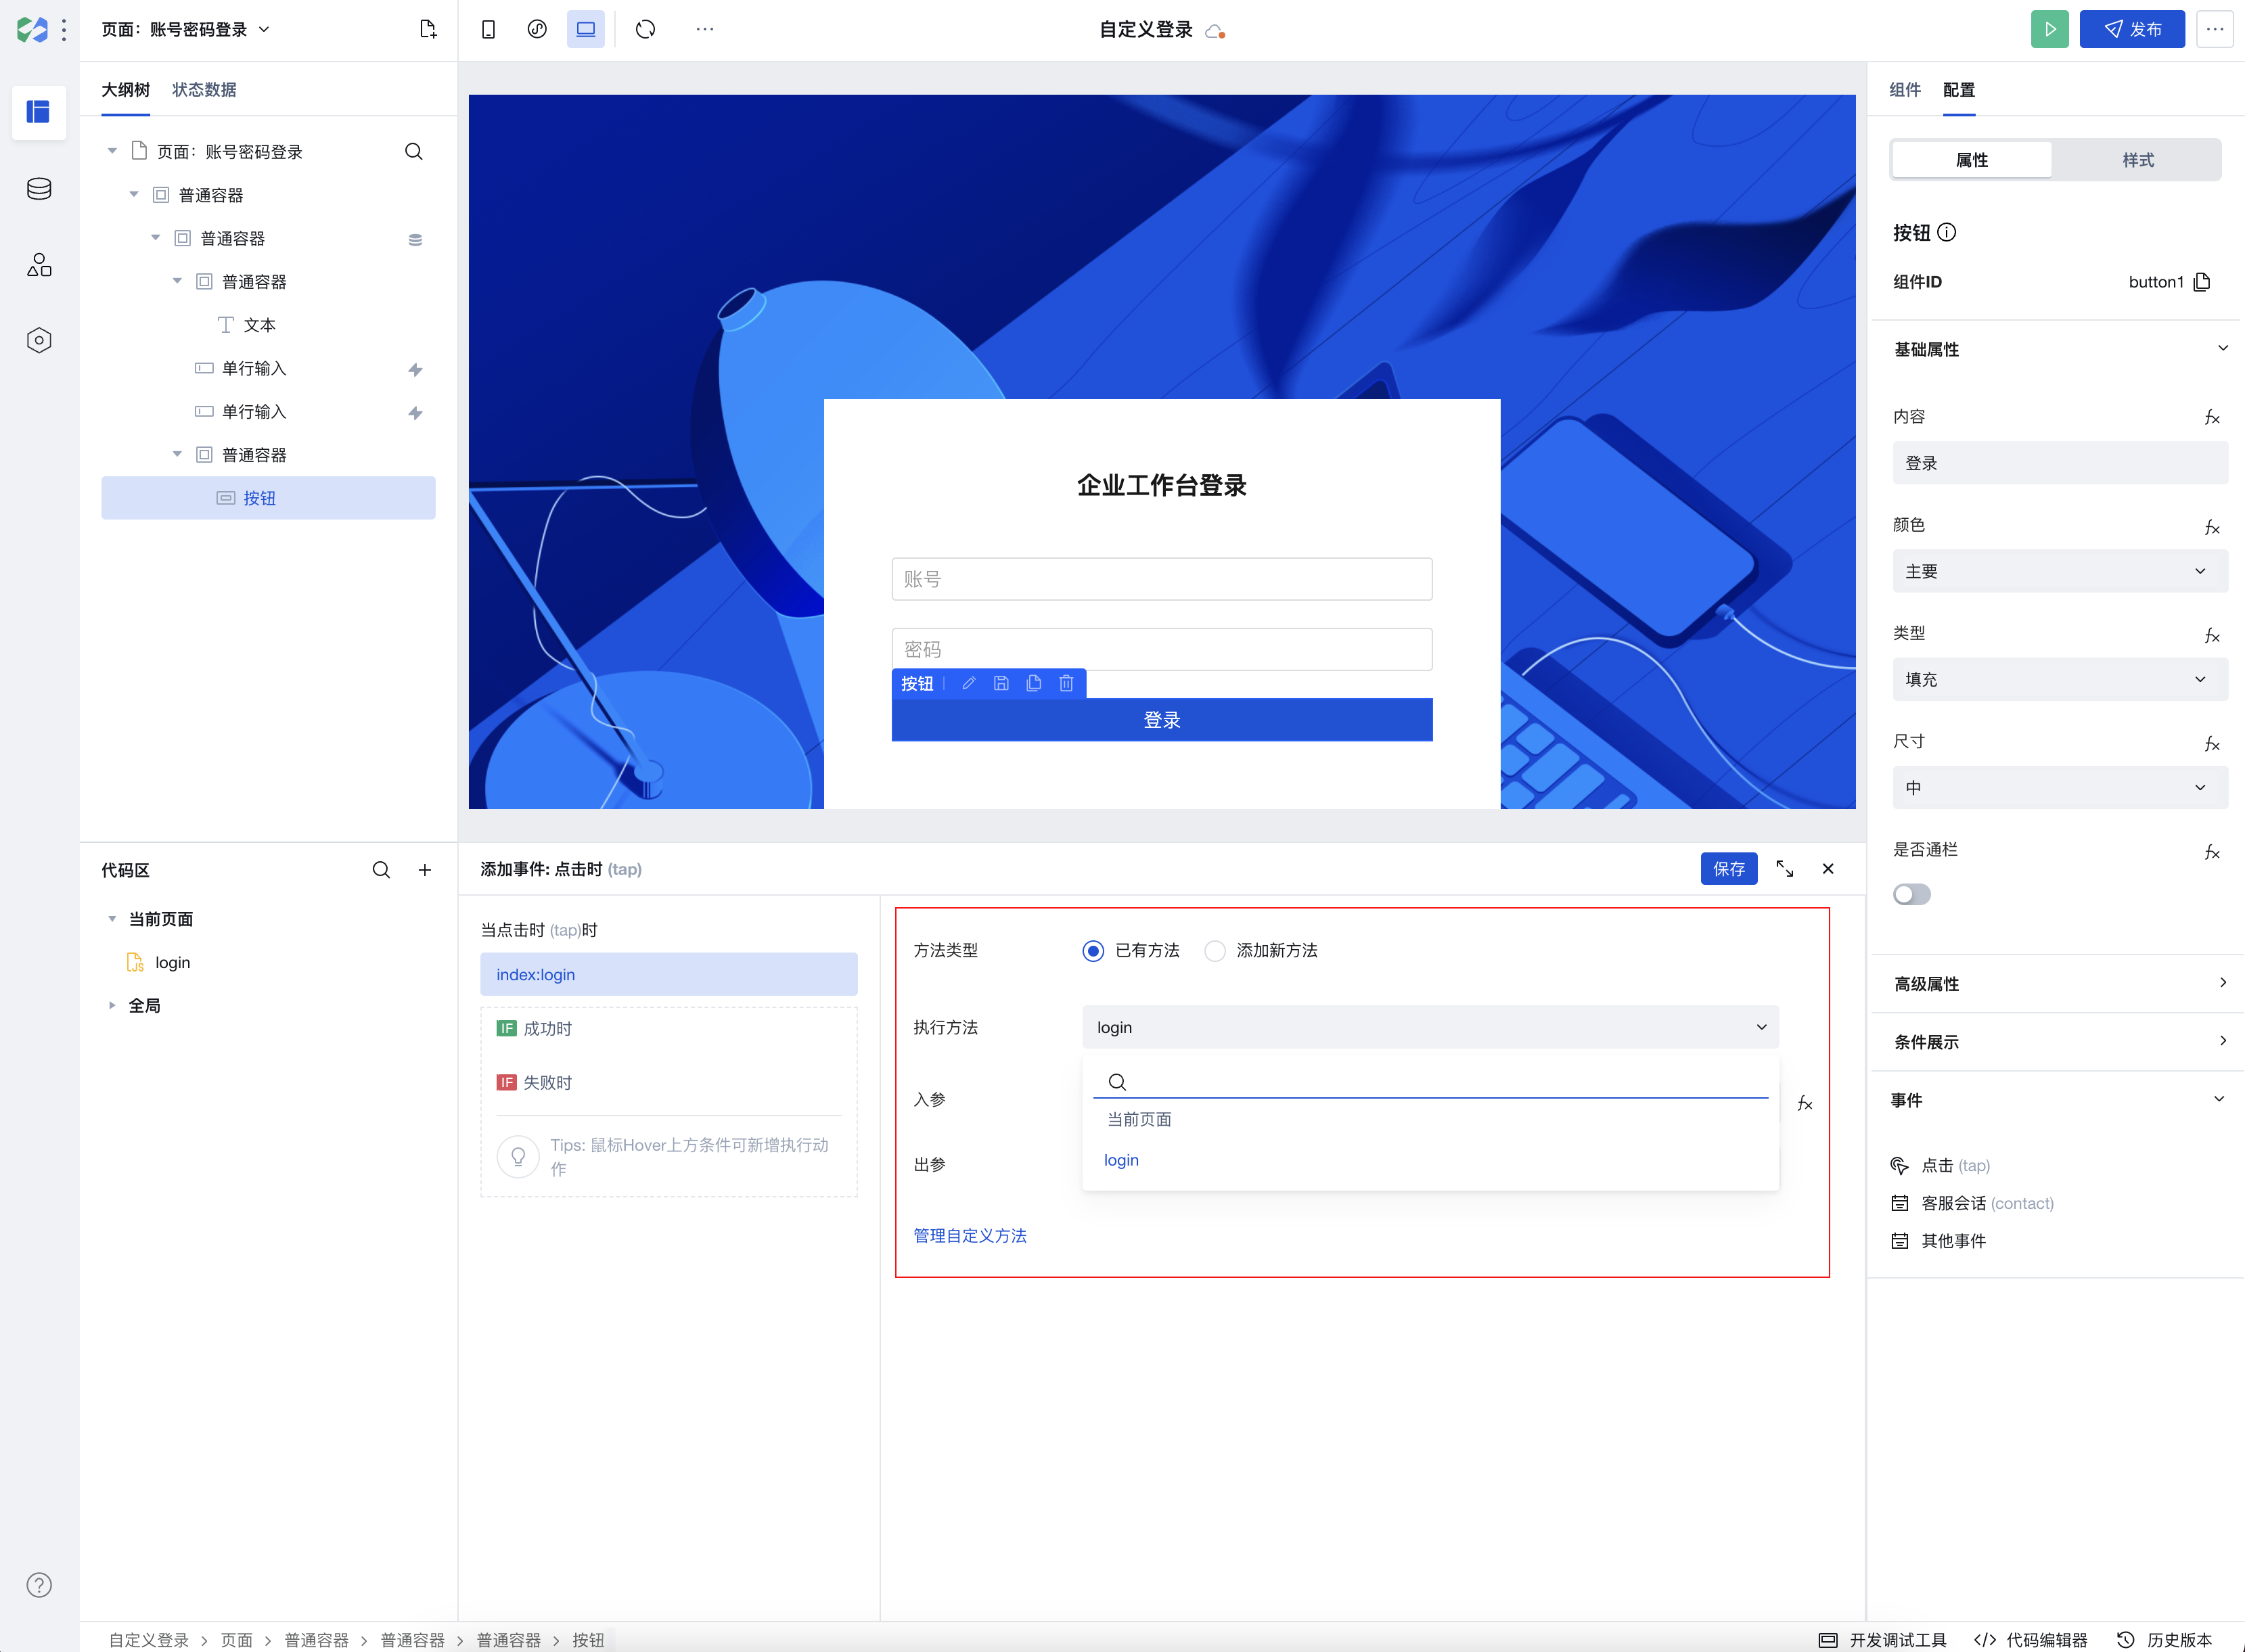
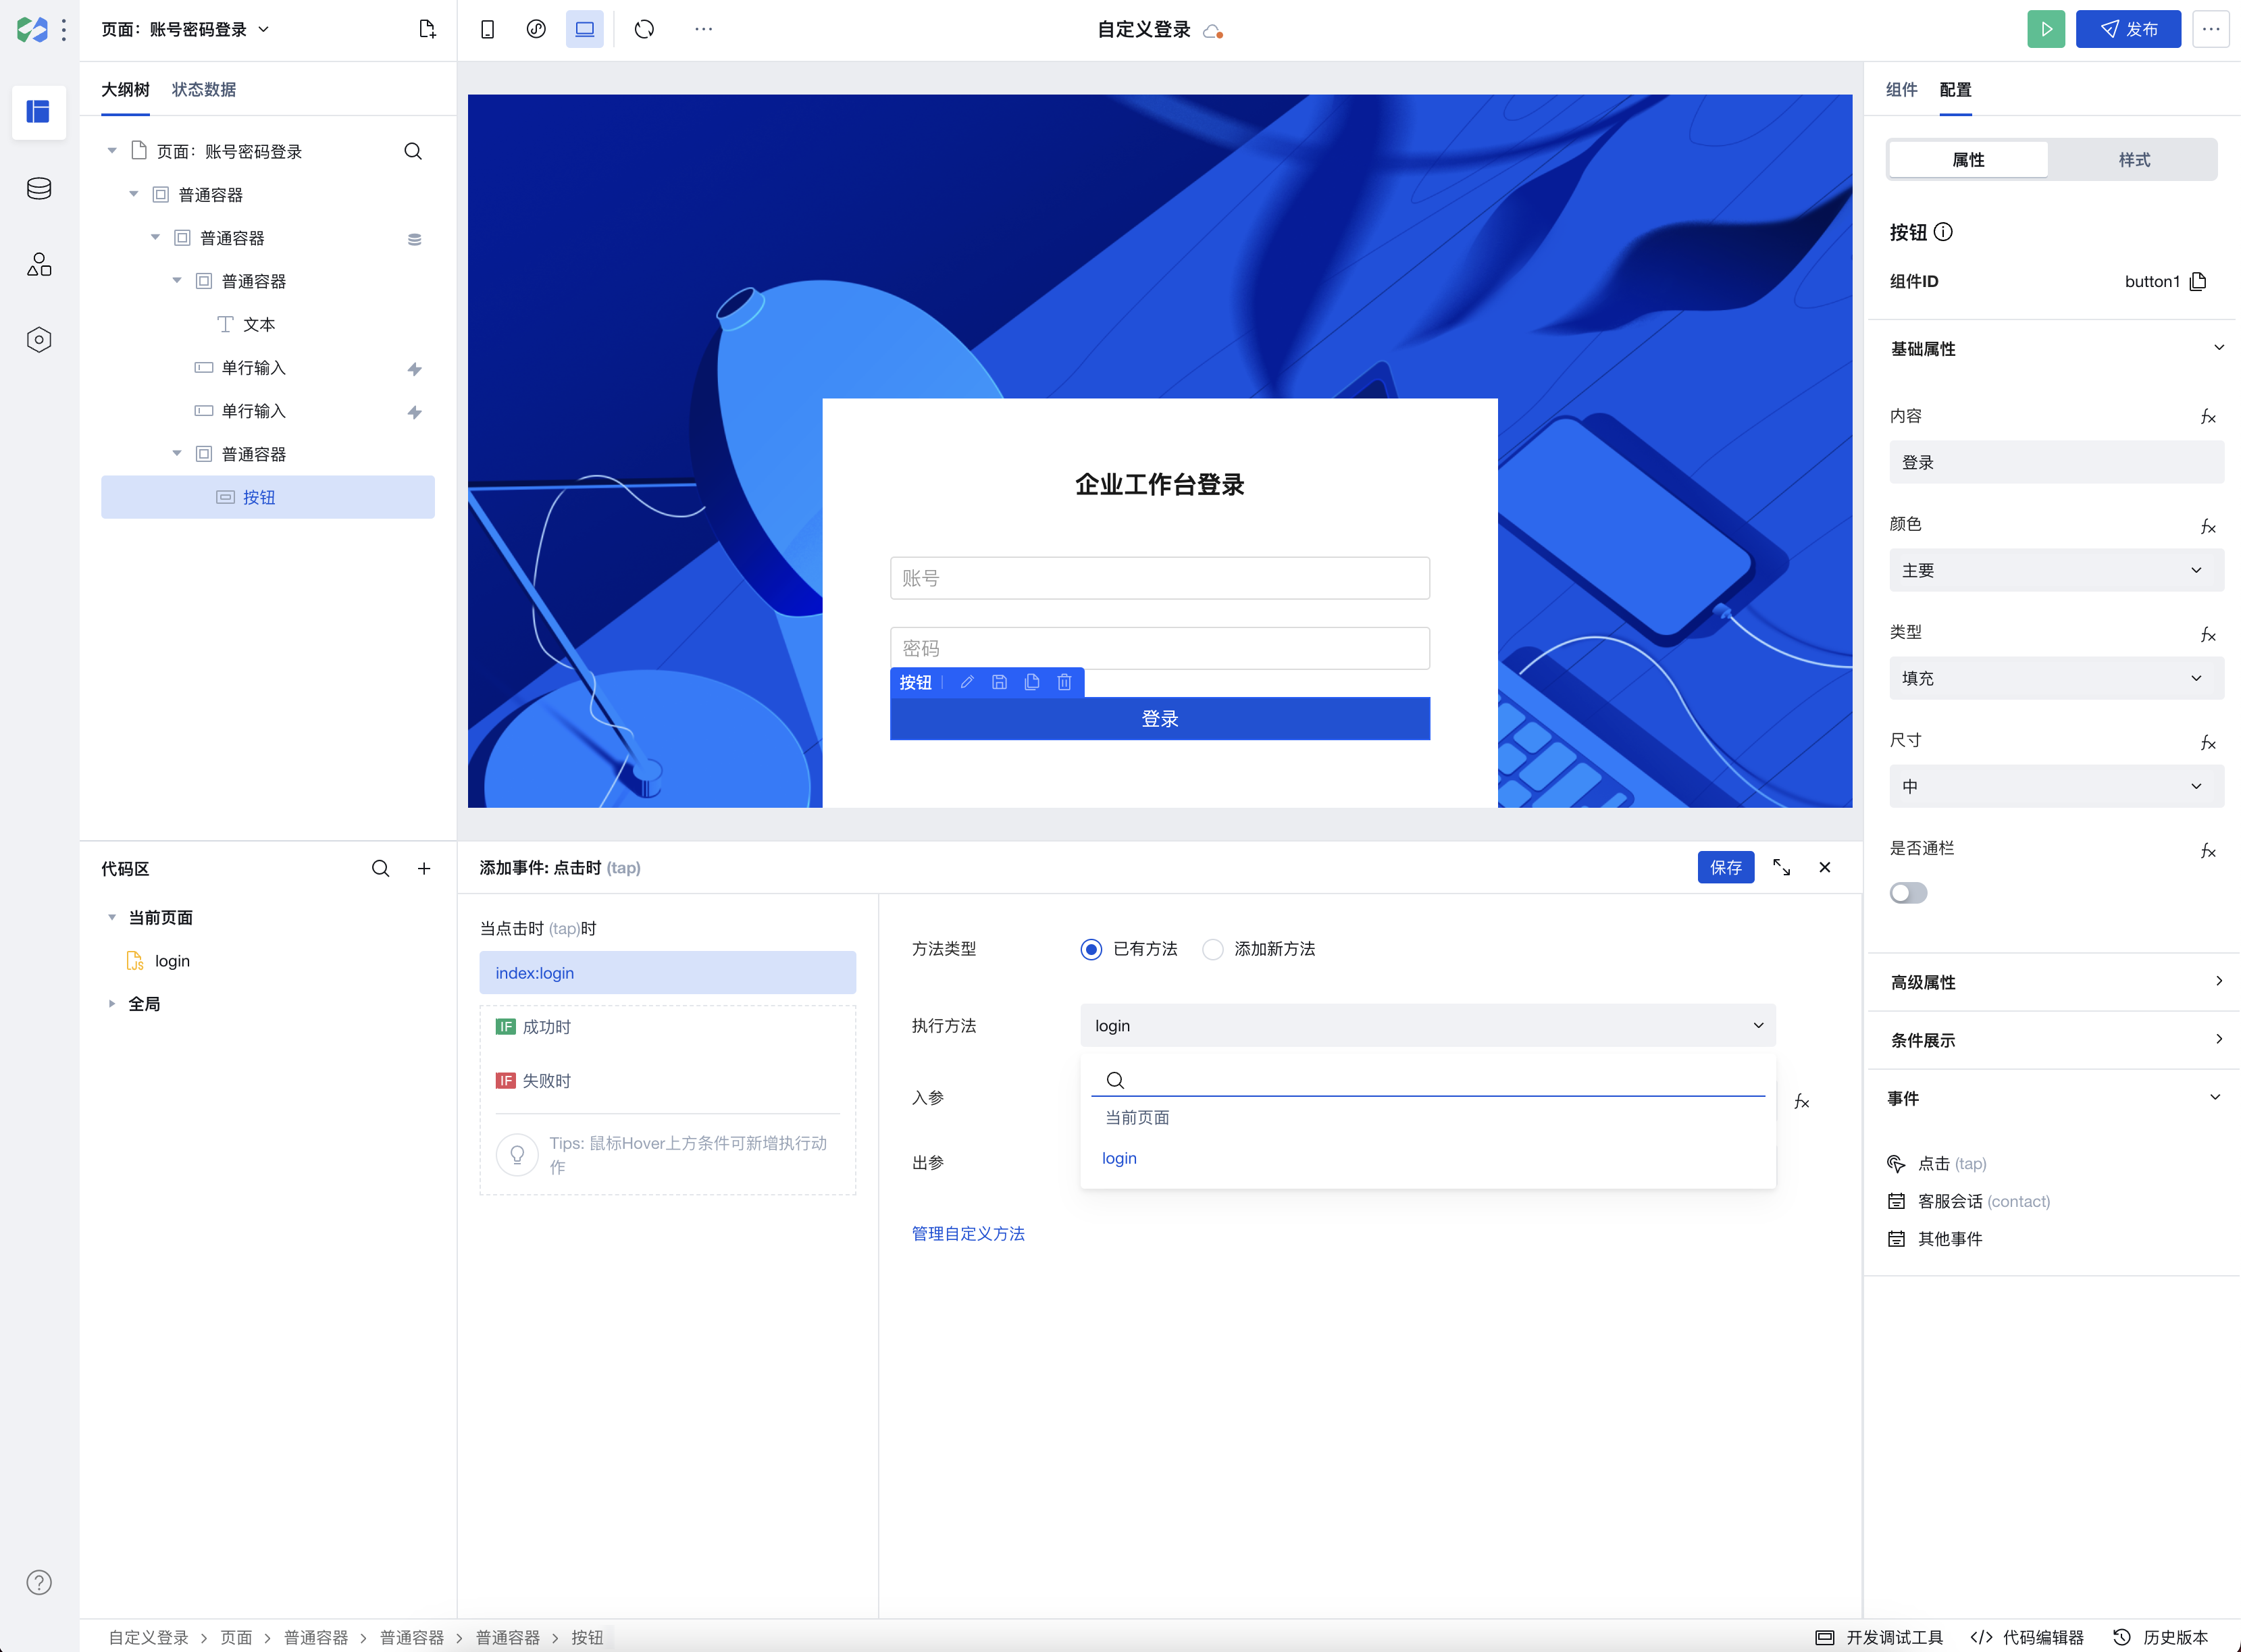
步骤4:设置登录按钮的事件
从页面编辑区或大纲树中选中登录按钮,在右侧事件区选择点击(tap)事件,在弹出层中选择 JavaScript 代码。
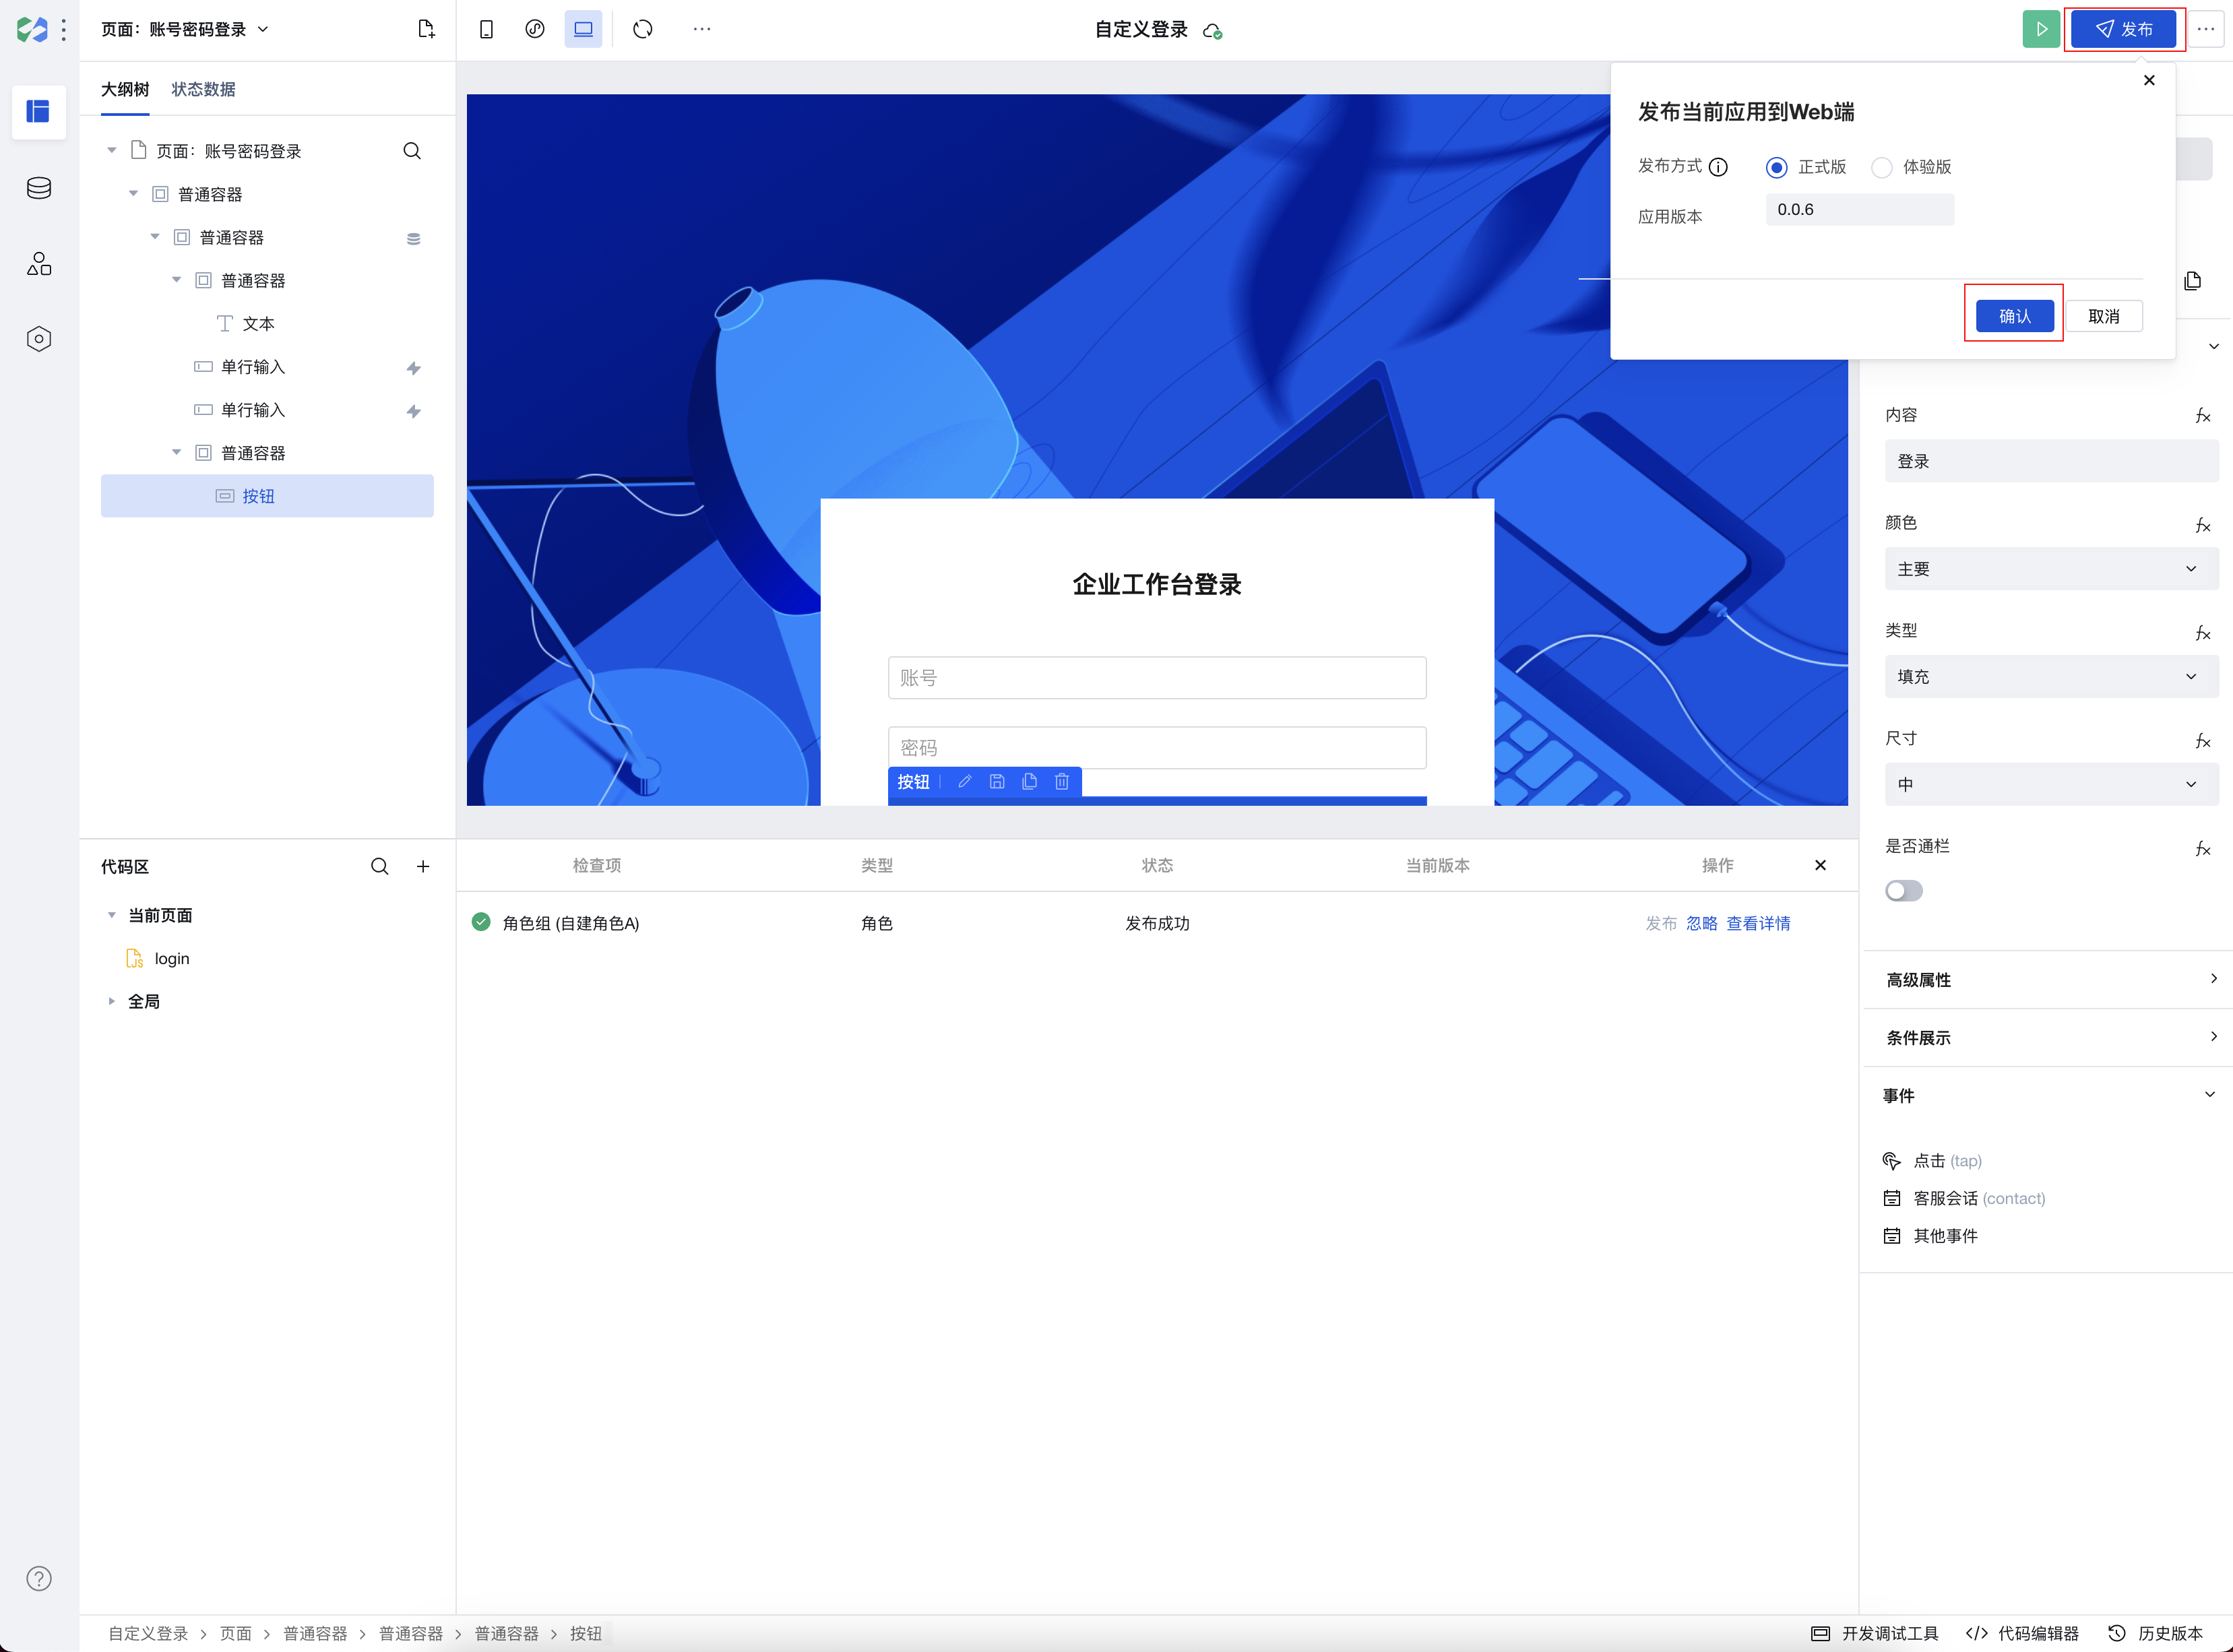
步骤5:保存并发布应用
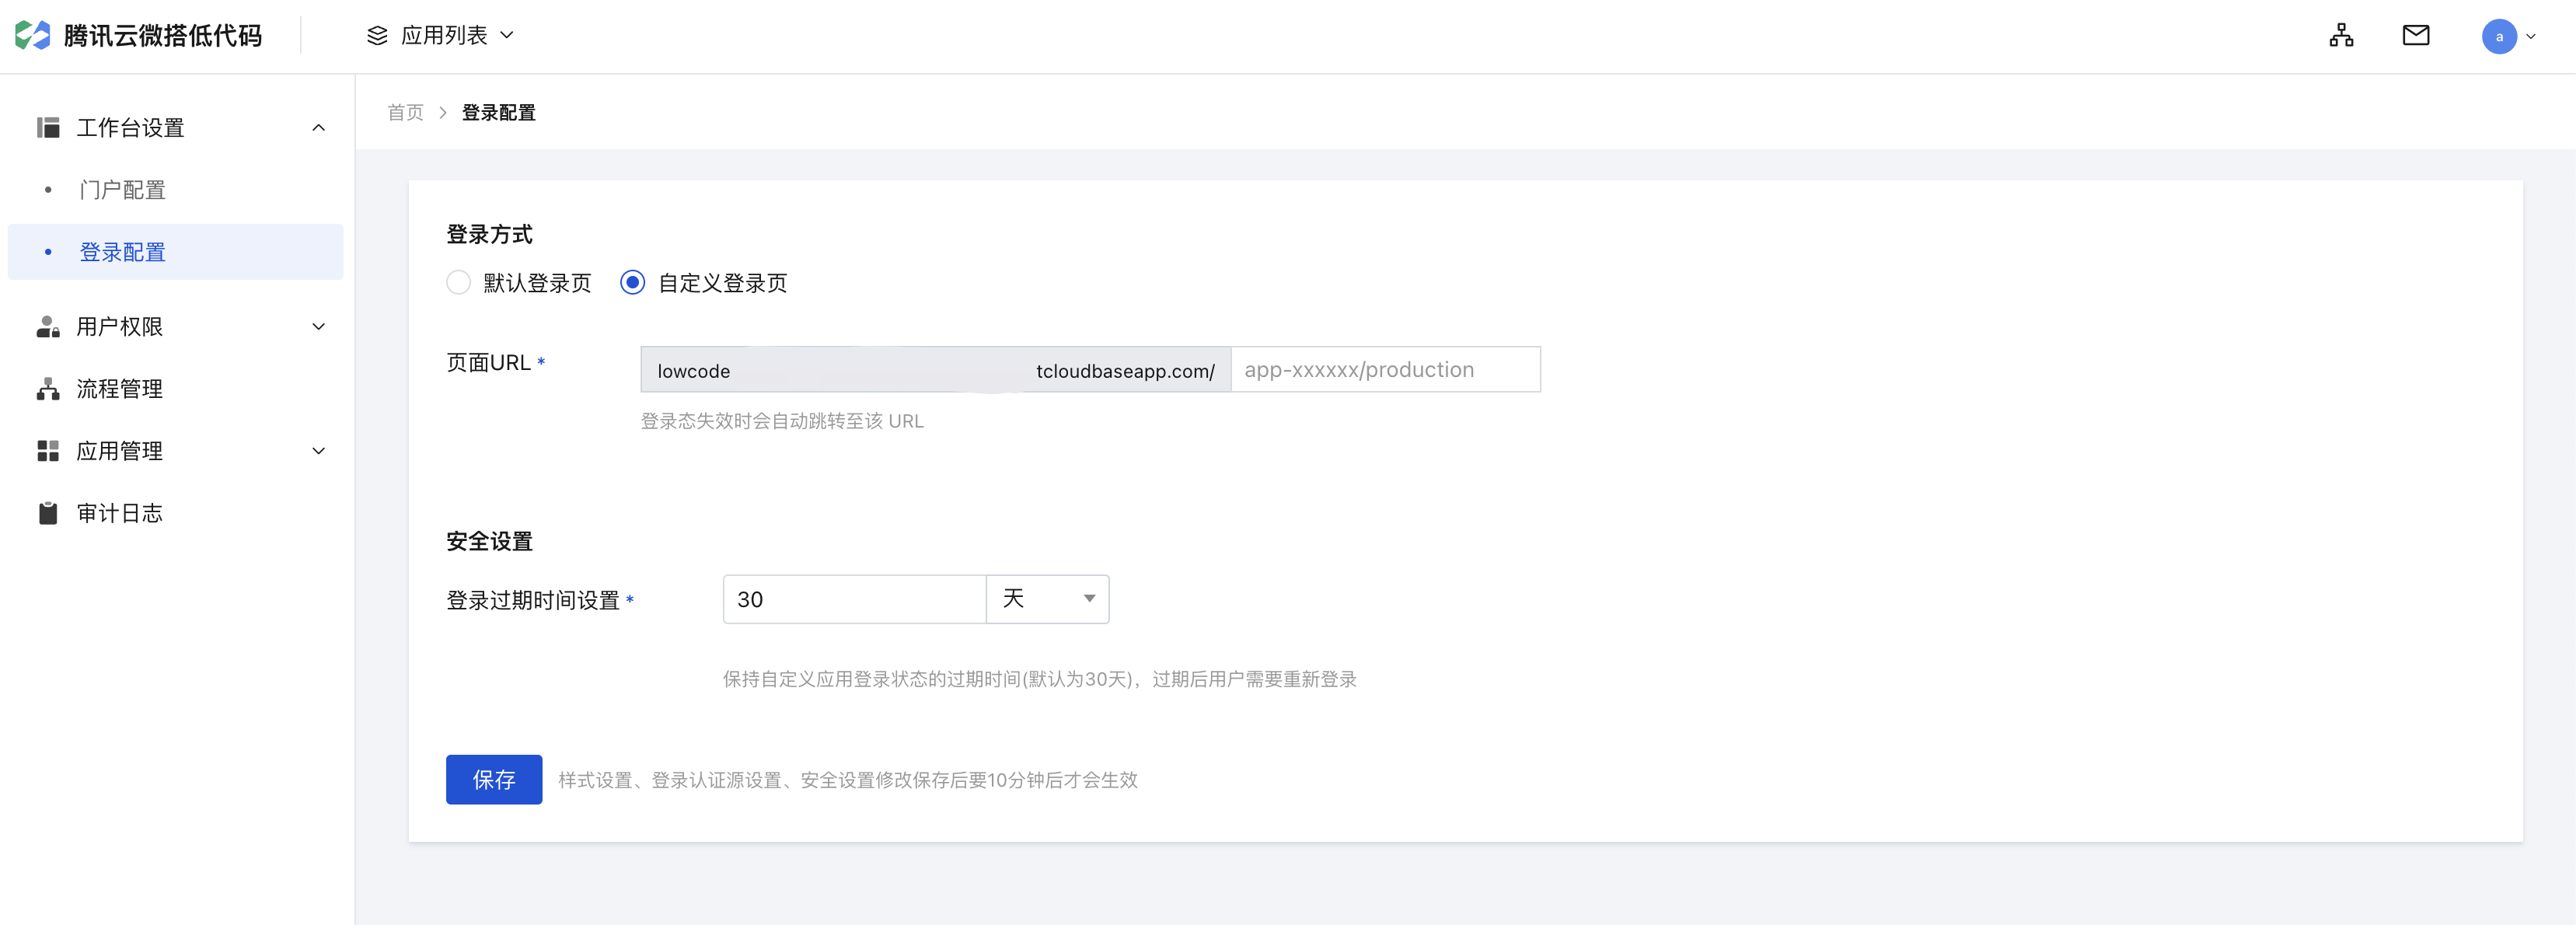
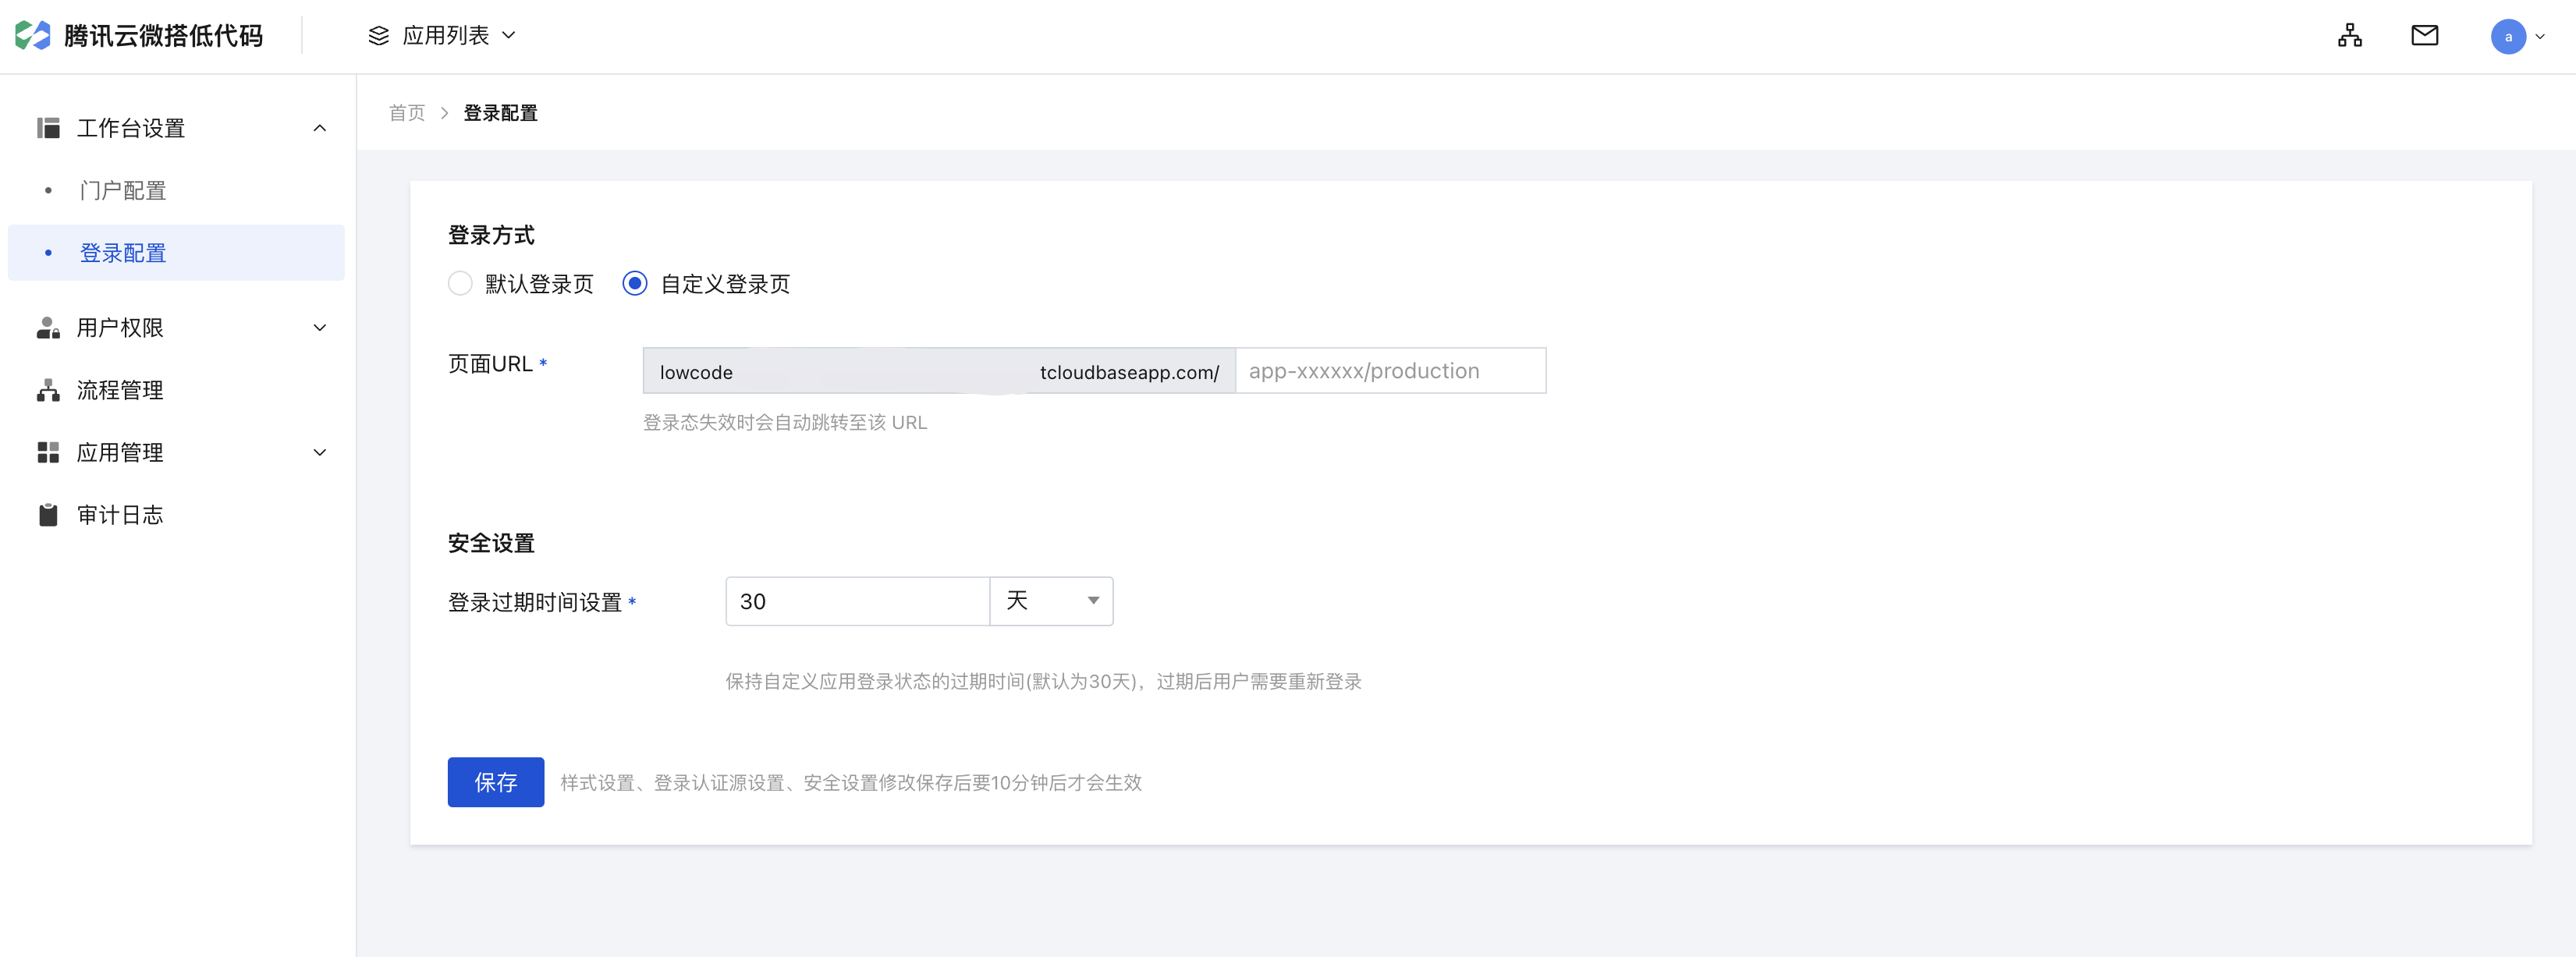
步骤6:在企业工作台中设置自定义登录页
在企业工作台 > 工作台设置 > 登录配置中,设置自定义登录页,地址写为该应用的登录页地址。最后保存并等待生效即可。
短信验证码登录
步骤1:创建自定义应用
步骤2:创建一个应用页面
创建一个符合自身需求的登录页面。
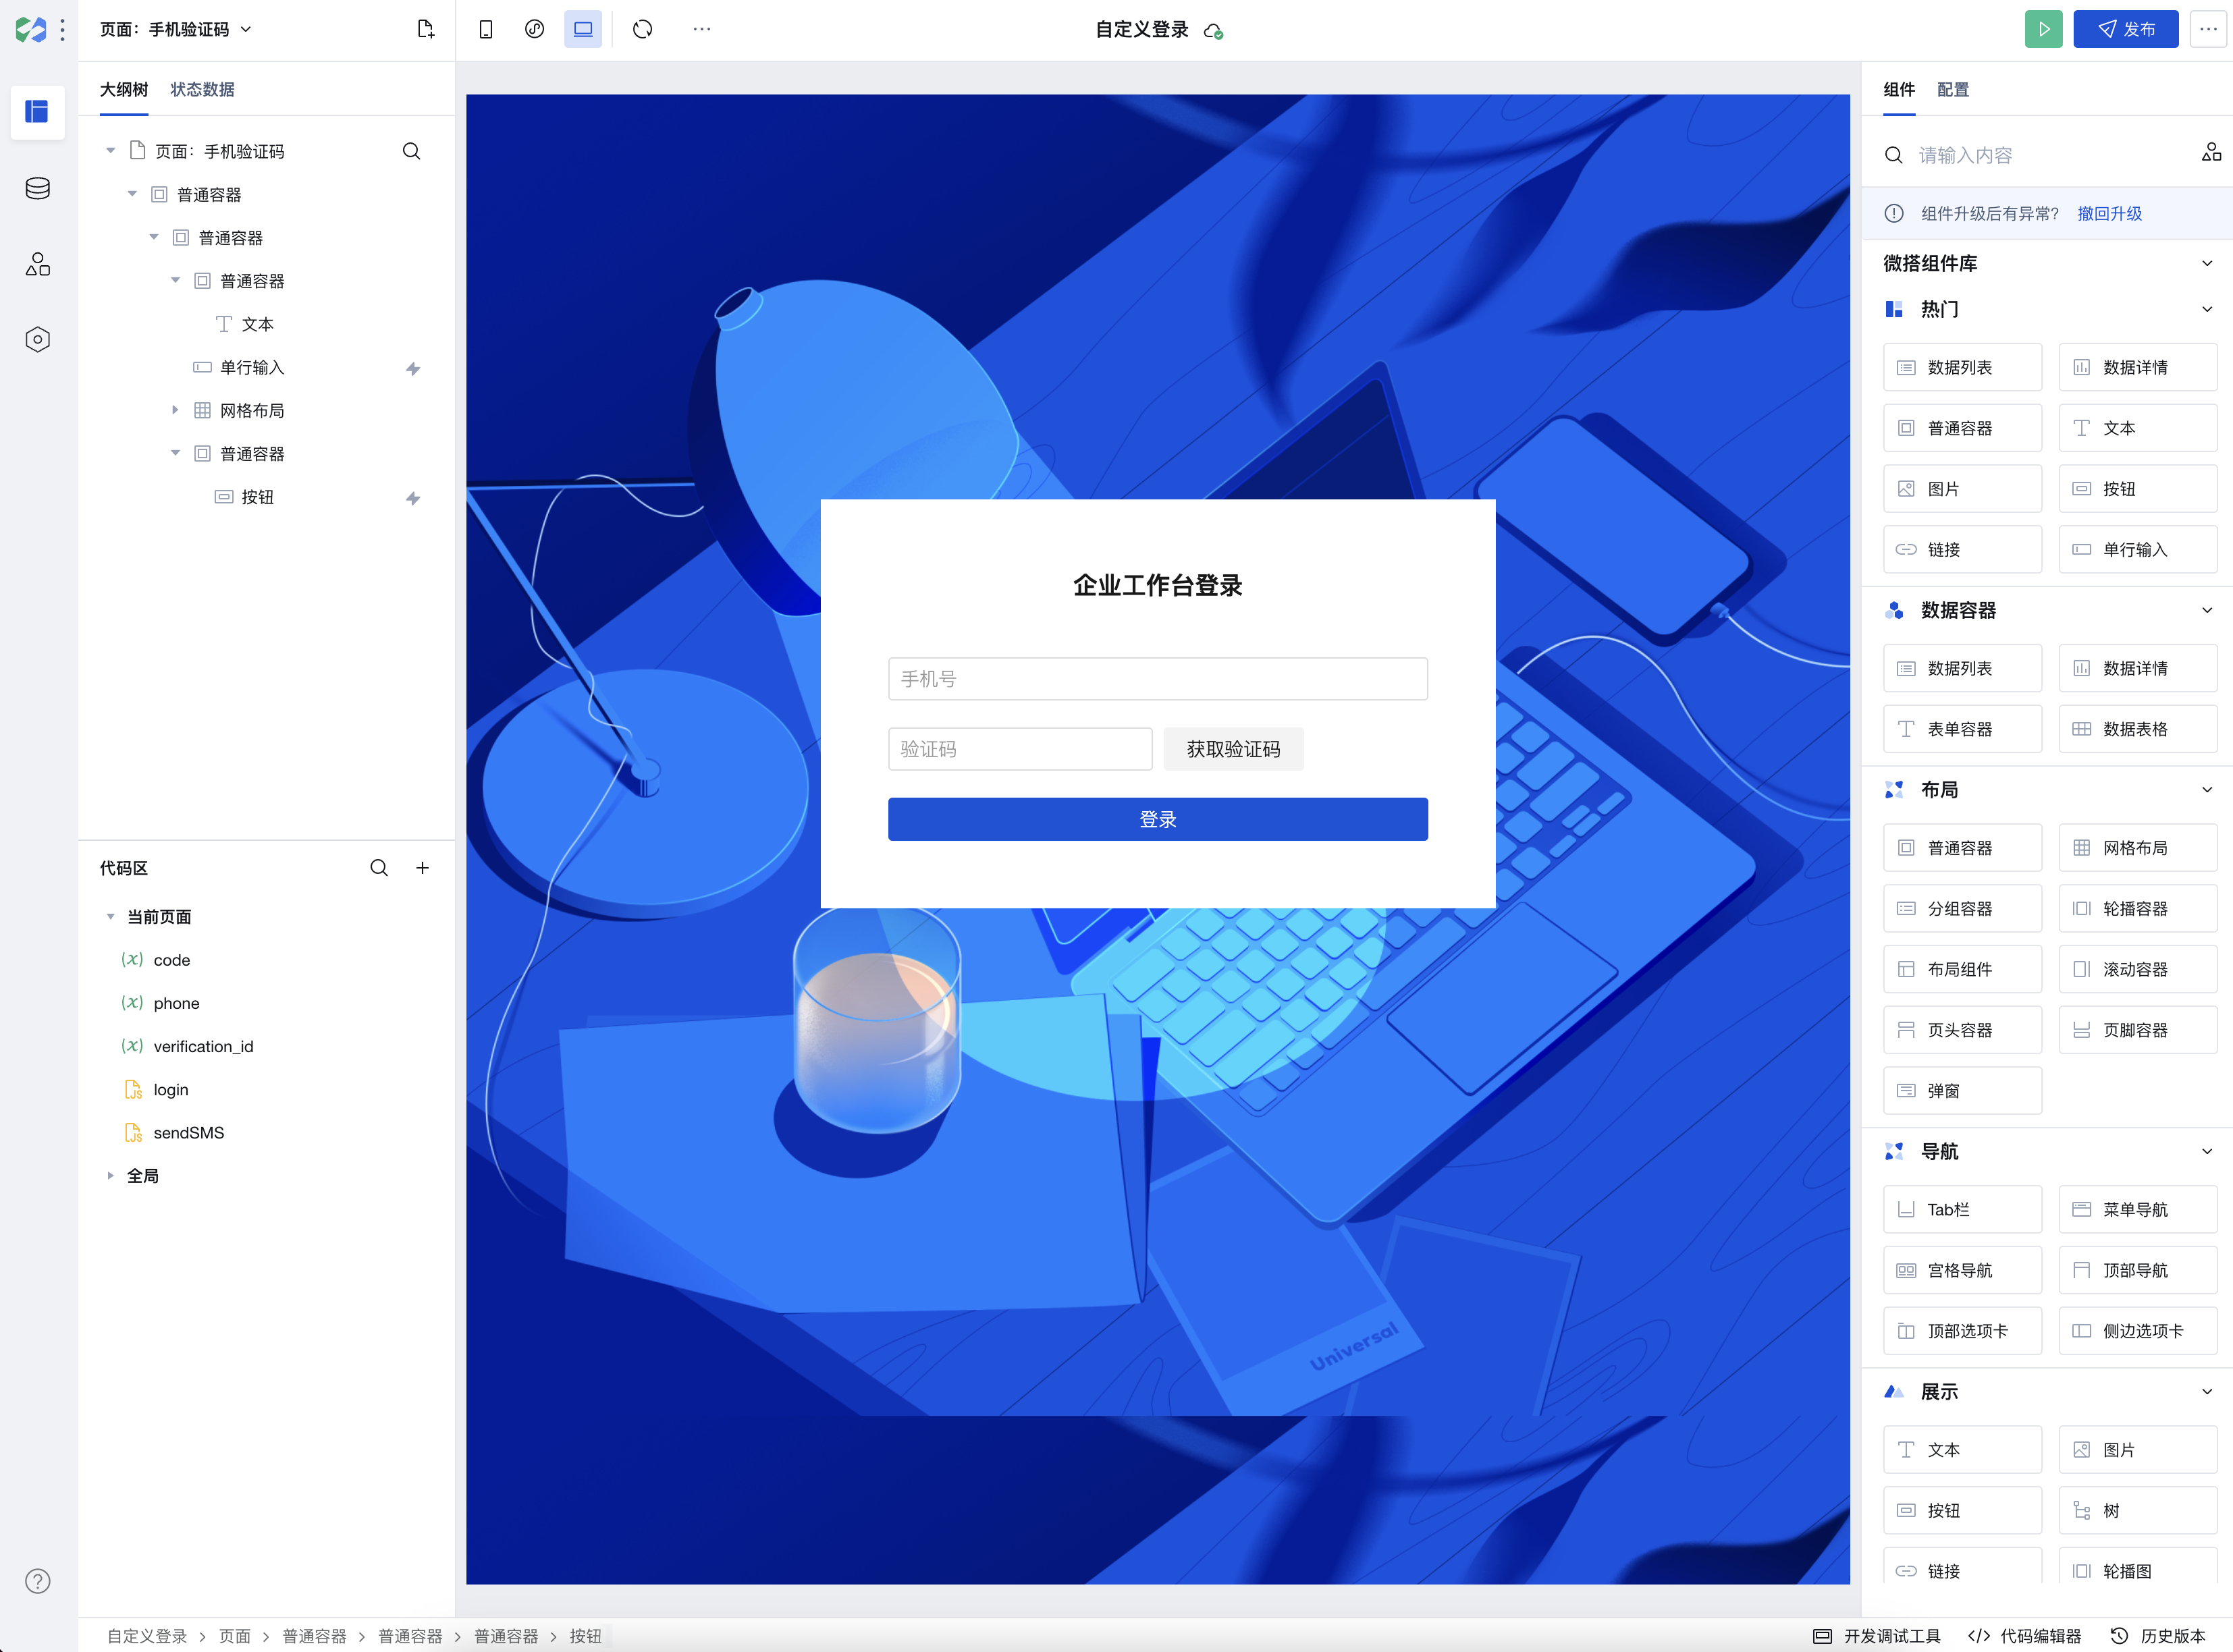
步骤3:创建变量
在左下角代码区创建自定义变量
verification_id,方便后续赋值取值。
选填好需要的内容,单击保存。

步骤4:新建 JavaScript 方法
在编辑器左下角代码区的当前页面分类下单击 + 号,在弹出层中选择新建 JavaScript 方法。
分别创建 2 个自定义 JavaScript 方法以实现获取验证码和登录,代码如下:
获取验证码:
export default async function ({ event, data }) {const { authInstance } = await $w.cloud.getCloudInstance();try {const { verification_id } = await authInstance.getVerification({phone_number: `+86 ${$w.input1.value}`, // 这里为手机号输入框组件的 id});$w.page.setState({ verification_id });} catch (e) {// 在这里处理登录失败的逻辑,例如:switch (e.error) {// 账号不存在case 'not_found':console.error(e.error_description)break;// 密码错误case 'invalid_password':console.error(e.error_description)break;// 参数不全case 'invalid_argument':console.error(e.error_description)break;default:console.error(e);}}}
登录:
export default async function ({ event, data }) {const { authInstance, _config: { clientId, env } } = await $w.cloud.getCloudInstance();try {// 使用验证码和 ID 换取 tokenconst { verification_token } = await authInstance.verify({verification_code: $w.input2.value, // 这里为验证码输入框组件的 idverification_id: $w.page.dataset.state.verification_id});// 使用 SDK 方法进行应用登录const loginState = await authInstance.signIn({verification_token,})// 登录用户信息console.log('userInfo', loginState.user);// 把当前自定义应用的鉴权信息写为企业工作台localStorage.setItem(`credentials_${env}`, localStorage.getItem(`credentials_${clientId}`));// 跳转到企业工作台,也可以自行指定地址location.href = "https://lowcode-xxxxxx.tcloudbaseapp.com/adminportal/#/package?envType=prod";} catch (e) {// 在这里处理登录失败的逻辑,例如:switch (e.error) {// 账号不存在case 'not_found':console.error(e.error_description)break;// 密码错误case 'invalid_password':console.error(e.error_description)break;// 参数不全case 'invalid_argument':console.error(e.error_description)break;default:console.error(e);}}}
步骤5:设置登录按钮和获取验证码按钮的事件
从页面编辑区或大纲树中选中登录按钮,在右侧事件区选择点击(tap)事件,在弹出层中选择 JavaScript 代码。

步骤6:保存并发布应用

步骤7:在企业工作台中设置自定义登录页
在企业工作台 > 工作台设置 > 登录配置中,设置自定义登录页,地址写为该应用的登录页地址。最后保存并等待生效即可。