配置 Prometheus 公网地址后可以打通网络隔离,实现在互联网环境中安全访问内网 Prometheus 服务,支持监控数据的远程查询与集成。
适用场景
多云部署场景:用户在多云部署场景中,通过为 Prometheus 配置公网地址,以实现从统一控制台查看所有 Prometheus 监控数据,实现全局可视与高效运维。
跨域数据汇聚:配置为远程写入(Remote Write)的目标地址,用于跨地域或跨 VPC 的监控数据汇聚。
系统集成:运维脚本、第三方平台通过公网调用 Prometheus API,实现自动化监控与管理。
操作步骤
步骤1:购买 Prometheus 实例
1. 登录 Prometheus 监控服务控制台。
2. 单击左上角的新建,进入 Prometheus 购买页,可根据自己的实际情况购买对应的实例,详情请参见 创建实例。
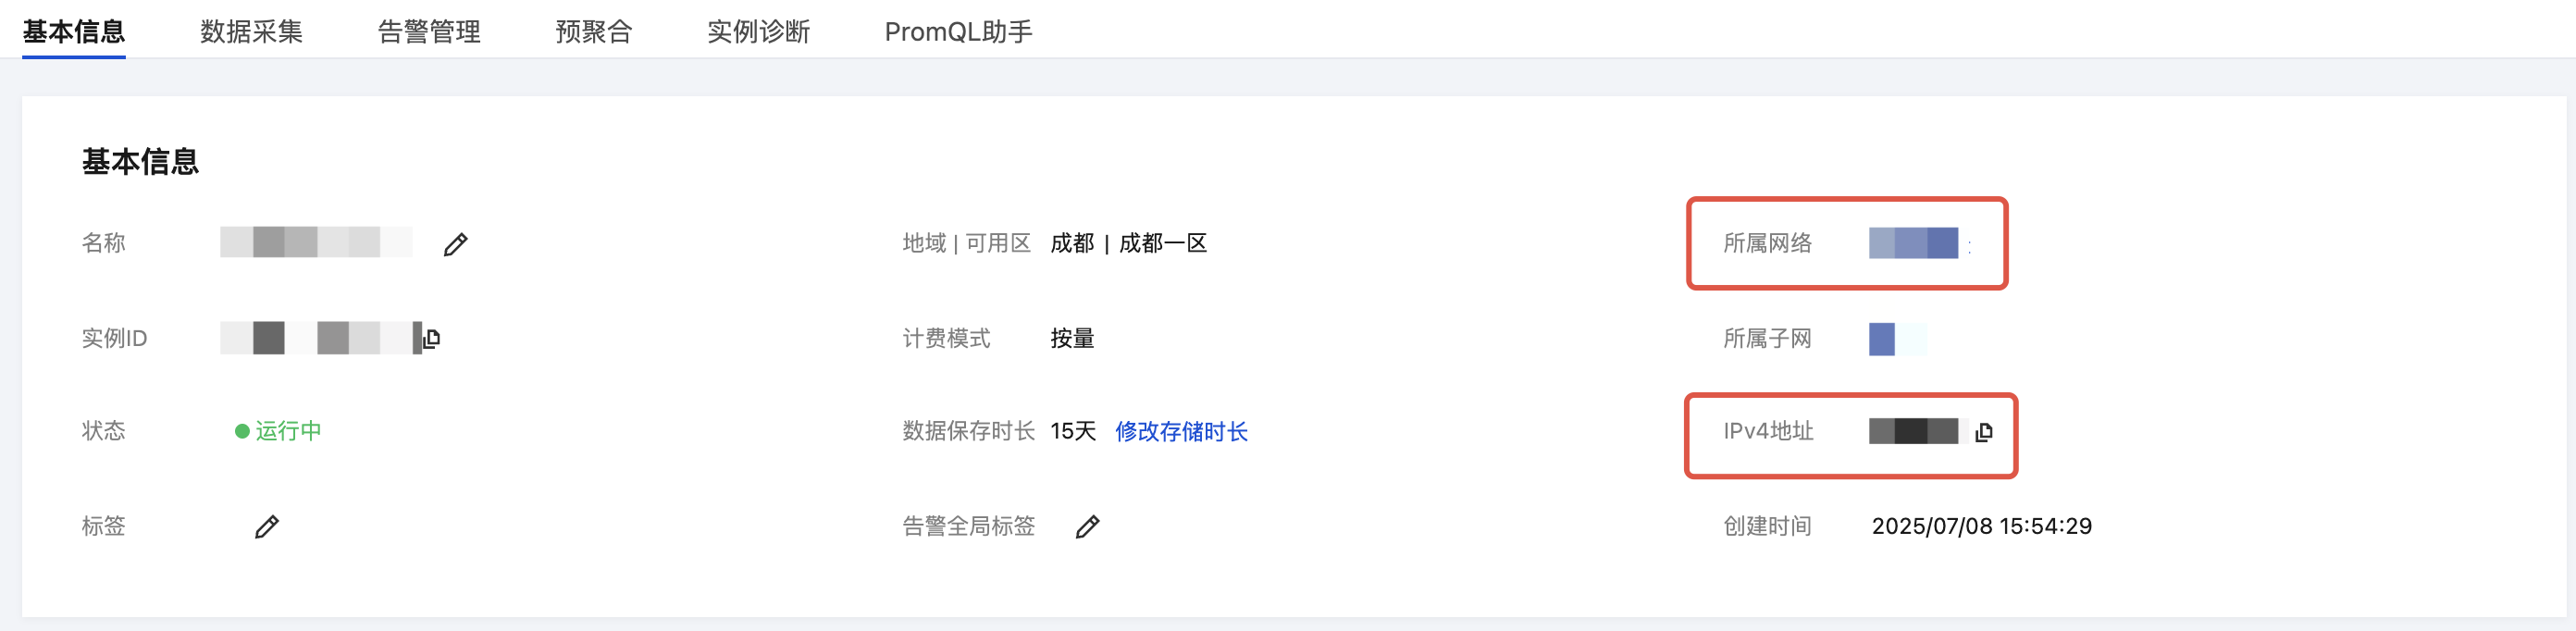
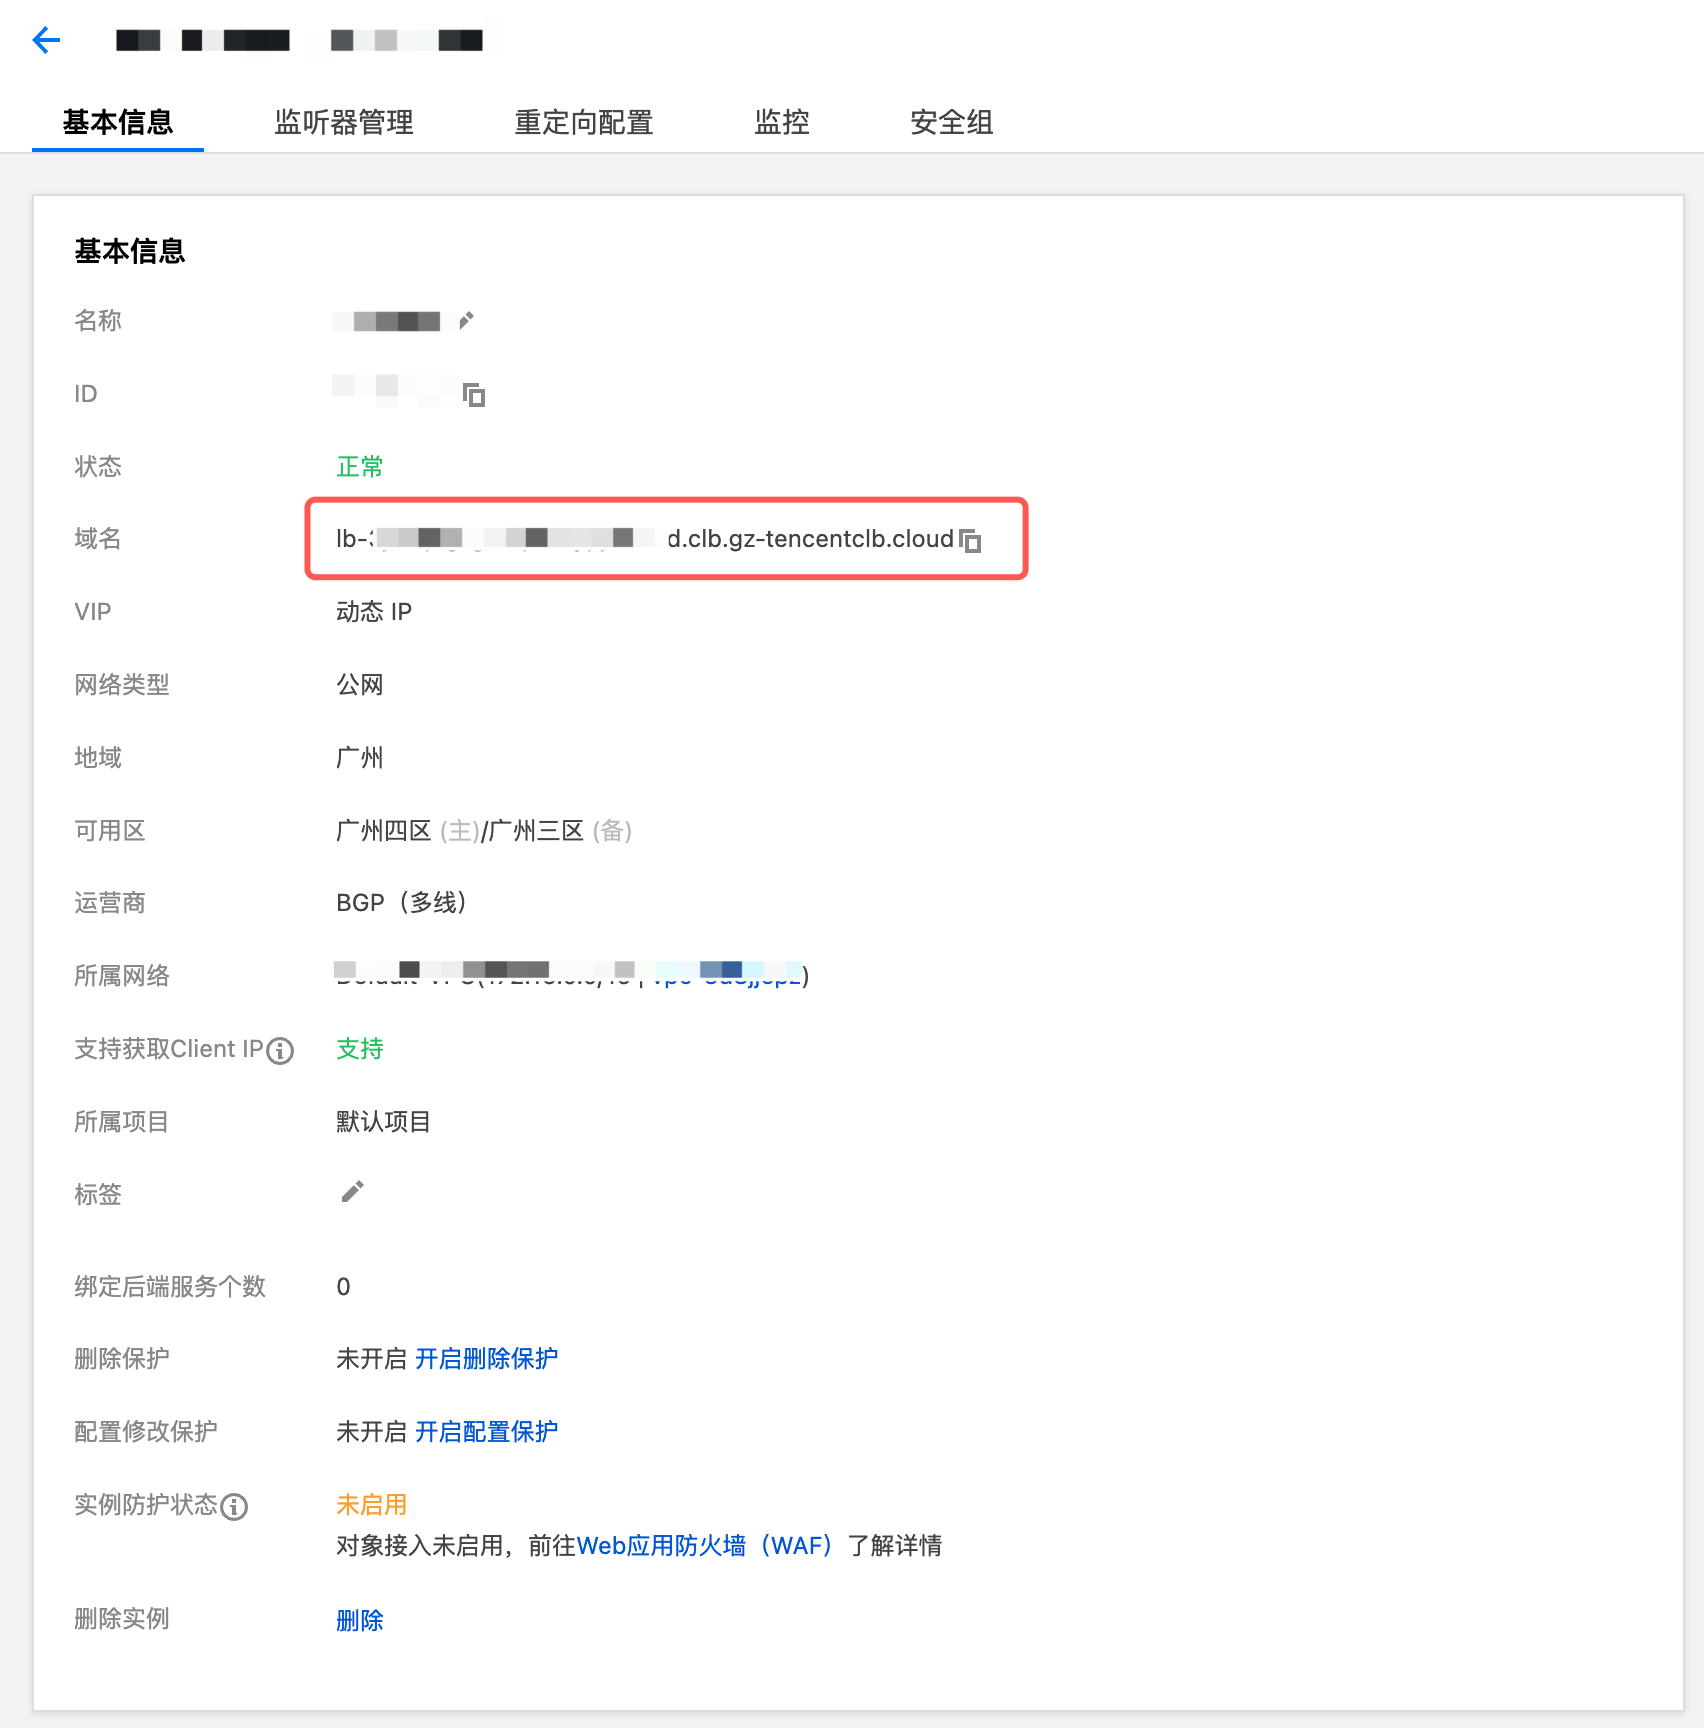
3. 成功购买后,单击创建的实例 ID/名称,进入实例详情页的基本信息,获取 Prometheus 所属网络以及 IPv4地址。
步骤2:新建公网 CLB 实例
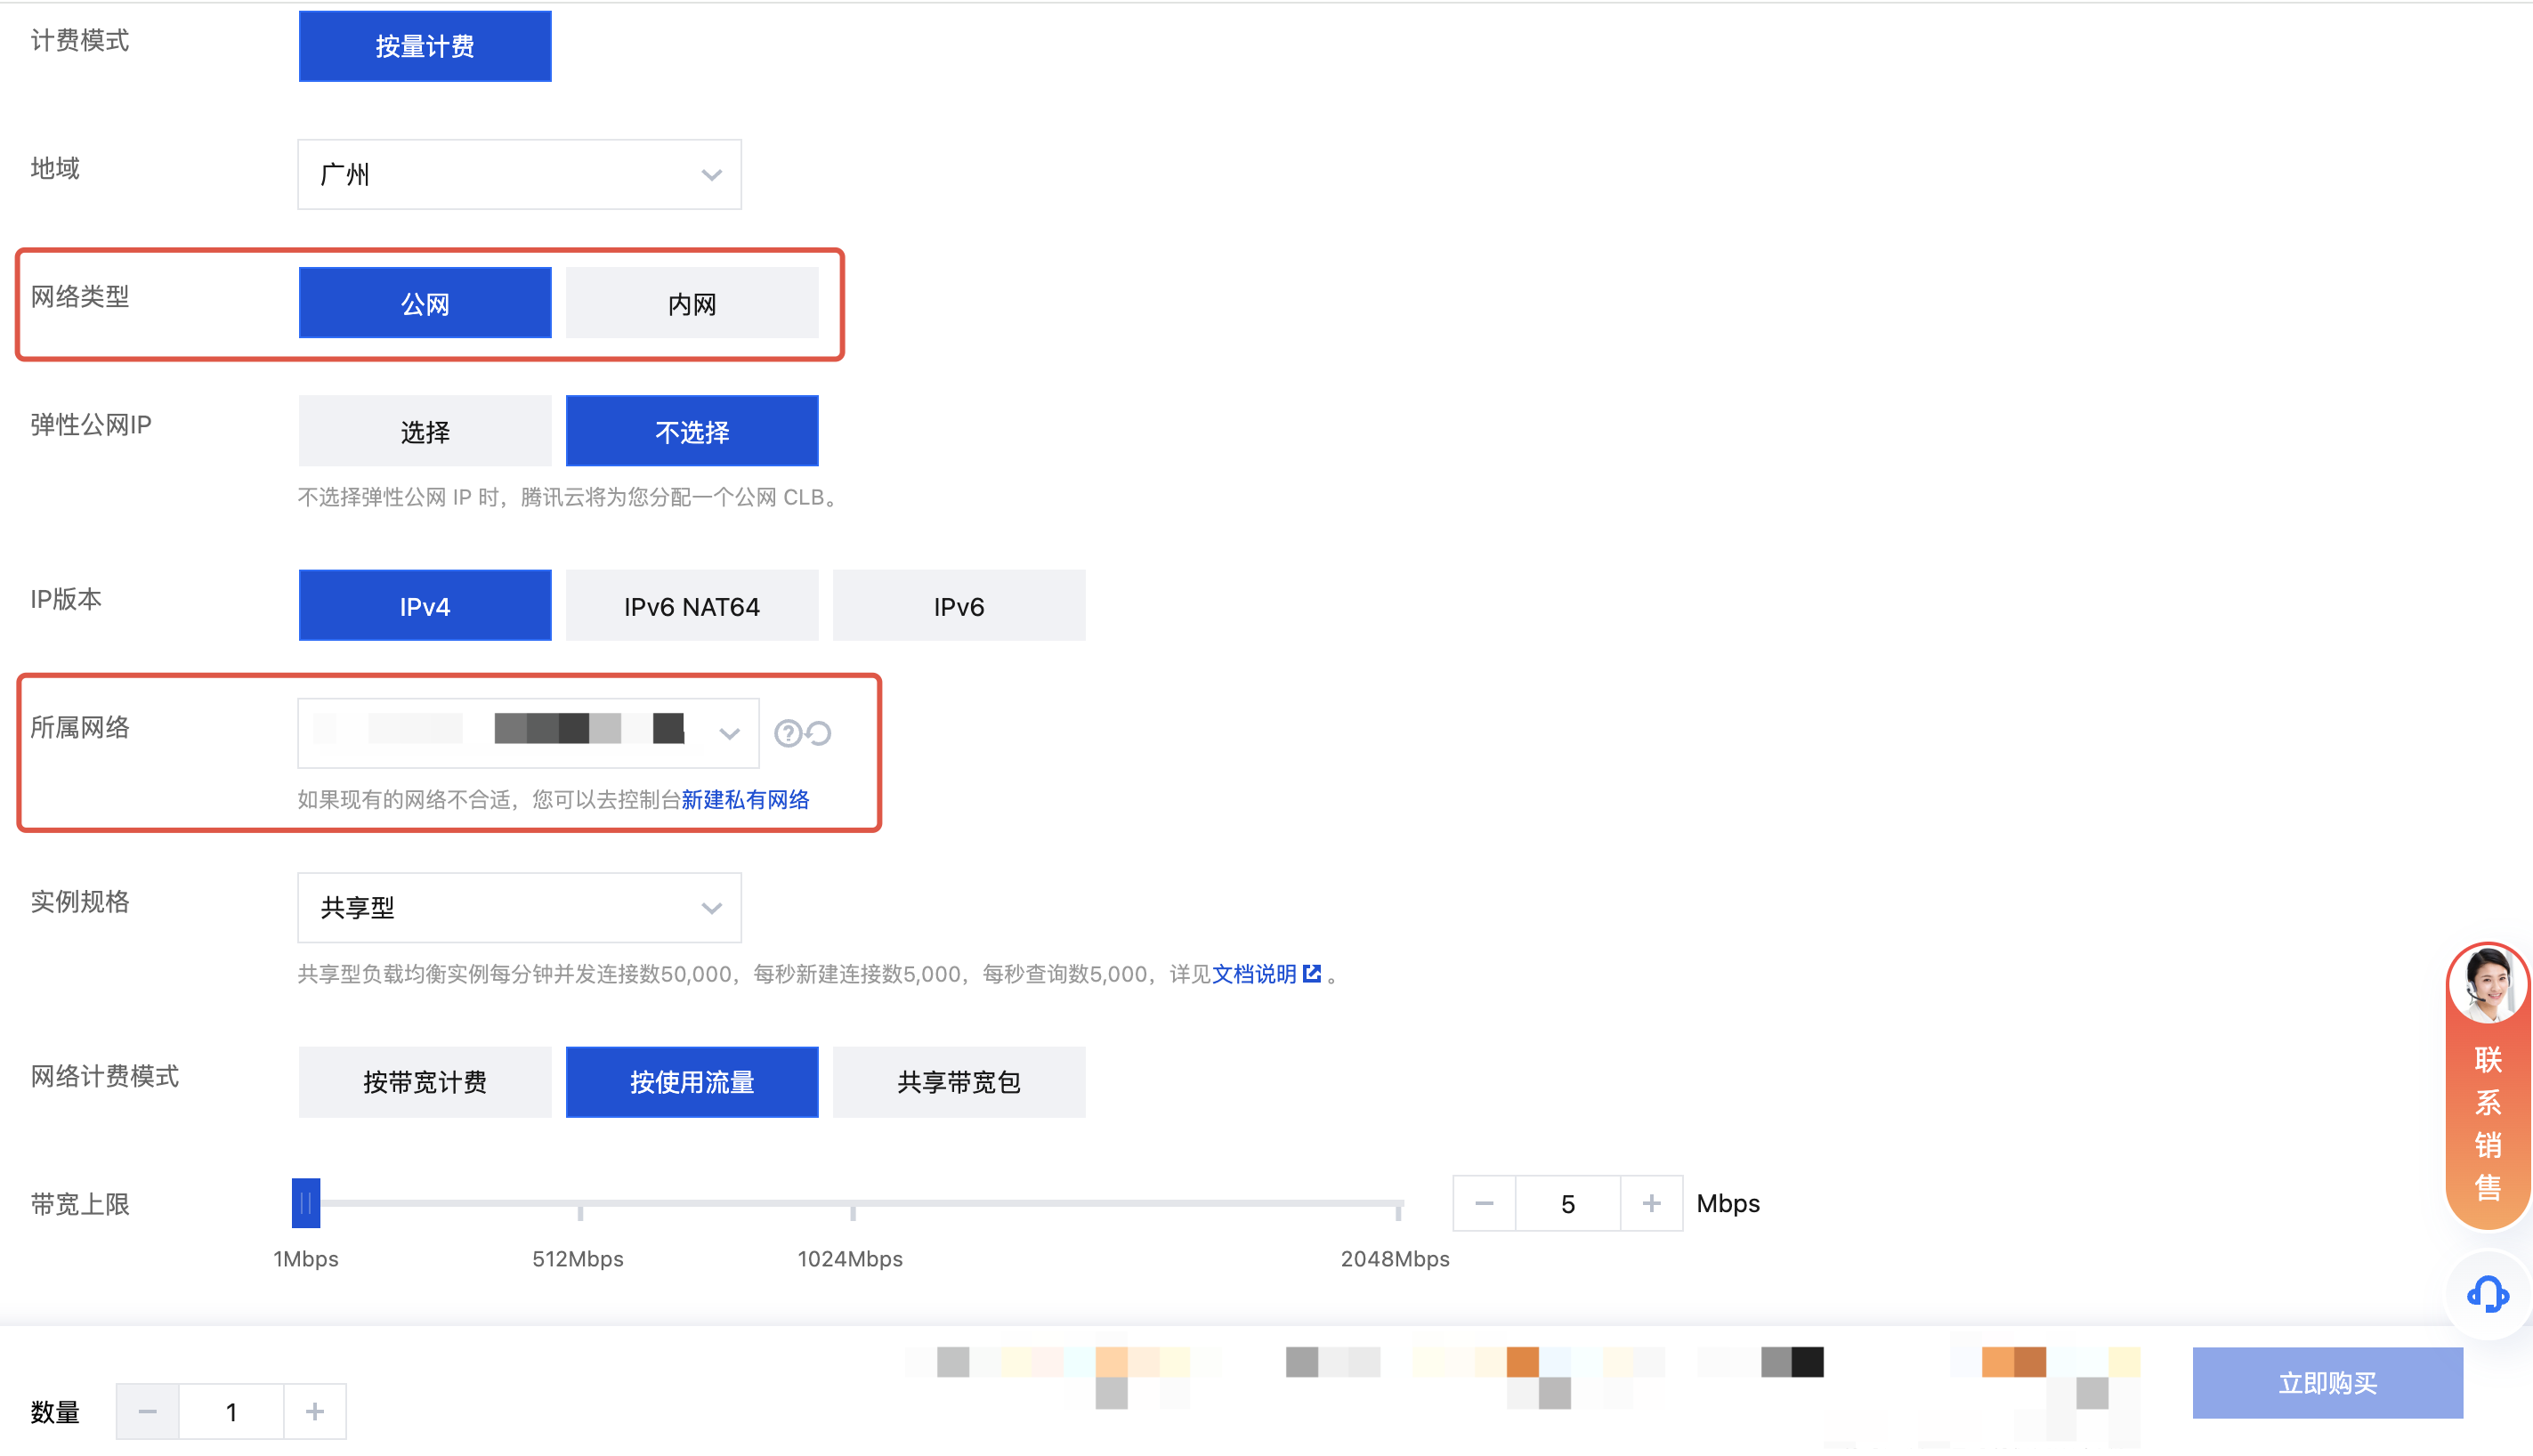
1. 进入 负载均衡控制台,新建 CLB 实例。
说明:
需创建与 Prometheus 同 VPC 下的 CLB 实例,才可绑定 Prometheus 内网 IP。若已有公网的 CLB 实例且与 Prometheus同 VPC,可复用已有公网 CLB。
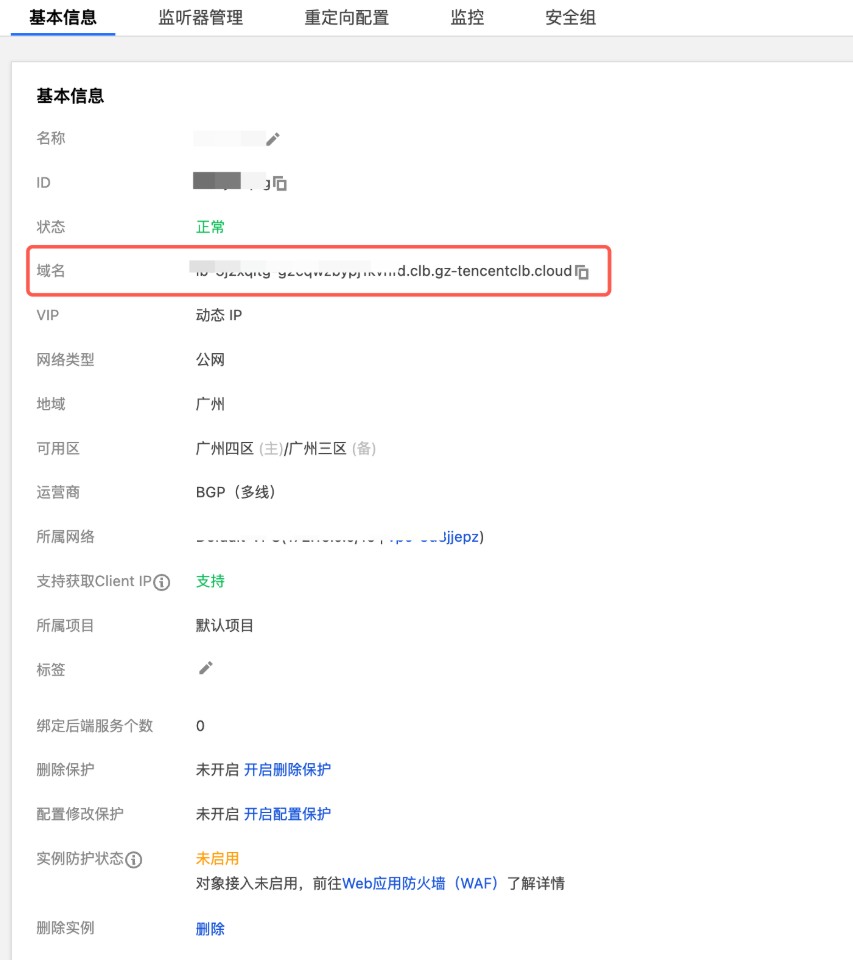
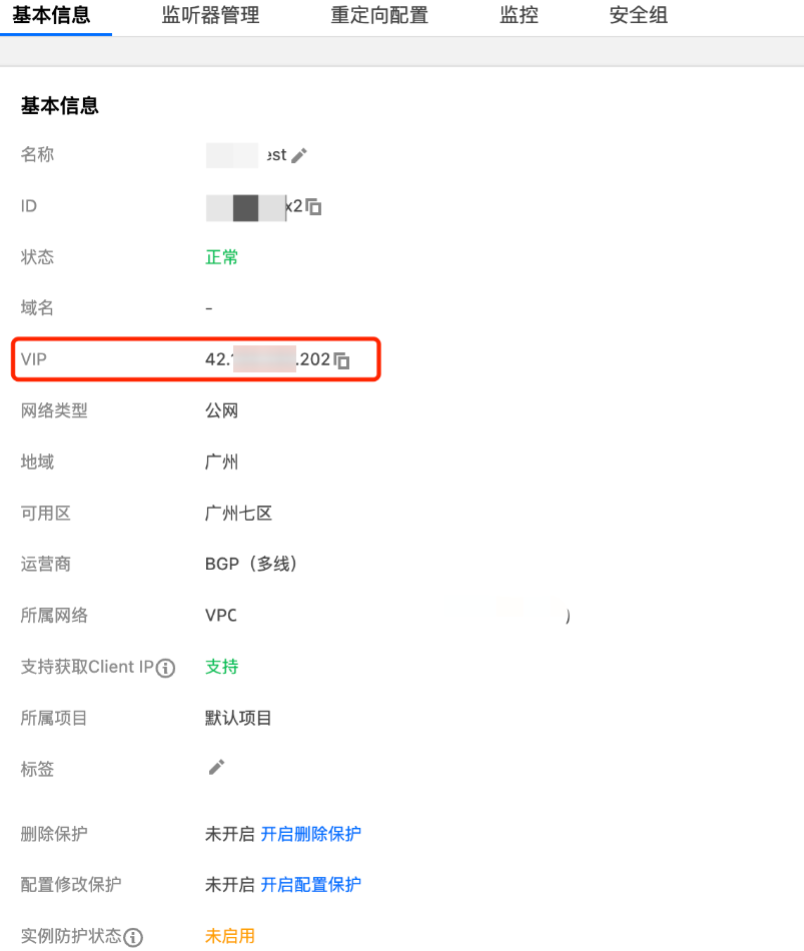
3. 创建完后进入实例基本信息页,可查看 CLB 对应的公网域名或 VIP。
说明:
域名化公网负载均衡实例页面:
固定 VIP 公网负载均衡实例页面:
步骤3:绑定后端服务
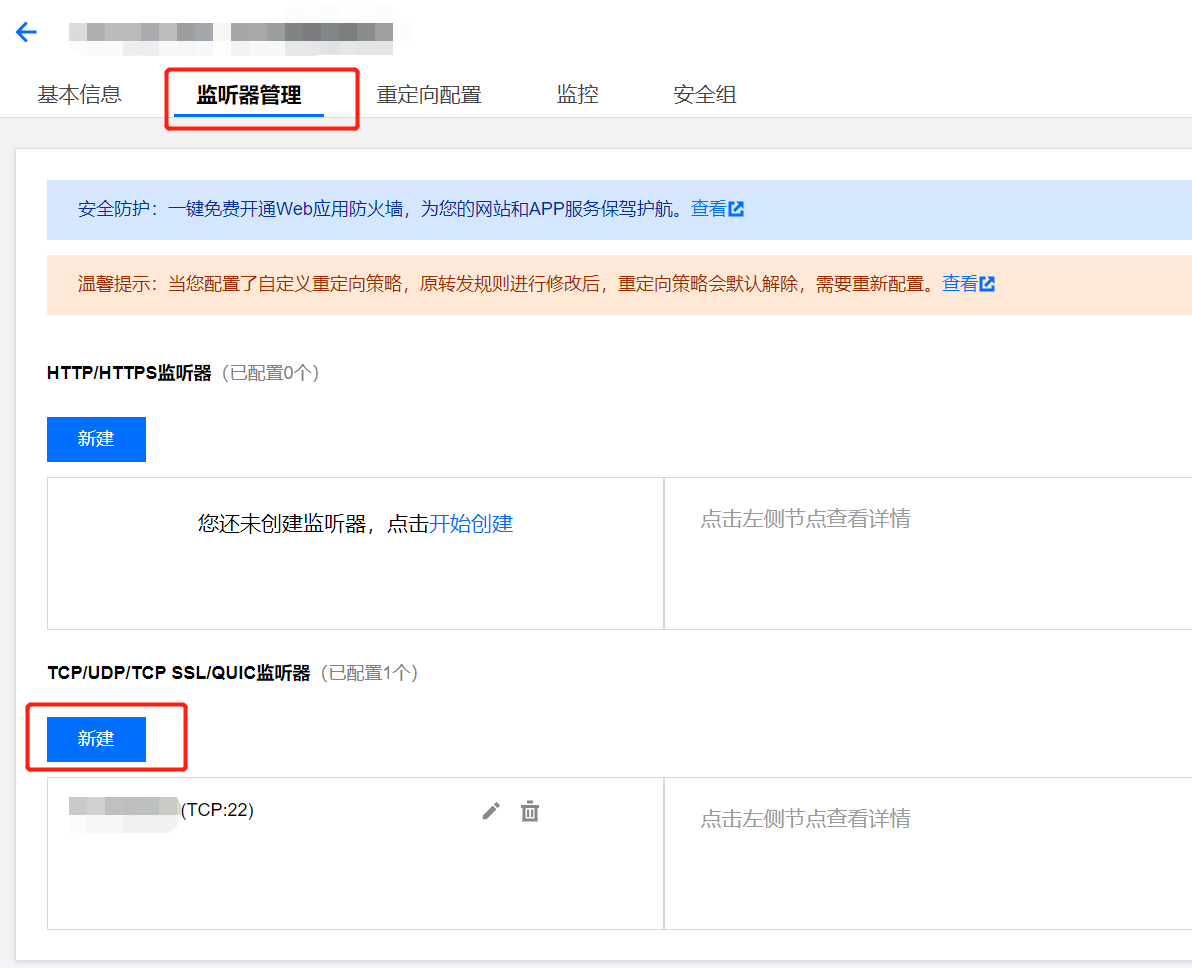
1. 进入监听器管理页面。
2. 单击 TCP/UDP/TCP SSL/QUIC 监听器下的新建。
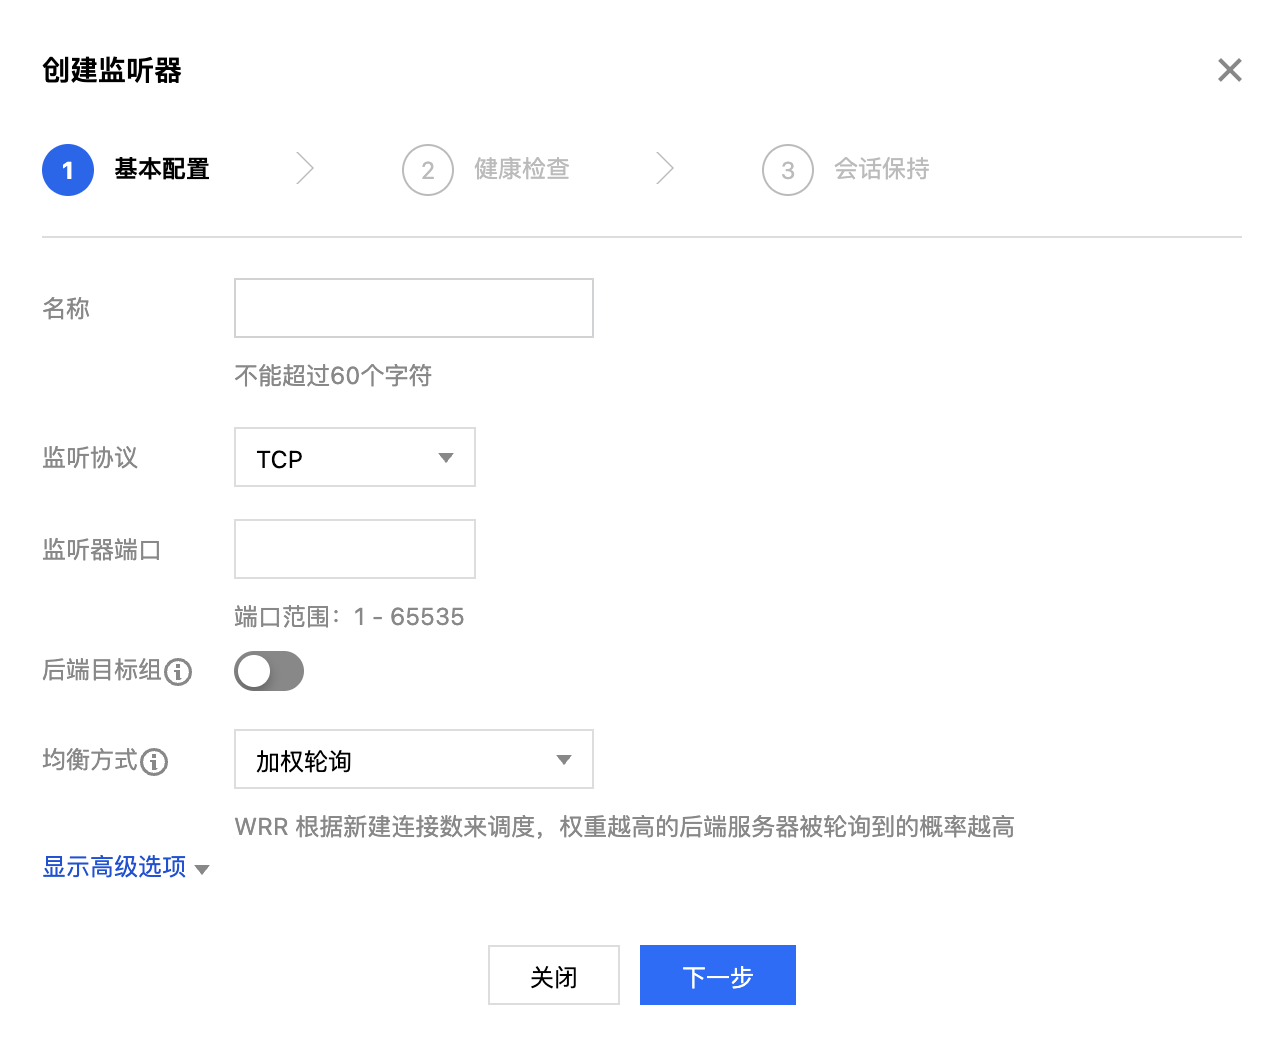
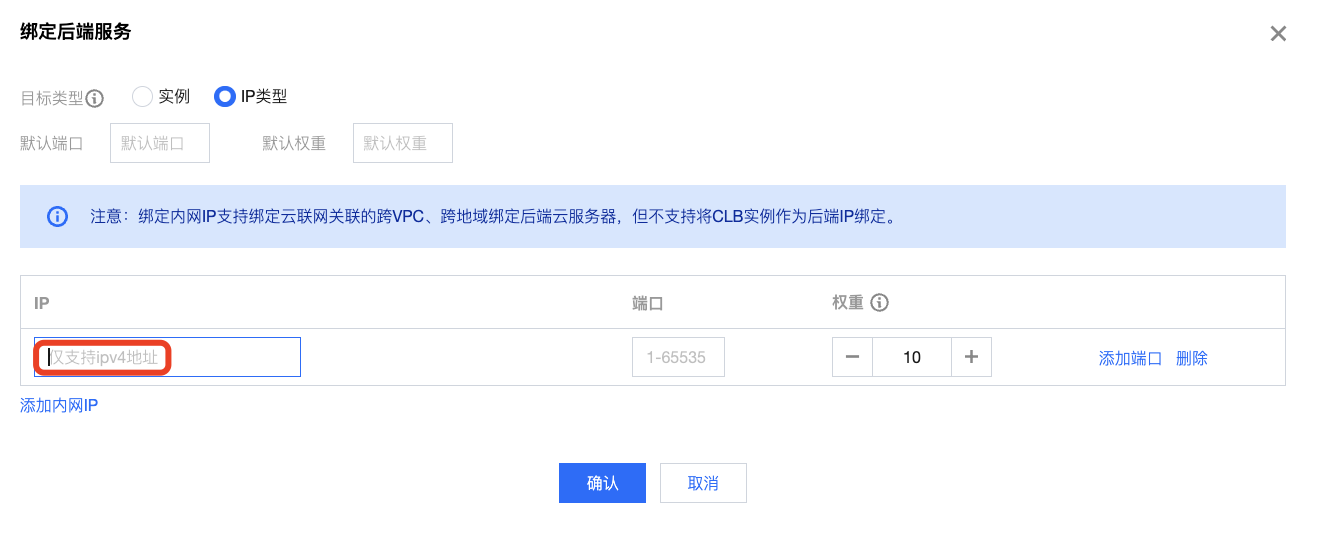
3. 新建完监听器后,单击监听器名称。在子窗口中单击绑定,绑定后端服务。配置完成后单击确认。
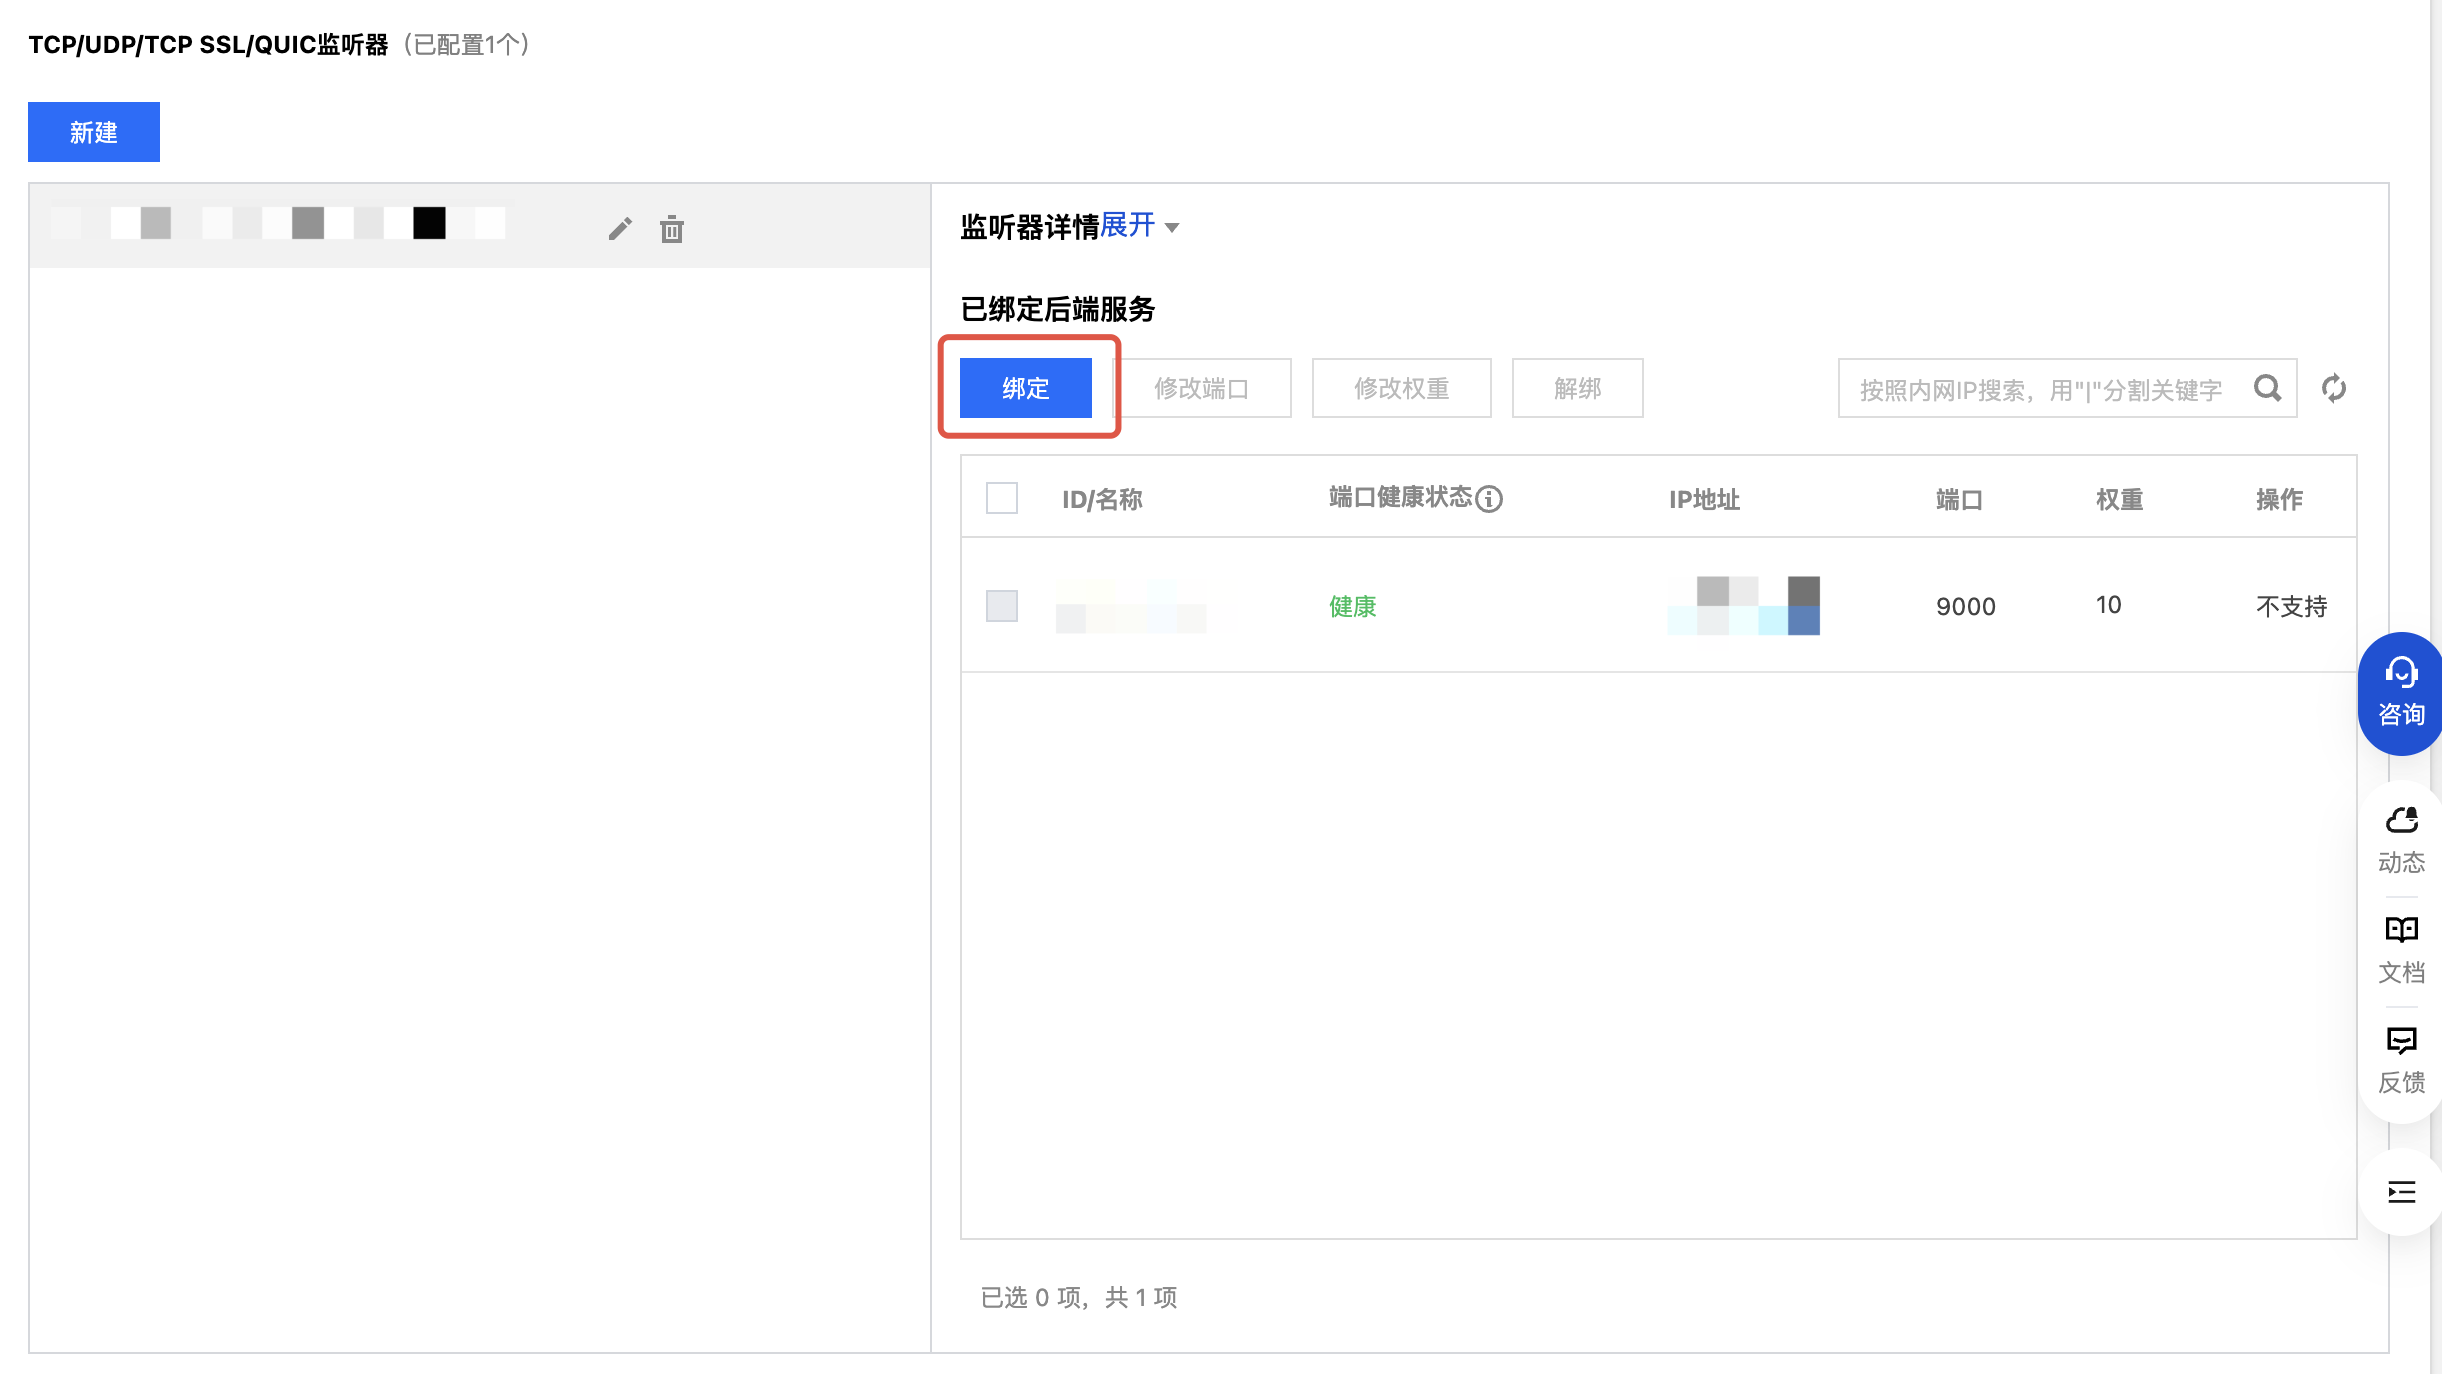
目标类型:选择 IP 类型。
IP 地址:需填写步骤1获取的 Prometheus IPv4 地址。
端口:填写 Prometheus 默认开放端口9090。
4. 单击监听器名称,查看是否监听正常。

步骤4:测试是否配置成功
1. 查看公网 CLB 的地址。
对于域名化负载均衡实例,假设查看到的公网地址为:lb-xxxxx-xxxxxxxxxx.clb.gz-tencentclb.cloud。
对于固定 VIP 负载均衡实例,假设查看到的公网地址为:81.71.21.123。

2. 查看监听配置端口。如下列端口为:8080。
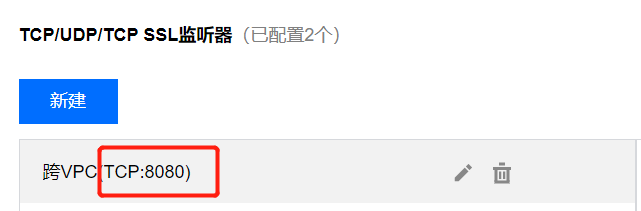
根据上述两个信息,确定 Prometheus 转发的公网地址。
对于域名化负载均衡实例,
域名:PORT 地址为:lb-xxxxx-xxxxxxxxxx.clb.gz-tencentclb.cloud:8080。对于固定 VIP 负载均衡实例,
IP:PORT 地址为:81.71.21.123:8080。3. 到浏览器或者机器上查看是否可以通过这个域名或 IP 获取 up 数据。
对于域名化负载均衡实例:
HTTP API 地址:
http://域名:PORT/api/v1/query?query=up
用对应 CLB 的公网域名和端口替换
域名:PORT 后如下:http://lb-xxxxx-xxxxxxxxxx.clb.gz-tencentclb.cloud:8080/api/v1/query?query=up
对于固定 VIP 负载均衡实例:
HTTP API 地址:
http://IP:PORT/api/v1/query?query=up
用对应 CLB 的公网 IP 和端口 替换
IP:PORT 后如下:http://81.71.21.123:8080/api/v1/query?query=up
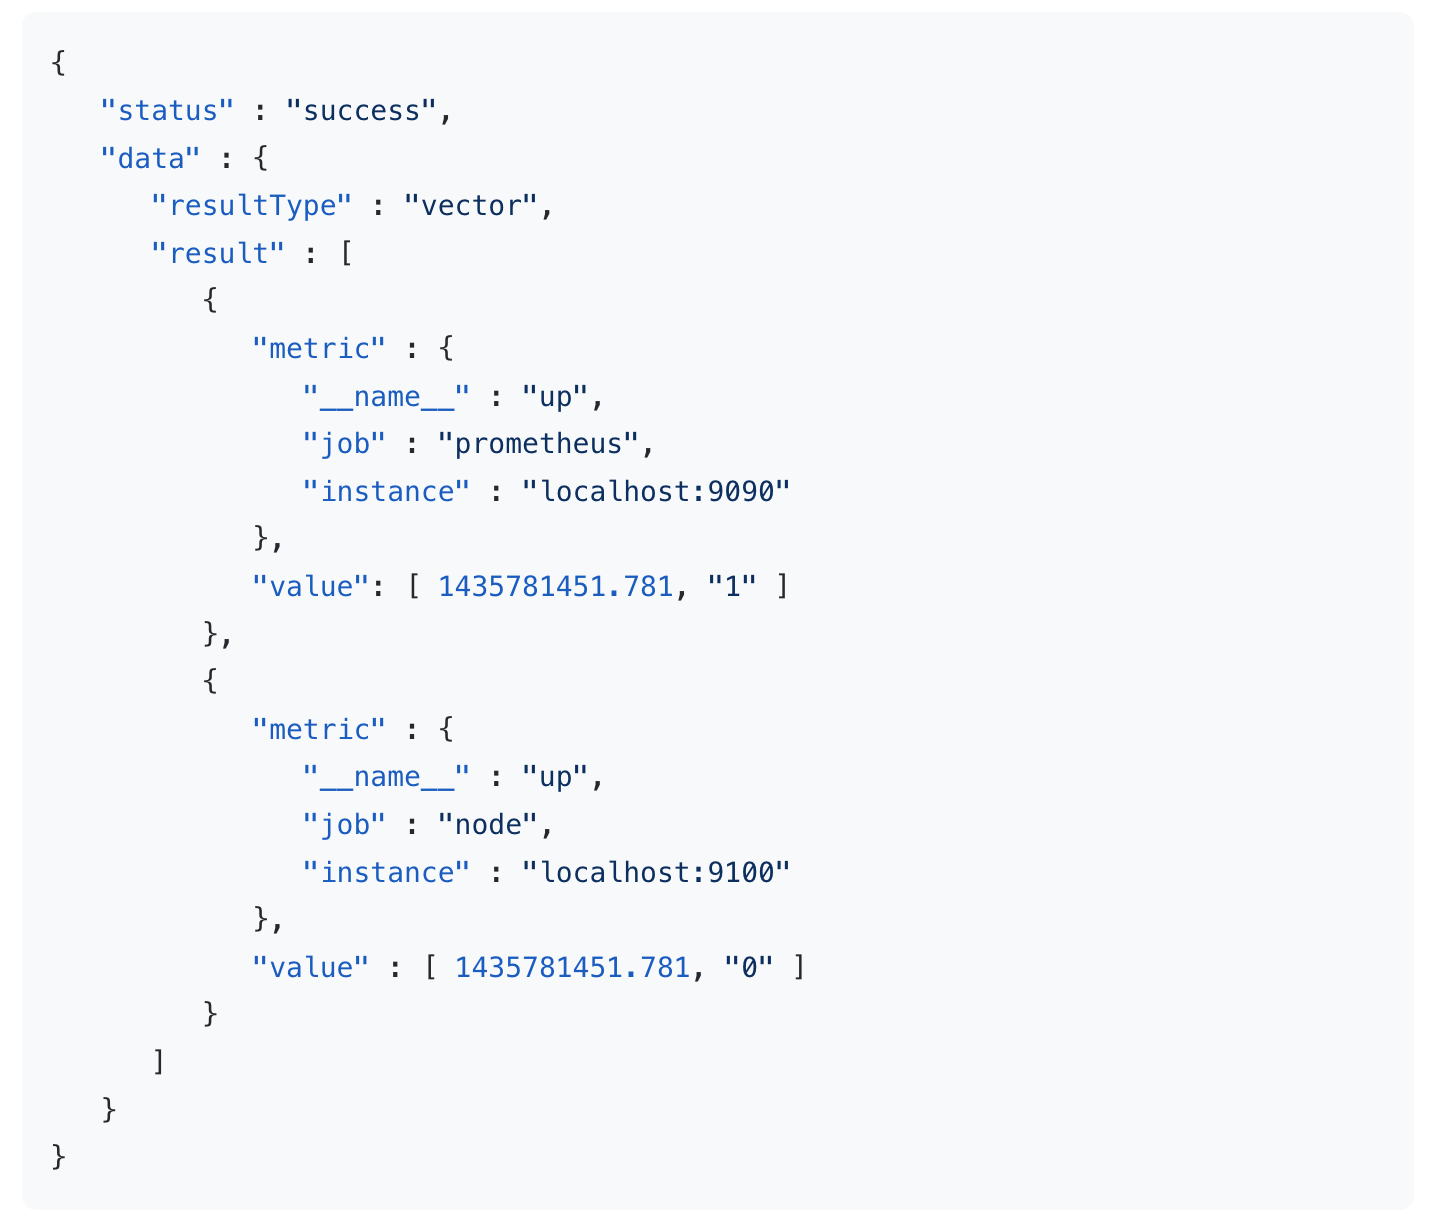
4. 进入对应链接地址。
用户名:填写您的主账号 ID (APPID)。
密码:在实例的基本信息页面获取 Token。
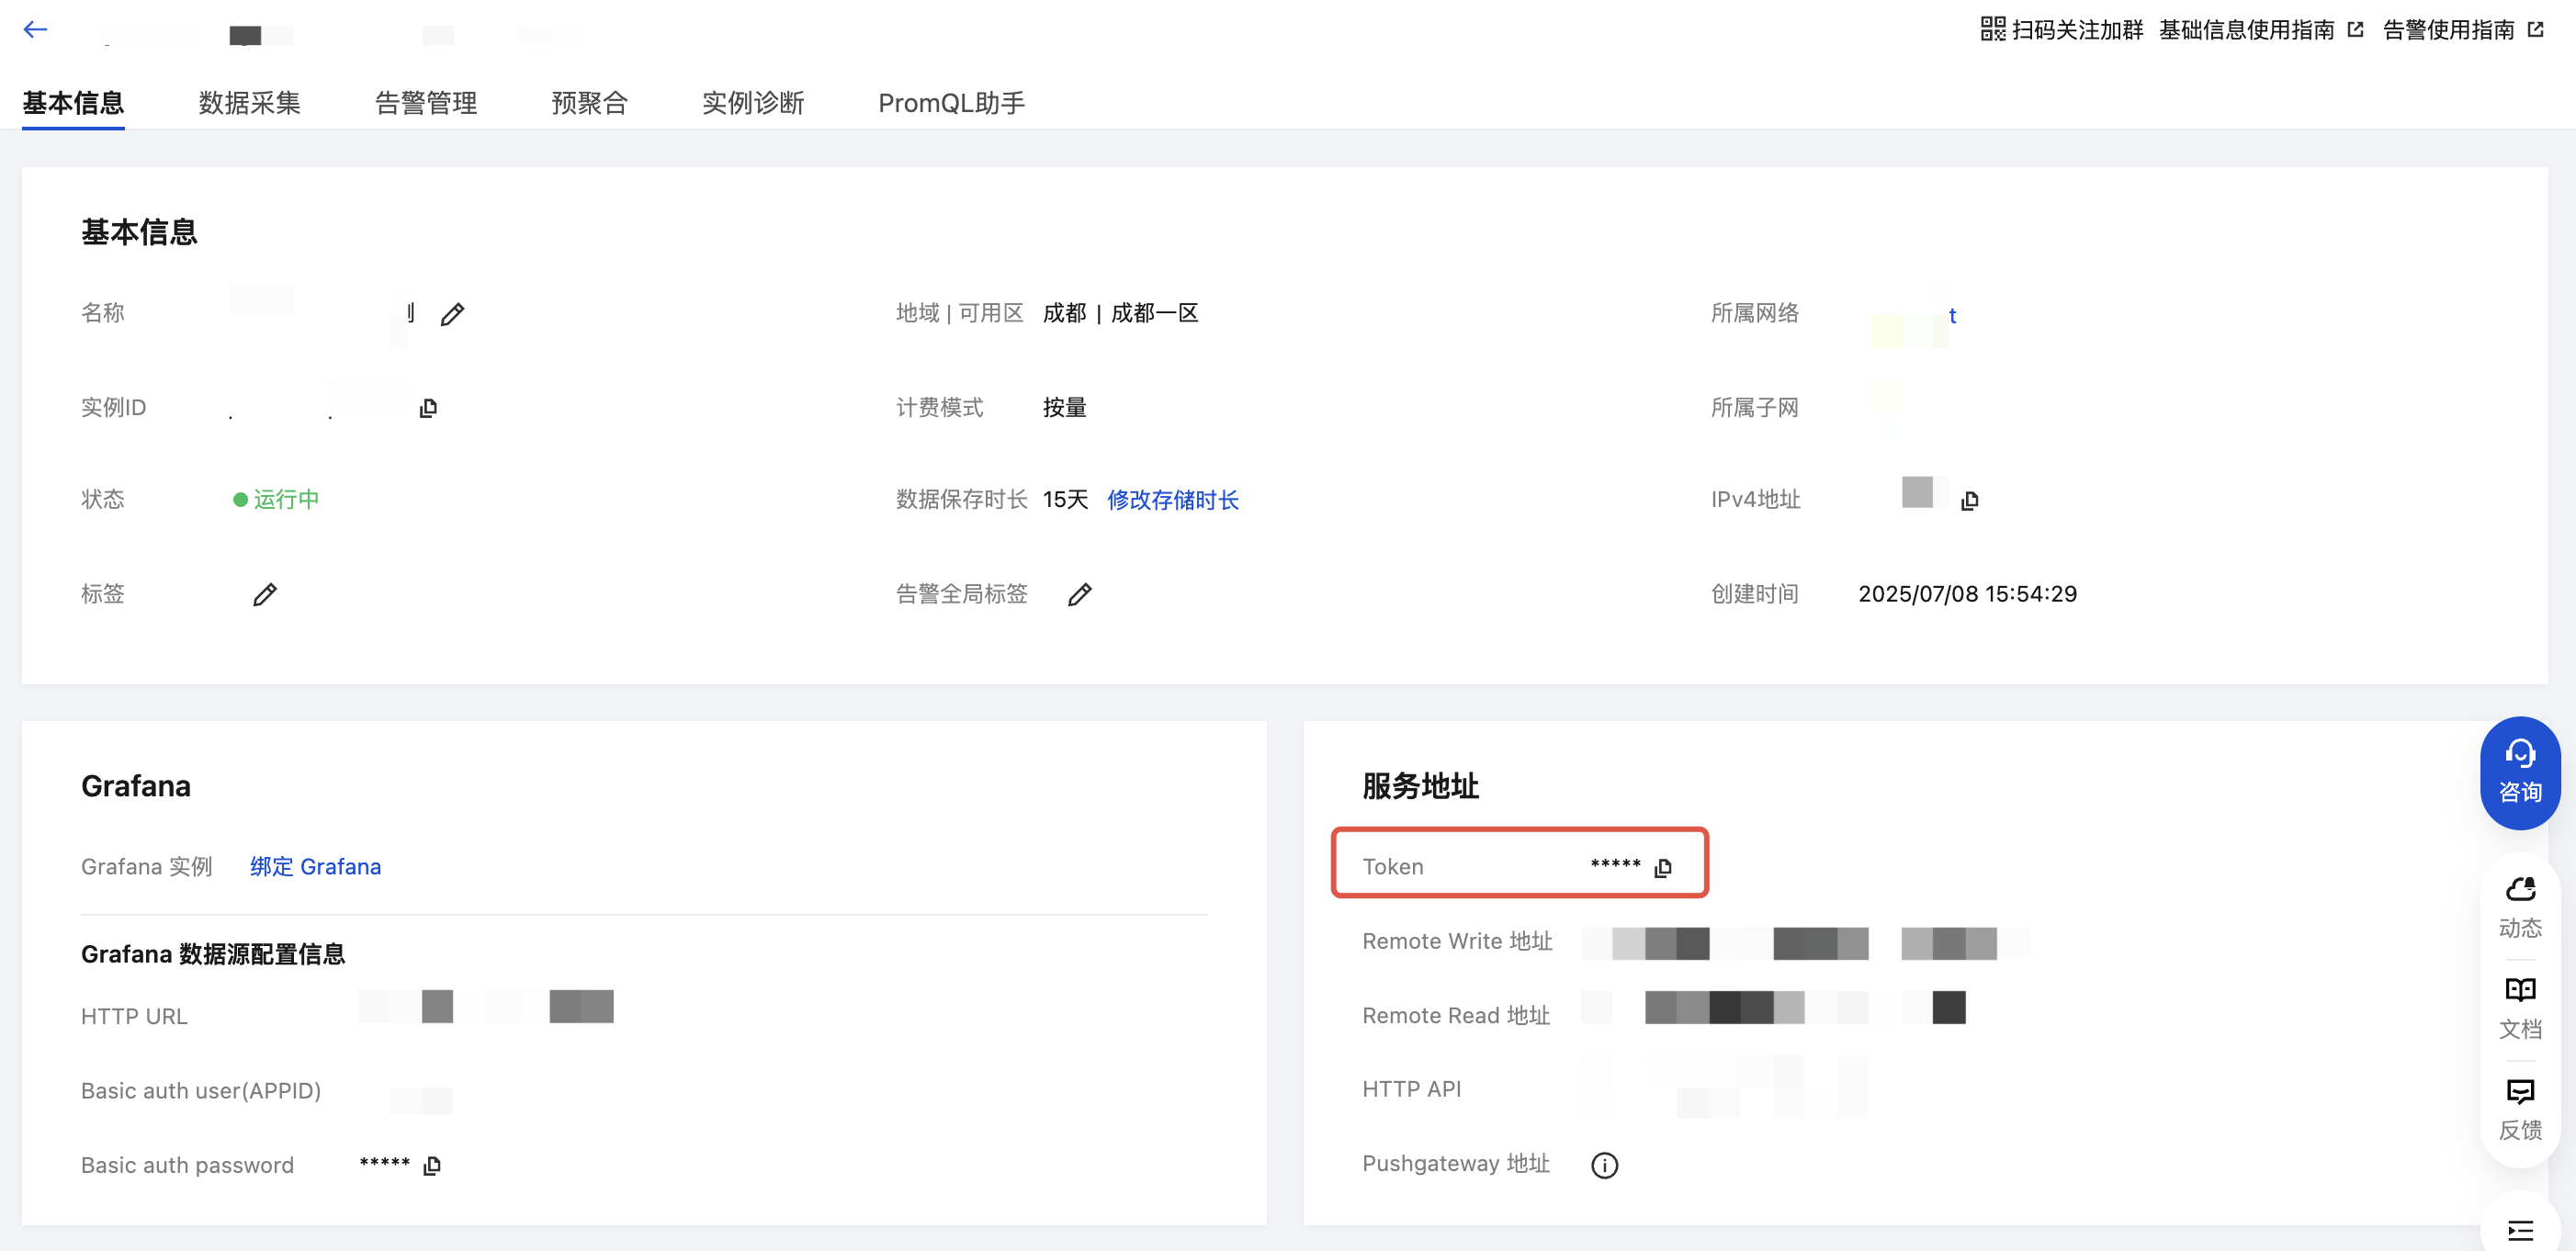
如下图所示,Prometheus 配置公网地址成功。