操作场景
消息队列 RocketMQ 版支持多种语言的 SDK 收发不同类型的消息,本文以调用 Java SDK 为例介绍通过 5.x SDK 连接消息队列 RocketMQ 版服务端实现普通消息收发的操作过程,
前提条件
已参考 SDK 概述,获取相关的客户端连接参数
下载 Demo
操作步骤
步骤1:安装 Java 依赖库
在 Java 项目中引入相关依赖,以 Maven 工程为例,在 pom.xml 添加以下依赖:
<dependencies><dependency><groupId>org.apache.rocketmq</groupId><artifactId>rocketmq-client-java</artifactId><version>5.0.6</version></dependency></dependencies>
注意:
如果您是在 Spring Boot 环境下使用,可能会遇到 annotations-api 依赖冲突,这时候,可以添加排除依赖即可。
<dependencies><dependency><groupId>org.apache.rocketmq</groupId><artifactId>rocketmq-client-java</artifactId><version>5.0.6</version><exclusions><exclusion><groupId>org.apache.tomcat</groupId><artifactId>annotations-api</artifactId></exclusion></exclusions></dependency></dependencies>
步骤2:生产消息
在已创建的 Java 工程中,创建发送消息程序并运行。
public class NormalMessageSyncProducer {private static final Logger log = LoggerFactory.getLogger(NormalMessageSyncProducer.class);private NormalMessageSyncProducer() {}public static void main(String[] args) throws ClientException, IOException {final ClientServiceProvider provider = ClientServiceProvider.loadService();// 添加配置的ak和skString accessKey = "yourAccessKey"; //ak,可以在控制台“权限管理”页面获取String secretKey = "yourSecretKey"; //sk,可以在控制台“权限管理”页面获取SessionCredentialsProvider sessionCredentialsProvider =new StaticSessionCredentialsProvider(accessKey, secretKey);// 填写腾讯云提供的接入地址String endpoints = "rmq-xxx.rocketmq.xxxtencenttdmq.com:8080";ClientConfiguration clientConfiguration = ClientConfiguration.newBuilder().setEndpoints(endpoints).enableSsl(false).setCredentialProvider(sessionCredentialsProvider).build();String topic = "yourNormalTopic";// In most case, you don't need to create too many producers, singleton pattern is recommended.final Producer producer = provider.newProducerBuilder().setClientConfiguration(clientConfiguration)// Set the topic name(s), which is optional but recommended. It makes producer could prefetch the topic// route before message publishing..setTopics(topic)// May throw {@link ClientException} if the producer is not initialized..build();// Define your message body.byte[] body = "This is a normal message for Apache RocketMQ".getBytes(StandardCharsets.UTF_8);String tag = "yourMessageTagA";final Message message = provider.newMessageBuilder()// Set topic for the current message..setTopic(topic)// Message secondary classifier of message besides topic..setTag(tag)// Key(s) of the message, another way to mark message besides message id..setKeys("yourMessageKey-1c151062f96e").setBody(body).build();try {final SendReceipt sendReceipt = producer.send(message);log.info("Send message successfully, messageId={}", sendReceipt.getMessageId());} catch (Throwable t) {log.error("Failed to send message", t);}// Close the producer when you don't need it anymore.producer.close();}}
参数 | 说明 |
accessKey | 角色密钥,在控制台的集群权限页面 AccessKey 列复制。  |
secretKey | 角色名称,在控制台的集群权限页面 SecretKey 列复制。 |
endpoints | 集群接入地址,在控制台集群基本信息页面的接入信息模块获取。 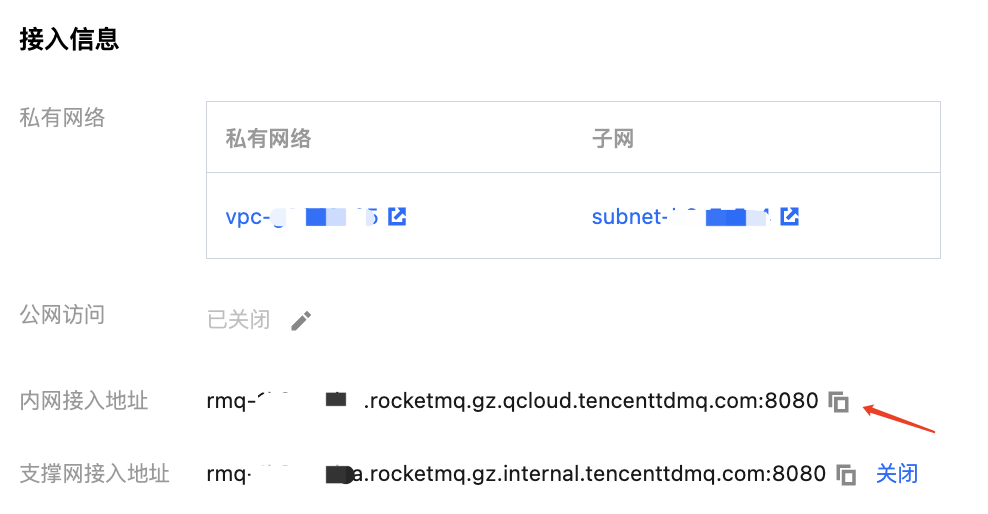 |
topic | Topic 的名称,在控制台 Topic 管理页面复制。  |
步骤3:消费消息
在已创建的 Java 工程中,创建订阅普通消息程序并运行。
腾讯云消息队列 TDMQ RocketMQ 版 5.x 系列支持两种类型的消费者客户端,分别为 Push Consumer 和 Simple Consumer。以下代码示例以 Push Consumer 为例:
public class NormalPushConsumer {private static final Logger log = LoggerFactory.getLogger(NormalPushConsumer.class);private NormalPushConsumer() {}public static void main(String[] args) throws ClientException, IOException, InterruptedException {final ClientServiceProvider provider = ClientServiceProvider.loadService();// 添加配置的ak和skString accessKey = "yourAccessKey"; //ak,可以在控制台“权限管理”页面获取String secretKey = "yourSecretKey"; //sk,可以在控制台“权限管理”页面获取SessionCredentialsProvider sessionCredentialsProvider =new StaticSessionCredentialsProvider(accessKey, secretKey);// 填写腾讯云提供的接入地址String endpoints = "rmq-xxx.rocketmq.xxxtencenttdmq.com:8080";ClientConfiguration clientConfiguration = ClientConfiguration.newBuilder().setEndpoints(endpoints).enableSsl(false).setCredentialProvider(sessionCredentialsProvider).build();String tag = "*";FilterExpression filterExpression = new FilterExpression(tag, FilterExpressionType.TAG);String consumerGroup = "yourConsumerGroup";String topic = "yourTopic";// In most case, you don't need to create too many consumers, singleton pattern is recommended.PushConsumer pushConsumer = provider.newPushConsumerBuilder().setClientConfiguration(clientConfiguration)// Set the consumer group name..setConsumerGroup(consumerGroup)// Set the subscription for the consumer..setSubscriptionExpressions(Collections.singletonMap(topic, filterExpression)).setMessageListener(messageView -> {// Handle the received message and return consume result.log.info("Consume message={}", messageView);return ConsumeResult.SUCCESS;}).build();// Block the main thread, no need for production environment.Thread.sleep(Long.MAX_VALUE);// Close the push consumer when you don't need it anymore.pushConsumer.close();}}
参数 | 说明 |
accessKey | 角色密钥,在控制台的集群权限页面 AccessKey 列复制。 |
secretKey | 角色名称,在控制台的集群权限页面 SecretKey 列复制。 |
endpoints | 集群接入地址,在控制台集群基本信息页面的接入信息模块获取。 |
consumerGroup | 消费者组名称,在控制台 Group 管理页面复制。  |
topic | Topic 的名称,在控制台 Topic 管理页面复制。 |
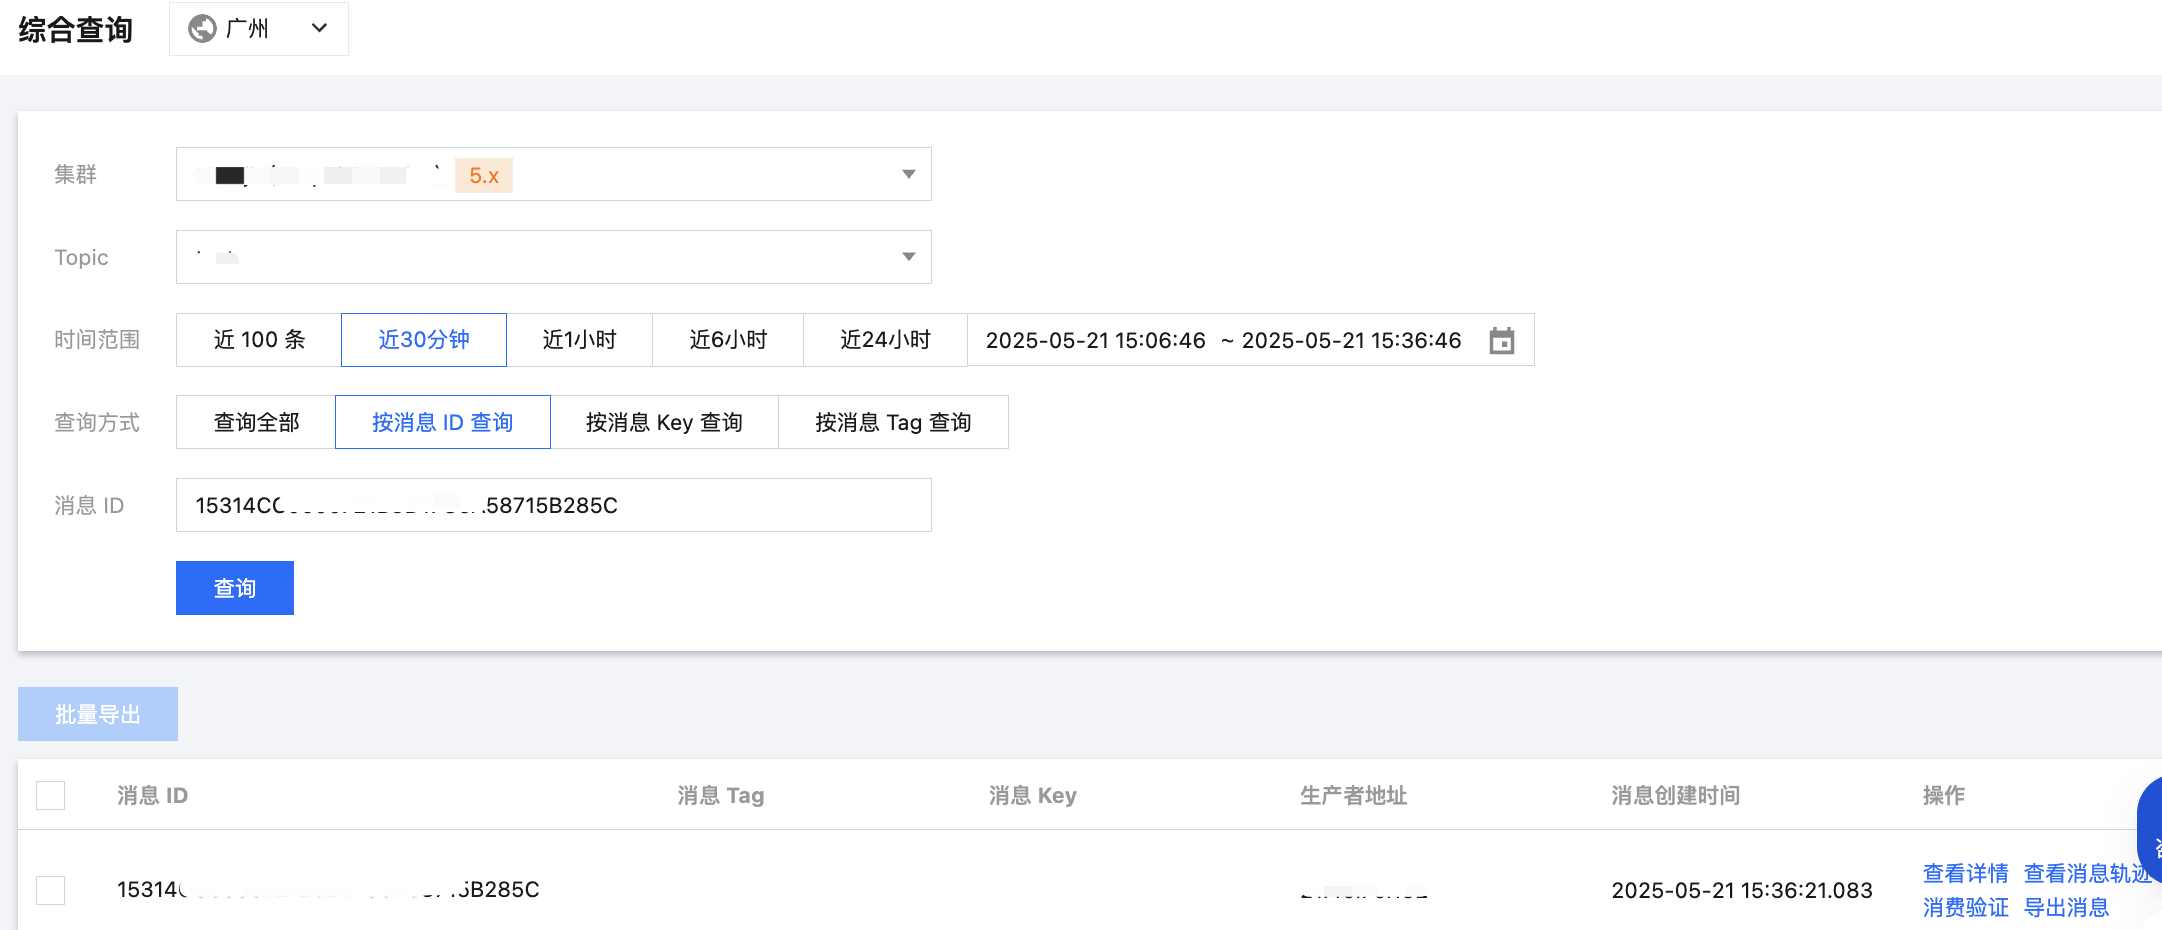
步骤4:查看消息详情
消息发送完成后会得到一个消息 ID (messageID),您可以在控制台的消息查询 > 综合查询页面查询刚刚发送的消息,以及该消息的详情和轨迹等信息。