The content of this page has been automatically translated by AI. If you encounter any problems while reading, you can view the corresponding content in Chinese.
A producer sends a message to an Exchange. The Exchange routes the message to one or more Queues based on its attributes or content (or discards it), and the Consumer pulls the message from the Queue for consumption.
This document describes how to create, delete, and query an exchange in the TDMQ for RabbitMQ console.
Prerequisites
You have created the corresponding Vhost (refer to Creating Vhost).
2. In the left sidebar, select Cluster Management >Exchange tab. After selecting Vhost, click Create New to enter the Exchange creation page.
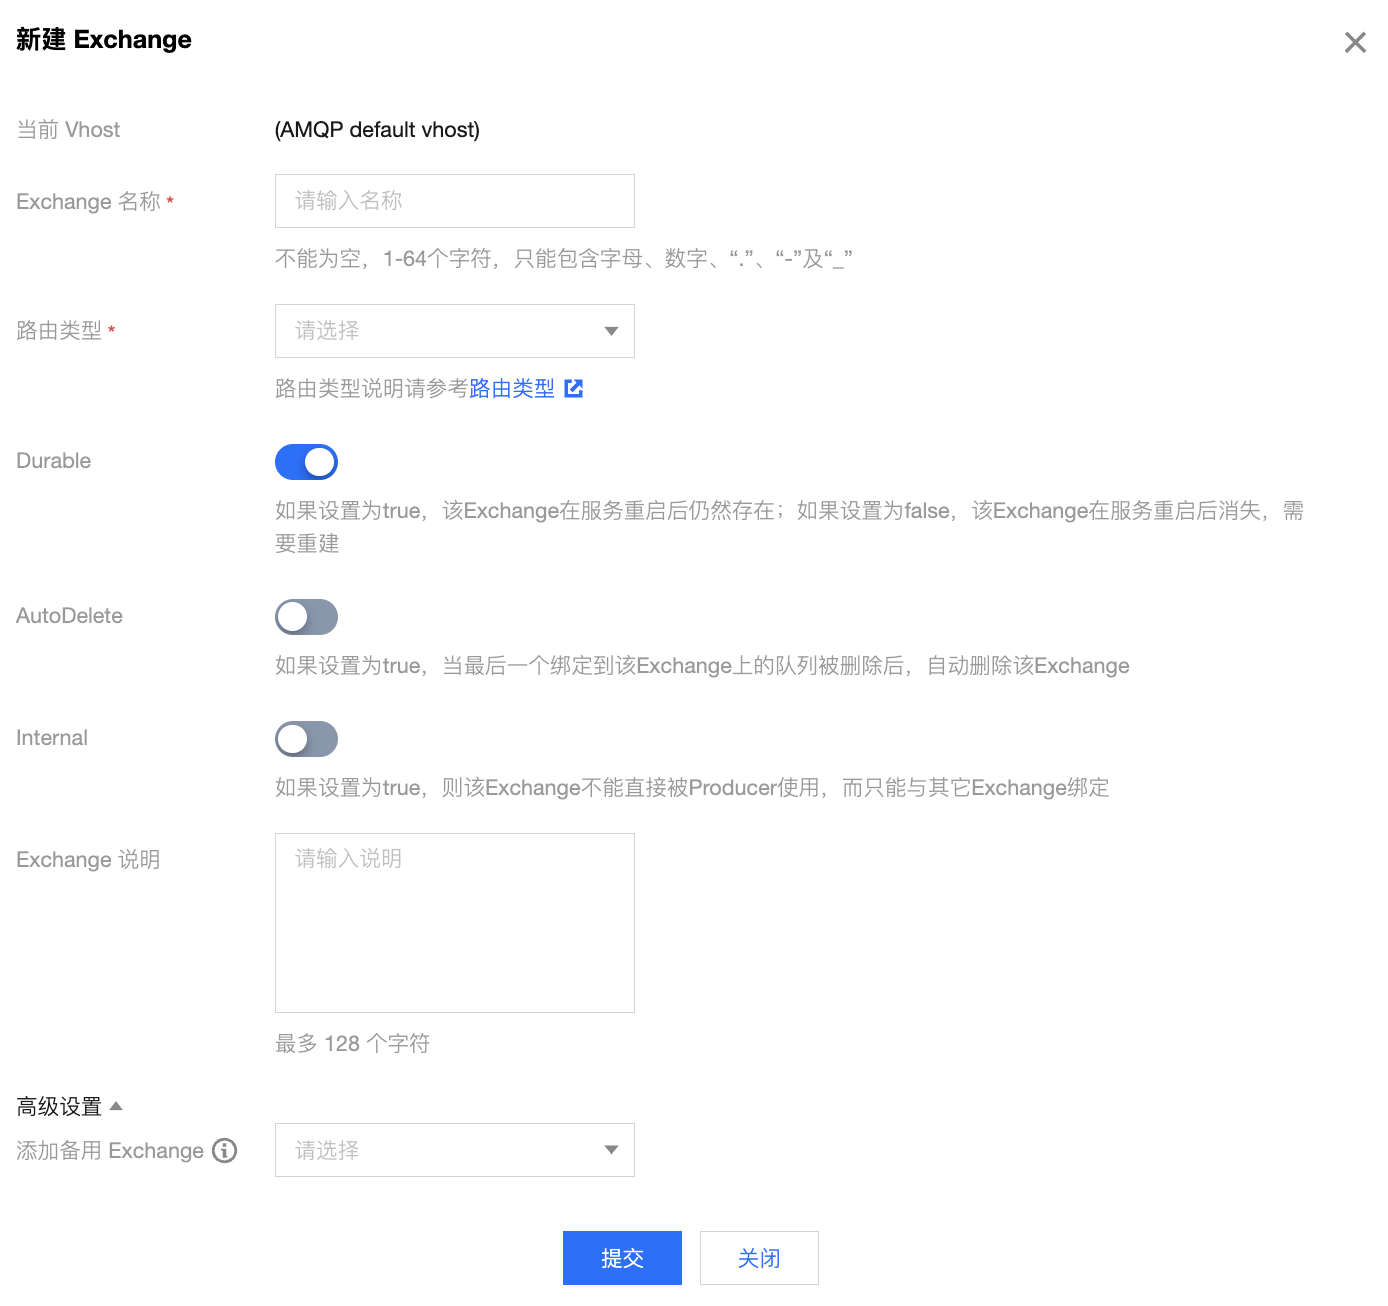
3. In the New Exchange dialog box, fill in the following information.
Exchange Name: Fill in the Exchange name (cannot be modified after creation), 1-64 characters, can only include letters, numbers, ".", "-", and "_"
Routing Type: Select the routing type, including Direct, Fanout, Topic, and Headers. The routing type cannot be modified once selected (for detailed descriptions of routing types, see Exchange)
Direct: This type of Exchange routes messages to Queues that match the Routing Key and Binding Key exactly
Fanout: This type of Exchange routes messages to all Queues bound to it
Topic: This type of Exchange supports multi-condition and fuzzy matching, meaning it routes messages to bound Queues using Routing Key pattern matching and string comparison.
Headers: Independent of the Routing Key, the matching mechanism is based on the message's Headers attributes. Declare a map key-value pair before binding a Queue to a Headers Exchange. This map object facilitates the binding of the message queue and the exchanger. When a message is sent to RabbitMQ, its Headers will be matched against the key-value pairs specified at the time of binding the Exchange; if they match exactly, the message is routed to the Queue, otherwise, it is not.
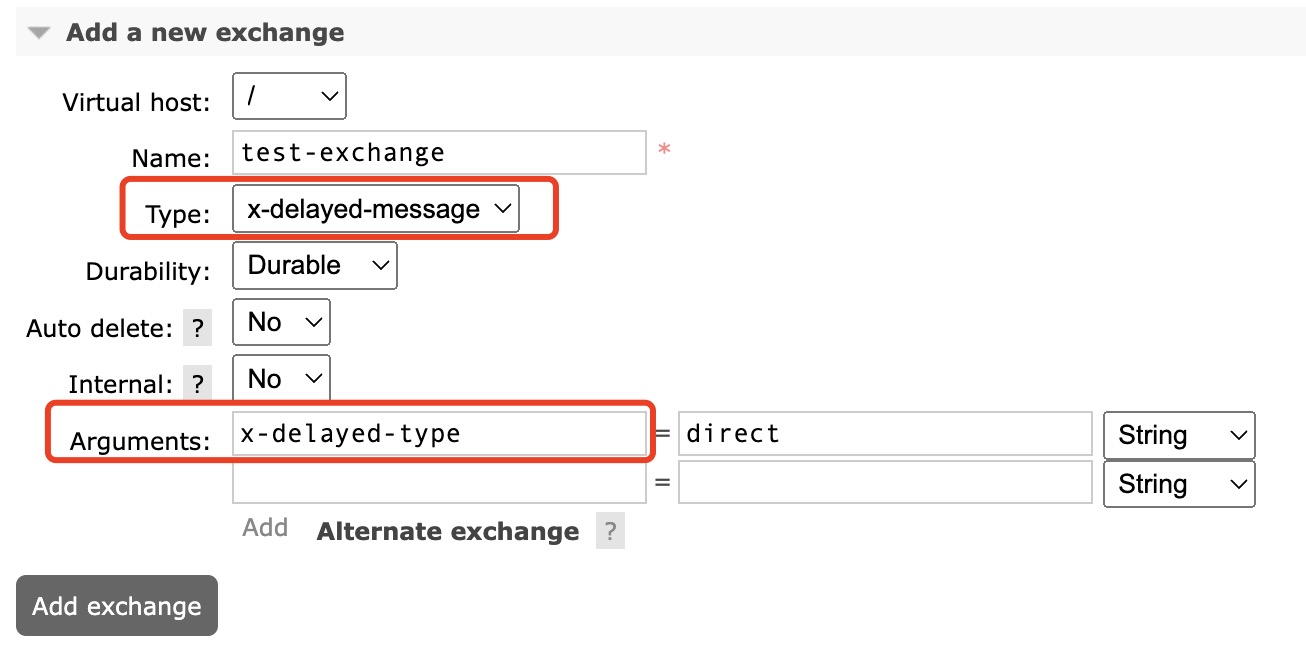
X-Delayed-Message: This is a type of exchange with a specific definition used to achieve delayed message delivery. When a message is sent to an X-Delayed-Message type exchange, a delay time can be set for the message. RabbitMQ will route the message to the bound queue after the delay time has ended. This type of exchange allows you to control when a message is delivered to the consumer, enabling message timing and delayed processing. For methods to create this type of exchange, please see the explanation below Explanation.
Durable: If set to true, the Exchange will persist after service restarts; if false, the Exchange will disappear after service restarts and will need to be recreated.
AutoDelete: If set to true, the Exchange is automatically deleted when the last Queue bound to it is deleted.
Internal: If set to true, the Exchange cannot be used directly by the Producer and can only be bound to other Exchanges.
Exchange Instructions: Enter the description for the Exchange, up to 128 characters.
Add Standby Exchange: Optional. By default, the standby Exchange is not used. If a message sent to the primary Exchange cannot be routed, it will be sent to the specified standby Exchange.
Explanation:
The console will subsequently support the X-Delayed-Message routing type. If needed, please create it first in the open-source console under -Exchanges-. When creating, Arguments needs to specify x-delayed-type, as shown below:
It is important to note that the X-Delayed-Message type is not a built-in RabbitMQ type. It requires enabling the rabbitmq_delayed_message_exchange plugin. For details, please see Plugin Management.
4. Click Submit, and you can see the created exchange in the exchange list.
Editing exchange
1. In the exchange list, find the exchange you need to edit, and click Edit in the operation column.
2. In the pop-up window, you can edit the exchange remarks.
3. Click Submit to complete the editing of the exchange.
Deleting exchange
1. In the exchange list, find the exchange you need to delete, and click Delete in the operation column.
2. In the pop-up window, click Delete to complete the deletion.
Note:
After an exchange is deleted, all the configurations under it will be cleared and cannot be recovered.