背景
早期上云时,会考虑成本情况,会复用 CVM 自行搭建一些中间件,作为生产环境的使用。但是伴随着业务规模的逐渐增加,后续的业务也逐步会使用云上的中间件替换自建中间件,从而提高中间件的高可用能力。对于自建的中间件可以通过注入网络封禁故障验证自身的高可用能力。
实验目标
验证自建 MySQL 高可用能力。
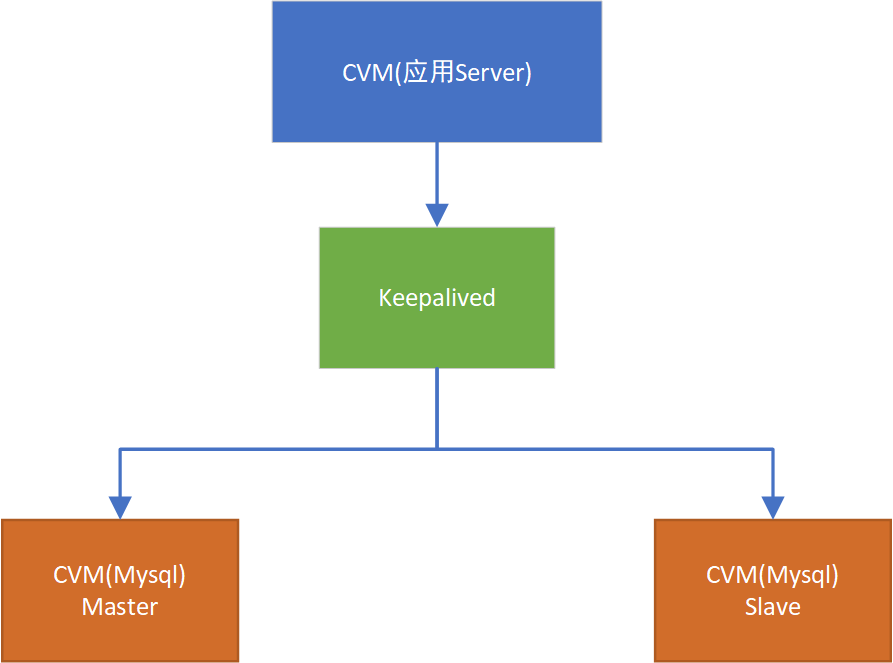
架构
利用 Keepalived+MySQL 的形式实现 MySQL 的容灾多活的能力。
构建实验
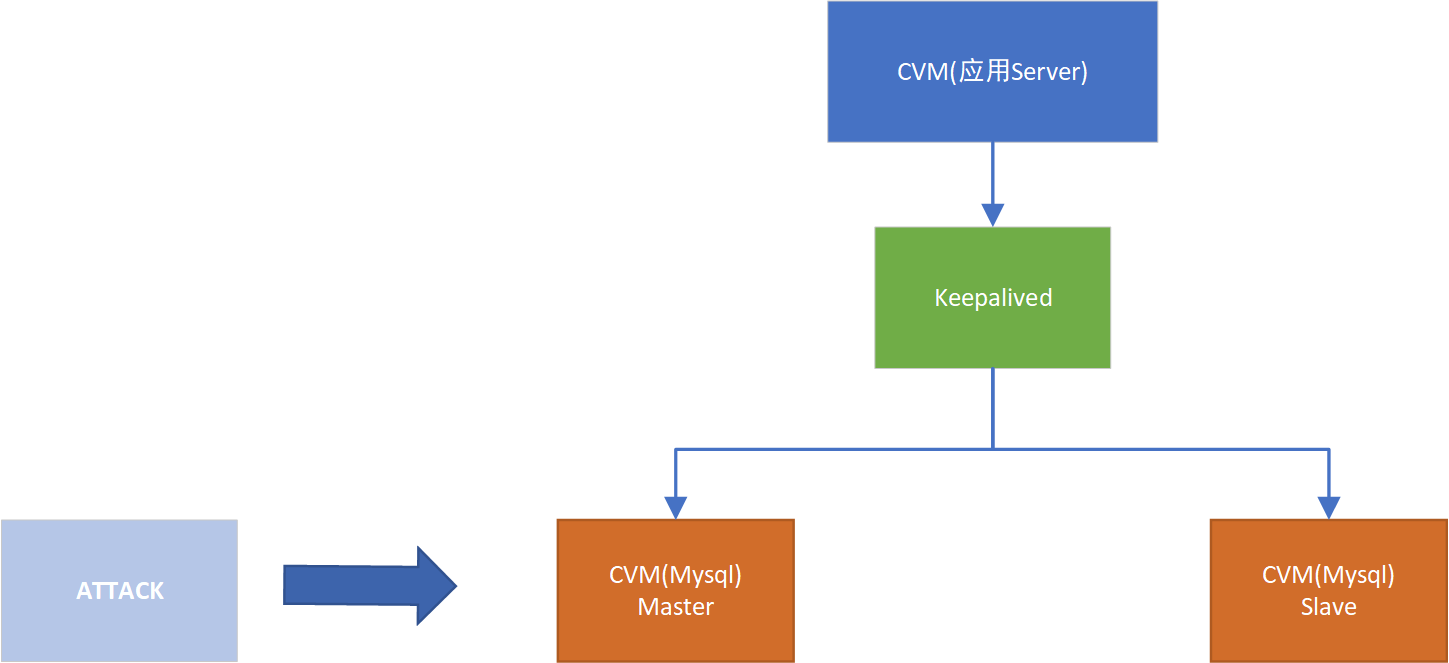
步骤1:确认故障注入目标
根据架构选择注入目标为 Master,验证当 Master 出现网络封堵时,是否能够正常切换到 Slave,并且实现业务无感知。
步骤2:进行实验构建
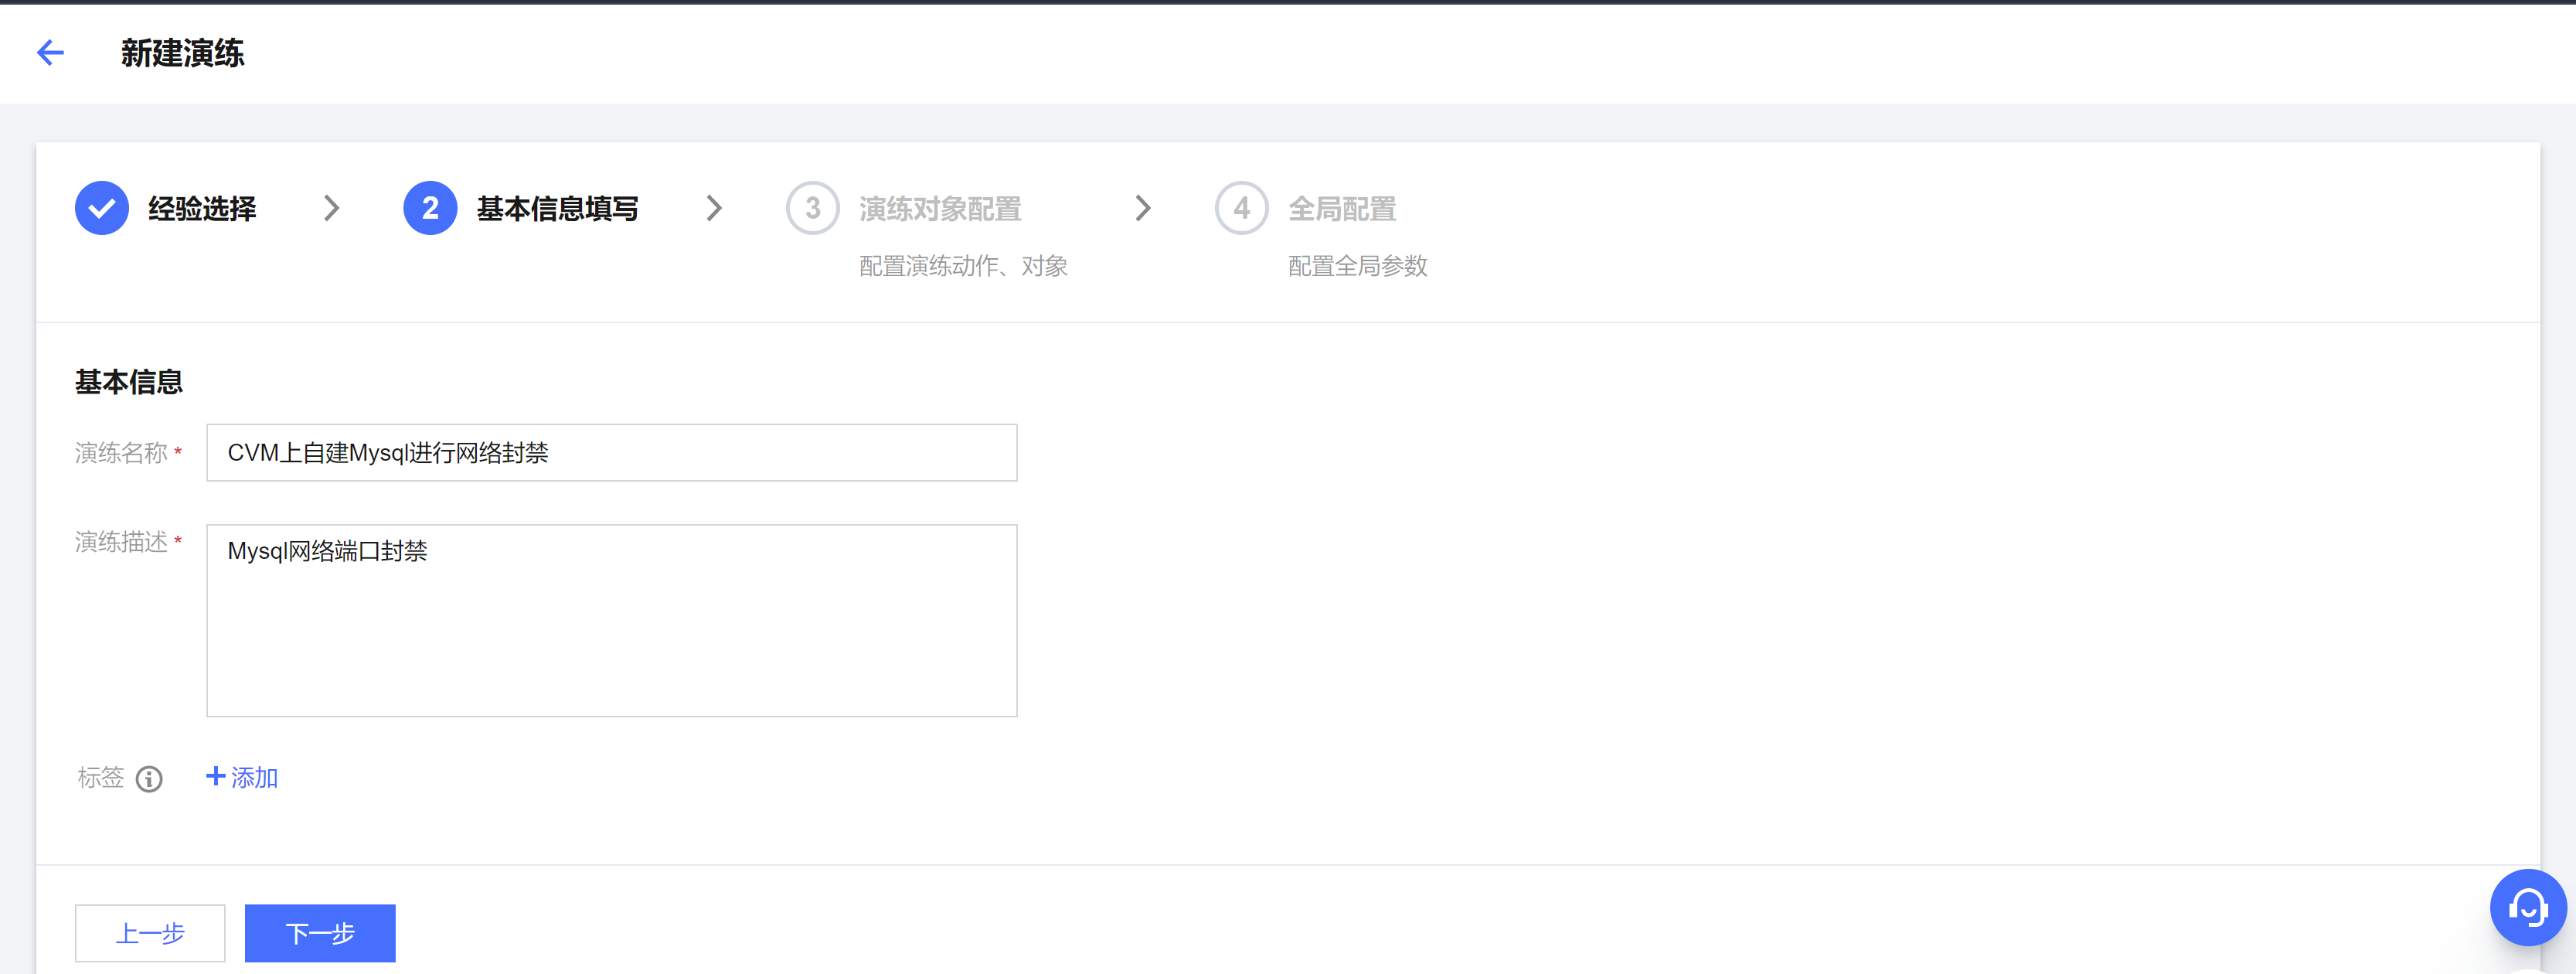
1. 登录 混沌演练平台,单击新建演练。
2. 选择创建空白场景 > 下一步。

3. 填写标题内容。
4. 进行故障编排与注入实例范围选择,配置故障参数。
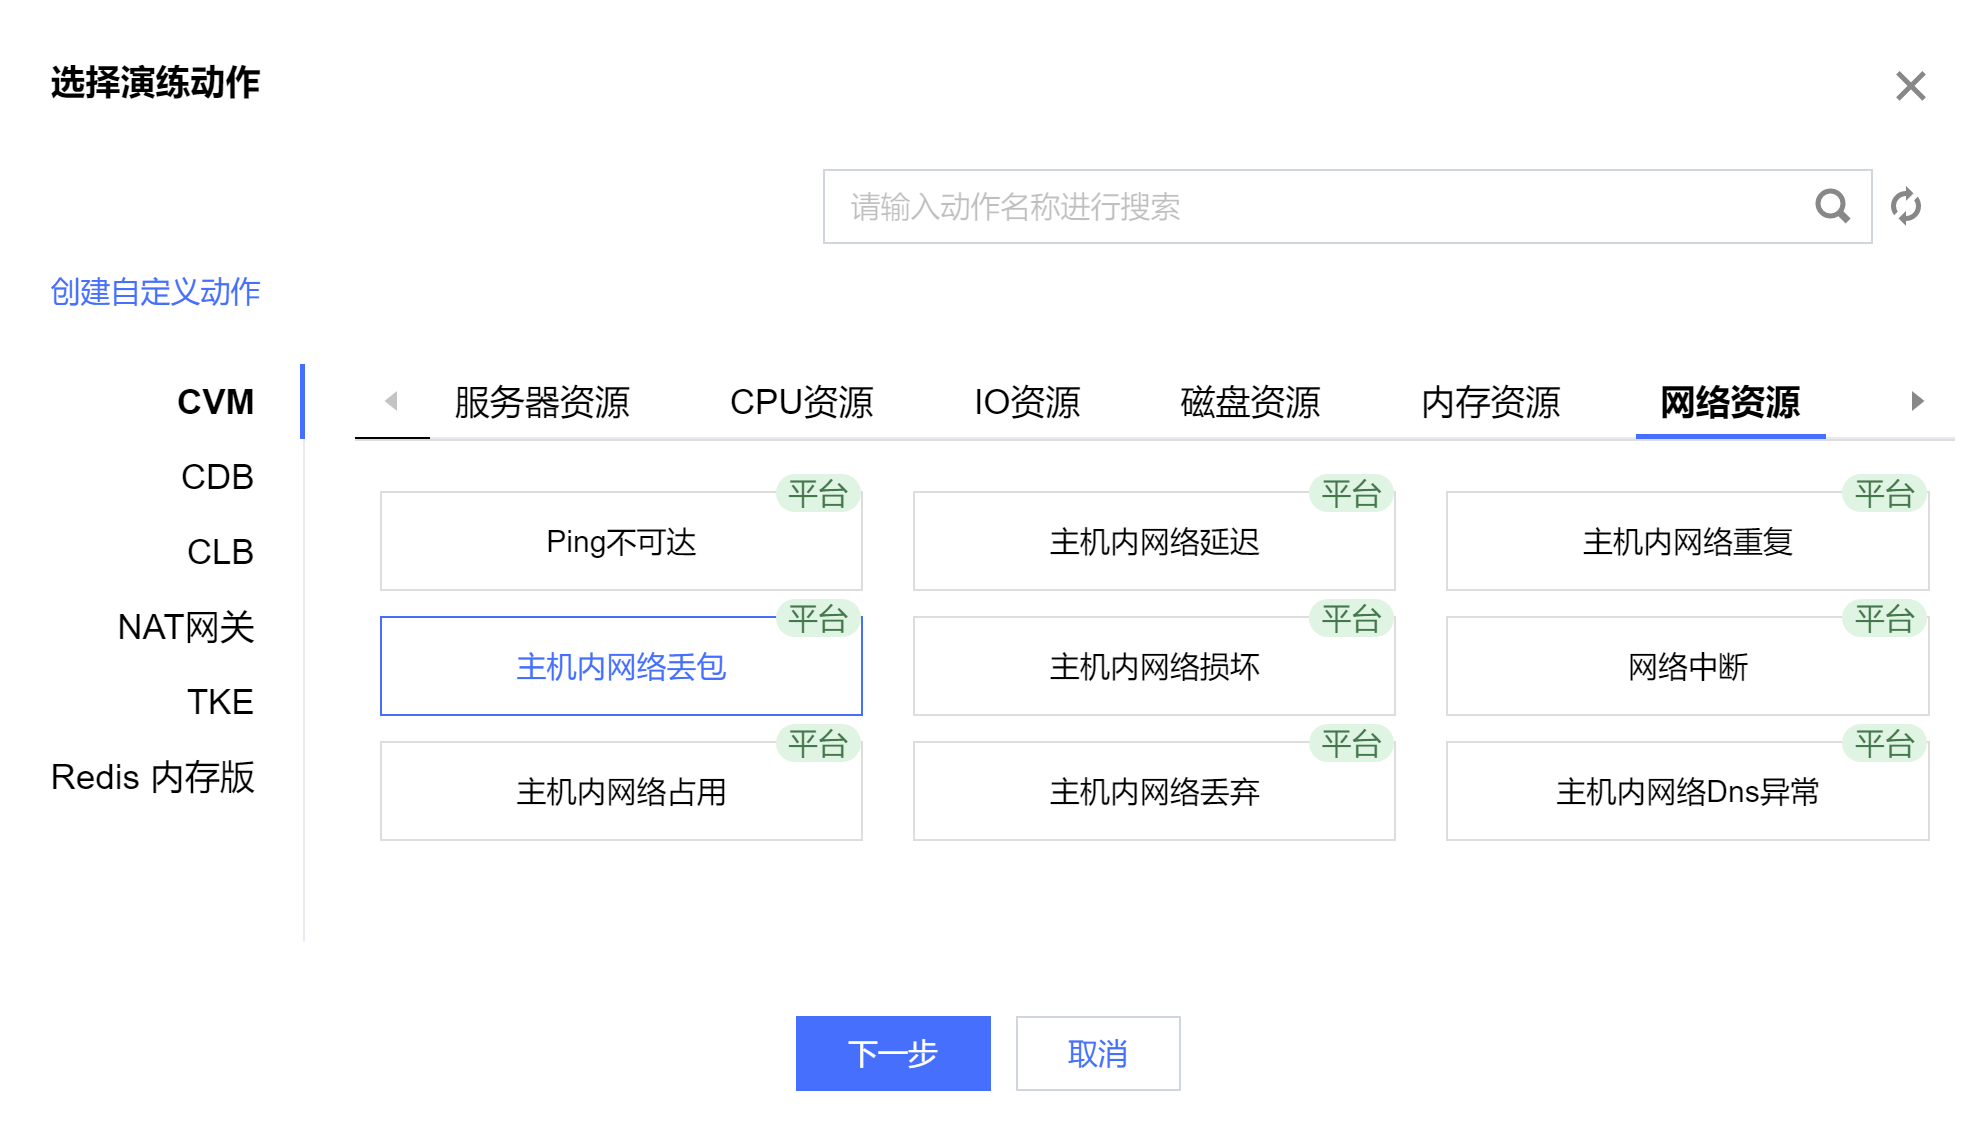
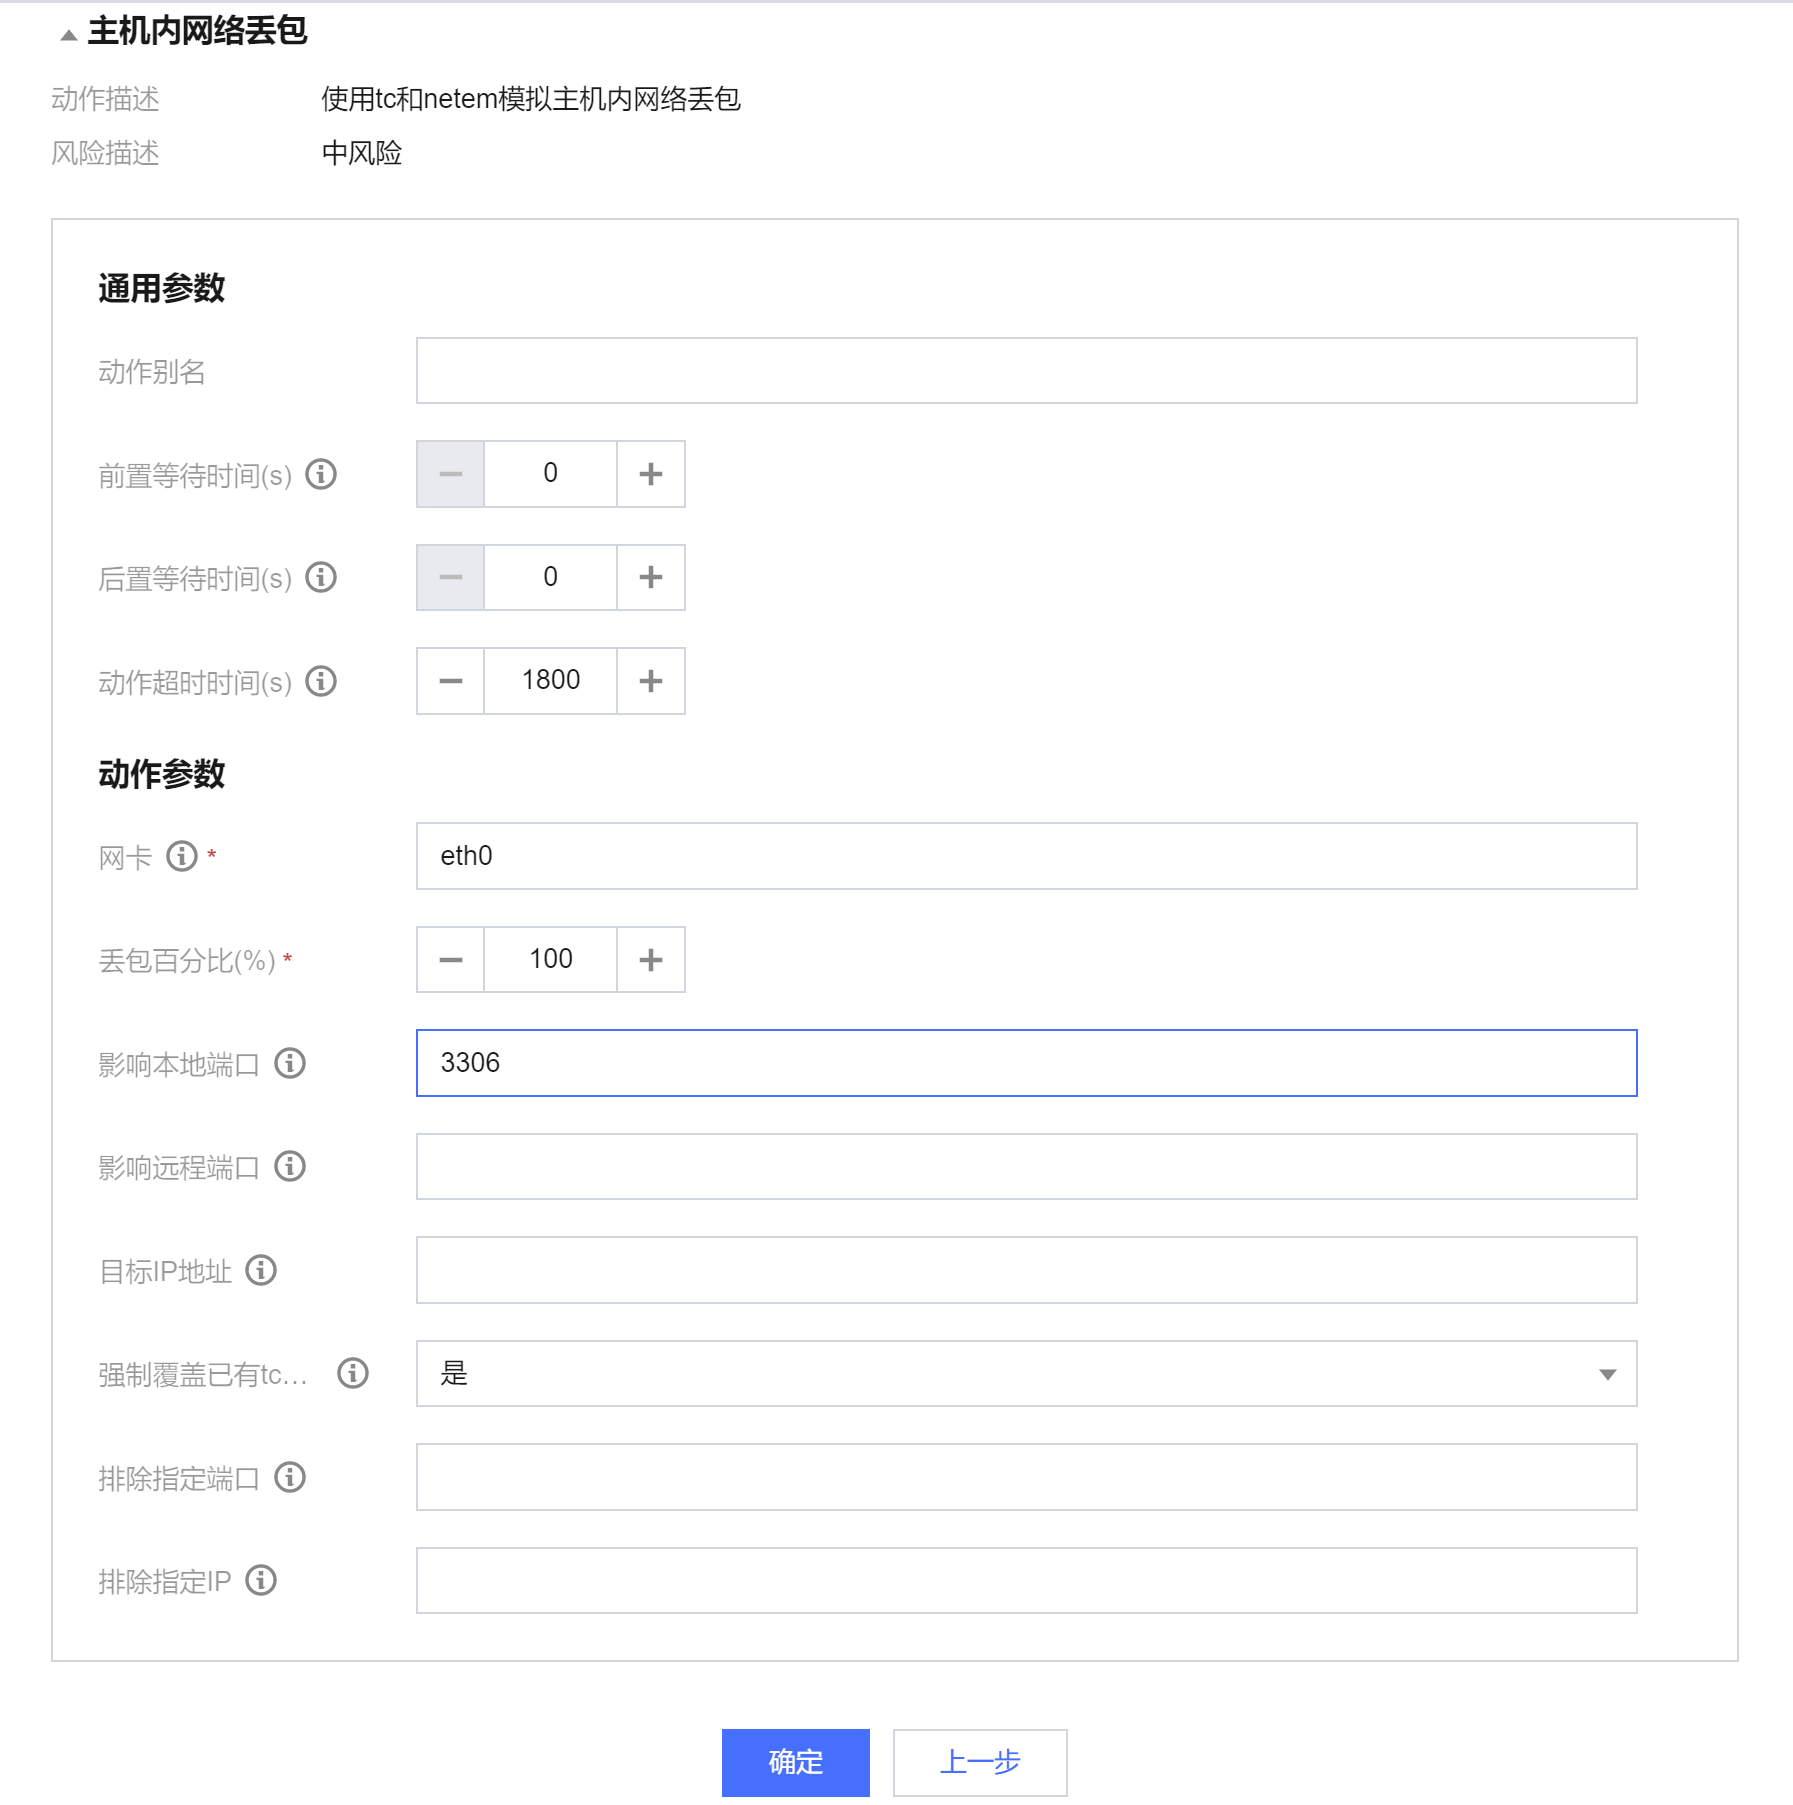
因为本次实验的目标端口为3306,内网网卡为 eth0。为了精确的封堵指定端口,就需要配置指定参数,配置完毕后单击确定进入下一步。
配置演练动作和对象:

5. 配置监控指标(可选):此处可以配置一些基础的 CVM 指标,方便进行指标的选择。
6. 完成构建。
进行实验
1. 确认开始前的业务是否处于正常状态,这里采用尝试连接验证 Master 节点是正常的且可以连接。
2. 单击开始,进行故障注入。
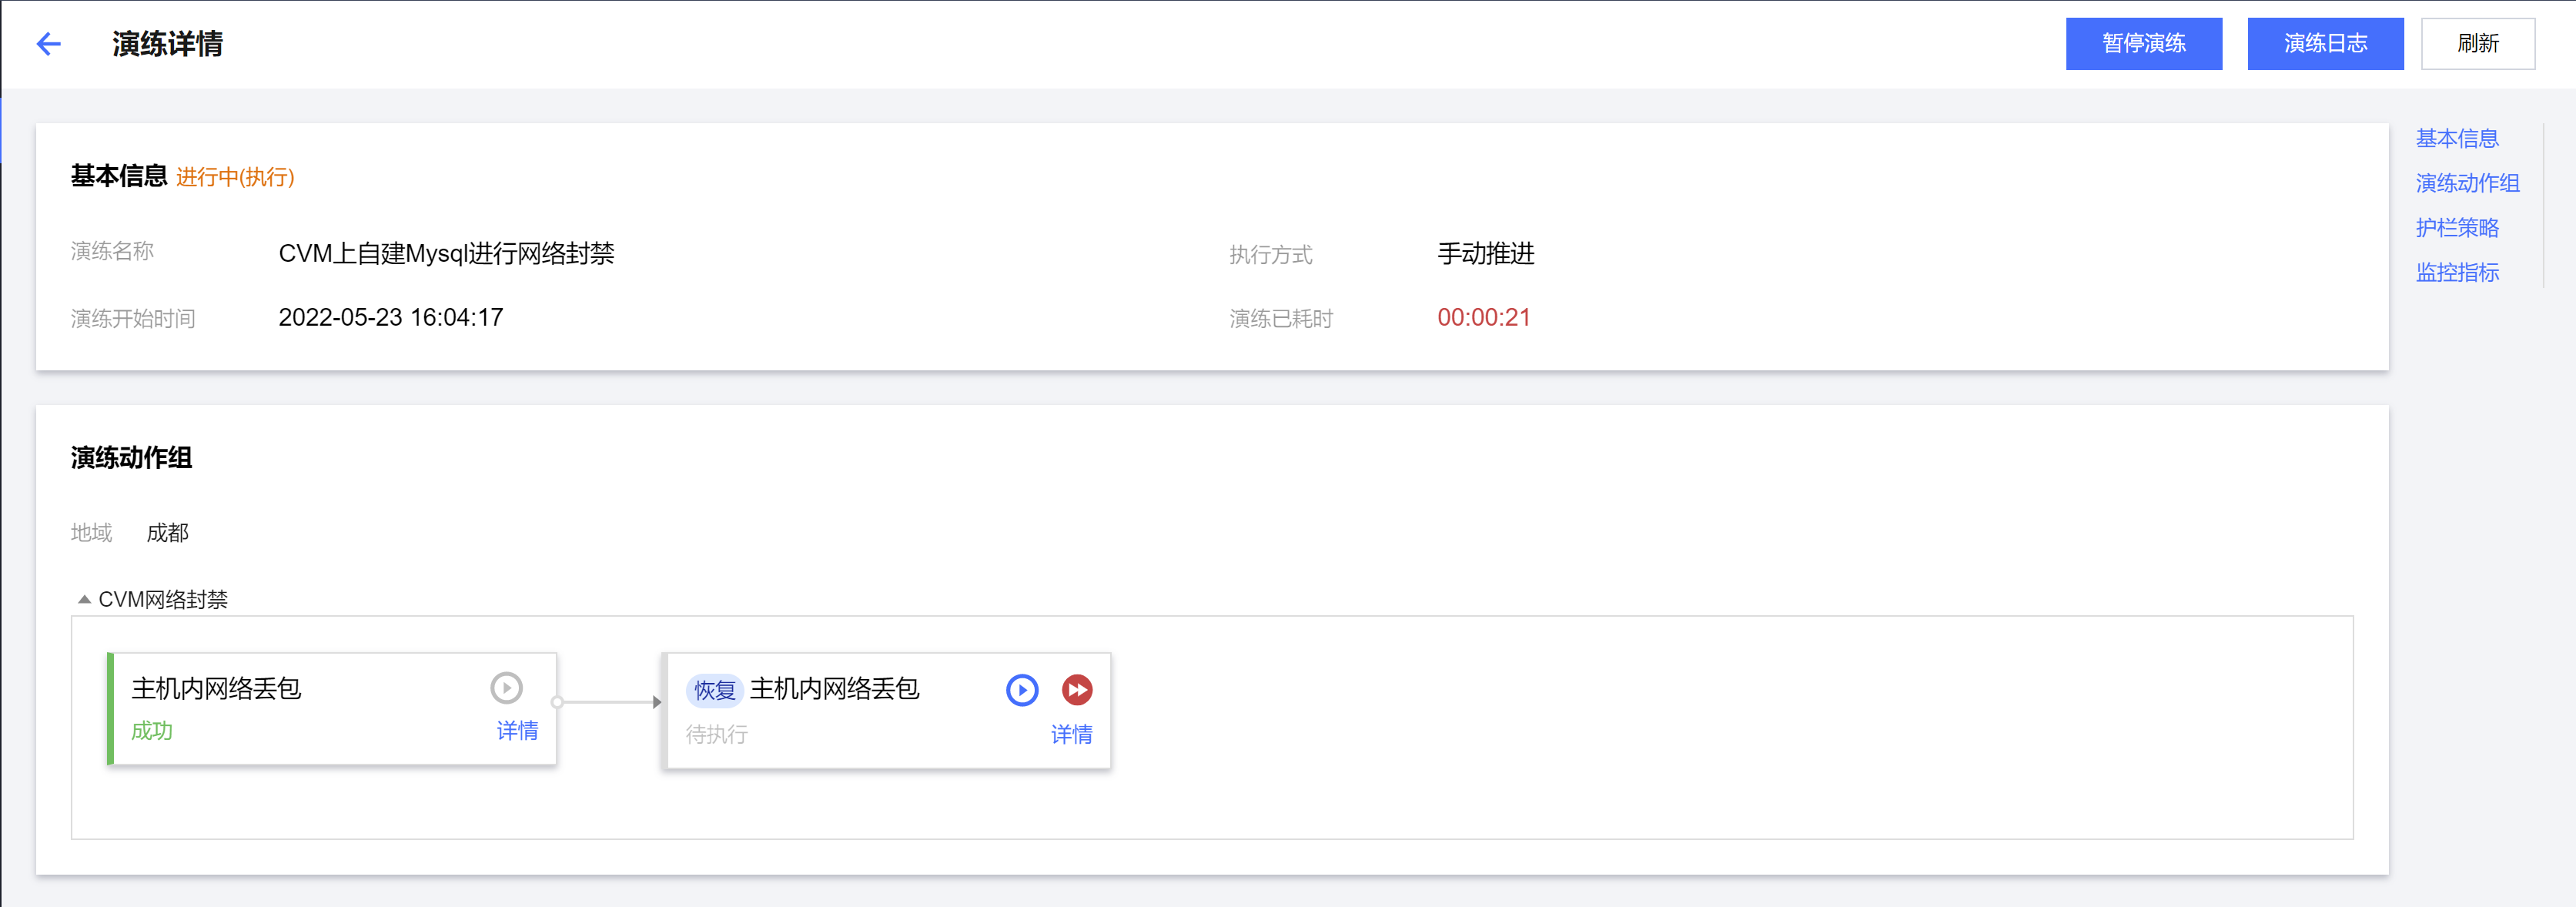
3. 完成故障注入后,验证业务是否连接正常。
4. 进行故障恢复,清理故障现场。


