CODING 支持使用 GPG 对 Git commit 进行签名验证。对于验证通过的 commit 提交记录,将会打上“已验证”标签,确保代码提交者是可靠来源,增强代码安全性。
生成 GPG 密钥对
1. 下载 并安装 GPG。如果使用 macOS,可直接使用 brew 包管理工具运行以下命令:
brew install gpg
2. 运行以下命令生成 GPG 密钥对(公钥/私钥):
gpg --full-gen-key
在某些场景下,例如使用了 Windows Gpg4win 或其他 macOS 版本,使用
gpg --gen-key 命令生成密钥对。该命令为交互式命令,需要根据提示选择算法类型,指定密钥的有效期,输入您的真实姓名和电子邮件,设置密码等。
密钥类型:选择使用的密钥类型,或按 Enter 键选择默认的 RSA 和 RSA。
椭圆曲线:按 Enter 键选择默认的椭圆曲线
Curve 25519。有效期限:按需指定密钥有效期,或按 Enter 键选择默认的永不过期。
电子邮件地址:需为 CODING 账户内配置的邮箱地址。
3. 运行以下命令列出已创建的 GPG 密钥(命令中的邮箱地址需填写步骤2中指定的邮件地址):
gpg --list-secret-keys --keyid-format LONG "your_email"
4. 复制以
sec 开头的 GPG 密钥 ID。以下示例中,复制4AEA00A342C24CA3:sec ed25519/4AEA00A342C24CA3 2021-09-14 [SC]6DE3507E82DEB6E8828FAAC34AEA00A342C24BD4uid [ 绝对 ] your_name "your_email"ssb cv25519/812B586FD245B560 2021-09-14 [E]
5. 利用复制的 ID 导出该 ID 的公钥(以上述 ID 为例):
gpg --armor --export 4AEA00A342C24CA3
生成公钥之后,可将其添加至您的 CODING 账户。
添加公钥至个人账户设置
1. 登录 CODING 之后,单击页面左下角中的个人账户设置选项。
2. 在左侧导航栏选择 GPG 公钥,进入公钥管理页面。
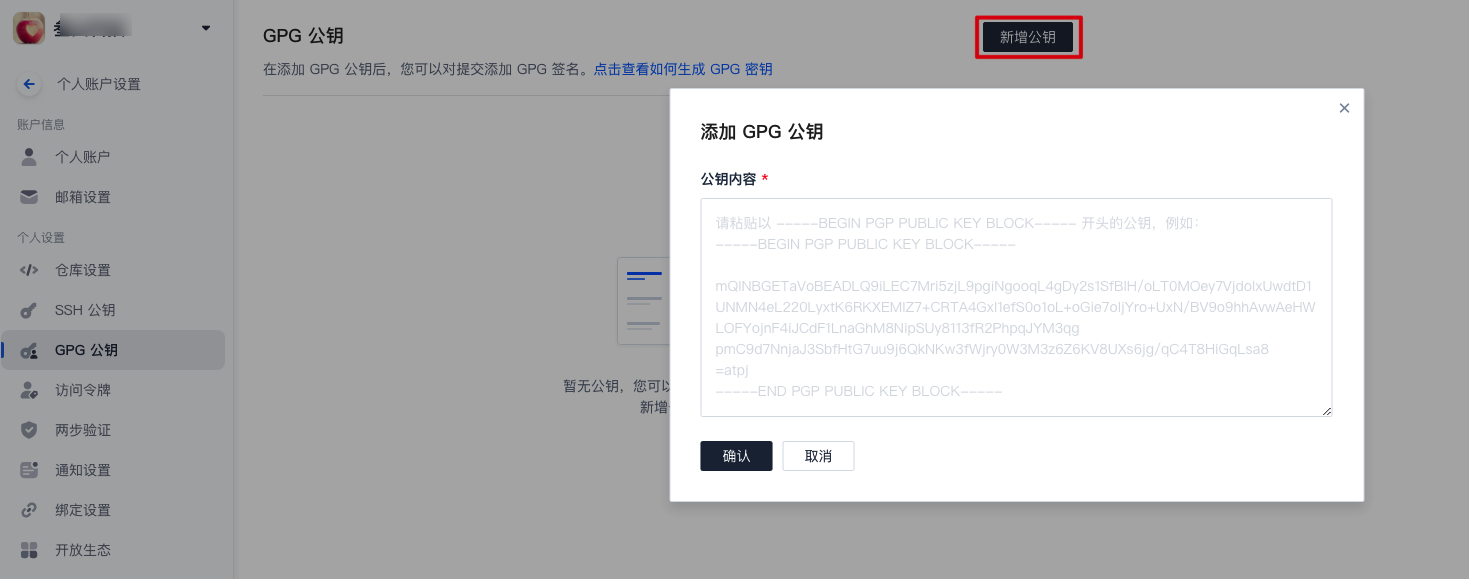
3. 单击新增公钥,将导出的 GPG 公钥粘贴至内容框,完成确认。
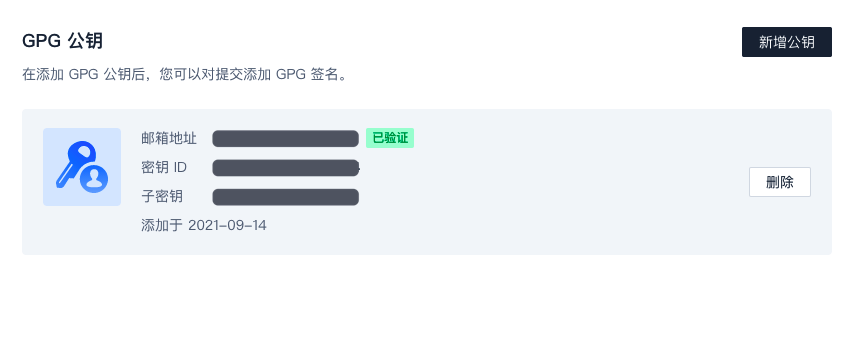
公钥成功添加之后,将会显示邮箱地址的验证状态、密钥 ID 和子密钥。
注意:
若邮箱地址显示未验证状态,意味着该邮箱没有在 CODING 账户中配置。请在个人账户设置 > 邮箱设置中添加该邮箱。
与本地 Git 仓库关联
1. 运行以下命令列出您已创建的 GPG 密钥(命令中的邮箱地址需填写生成密钥时指定的邮件地址):
gpg --list-secret-keys --keyid-format LONG "your_email"
2. 复制
sec 开头的 GPG 密钥 ID。以下示例中,复制4AEA00A342C24CA3:sec ed25519/4AEA00A342C24CA3 2021-09-14 [SC]6DE3507E82DEB6E8828FAAC34AEA00A342C24BD4uid [ 绝对 ] your_name "your_email"ssb cv25519/812B586FD245B560 2021-09-14 [E]
3. 在本地 Git 仓库中配置该密钥,对 commit 提交进行签名:
git config --global user.signingkey 4AEA00A342C24CA3
至此,您已经成功将创建的 GPG 密钥与本地 Git 仓库进行关联。在本地修改完代码后书写 Git commit message 时进行签名,以此验明提交者的真实性。
签名 Git commit
运行 Git commit 命令时需要用到 -S 参数。
1. 在本地完成代码编辑需要提交更改时,将 -S 参数添加到 git commit 命令中:
git commit -S -m "your_commit_message"
如果不希望每次都要输入 -S 标志,您可以使用以下命令行设置 Git 自动为 commit 签名:
git config --global commit.gpgsign true
2. 如提示输入密码,则提供生成 GPG 密钥时设置的密码。
验证签名
将签了名的提交推送至 CODING 代码仓库后,您可以在代码仓库的提交页查看提交验证是否签名成功。
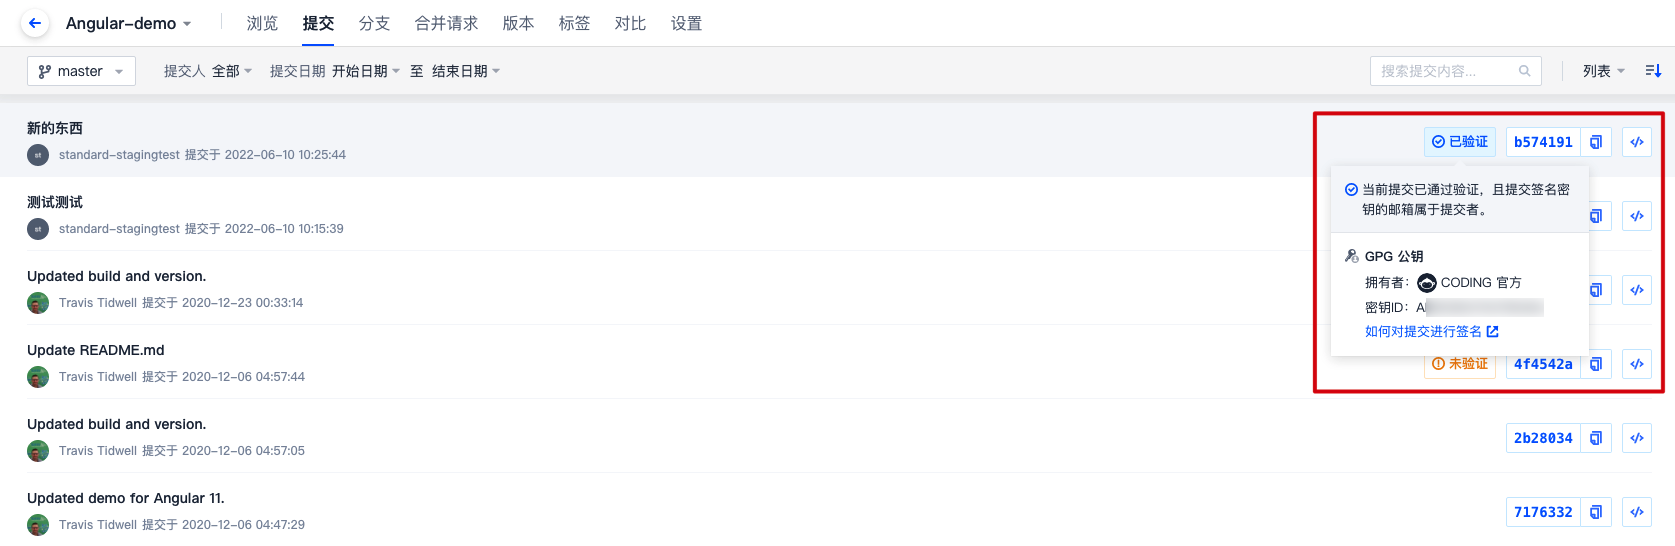
提交验证状态的说明如下:
验证状态 | 说明 |
已验证 | 使用 GPG 私钥签名,CODING 账户中有对应公钥,且公钥邮箱已验证。 |
未验证 | 使用 GPG 私钥签名,但 CODING 账户中无对应公钥或公钥邮箱未验证(若出现未验证的邮箱,请前往个人账户设置 > 邮箱设置中添加该邮箱)。 |
无验证状态标签 | 没有使用 GPG 私钥签名。 |
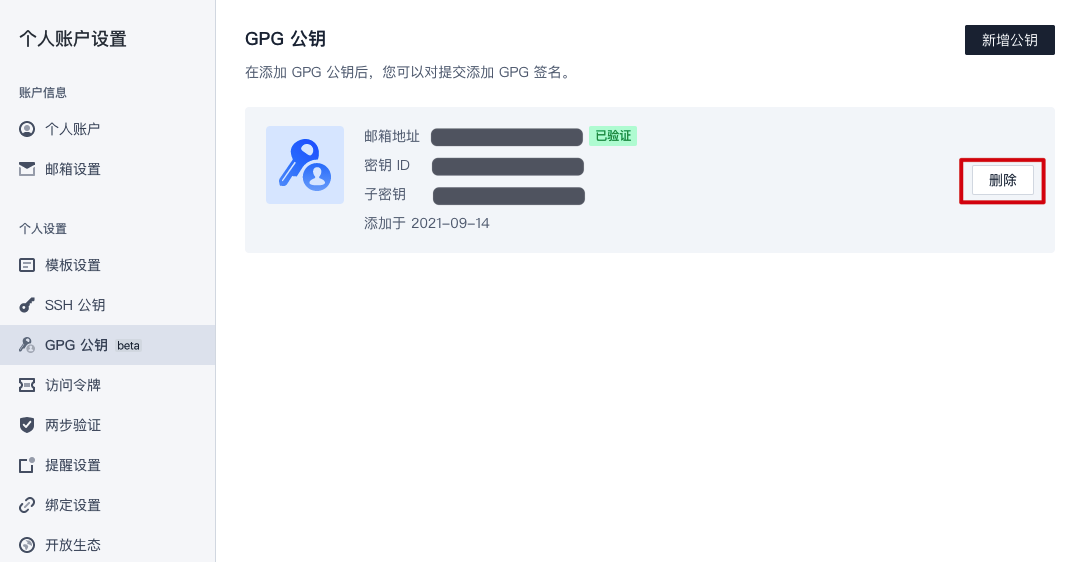
删除 GPG 公钥
如果您的 GPG 公钥有泄露风险或已不再使用 GPG 签名,可在个人账户设置 > GPG 公钥中删除该公钥。
公钥删除之后:
已验证的提交变成未验证状态。
仍使用 GPG 私钥签名的提交(即使用
git commit -S -m)将变成未验证状态。无签名的提交(即使用
git commit -m)将不被验证,无验证状态标签。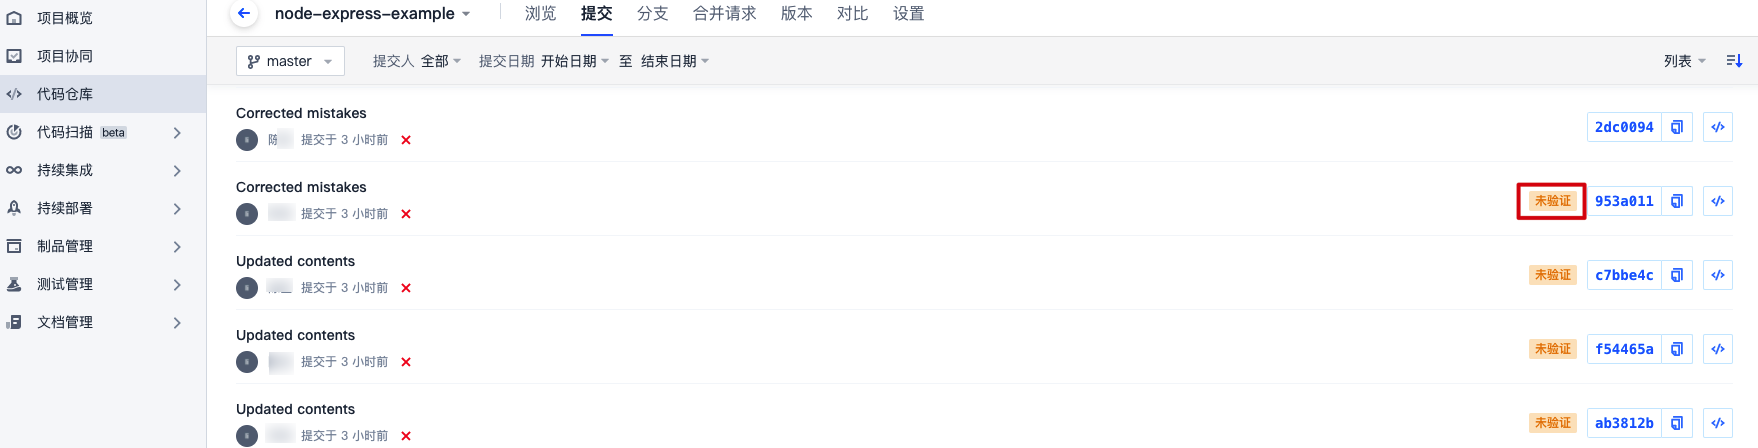
说明:
若已配置 Git 自动签名,可运行
git config --global commit.gpgsign false 命令取消自动签名。否则 GPG 公钥删除后,推送至远端仓库的提交依然显示「未验证」状态。GPG 签名提交报错处理
error: gpg failed to sign the datafatal: failed to write commit object


