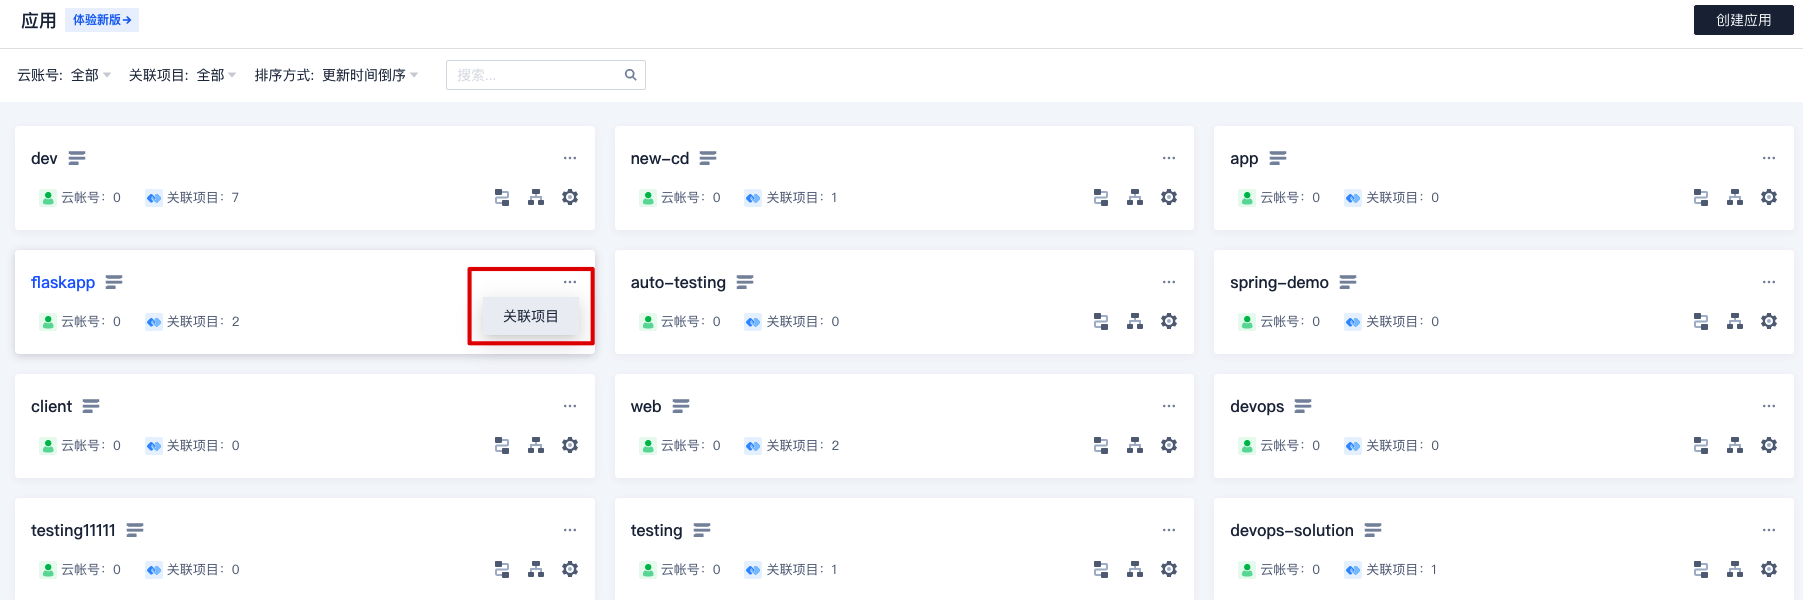
在持续集成中触发部署时请提前前往应用中心,将应用与项目关联。
本文给出了两种设置方法,您可以按照需求有选择性阅读。
直接使用构建计划模板
在已有构建计划中添加部署阶段
使用构建计划模板
单击项目内左侧产品栏持续集成,右上角创建构建计划,选择部署分类下的推送到 Kubernetes 模板。
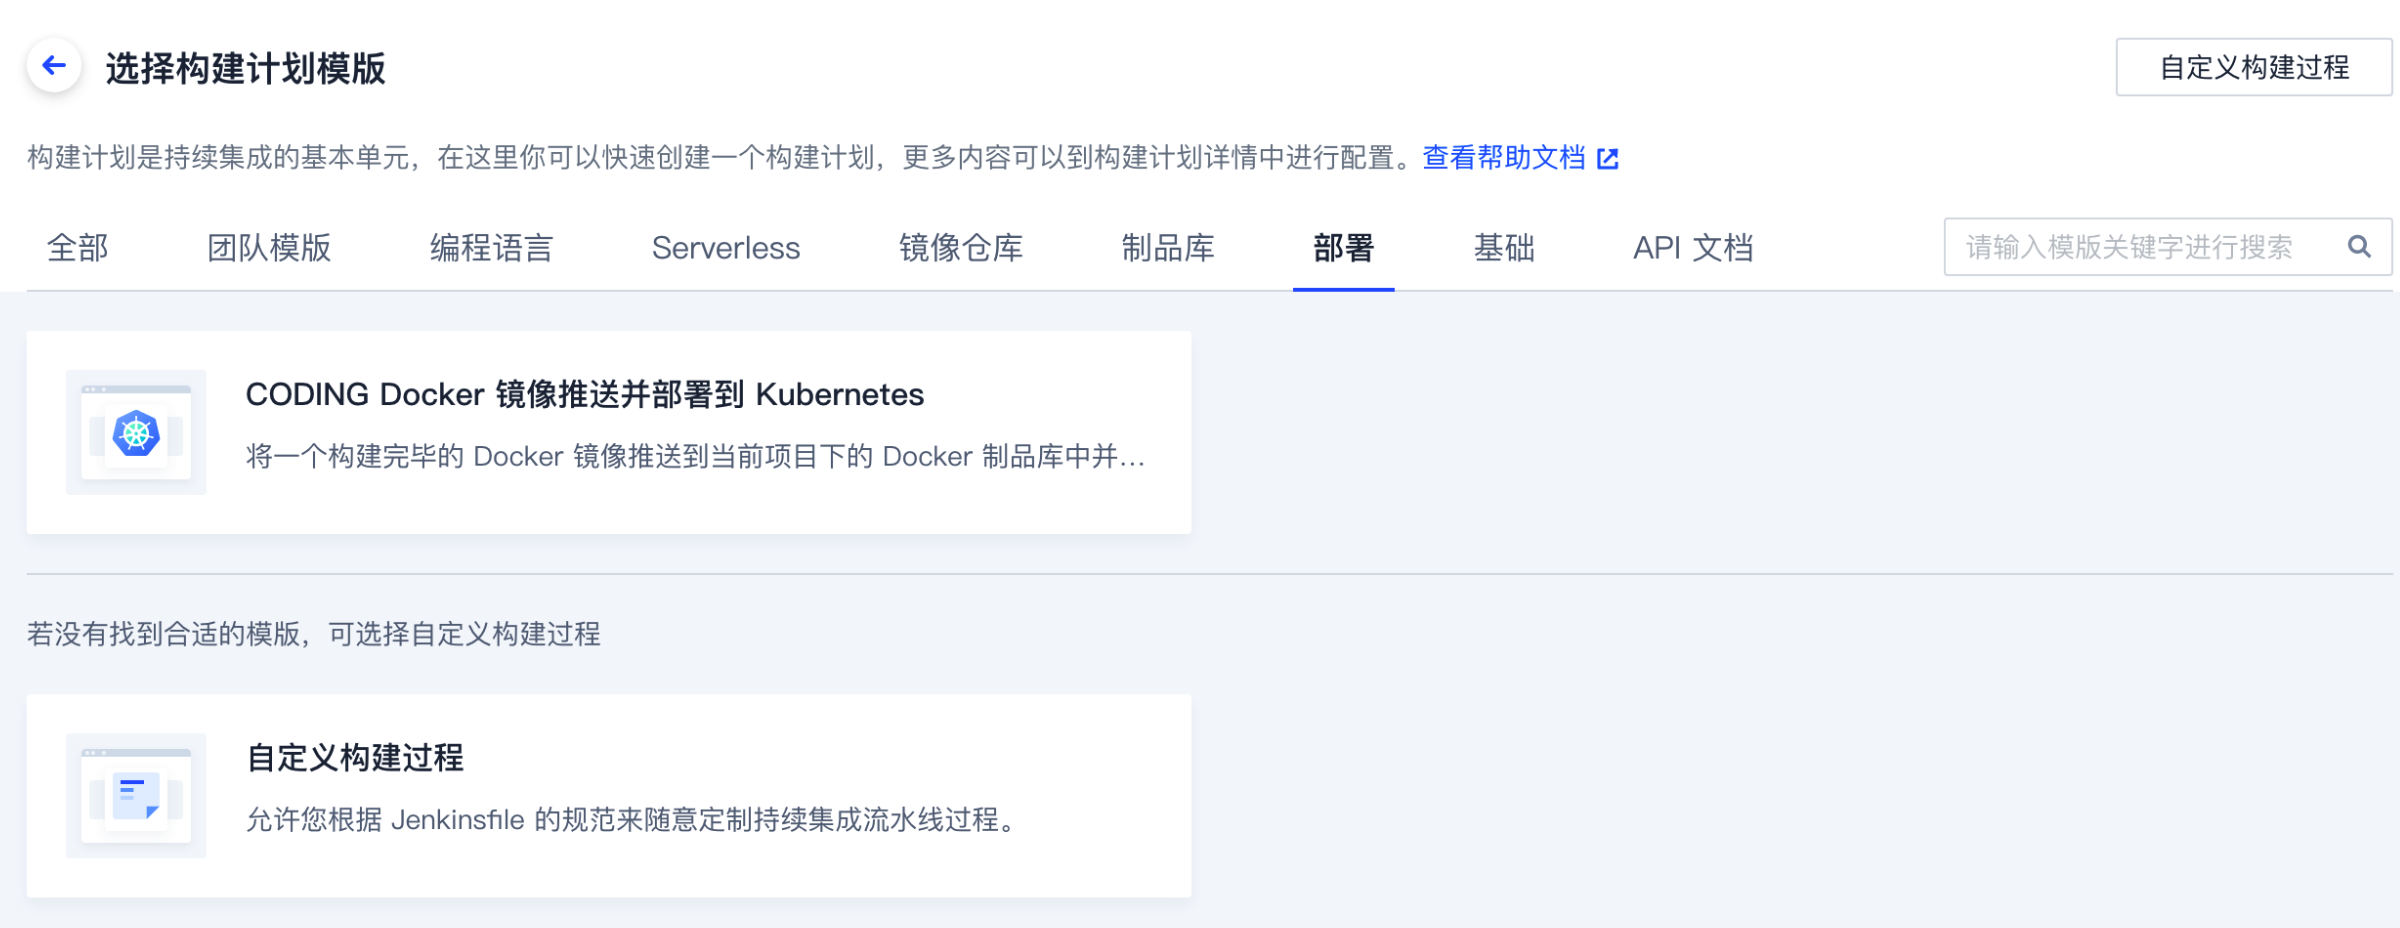
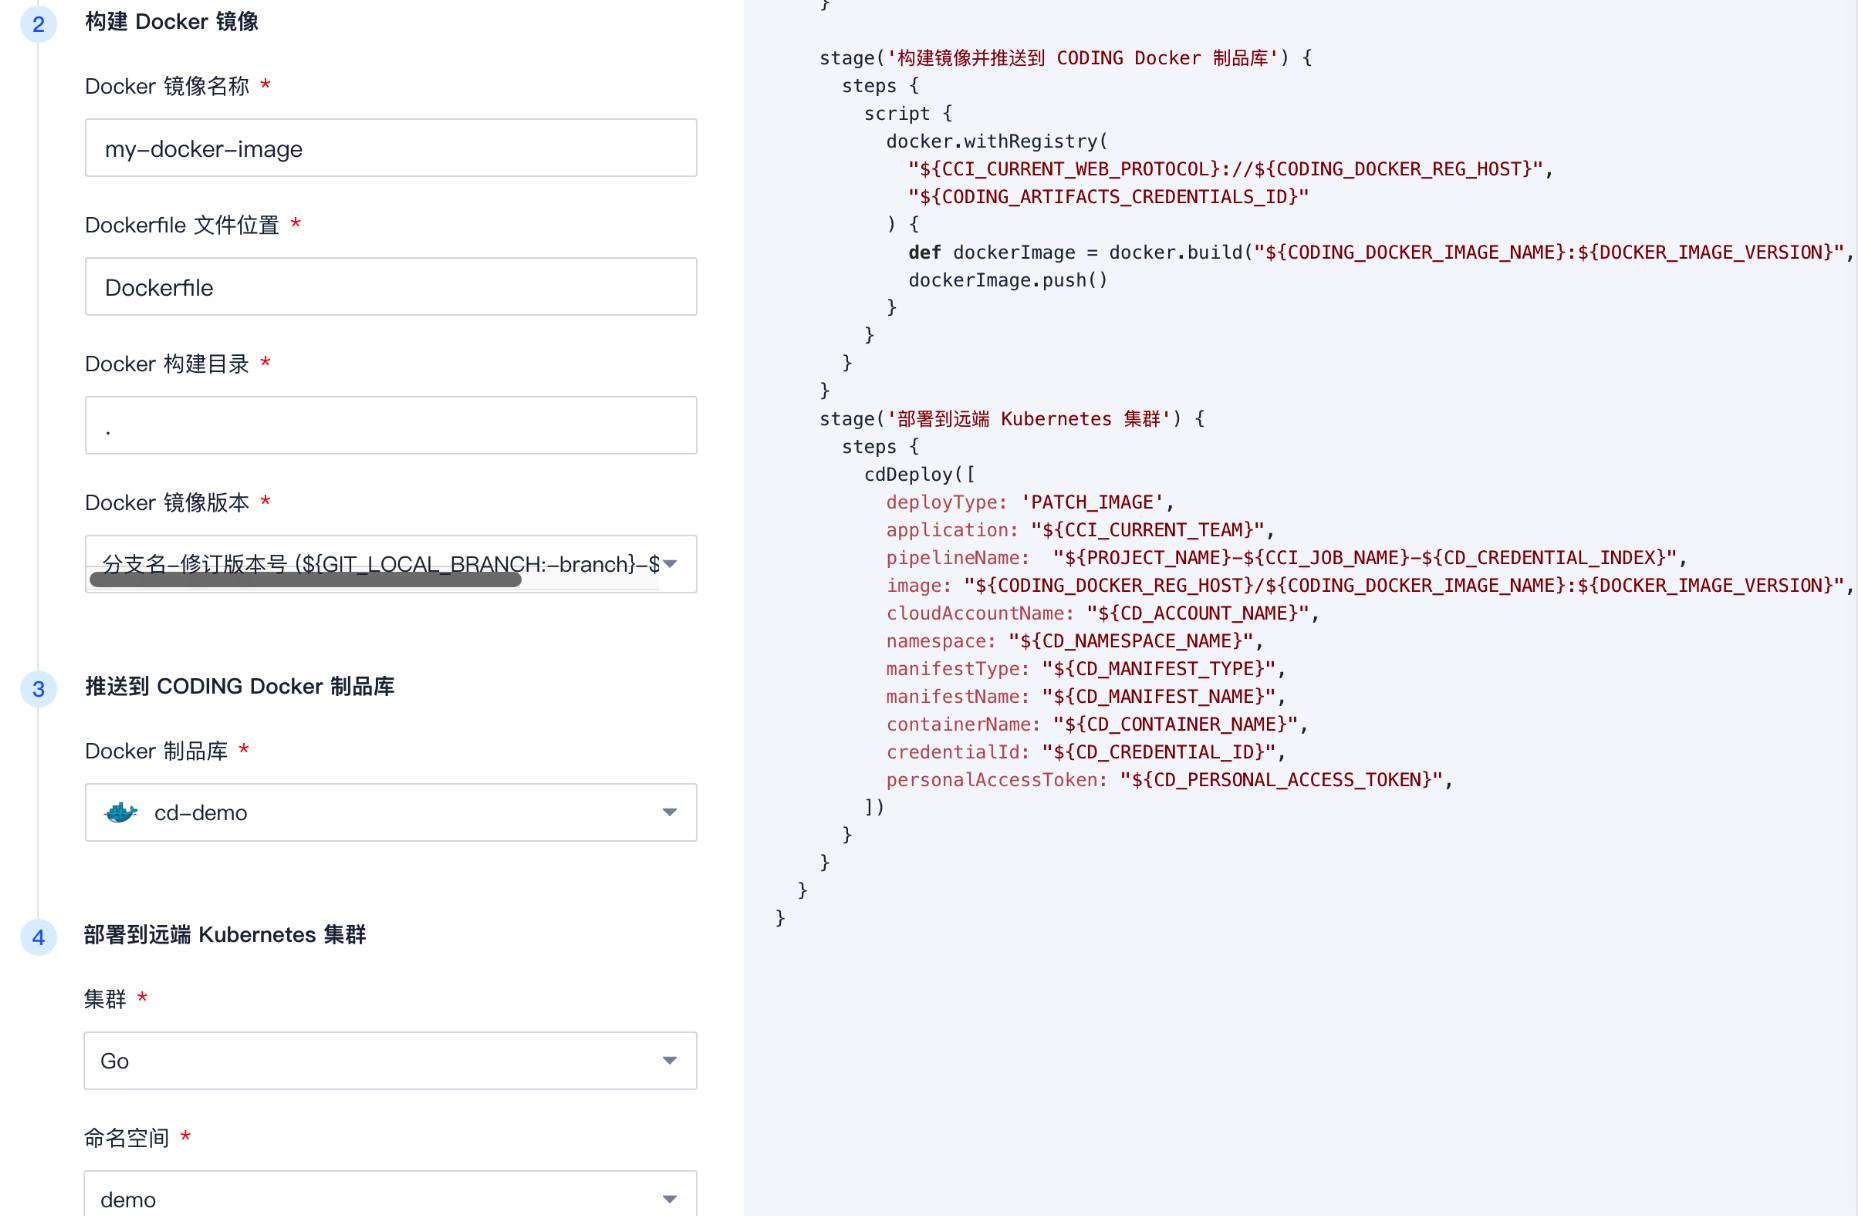
按照模板提示选择相应的制品仓库、远端集群地址等信息,完成后勾选创建后触发构建。
设置完成后,运行持续构建计划即可完成自动发布。
添加部署阶段
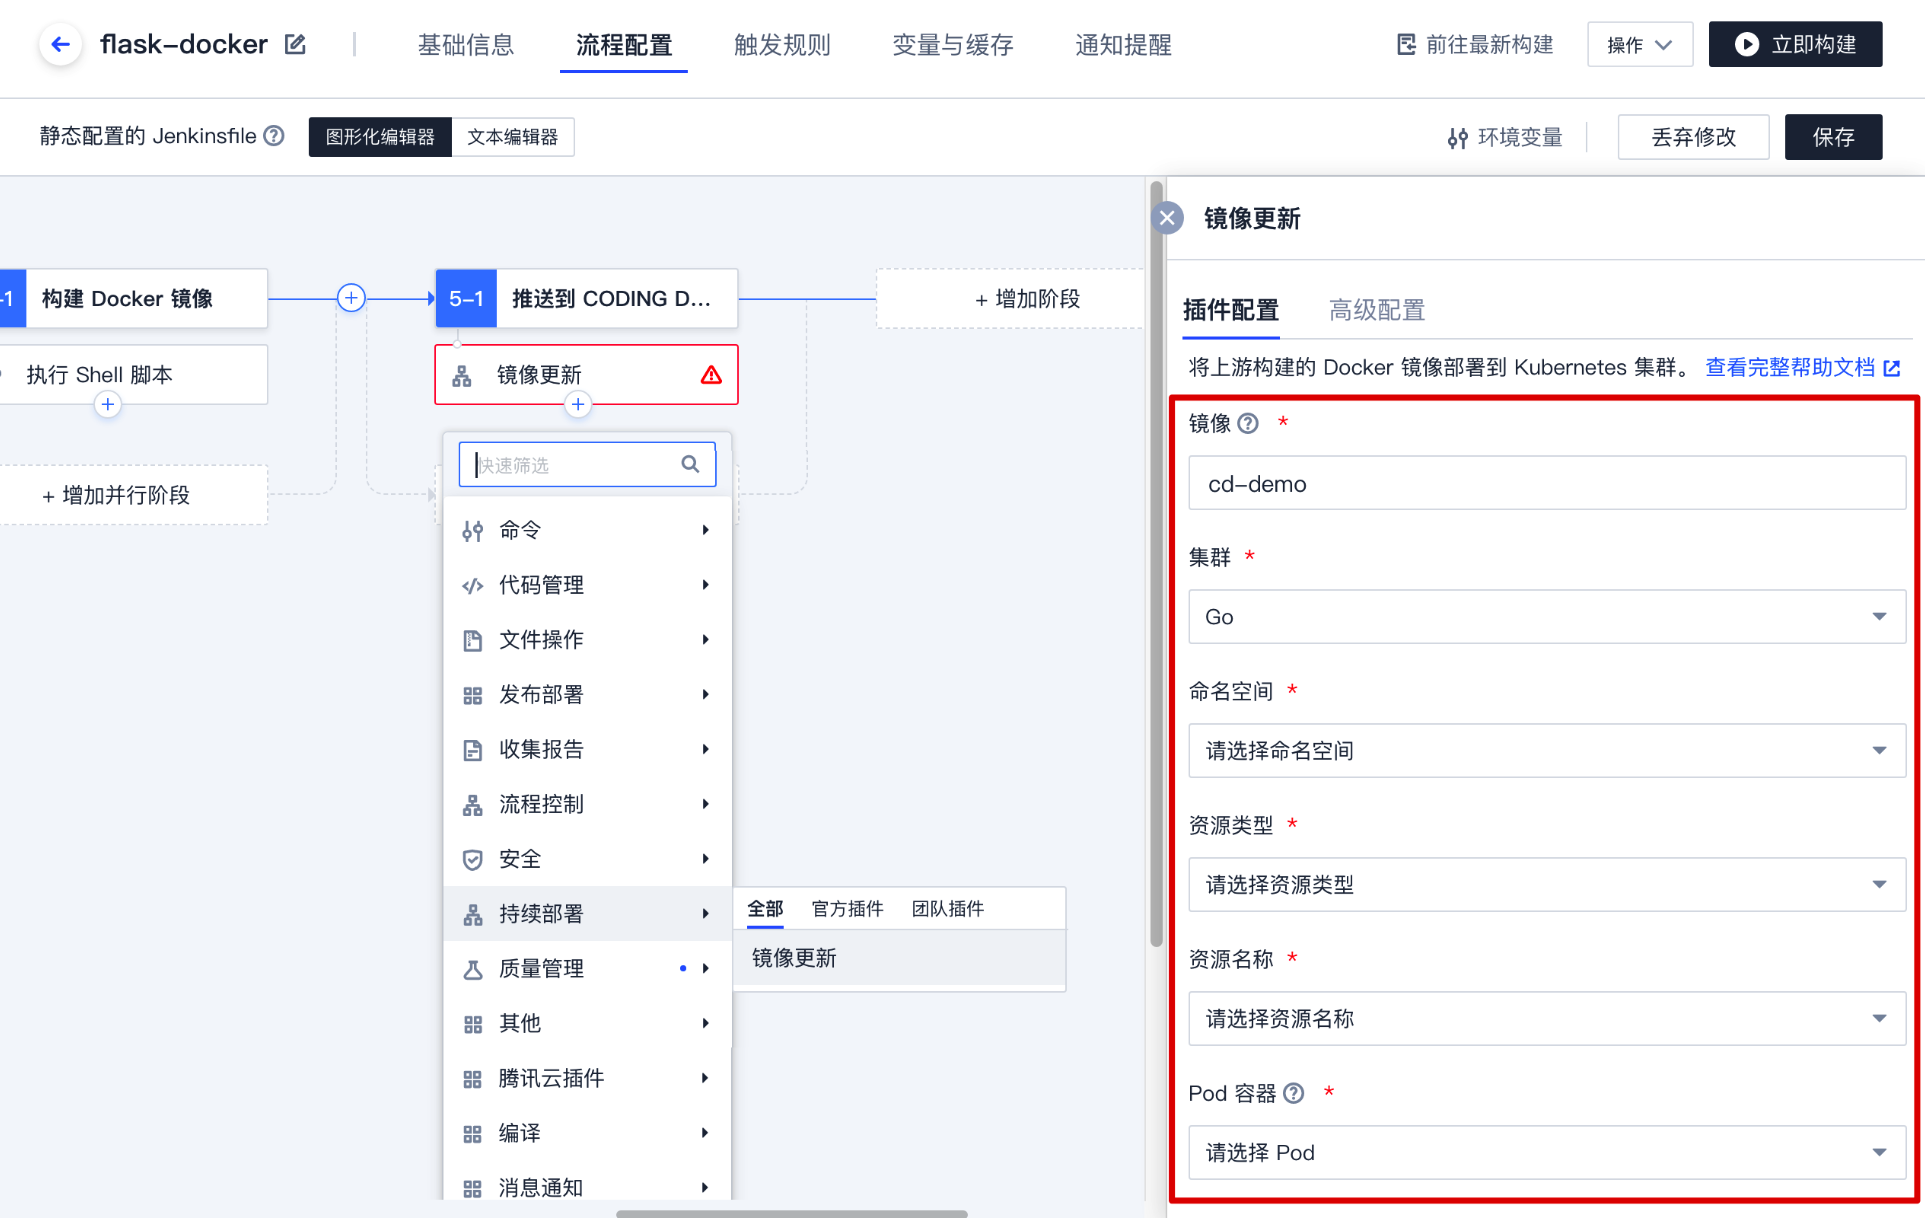
在此方法中您可以在构建计划 > 流程配置中使用编辑器或填写命令添加部署阶段。
图形化编辑器
在已有构建计划设置中添加部署阶段,填写镜像地址、集群与命名空间等关键信息。
Jenkinsfile 参考:
stage('部署到远端 Kubernetes 集群') {steps {cdDeploy([deployType: 'PATCH_IMAGE',application: "${CCI_CURRENT_TEAM}",pipelineName: "${PROJECT_NAME}-${CCI_JOB_NAME}-${CD_CREDENTIAL_INDEX}",image: "${CODING_DOCKER_REG_HOST}/${CODING_DOCKER_IMAGE_NAME}:${DOCKER_IMAGE_VERSION}",cloudAccountName: "${CD_ACCOUNT_NAME}",namespace: "${CD_NAMESPACE_NAME}",manifestType: "${CD_MANIFEST_TYPE}",manifestName: "${CD_MANIFEST_NAME}",containerName: "${CD_CONTAINER_NAME}",credentialId: "${CD_CREDENTIAL_ID}",personalAccessToken: "${CD_PERSONAL_ACCESS_TOKEN}",])}}


