该文档介绍如何将 PyPI 类型制品存储在 CODING 制品库中,方便团队在项目进行统一的制品管理与版本控制。下文包含如何进行制品制作、认证配置与制品推拉。
初始化
1. 新建 Demo 目录作为本地 PyPI 包的地址,在终端中运行命令创建 Demo 项目文件夹。
mkdir -p demo/example_pkg/__init__.py
2. 进入 demo 目录,创建 setup.py 文件。
cd demo && touch setup.py
3. 在 setup.py 文件中粘贴配置内容。
import setuptoolssetuptools.setup(name="example-pkg-YOUR-USERNAME-HERE", # Replace with your own usernameversion="0.0.1",author="Example Author",author_email="author@example.com",description="A small example package",url="https://github.com/pypa/sampleproject",packages=setuptools.find_packages(),classifiers=["Programming Language :: Python :: 3","License :: OSI Approved :: MIT License","Operating System :: OS Independent",],python_requires='>=3.6',)
4. 安装 setuptools 和 wheel 工具。
python3 -m pip install --user --upgrade setuptools wheel
5. 打包项目。
python3 setup.py sdist bdist_wheel
打包项目后,会在
/dist 目录下生成以下两个文件,用于推送到制品仓库。└─dist├─example_pkg_YOUR_USERNAME_HERE-0.0.1-py3-none-any.whl├─example_pkg_YOUR_USERNAME_HERE-0.0.1.tar.gz
配置制品库认证信息
推送至 CODING 制品仓库之前,需在本地文件中添加相应的认证信息。您可以通过自动生成配置或手动配置两种方式进行认证。在进行操作前,请使用命令
cd / 前往根目录,输入 ls -a 查看是否存在 .pypirc 和 pip.conf 文件。如果没有的话,输入以下命令以新建两个文件。
touch .pypirc && touch pip.conf
自动生成配置
1. 单击网页上的生成个人令牌作为凭据,系统会自动帮您生成访问凭据。若需查看个人令牌,则前往个人账户设置 > 访问令牌处进行管理。
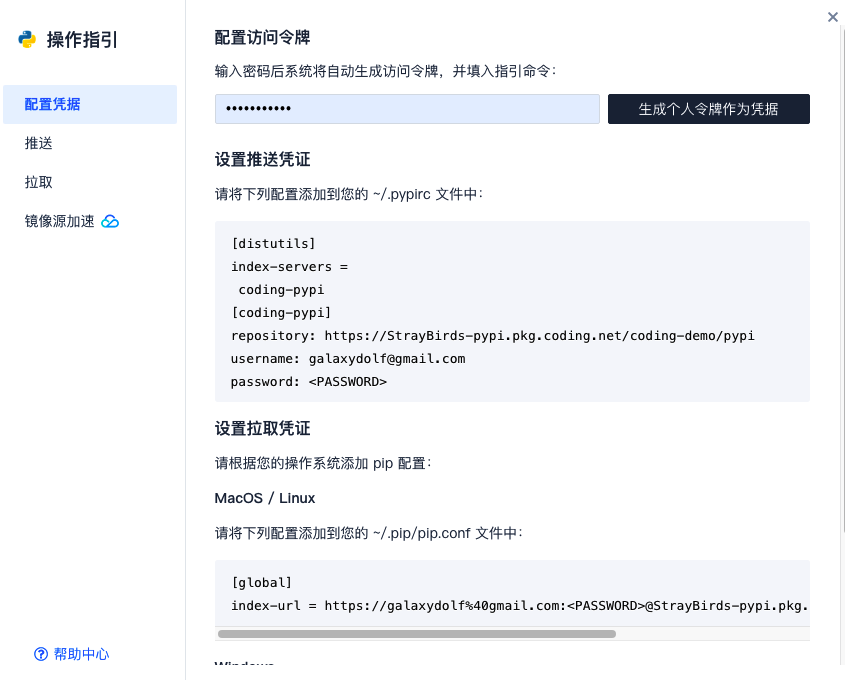
2. 输入登录密码后确认,得到配置内容。
将配置内容复制进入根目录的
.pypirc 和 pip.conf 文件中。推送
进入项目目录,如上文中新建的 Demo 目录,复制网页上的命令后在终端执行,即可把
Demo/dist 目录下的所有制品推送至制品库。twine upload -r coding-pypi dist/*

推送成功后,刷新仓库页面,您可以看到最新推送的制品。
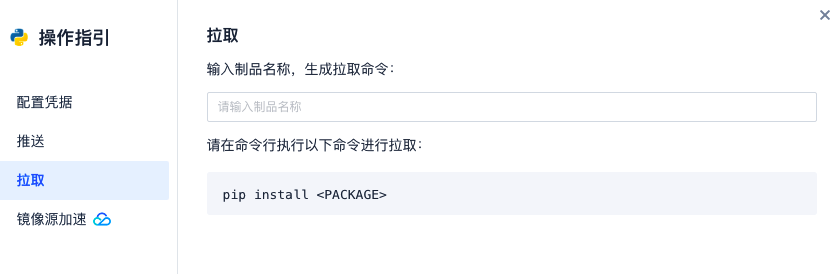
拉取
根据 PyPI 制品仓库中具体制品的拉取指引可以执行
pip install 拉取制品。pip install <制品名>
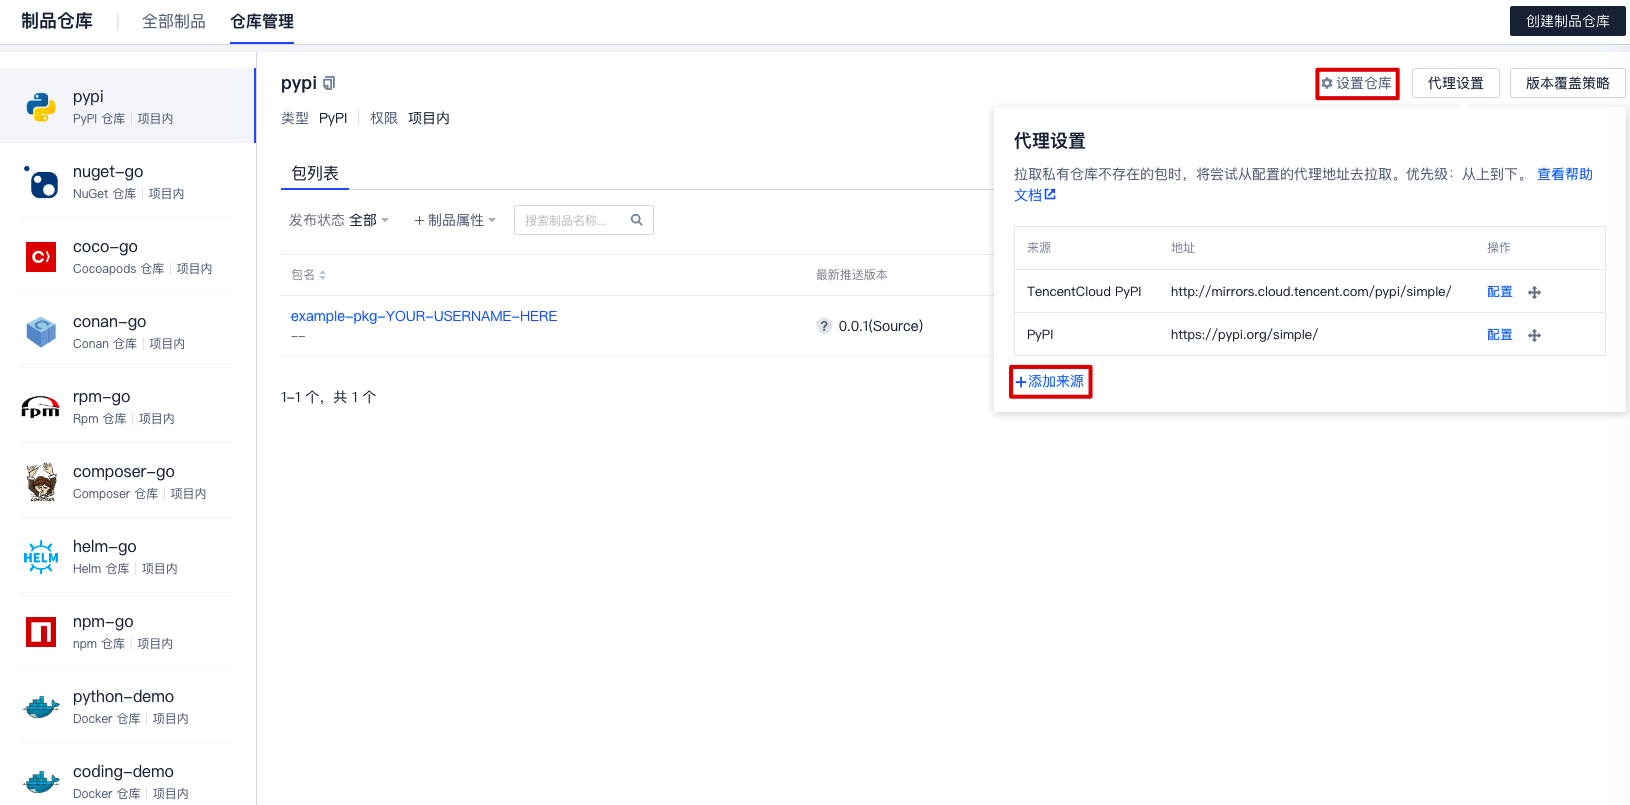
设置代理
当 CODING 私有制品仓库不存在想要拉取的制品时,将尝试从配置的代理地址拉取。您可以添加第三方制品源,用以获取特定仓库中的制品。无需额外设置,CODING 将会按照顺序从上到下依次检索相应的制品包。
使用网页上生成的命令,替换
<package> 的包名,完成拉取。拉取的制品及依赖会成功拉取到本地,并且还会同步至 CODING 制品仓库中,详情页会显示包的来源。


