操作场景
目前腾讯云云服务器支持导入镜像文件格式为:RAW、VHD、QCOW2、VMDK。其他格式的镜像文件需进行转换才可导入。本文介绍通过 qemu-img 工具将其他格式的镜像文件转换为 VHD 或 RAW 格式。
操作步骤
说明:
qemu-img 不支持将 ISO 镜像转换为 VHD 或 RAW 格式,如需转换,建议先创建虚拟机,使用 ISO 引导启动系统,将系统安装到磁盘后,再导出为支持的格式。
您可根据实际使用的操作系统,选择对应操作步骤:
说明:
本文以
Windows
10 操作系统为例进行镜像格式转换。不同操作系统版本有一定区别,请您结合实际情况参考文档操作。安装 qemu-img
配置环境变量
1. 右键单击开始,在弹出的菜单中选择系统。
2. 在弹出的窗口中,选择高级系统设置。
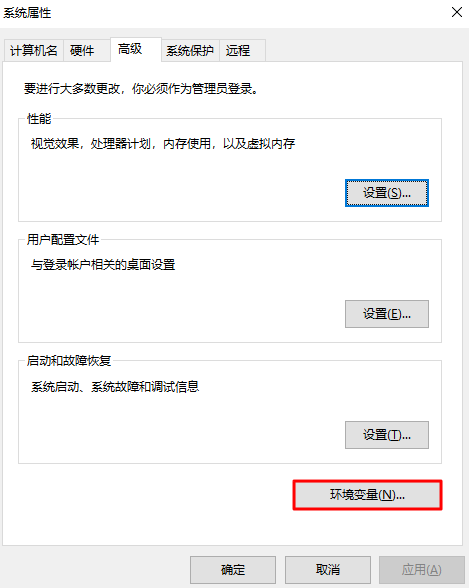
3. 在弹出的系统属性窗口中,选择高级页签,并单击环境变量。如下图所示:
4. 在环境变量窗口中,选择系统变量中的 
Path 并单击编辑。如下图所示:
5. 在弹出的编辑环境变量窗口中,单击新建,输入 qemu-img 的安装路径
C:\\Program Files\\qemu 后单击确定。6. 在环境变量窗口中,再次单击确定。
验证环境变量配置
1. 按 Win + R,打开运行窗口。
2. 在运行窗口中,输入 cmd 打开命令行。
3. 执行以下命令,根据返回结果判断环境变量是否配置成功。
qemu-img --help
转换镜像格式
1. 在命令行中,执行以下命令,切换至镜像文件所在目录。
cd <源镜像文件所在的目录>
2. 执行以下命令,转换镜像格式。
qemu-img convert -f <源镜像文件格式> -O <目标镜像格式> <源镜像文件名> <目标镜像文件名>
参数说明如下:
-f:源镜像文件的格式,支持以下常见格式标识符:qcow2:QCOW2 格式
raw:RAW 格式
vmdk:VMware VMDK 格式
vpc:腾讯云支持的 VHD 格式(需指定为 vpc)
vhd:通用 VHD 格式(部分场景需注意与 vpc 的差异)
-O(必须为大写):参数值为目标镜像格式、源镜像文件名和目标文件名。例如:
执行以下命令,将
test.qcow2 镜像文件转换为 test.raw。qemu-img convert -f qcow2 -O raw test.qcow2 test.raw
将 QCOW2 转换为腾讯云 VHD 格式(需指定 vpc):
qemu-img convert -f qcow2 -O vpc test.qcow2 test.vhd
转换完成后,目标文件会出现在源镜像文件所在的目录下。
说明:
本
文以 Ubuntu 20.04
及 CentOS 7.8 操作系统为例进行镜像格式转换。不同操作系统版本有一定区别,请您结合实际情况参考文档操作。安装 qemu-img
1. 执行以下命令,安装 qemu-img。
Ubuntu:
apt-get clean all #清除缓存
apt-get update #更新包列表
apt-get install qemu-utils #安装qemu-img工具
CentOS:
yum install qemu-img
2. 执行以下命令,转换镜像格式。
qemu-img convert -f qcow2 -O raw test.qcow2 test.raw
参数说明如下:
-f:参数值为源镜像文件的格式。 -O(必须为大写):参数值为目标镜像格式、源镜像文件名和目标文件名。
转换完成后,目标文件会出现在源镜像文件所在的目录下。


