简介
本文档主要介绍 COS Android SDK 如何集成日志上报功能。
注意:
COS Android SDK 版本需要大于等于 v5.9.21。
功能说明
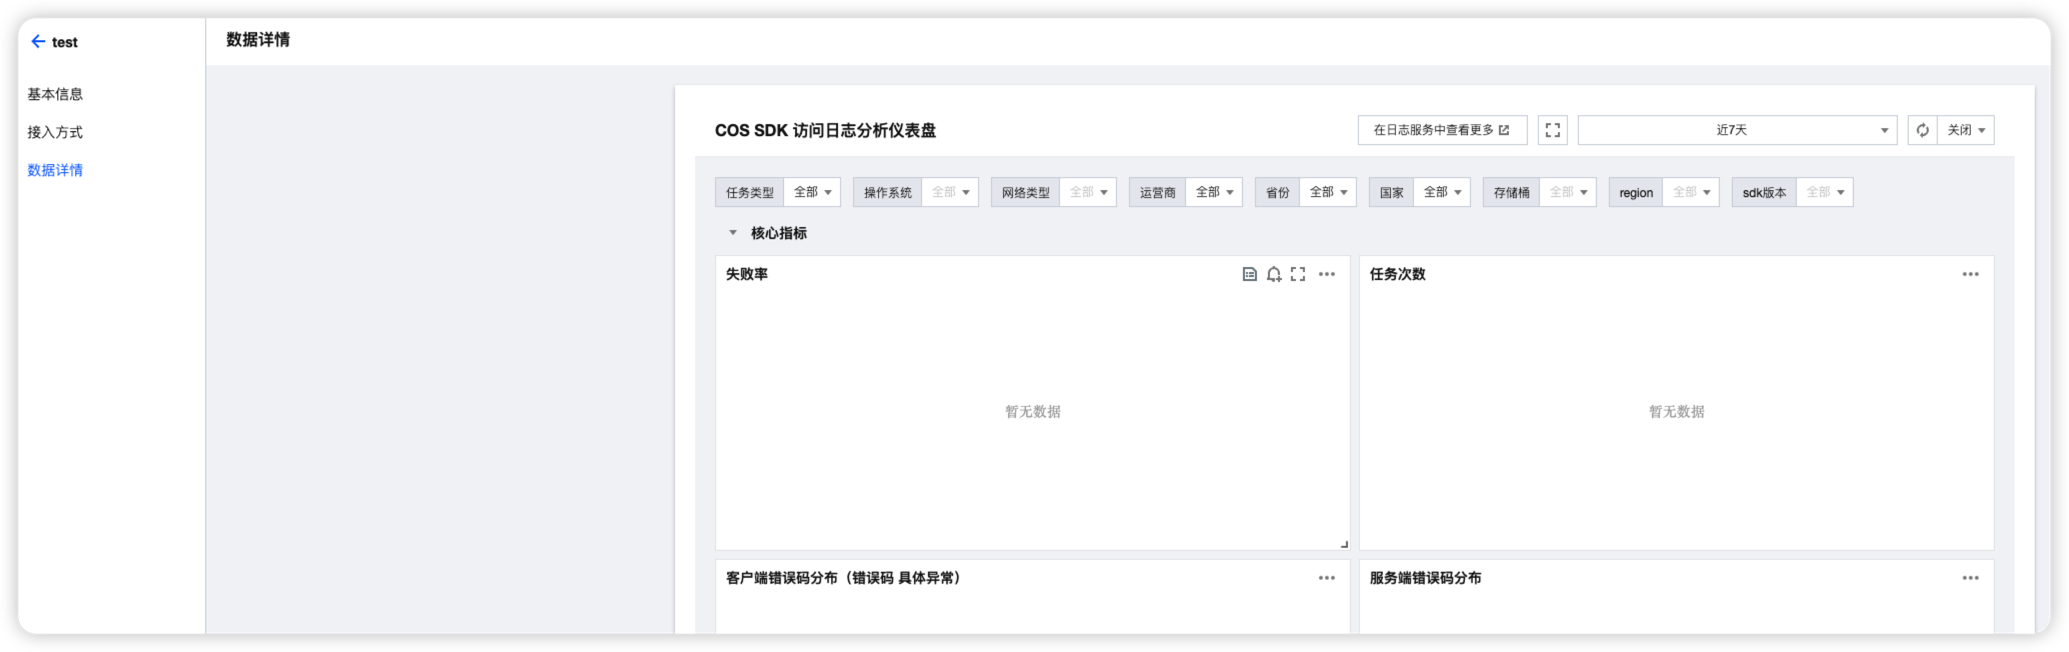
日志上报功能将客户端 COS SDK 的运行日志,上报至腾讯云日志服务 CLS。您可在 COS 控制台上查看请求成功率、任务次数、错误码以及地域等数据,便于您后续分析和了解业务运行情况。
费用说明
说明:
停止日志上报的方式有两种:
1. App 代码中删掉代码集成中
CosTrackService.initCLs 即可,不再进行 CLS 日志上报初始化。2. 从控制台删除对应的应用,删除应用将删除该应用的所有历史日志数据,且不可恢复。该操作属于高危操作,请您谨慎操作。
准备事项
操作步骤
步骤一、安装 CLS SDK
在应用级别(通常是 App 模块下)的
build.gradle 中添加依赖:dependencies {...// 增加这两行implementation 'com.tencentcloudapi.cls:tencentcloud-cls-sdk-android:1.0.5' implementation 'com.google.guava:guava:27.0.1-android'}
步骤二、实现获取日志服务的临时密钥
注意:
如果您一定要使用永久密钥,建议遵循 最小权限指引原则 对永久密钥的权限范围进行限制。
实现一个
ClsLifecycleCredentialProvider 的子类,实现请求临时密钥并返回结果的过程。ClsLifecycleCredentialProvider clsLifecycleCredentialProvider = new ClsLifecycleCredentialProvider() { @Override protected ClsSessionCredentials fetchNewCredentials() throws ClsAuthenticationException { // 首先从您的临时密钥服务器获取包含了密钥信息的响应 // 然后解析响应,获取临时密钥信息 String tmpSecretId = "SECRETID"; // 临时密钥 SecretId String tmpSecretKey = "SECRETKEY"; // 临时密钥 SecretKey String sessionToken = "SESSIONTOKEN"; // 临时密钥 Token long expiredTime = 1556183496L;//临时密钥有效截止时间戳,单位是秒 // 最后返回临时密钥信息对象 return new ClsSessionCredentials(tmpSecretId, tmpSecretKey, sessionToken, expiredTime); } };
您可以使用腾讯云的固定密钥来进行开发阶段的本地调试。由于该方式存在泄露密钥的风险,请务必在上线前替换为临时密钥的方式。
//用户的 SecretId,建议使用子账号密钥,授权遵循最小权限指引,降低使用风险。//子账号密钥获取可参见 https://cloud.tencent.com/document/product/598/37140String secretId = "SECRETID";//用户的 SecretKey,建议使用子账号密钥,授权遵循最小权限指引,降低使用风险。//子账号密钥获取可参见 https://cloud.tencent.com/document/product/598/37140String secretKey = "SECRETKEY";
步骤三、用上述密钥初始化 CLS 上报
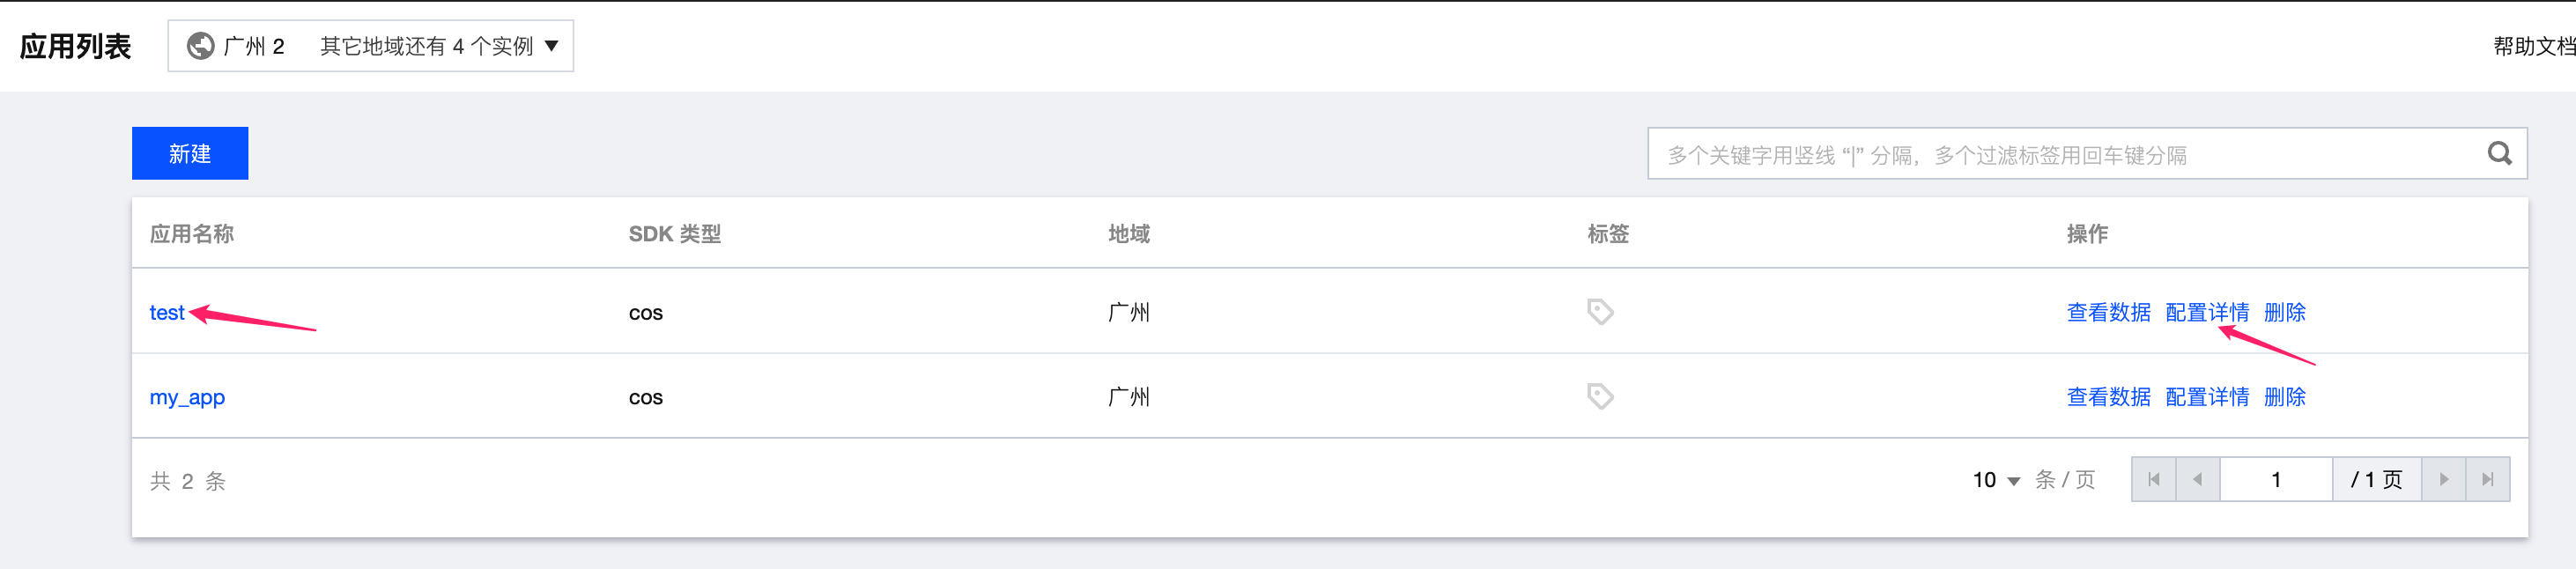
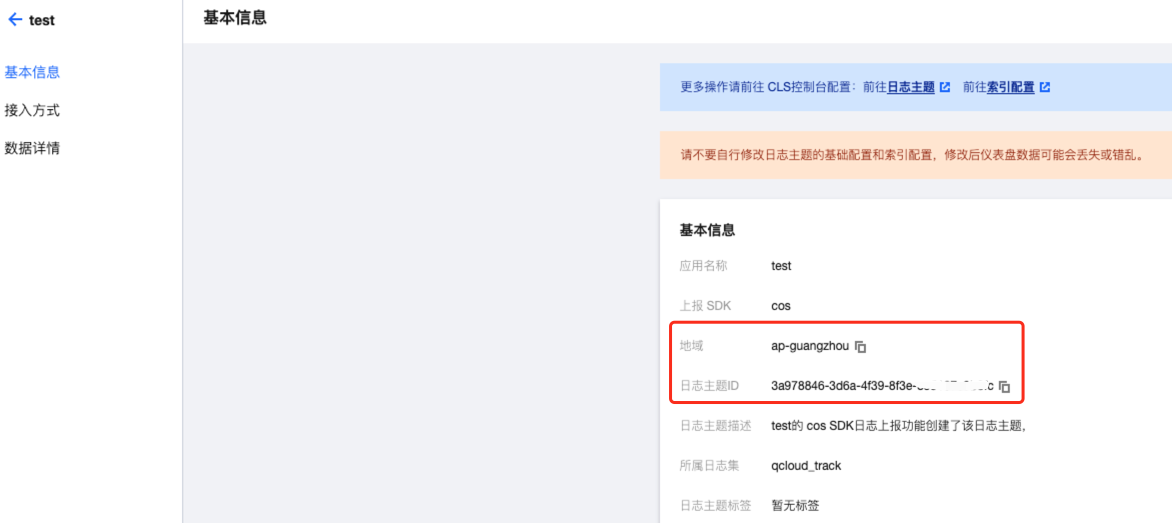
1. 前往 准备事项 中的应用列表,点击应用名称或配置详情,进入该应用详情页,在基本信息页签中获取到日志主题ID和地域 日志地域说明,例如:日志主题ID为 c09216e3-ade5-4725-a000-000000000000,地域为 ap-guangzhou。
2. 在COS SDK使用之前进行初始化,一般为 Application 中。
// clsLifecycleCredentialProvider为 步骤1 中获取到的cls临时密钥提供器CosTrackService.initCLs(this,"c09216e3-ade5-4725-a000-000000000000","ap-guangzhou.cls.tencentcs.com",clsLifecycleCredentialProvider);
或者您可以使用腾讯云的固定密钥来进行开发阶段的本地调试。由于该方式存在泄露密钥的风险,请务必在上线前替换为临时密钥的方式。
// secretId 和 secretKey为 步骤1 中获取到的固定密钥CosTrackService.initCLs(this,topicId,topicEndpoint,secretId,secretKey);
如果要停止 COS SDK 日志上报,只需要删掉上述
CosTrackService.initCLs 不进行初始化即可。步骤四、设置网络权限
日志上传是基于 http 的,因此需要对 xxx.cls.tencentcs.com 域名进行 http 开放。
1. 在 res 文件夹下创建一个 xml 文件夹,然后创建一个 network_security_config.xml 文件,文件内容如下:
<?xml version="1.0" encoding="utf-8"?>
<network-security-config>
    <domain-config cleartextTrafficPermitted="true">
        <!--cls-->
        <domain includeSubdomains="true">cls.tencentcs.com</domain>
    </domain-config>
</network-security-config>
2. 在 AndroidManifest.xml 文件下的 application 标签增加以下属性:
<application...android:networkSecurityConfig="@xml/network_security_config".../>
步骤五、配置自定义字段
1. 在日志主题索引字段中增加自定义字段。
2. 代码中设置上述自定义字段和具体的值。
Map<String, String>businessParams=newHashMap<>();businessParams.put("businessKey1","businessValue1");businessParams.put("businessKey2","businessValue2");businessParams.put("businessKey3","businessValue3");QCloudTrackService.getInstance().setBusinessParams(businessParams);
步骤六、结果验证