Data is invaluable, and many people can attest to this. The loss of digital photos, electronic documents, work outputs, or game saves can be quite distressing. File loss due to hard drive failure, accidental deletion, computer crashes, or software malfunctions, as well as the awkwardness of being asked to "roll back a version" only to find that no historical versions were saved, are all vexing issues in both work and life. Therefore, the importance of backups cannot be overstated.
When it comes to backups, many people think of using portable hard drives or setting up NAS storage within a local area network and simply uploading files to it. But is it really that simple in practice?
Backup is, in fact, a systematic process. In addition to copying files to the backup medium, it is also necessary to verify the accuracy of the backup content. Both copying and verification tasks need to be performed regularly to minimize losses in the event of file loss. Moreover, the backup medium itself requires maintenance, such as timely replacement of damaged hard drives.
In light of the above, is there a simpler way to ensure the safety of files? The answer is affirmative.
With the development of cloud services, we now have reliable enterprise-grade cloud storage services, such as Tencent Cloud Object Storage (COS). As broadband speeds increase and costs decrease due to national initiatives, backing up files to the cloud has become a reality. What we need next is a software solution that connects files on our computers to cloud storage, automatically backs up our files to the cloud on a regular basis, and periodically verifies the accuracy of the backup files.
Software Introduction
Arq® Backup is a commercial backup software that supports Windows and macOS systems. The software runs in the background and automatically backs up specified directories at regular intervals according to the configuration. It also retains backups from each time point, making it easy to find historical versions of a file. Moreover, backups at each time point only include differential files, and duplicate files in different paths are backed up only once, minimizing backup size and maximizing speed. Before transferring backup files to the network, the software encrypts them based on the user's input password, ensuring that they are not misused during transmission or while stored in the cloud, thus safeguarding the security of sensitive data.
Arq® Backup offers a commercial license for $49.99 per user, which allows usage on a single computer. Additionally, the software provides a 30-day free trial, allowing users to test it before making a purchase.
Note
Currently, there is no Simplified Chinese version of Arq® Backup software. The download, purchase, and related instructions can be found on the software's official website.
Prepare Tencent Cloud Object Storage
Note
If you are currently using COS, please skip steps 1 and 2.
2. Log in to the COS console and follow the prompts to activate COS.
3. In the Cloud Object Storage (COS) console, click on the Bucket List in the left sidebar, and then click Create Bucket to start creating a bucket:
Name: Bucket name, for example, "backups".
Region: You can choose a region close to your location, but please do not select a financial region. Currently, we offer price discounts for the Southwest region, so you can also choose "Chengdu" or "Chongqing" to enjoy more favorable pricing.
Keep other configuration options at their default settings, copy and save the Request Domain address, and then click Confirm to complete the creation.
Note
For detailed steps on creating a bucket, please refer to Creating a Bucket.
4. Log in to the API Key Management Console and create and record the key information SecretId and SecretKey.
Install and Configure Arq® Backup
Note
This article uses Arq® Backup version 6.2.11 for Windows as an example.
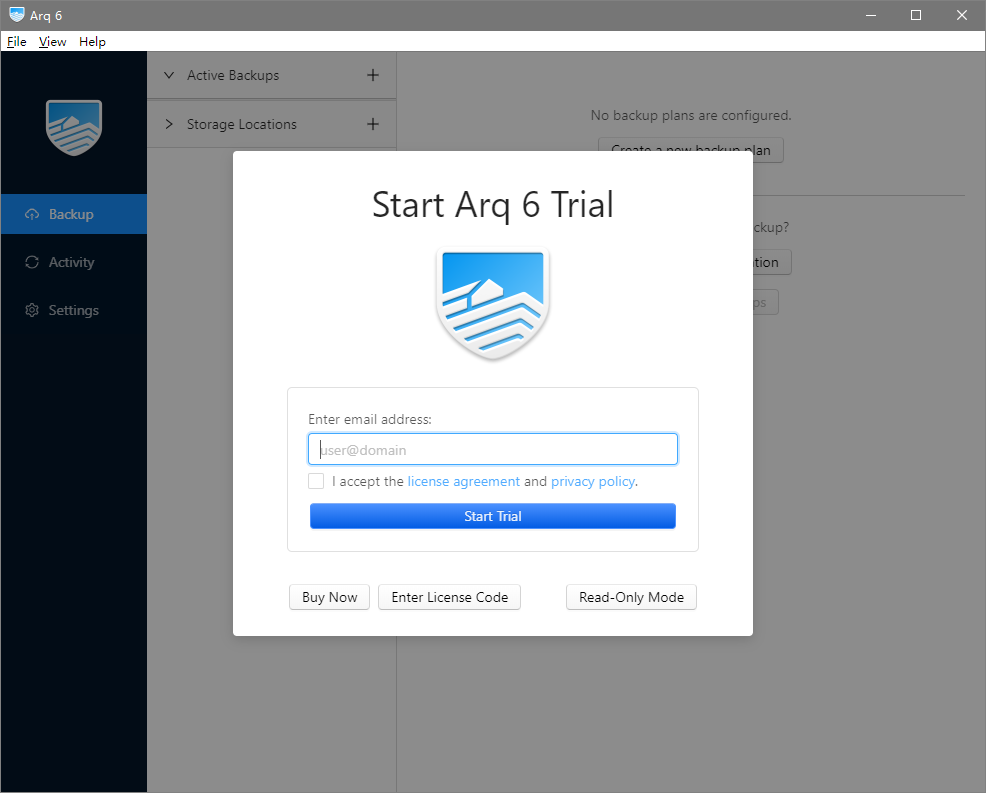
2. Follow the prompts to complete the software installation. After installation, the software will automatically launch. Upon the first launch, you will be prompted to log in. Enter your email address and click Start Trial.
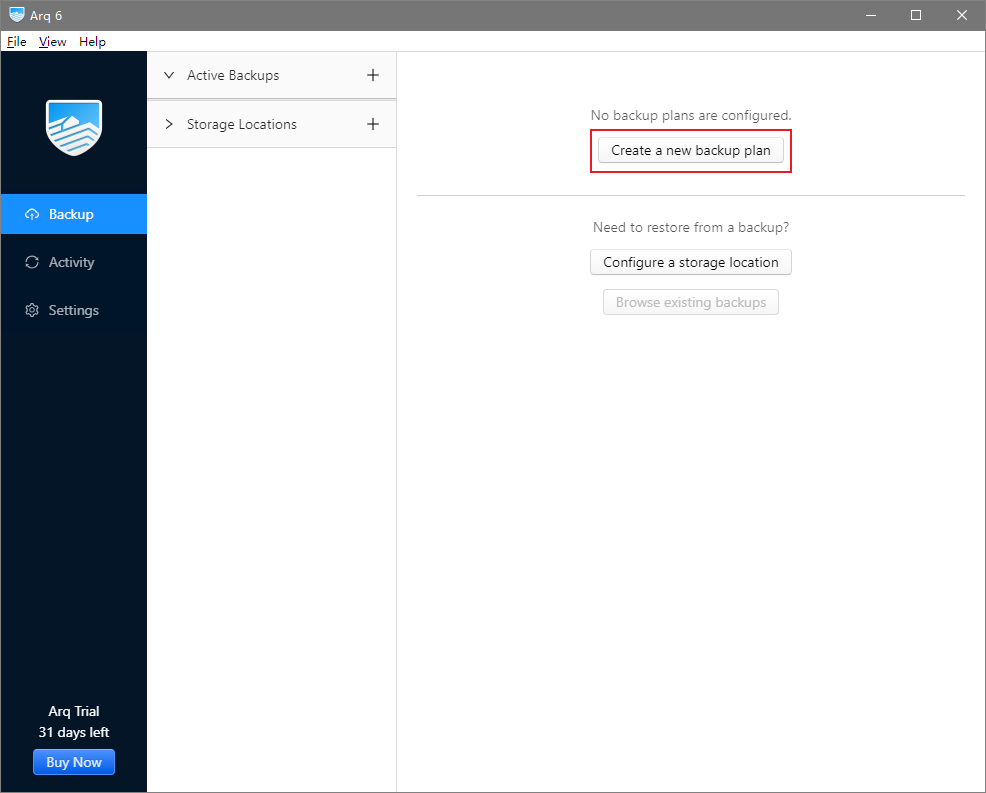
3. In the Backup interface, click Create a new backup plan to add a backup plan.
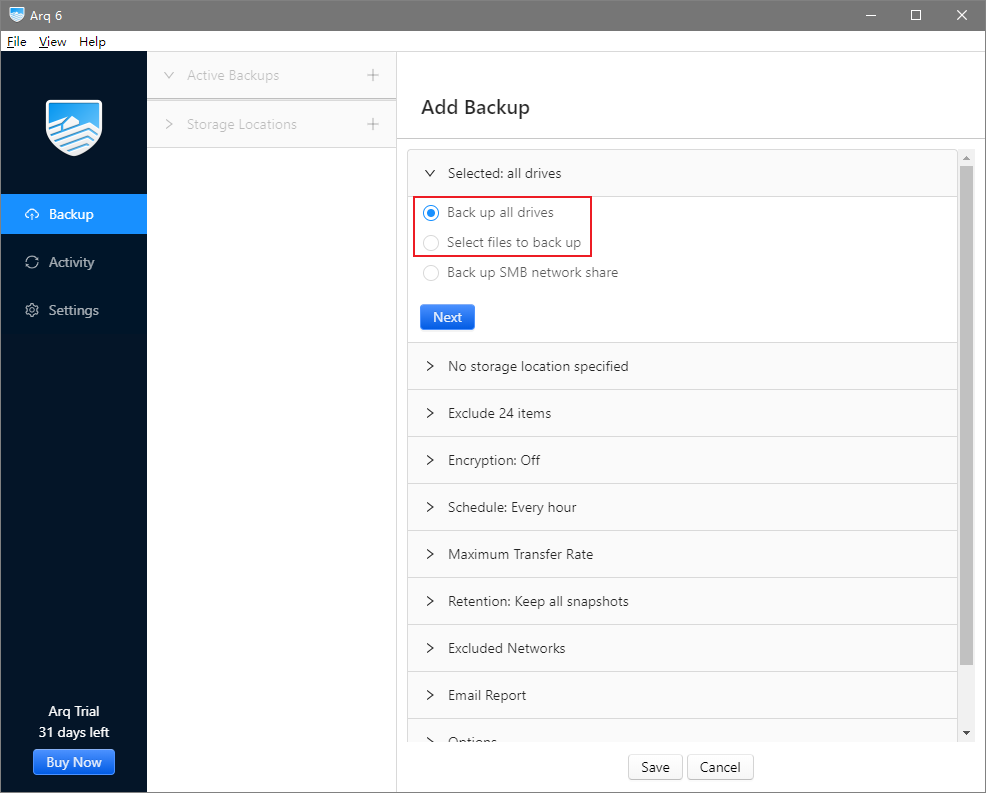
4. In the interface, select the directory you want to back up. You can choose all hard drives or a specific directory.
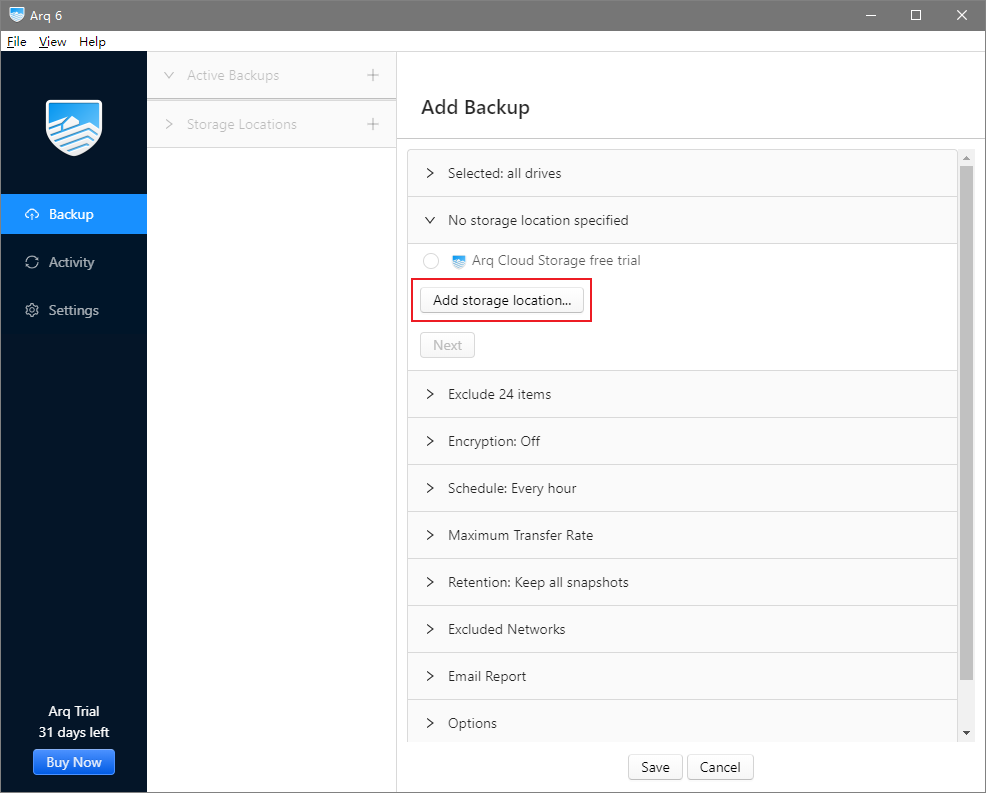
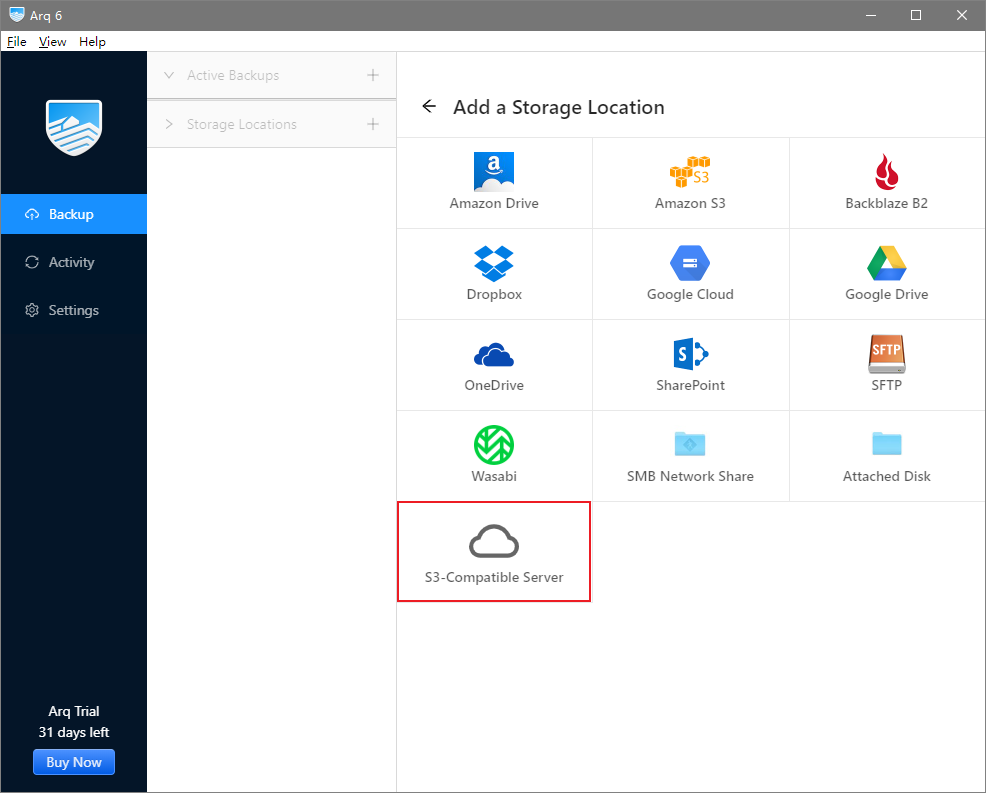
5. Click Add Storage Location to add a backup storage location, as shown below.
6. Here, we select S3-Compatible Server.
7. In the redirected interface, follow the instructions below to configure. Once completed, click Continue.
Server URL: Enter the portion of the previously recorded request domain name starting with cos, and prepend https:// to it, for example, https://cos.ap-chengdu.myqcloud.com. Please note that this does not include the bucket name.
Access Key ID: The SecretId found in the previously recorded key information.
Secret Access Key: The SecretKey from the key information recorded earlier.
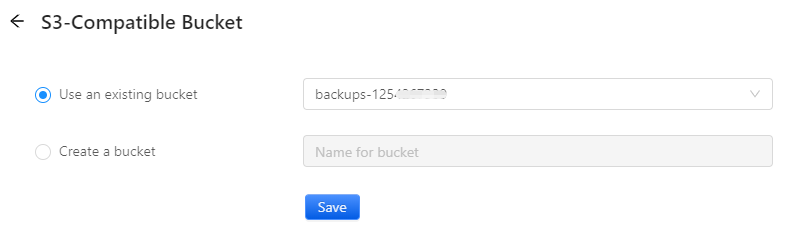
8. In the subsequent interface, select Use an existing bucket and choose the bucket created earlier, such as backups-1250000000, then click Save.
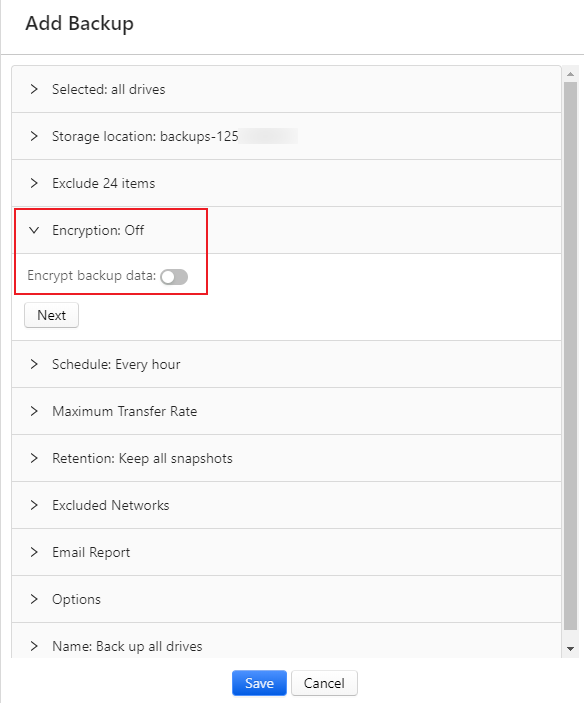
9. (Optional) Choose whether to encrypt the backup data; here, we select the Enable button.
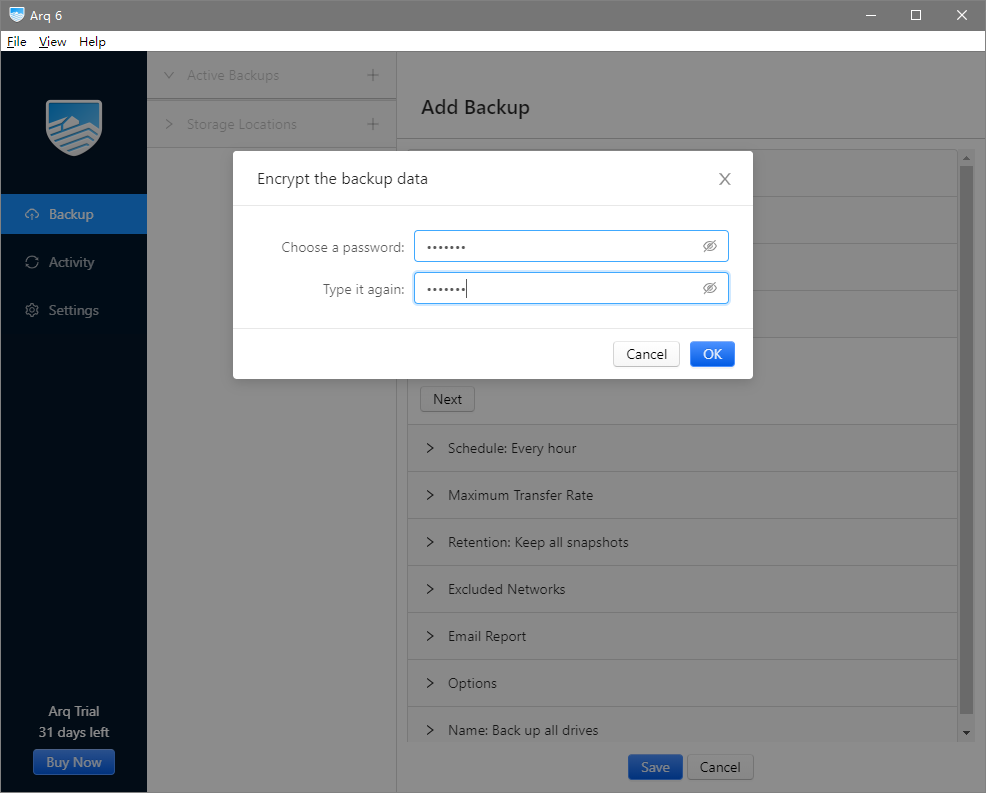
10. In the pop-up window, set the password for encryption. Enter the encryption password for the backup file twice and click OK. Please remember the backup password, as you will not be able to restore files from the backup without it!
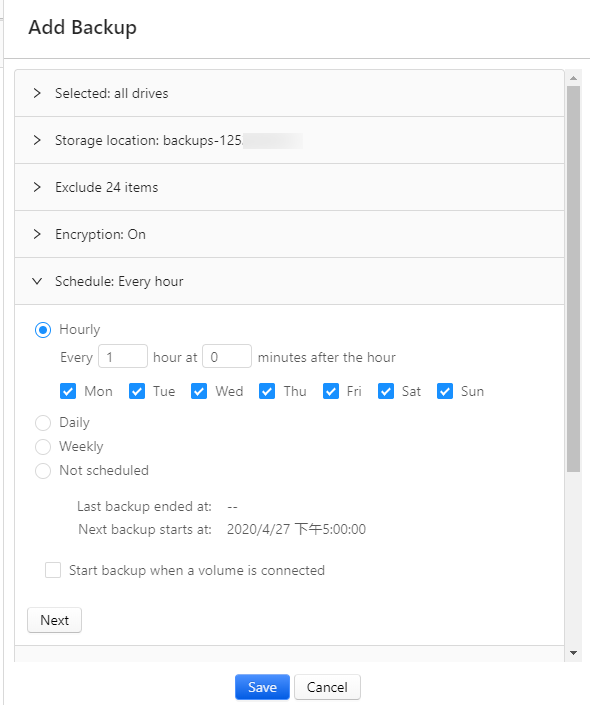
11. (Optional) Set the backup cycle.
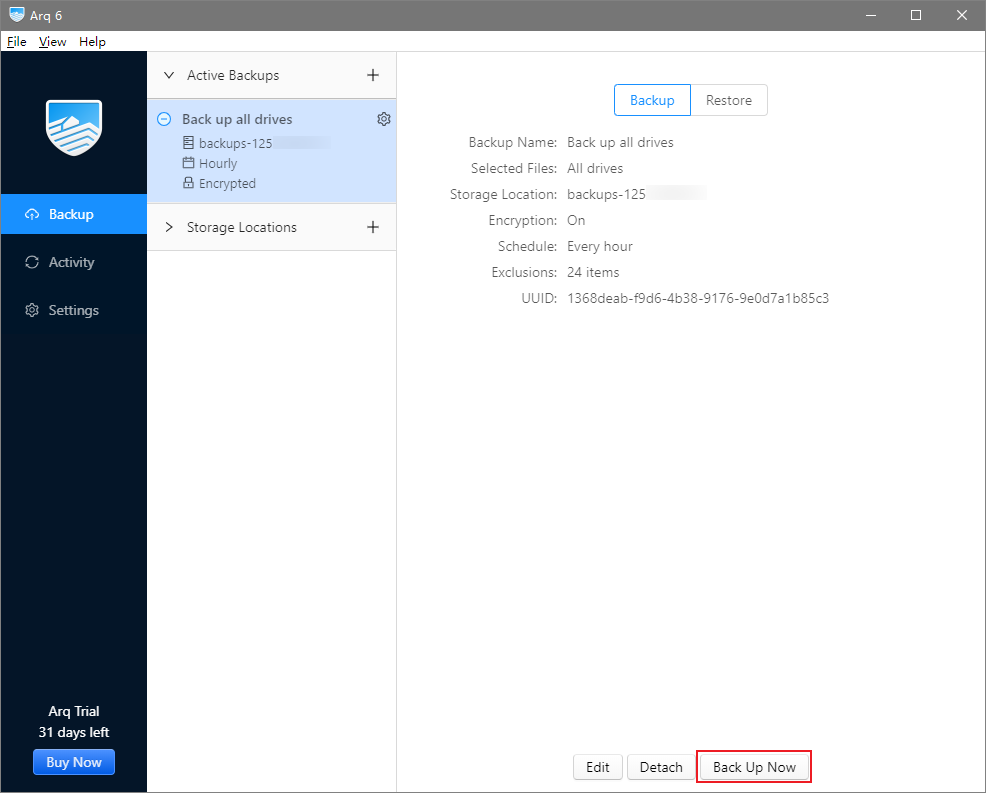
12. Click Save to save the settings, and then click Back Up Now to start the backup.
Restoring Files from Backups
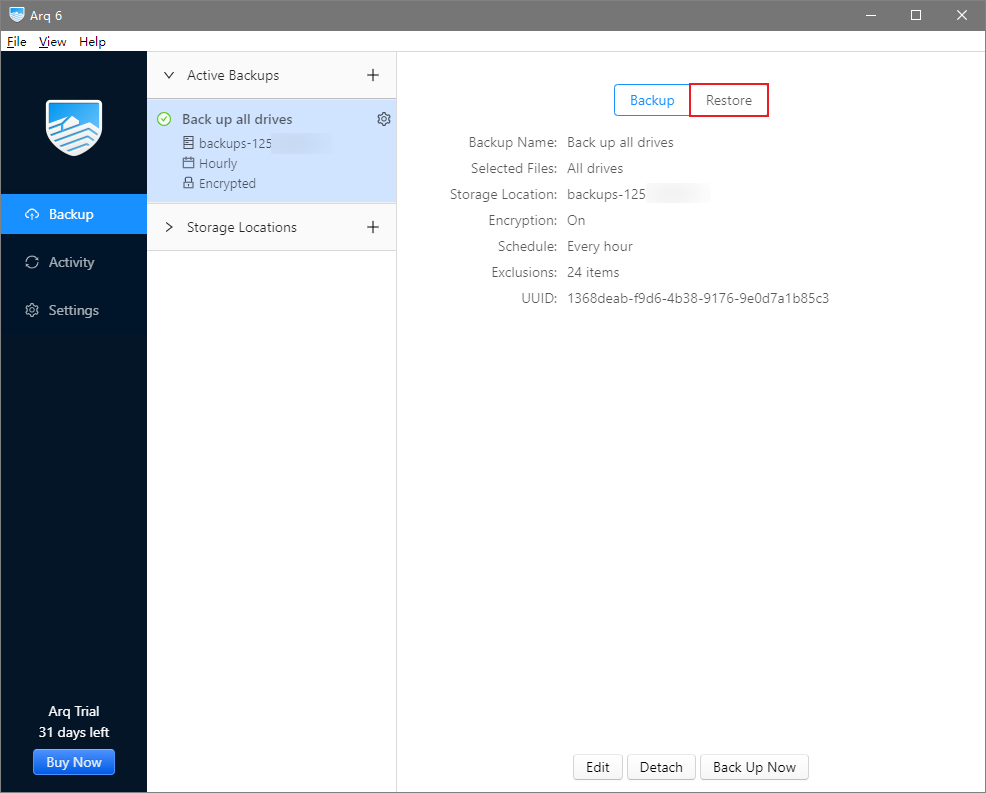
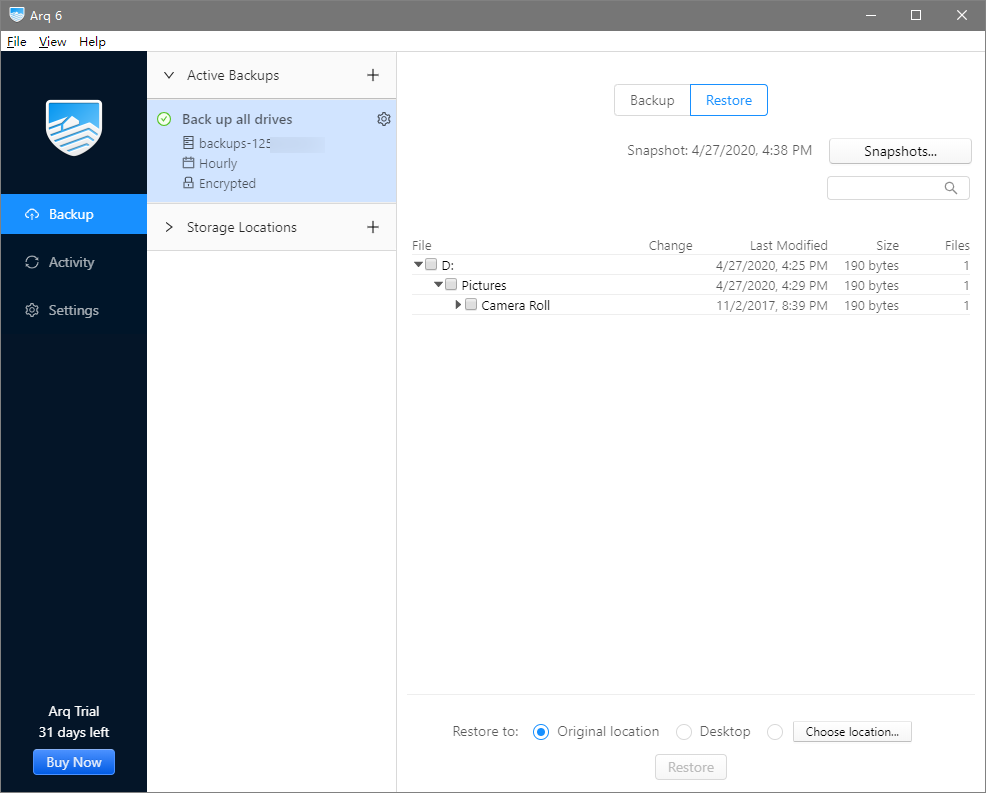
1. In the left Backup list on the main interface, click Restore.
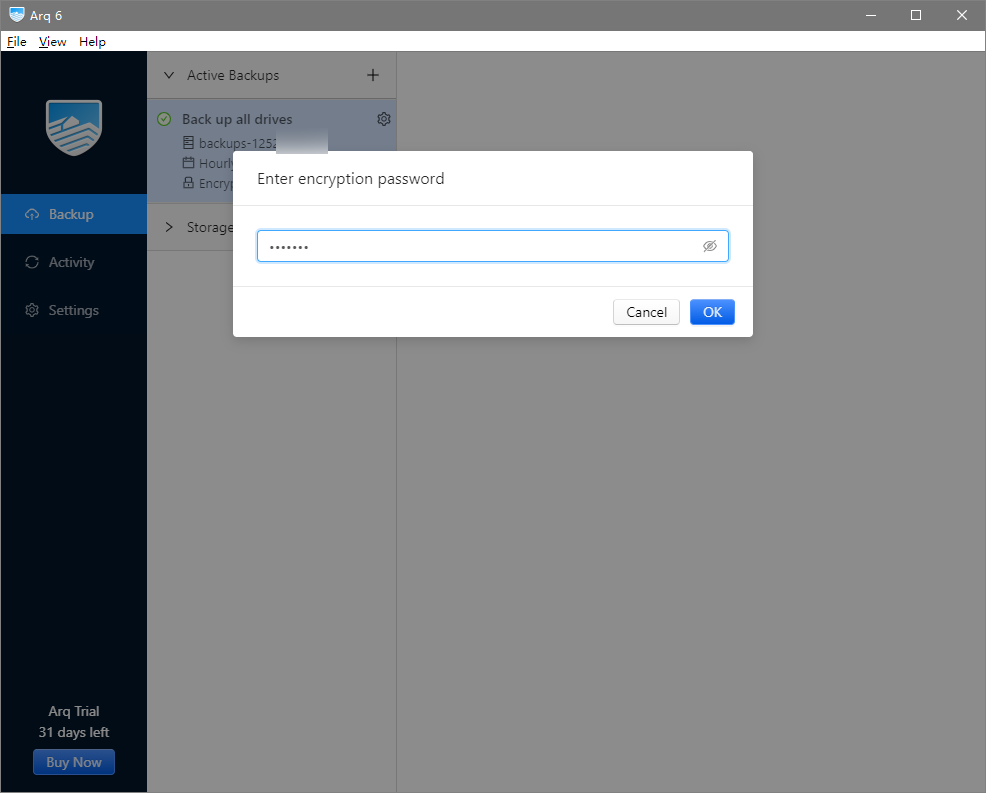
2. If you have set up encrypted backup data according to step 9 above, you will need to enter the password.
3. Select the directory or file to be restored, as well as the location to save the restored directory or file, and click Restore to begin the recovery process.
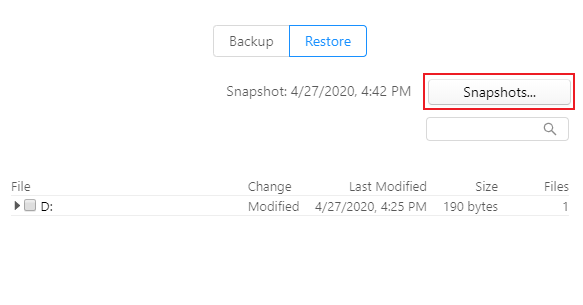
4. The recovery operation defaults to restoring from the latest backup. If needed, you can find historical version backups in snapshots and restore from those. Click Snapshots to view historical snapshots.
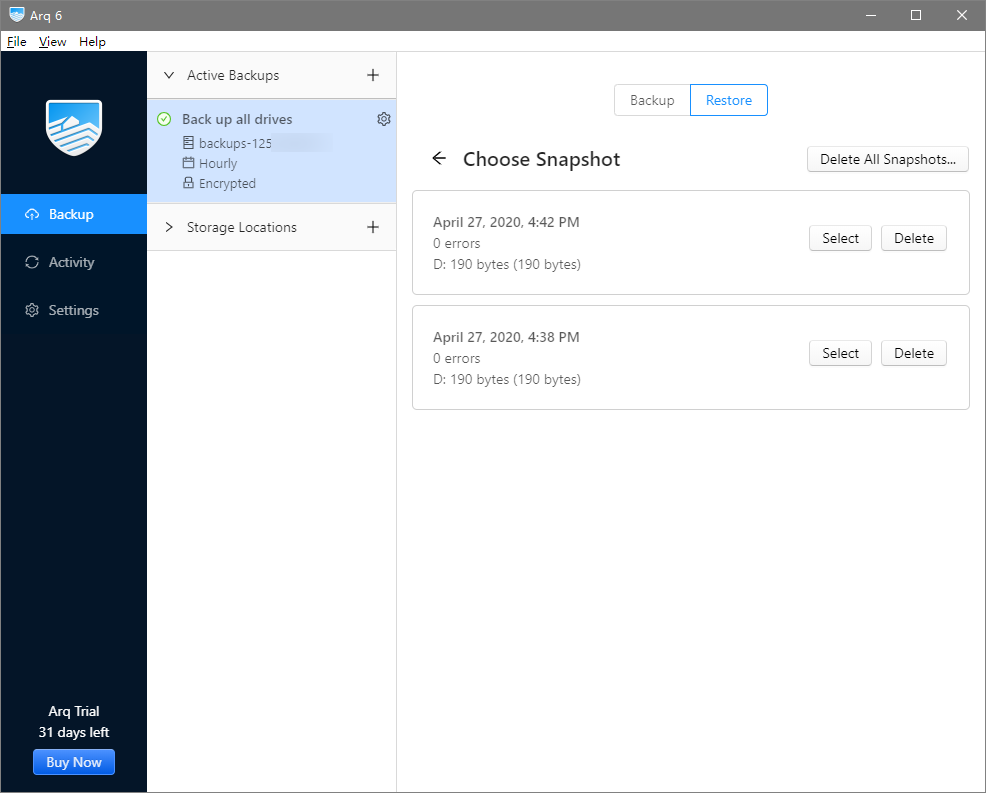
5. Opt for historical snapshots.
6. Select the historical directory or file to be restored, as well as the location to save the restored directory or file, and click Restore to begin the recovery process.
7. Upon receiving the recovery completion prompt, you can view the restored files in the previously specified directory.
Summary
Of course, COS not only offers the above applications and services but also supports various popular open-source applications integrated with Tencent Cloud COS plugins. Click here to launch and start using them immediately!