简介
CDH(Cloudera's Distribution, including Apache Hadoop)是业界流行的 Hadoop 发行版本。本文指导如何在 CDH 环境下通过 HDFS 协议访问对象存储(Cloud Object Storage,COS)的元数据加速桶,以实现大数据计算与存储分离,提供灵活及低成本的大数据解决方案。
注意:
通过 HDFS 协议访问 COS 元数据加速桶,需要先开启元数据加速能力。
当前 COS元数据加速存储桶对大数据组件支持情况如下:
组件名称 | 元数据加速桶支持情况 | 服务组件是否需要重启 |
Yarn | 支持 | 重启 NodeManager |
Yarn | 支持 | 重启 NodeManager |
Hive | 支持 | 重启 HiveServer 及 HiveMetastore |
Spark | 支持 | 重启 NodeManager |
Sqoop | 支持 | 重启 NodeManager |
Presto | 支持 | 重启 HiveServer 及 HiveMetastore 和 Presto |
Flink | 支持 | 否 |
Impala | 支持 | 否 |
EMR | 支持 | 否 |
自建组件 | 后续支持 | 无 |
HBase | 不推荐 | 无 |
版本依赖
本文依赖的组件版本如下:
CDH 5.16.1
Hadoop 2.6.0
使用方法
存储环境配置
1. 登录 CDH 管理页面。
2. 在系统主页,选择配置 > 服务范围 > 高级,进入高级配置代码段页面,如下图所示:
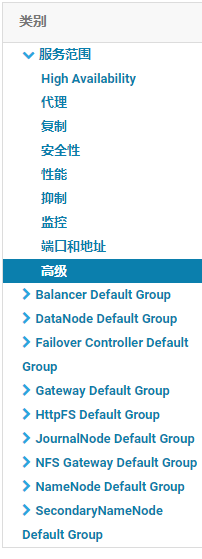
3. 在
Cluster-wide Advanced Configuration Snippet(Safety Valve) for core-site.xml 的代码框中,参考 挂载元数据加速桶 的“挂载至自建 Hadoop/CDH 等环境”章节的指引,填入 COS 大数据服务相关的配置。4. 对 HDFS 服务进行操作,单击部署客户端配置,此时以上 core-site.xml 配置会更新到集群里的机器上。
5. 根据 创建元数据加速桶并开启 HDFS 协议 的指引,创建元数据加速存储桶,并为 CDH 计算集群配置好访问权限。
6. 根据 挂载元数据加速桶 的“挂载至自建 Hadoop/CDH 等环境”章节的指引,下载所依赖的 jar 包,并放置到 CDH HDFS 服务的 jar 包路径下,示例如下,请根据实际值进行替换:
cp chdfs_hadoop_plugin_network-3.5.jar /opt/cloudera/parcels/CDH-5.16.1-1.cdh5.16.1.p0.3/lib/hadoop-hdfs/cp cos_api-bundle-5.6.228.jar /opt/cloudera/parcels/CDH-5.16.1-1.cdh5.16.1.p0.3/lib/hadoop-hdfs/cp hadoop-cos-2.7.5-8.3.11.jar /opt/cloudera/parcels/CDH-5.16.1-1.cdh5.16.1.p0.3/lib/hadoop-hdfs/
注意:
在集群中的每台机器都需要在相同的位置放置 SDK 包。
数据迁移
大数据套件使用元数据加速桶
MapReduce
操作步骤
1. 按照 数据迁移 章节,配置好 HDFS 的相关配置,并将 COS 的客户端安装包,放置到 HDFS 相应的目录。
2. 在 CDH 系统主页,找到 YARN,重启 NodeManager 服务(TeraGen 命令可以不用重启,但是 TeraSort 由于业务内部逻辑,需要重启 NodeManger,建议都统一重启 NodeManager 服务)。
示例
下面以 Hadoop 标准测试中的 TeraGen 和 TeraSort 为例:
hadoop jar ./hadoop-mapreduce-examples-2.7.3.jar teragen -Dmapred.map.tasks=4 1099 cosn://examplebucket-1250000000/teragen_5/hadoop jar ./hadoop-mapreduce-examples-2.7.3.jar terasort -Dmapred.map.tasks=4 cosn://examplebucket-1250000000/teragen_5/ cosn://examplebucket-1250000000/result14
说明:
cosn:// schema后面请替换为用户大数据业务的元数据加速存储桶路径。Hive
操作步骤
1. 按照 数据迁移 章节,配置好 HDFS 的相关配置,并且将 COS 的客户端安装包,放置到 HDFS 相应的目录。
2. 在 CDH 主页面,找到 Hive 服务, 重启 Hiveserver2 及 HiverMetastore 角色。
示例
某用户的真实业务查询,例如执行 Hive 命令行,创建一个 Location,作为在元数据加速桶上的分区表:
CREATE TABLE `report.report_o2o_pid_credit_detail_grant_daily`(`cal_dt` string,`change_time` string,`merchant_id` bigint,`store_id` bigint,`store_name` string,`wid` string,`member_id` bigint,`meber_card` string,`nickname` string,`name` string,`gender` string,`birthday` string,`city` string,`mobile` string,`credit_grant` bigint,`change_reason` string,`available_point` bigint,`date_time` string,`channel_type` bigint,`point_flow_id` bigint)PARTITIONED BY (`topicdate` string)ROW FORMAT SERDE'org.apache.hadoop.hive.ql.io.orc.OrcSerde'STORED AS INPUTFORMAT'org.apache.hadoop.hive.ql.io.orc.OrcInputFormat'OUTPUTFORMAT'org.apache.hadoop.hive.ql.io.orc.OrcOutputFormat'LOCATION'cosn://examplebucket-1250000000/user/hive/warehouse/report.db/report_o2o_pid_credit_detail_grant_daily'TBLPROPERTIES ('last_modified_by'='work','last_modified_time'='1589310646','transient_lastDdlTime'='1589310646')
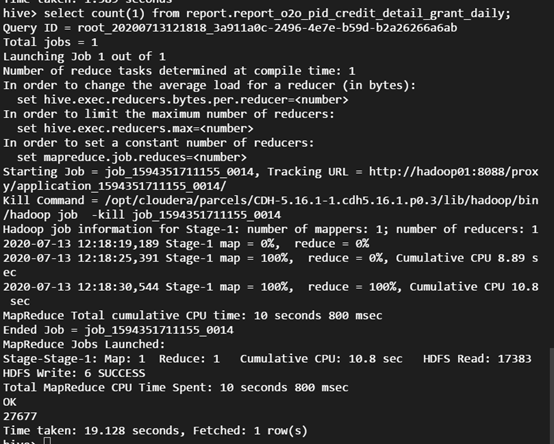
执行 SQL 查询:
select count(1) from report.report_o2o_pid_credit_detail_grant_daily;
观察结果如下:
Tez 引擎需要将 COS 的客户端安装包导入到 Tez 的压缩包内,下面以 apache-tez.0.8.5 为例进行说明:
操作步骤
1. 找到 CDH 集群安装的 tez 包,然后解压,例如 /usr/local/service/tez/tez-0.8.5.tar.gz。
2. 将 COS 的 客户端安装包放置到解压后的目录下,然后重新压缩输出一个压缩包。
3. 将新的压缩包上传到 tez.lib.uris 指定的路径下(如果之前存在路径则直接替换即可)。
4. 在 CDH 主页面,找到 HIVE,重启 hiveserver 和 hivemetastore。
Spark
操作步骤
1. 按照 数据迁移 章节,配置好 HDFS 的相关配置,并且将 COS 的客户端安装包,放置到 HDFS 相应的目录。
2. 重启 NodeManager 服务。
示例
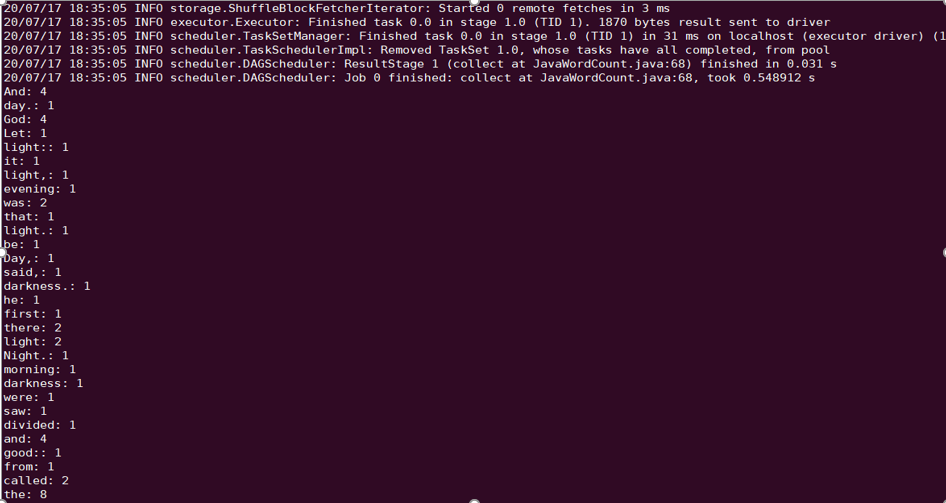
以进行 Spark example word count 测试为例。
spark-submit --class org.apache.spark.examples.JavaWordCount --executor-memory 4g --executor-cores 4 ./spark-examples-1.6.0-cdh5.16.1-hadoop2.6.0-cdh5.16.1.jar cosn://examplebucket-1250000000/wordcount
执行结果如下:
Sqoop
操作步骤
1. 按照 数据迁移 章节,配置好 HDFS 的相关配置,并且将 COS 的客户端安装包,放置到 HDFS 相应的目录。
2. COSN 与 CHDFS 的 SDK jar 包还需要放到 sqoop 目录下(例如 /opt/cloudera/parcels/CDH-5.16.1-1.cdh5.16.1.p0.3/lib/sqoop/)。
3. 重启 NodeManager 服务。
示例
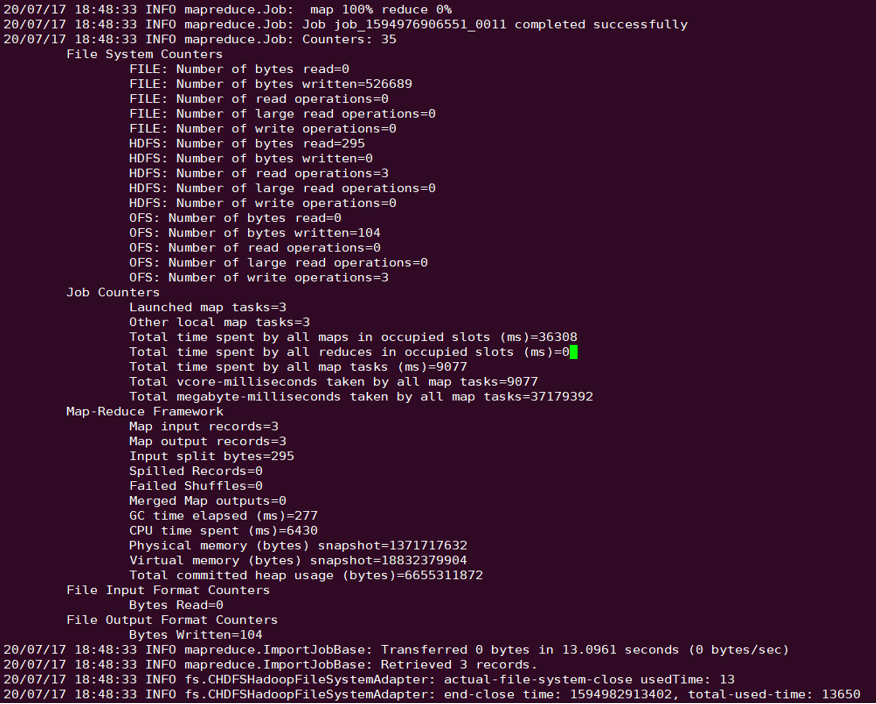
sqoop import --connect "jdbc:mysql://IP:PORT/mysql" --table sqoop_test --username root --password 123 --target-dir cosn://examplebucket-1250000000/sqoop_test
执行结果如下:
Presto
操作步骤
1. 按照 数据迁移 章节,配置好 HDFS 的相关配置,并且将 COS 的客户端安装包,放置到 HDFS 相应的目录。
2. COSN 与 CHDFS 的 SDK jar 包还需要放到 presto 目录下(例如 /usr/local/services/cos_presto/plugin/hive-hadoop2)。
3. 由于 presto 不会加载 hadoop common 下的 gson-2...jar,需将 gson-2...jar 也放到 presto 目录下(例如 /usr/local/services/cos_presto/plugin/hive-hadoop2,仅 COS 依赖 gson)。
4. 重启 HiveServer、HiveMetaStore 和 Presto 服务。
示例
以 HIVE 创建 Location 为 COS 的表查询为例:
select * from chdfs_test_table where bucket is not null limit 1;
说明:
chdfs_test_table 为 location 是 ofs scheme 的表。
查询结果如下:


