连麦方案介绍
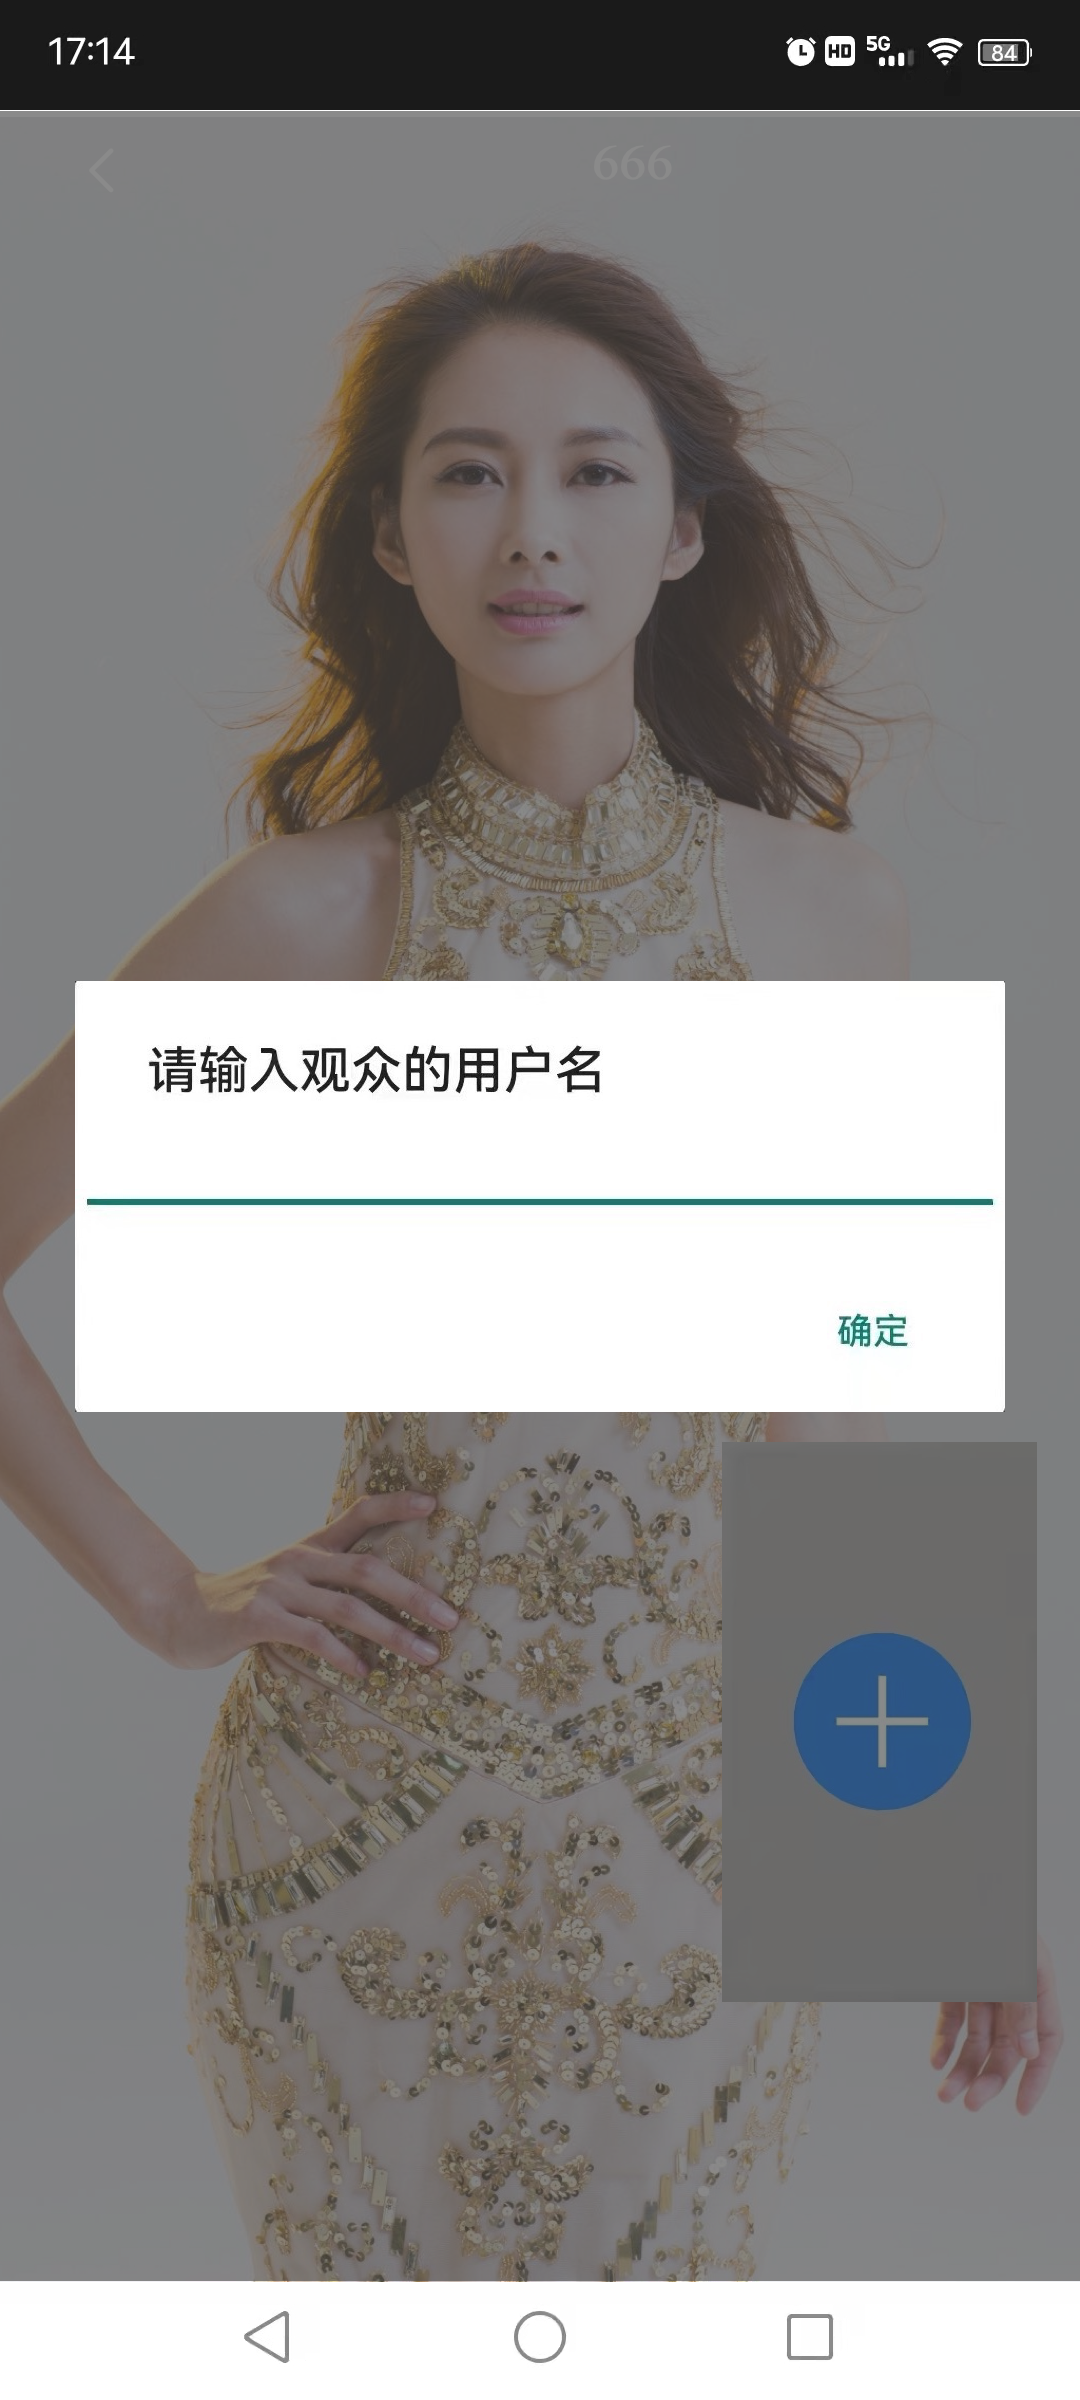
连麦方案演示
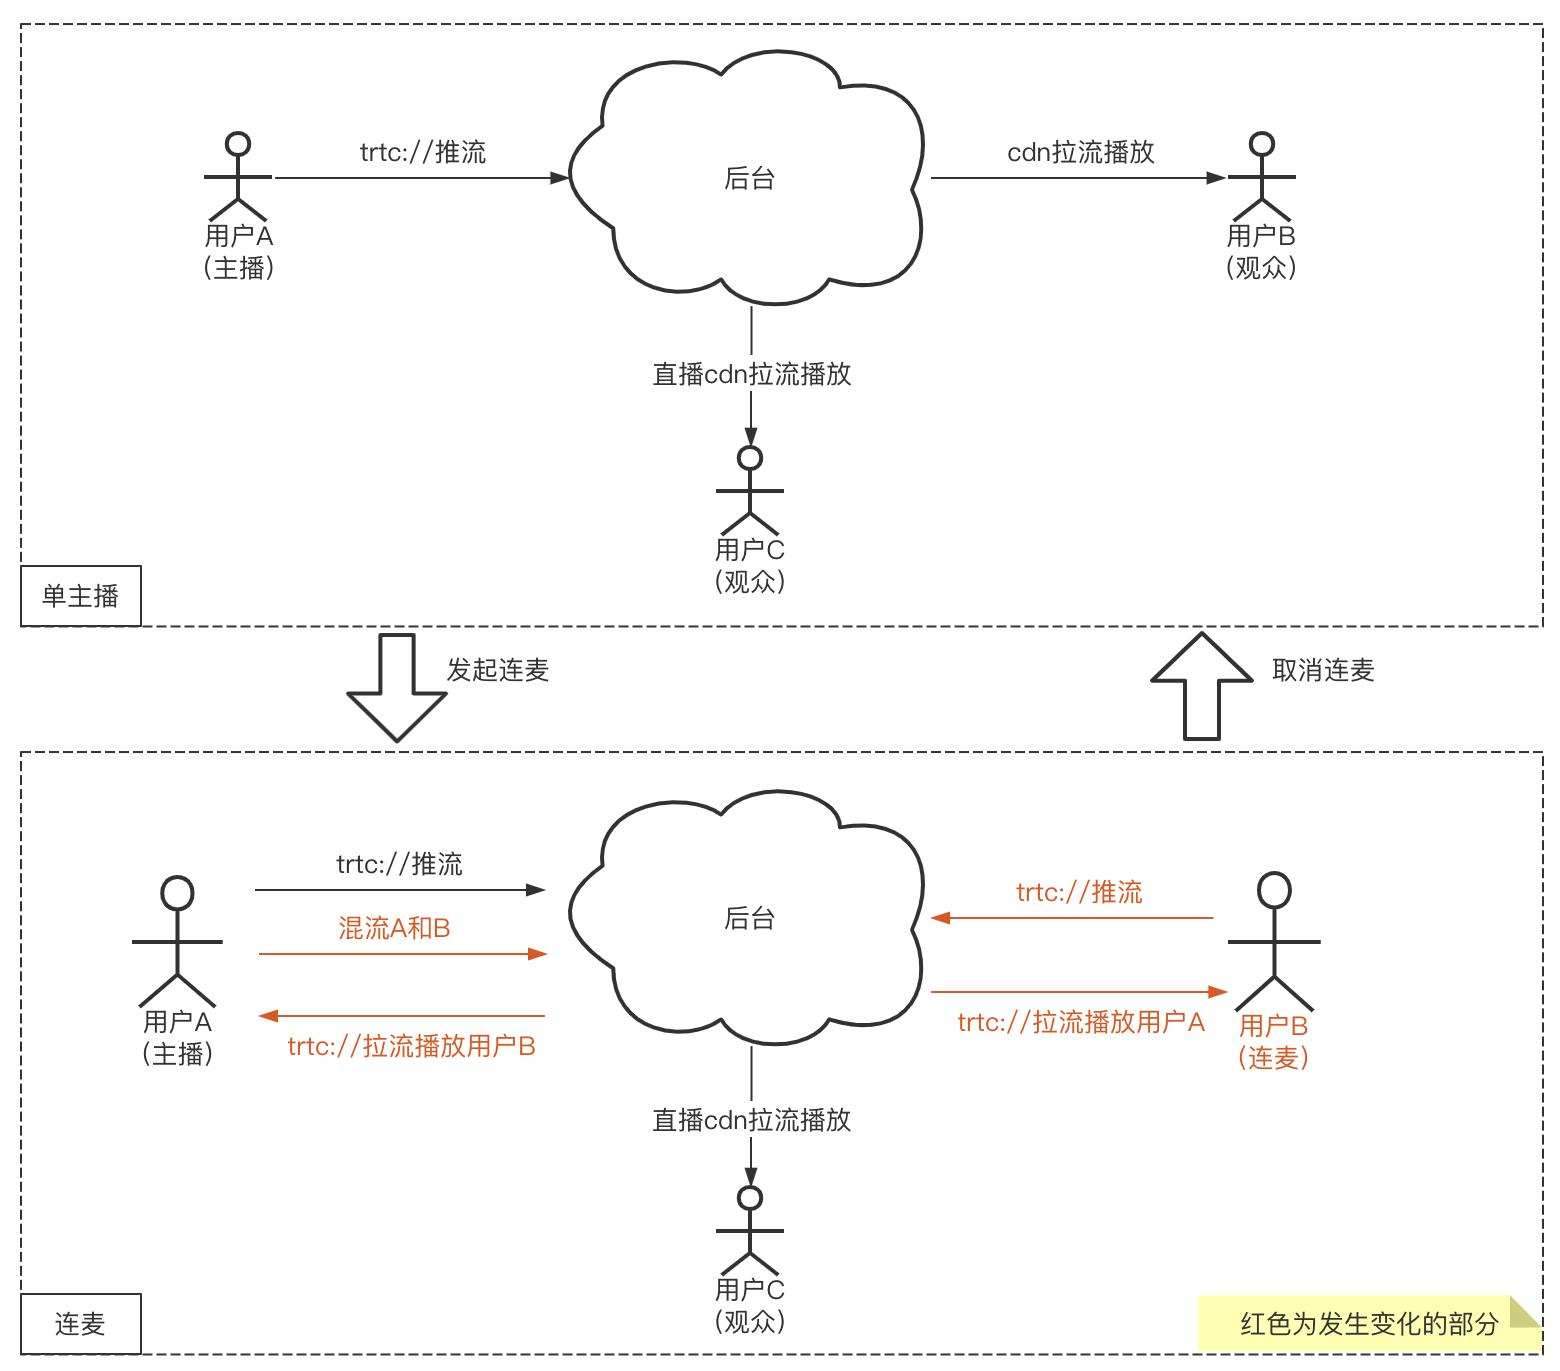
一般情况观众连麦流程如下:
连麦前:主播使用 RTC 地址推流,观众使用 CDN 地址进行拉流观看即可。
连麦时:观众切换为 RTC 地址推送自己的音视频,使用 RTC 地址播放主播音视频流,此时主播使用 RTC 地址播放观众的音视频流。
连麦后:观众切换为 CDN 地址拉流观看,主播停止播放观众音视频流。
演示图示
主播 |  |  |  |
连麦观众和观众 | |  | 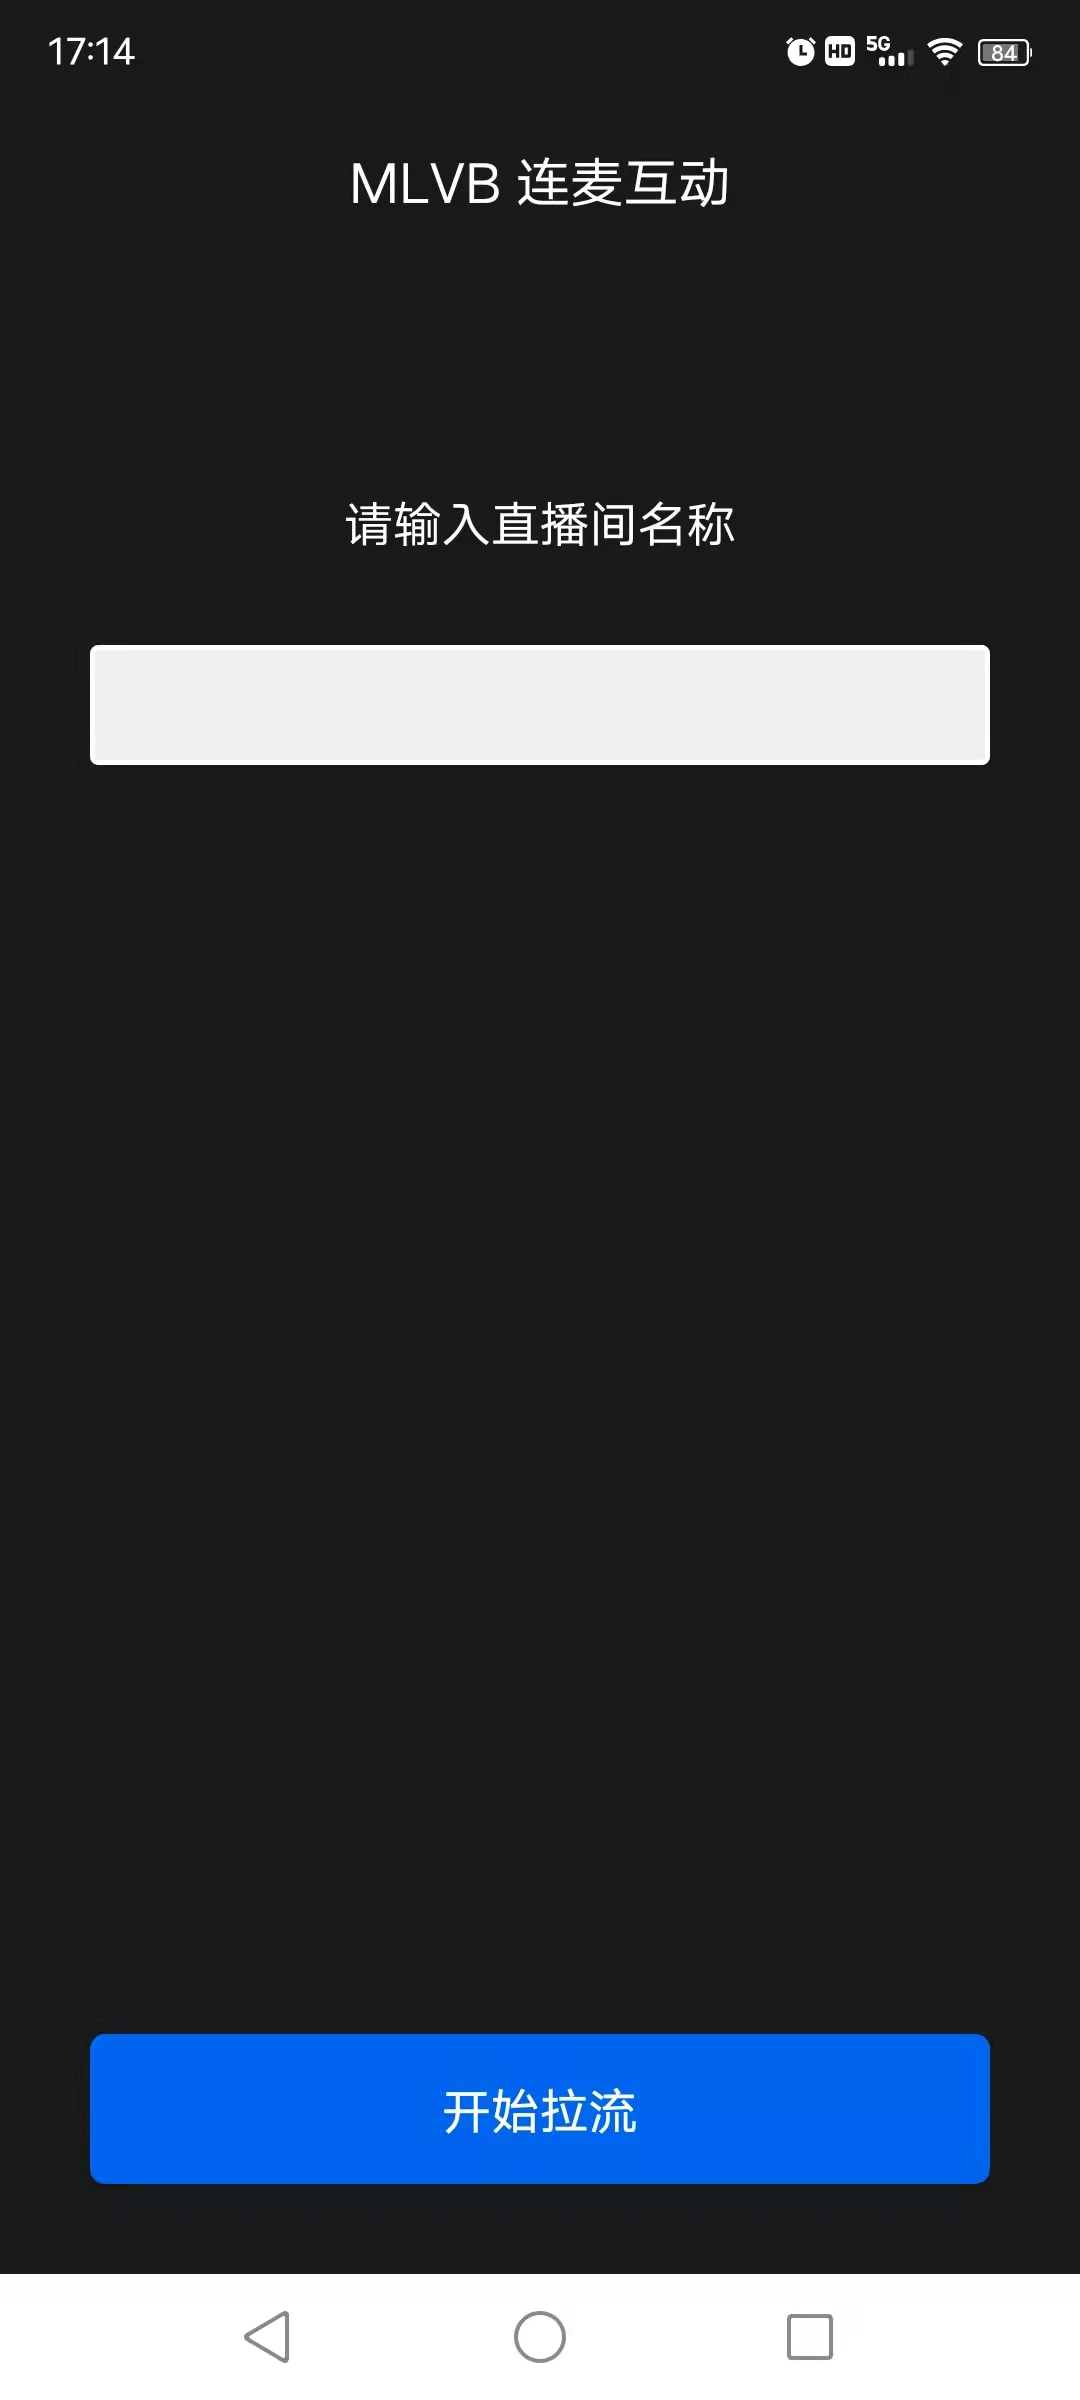 |
主播 | 连麦观众 |
  |  |
主播端(手机 A) | 连麦观众(手机 B) | 普通观众(手机 C) |
 |  |  |
连麦功能实现
如下示意图,用户 A 是主播,B 和 C 都是观众,如果观众 B 要与 主播 A 连麦,需要做的事情非常简单:
观众 B:启动
trtc:// 协议推流,播放流也从 CDN 切到超低延迟的 trtc:// 协议。主播 A:开始播放观众 B 的流,同时发起混流指令,把 A 和 B 的内容合成一路。
观众 C:无需变化,继续 CDN 播放即可,只不过会看到混流后的连麦画面。
1. 主播 RTC 推流
V2TXLivePusher pusher = new V2TXLivePusherImpl(this, V2TXLiveMode.TXLiveMode_RTC);pushURLA= "trtc://cloud.tencent.com/push/streamid?sdkappid=1400188888&userId=A&usersig=xxx";pusher.startPush(pushURLA);
V2TXLivePusher *pusher = [[V2TXLivePusher alloc] initWithLiveMode:V2TXLiveMode_RTC];NSString *pushURLA = @"trtc://cloud.tencent.com/push/streamid?sdkappid=1400188888&userId=A&usersig=xxx";[pusher startPush:pushURLA];
// wxml<live-pusher url="{{pusher.url}}" />// jsimport TRTC from 'trtc-wx-sdk'this.TRTC = new TRTC(this)this.TRTC.createPusher({})data: { pusher: {} }this.setData({pusher: this.TRTC.enterRoom({userID: 'Anchor',sdkAppID: 000000,userSig: 'xxxxxx',roomID: 123456}),}, () => {trtc.getPusherInstance().start() // 开始推流})}
import { createV2TXLivePusher, V2TXLivePusher, V2TXLiveMode } from '@tencentcloud/liteavsdk_professional';const pusher: V2TXLivePusher = createV2TXLivePusher(getContext(this), V2TXLiveMode.V2TXLiveModeRTC);const pushURLA: string = "trtc://cloud.tencent.com/push/streamidA?sdkappid=1400188888&userId=A&usersig=xxx";pusher.startPush(pushURLA);
2. 观众 CDN 拉流
V2TXLivePlayer player = new V2TXLivePlayerImpl(mContext);/*** 这里使用 CDN 拉流,支持 FLV、HLS、WebRTC 协议,任选一种协议。FLV、HLS 等标准协议价格更合理,WebRTC 快直播能够提供更低延迟的互动体验。* playURLA= "http://3891.liveplay.myqcloud.com/live/streamidA.flv";* playURLA= "http://3891.liveplay.myqcloud.com/live/streamidA.hls";* playURLA= "webrtc://3891.liveplay.myqcloud.com/live/streamidA"*/player.startLivePlay(playURLA);
V2TXLivePlayer * player = [[V2TXLivePlayer alloc] init];/*** 这里使用 CDN 拉流,支持 FLV、HLS、WebRTC 协议,任选一种协议。FLV、HLS 等标准协议价格更合理,WebRTC 快直播能够提供更低延迟的互动体验。* NSString *playURLA= @"http://3891.liveplay.myqcloud.com/live/streamidA.flv";* NSString *playURLA= @"http://3891.liveplay.myqcloud.com/live/streamidA.hls";* NSString *playURLA= @"webrtc://3891.liveplay.myqcloud.com/live/streamidA"*/[player setRenderView:view];[player startLivePlay:playURLA];
// wxml<live-player src="{{ url }}" />/*** 这里使用 CDN 拉流,支持 FLV、HLS、WebRTC 协议,任选一种协议。FLV、HLS 等标准协议价格更合理,WebRTC 快直播能够提供更低延迟的互动体验。* playURLA= "http://3891.liveplay.myqcloud.com/live/streamidA.flv";* playURLA= "http://3891.liveplay.myqcloud.com/live/streamidA.hls";* playURLA= "webrtc://3891.liveplay.myqcloud.com/live/streamidA"*/this.setData({ ulr: playURLA })
import { createV2TXLivePlayer, V2TXLivePlayer } from '@tencentcloud/liteavsdk_professional';const player: V2TXLivePlayer = createV2TXLivePlayer(getContext(this));/*** 这里使用 CDN 拉流,支持 FLV、HLS、WebRTC 协议,任选一种协议。* FLV、HLS 等标准协议价格更合理,WebRTC 快直播能够提供更低延迟的互动体验。* playURLA = "http://3891.liveplay.myqcloud.com/live/streamidA.flv";* playURLA = "http://3891.liveplay.myqcloud.com/live/streamidA.hls";* playURLA = "webrtc://3891.liveplay.myqcloud.com/live/streamidA";*/player.startPlay(playURLA);
3. 观众发起连麦
其中观众 B 调用
V2TXLivePusher 发起推流(后续会称呼为连麦观众 B)。V2TXLivePusher pusher = new V2TXLivePusherImpl(this,V2TXLiveMode.TXLiveMode_RTC);pushURLB= "trtc://cloud.tencent.com/push/streamid?sdkappid=1400188888&userId=B&usersig=xxx";pusher.startPush(pushURLB);
V2TXLivePusher *pusher = [[V2TXLivePusher alloc] initWithLiveMode:V2TXLiveMode_RTC];NSString *pushURLB = @"trtc://cloud.tencent.com/push/streamid?sdkappid=1400188888&userId=B&usersig=xxx";[pusher startPush:pushURLB];
// wxml<live-pusher url="{{pusher.url}}" />// jsimport TRTC from 'trtc-wx-sdk'this.TRTC = new TRTC(this)this.TRTC.createPusher({})data: { pusher: {} }this.setData({pusher: this.TRTC.enterRoom({userID: 'audience',sdkAppID: 000000,userSig: 'xxxxxx',roomID: 123456}),}, () => {trtc.getPusherInstance().start() // 开始推流})}
import { createV2TXLivePusher, V2TXLivePusher, V2TXLiveMode } from '@tencentcloud/liteavsdk_professional';const pusher: V2TXLivePusher = createV2TXLivePusher(getContext(this), V2TXLiveMode.V2TXLiveModeRTC);const pushURLB: string = "trtc://cloud.tencent.com/push/streamidB?sdkappid=1400188888&userId=B&usersig=xxx";pusher.startPush(pushURLB);
4. 进入连麦状态
主播 A 调用
V2TXLivePlayer 使用 RTC 协议拉取放连麦观众 B 的流。V2TXLivePlayer player = new V2TXLivePlayerImpl(mContext);playURLB= "trtc://cloud.tencent.com/play/streamid?sdkappid=1400188888&userId=A&usersig=xxx&appscene=live";player.startLivePlay(playURLB);
V2TXLivePlayer * player = [[V2TXLivePlayer alloc] init];NSString* playURLB = @"trtc://cloud.tencent.com/play/streamid?sdkappid=1400188888&userId=A&usersig=xxx&appscene=live";[player setRenderView:view];[player startLivePlay:playURLB];
// wxml<live-player src="{{player.src}} mute-audio={{ false }}" mute-vedio="{{ false }}" />// jsimport TRTC from 'trtc-wx-sdk'this.TRTC = new TRTC(this)data: {player: {}}// 远端用户推送视频this.TRTC.on(TRTC_EVENT.REMOTE_VIDEO_ADD, (event) => {const { player } = event.datathis.setData({ player: player })})// 远端用户推送音频this.TRTC.on(TRTC_EVENT.REMOTE_AUDIO_ADD, (event) => {const { player } = event.datathis.setData({ player: player })})
import { createV2TXLivePlayer, V2TXLivePlayer } from '@tencentcloud/liteavsdk_professional';const player: V2TXLivePlayer = createV2TXLivePlayer(getContext(this));const playURLB: string = "trtc://cloud.tencent.com/play/streamidB?sdkappid=1400188888&userId=A&usersig=xxx&appscene=live";player.startPlay(playURLB);
同时,连麦观众 B 调用
V2TXLivePlayer 切换至 RTC 协议,开始播放主播 A 的流。V2TXLivePlayer player = new V2TXLivePlayerImpl(mContext);playURLA= "trtc://cloud.tencent.com/play/streamid?sdkappid=1400188888&userId=B&usersig=xxx&appscene=live";player.startLivePlay(playURLA);
V2TXLivePlayer * player = [[V2TXLivePlayer alloc] init];NSString* playURLA = @"trtc://cloud.tencent.com/play/streamid?sdkappid=1400188888&userId=B&usersig=xxx&appscene=live";[player setRenderView:view];[player startLivePlay:playURLA];
// wxml<live-player src="{{player.src}} mute-audio={{ false }}" mute-vedio="{{ false }}" />// jsimport TRTC from 'trtc-wx-sdk'this.TRTC = new TRTC(this)data: {player: {}}// 远端用户推送视频this.TRTC.on(TRTC_EVENT.REMOTE_VIDEO_ADD, (event) => {const { player } = event.datathis.setData({ player: player })})// 远端用户推送音频this.TRTC.on(TRTC_EVENT.REMOTE_AUDIO_ADD, (event) => {const { player } = event.datathis.setData({ player: player })})
import { createV2TXLivePlayer, V2TXLivePlayer } from '@tencentcloud/liteavsdk_professional';const player: V2TXLivePlayer = createV2TXLivePlayer(getContext(this));const playURLA: string = "trtc://cloud.tencent.com/play/streamidA?sdkappid=1400188888&userId=B&usersig=xxx&appscene=live";player.startPlay(playURLA);
此时主播 A 和 连麦观众 B 即可进入超低延时的实时互动场景中。
5. 连麦成功后,进行混流
为了保证观众可以看到连麦观众 B 的画面,这里主播 A 需要发起一次混流操作。也就是将主播 A 自己和连麦观众 B,混合成一路流。观众可以在一路流上看到主播和连麦观众进行互动。A 调用 setMixTranscodingConfig 接口启动云端混流,调用时需要设置音频相关的参数,例如 音频采样率
audioSampleRate、音频码率 audioBitrate 和声道数 audioChannels 等。如果您的业务场景中也包含视频,需同时设置视频相关的参数,例如 视频宽度
videoWidth、视频高度 videoHeight、视频码率 videoBitrate、视频帧率 videoFramerate 等。示例代码 :
V2TXLiveDef.V2TXLiveTranscodingConfig config = new V2TXLiveDef.V2TXLiveTranscodingConfig();// 设置分辨率为 720 × 1280, 码率为 1500kbps,帧率为 20FPSconfig.videoWidth = 720;config.videoHeight = 1280;config.videoBitrate = 1500;config.videoFramerate = 20;config.videoGOP = 2;config.audioSampleRate = 48000;config.audioBitrate = 64;config.audioChannels = 2;config.outputStreamId = null;config.mixStreams = new ArrayList<>();// 主播摄像头的画面位置V2TXLiveDef.V2TXLiveMixStream local = new V2TXLiveDef.V2TXLiveMixStream();local.userId = "localUserId";local.streamId = null; // 本地画面不用填写 streamID,远程需要local.x = 0;local.y = 0;local.width = videoWidth;local.height = videoHeight;local.zOrder = 0; // zOrder 为 0 代表主播画面位于最底层config.mixStreams.add(local);// 连麦者的画面位置V2TXLiveDef.V2TXLiveMixStream remoteA = new V2TXLiveDef.V2TXLiveMixStream();remoteA.userId = "remoteUserIdA";remoteA.streamId = "remoteStreamIdA"; // 本地画面不用填写 streamID,远程需要remoteA.x = 400; //仅供参考remoteA.y = 800; //仅供参考remoteA.width = 180; //仅供参考remoteA.height = 240; //仅供参考remoteA.zOrder = 1;config.mixStreams.add(remoteA);// 连麦者的画面位置V2TXLiveDef.V2TXLiveMixStream remoteB = new V2TXLiveDef.V2TXLiveMixStream();remoteB.userId = "remoteUserIdB";remoteB.streamId = "remoteStreamIdB"; // 本地画面不用填写 streamID,远程需要remoteB.x = 400; //仅供参考remoteB.y = 800; //仅供参考remoteB.width = 180; //仅供参考remoteB.height = 240; //仅供参考remoteB.zOrder = 1;config.mixStreams.add(remoteB);// 发起云端混流pusher.setMixTranscodingConfig(config);
V2TXLiveTranscodingConfig *config = [[V2TXLiveTranscodingConfig alloc] init];// 设置分辨率为 720 × 1280, 码率为 1500kbps,帧率为 20FPSconfig.videoWidth = 720;config.videoHeight = 1280;config.videoBitrate = 1500;config.videoFramerate = 20;config.videoGOP = 2;config.audioSampleRate = 48000;config.audioBitrate = 64;config.audioChannels = 2;config.outputStreamId = nil;// 主播摄像头的画面位置V2TXLiveMixStream *local = [[V2TXLiveMixStream alloc] init];local.userId = @"localUserId";local.streamId = nil; // 本地画面不用填写 streamID,远程需要local.x = 0;local.y = 0;local.width = videoWidth;local.height = videoHeight;local.zOrder = 0; // zOrder 为 0 代表主播画面位于最底层// 连麦者的画面位置V2TXLiveMixStream *remoteA = [[V2TXLiveMixStream alloc] init];remoteA.userId = @"remoteUserIdA";remoteA.streamId = @"remoteStreamIdA"; // 本地画面不用填写 streamID,远程需要remoteA.x = 400; //仅供参考remoteA.y = 800; //仅供参考remoteA.width = 180; //仅供参考remoteA.height = 240; //仅供参考remoteA.zOrder = 1;// 连麦者的画面位置V2TXLiveMixStream *remoteB = [[V2TXLiveMixStream alloc] init];remoteB.userId = @"remoteUserIdB";remoteB.streamId = @"remoteStreamIdB"; // 本地画面不用填写 streamID,远程需要remoteB.x = 400; //仅供参考remoteB.y = 800; //仅供参考remoteB.width = 180; //仅供参考remoteB.height = 240; //仅供参考remoteB.zOrder = 1;//设置混流 streamsconfig.mixStreams = @[local,remoteA,remoteB];// 发起云端混流pusher.setMixTranscodingConfig(config);
import {V2TXLiveTranscodingConfig, V2TXLiveMixStream, V2TXLiveMixInputType} from '@tencentcloud/liteavsdk_professional';const config: V2TXLiveTranscodingConfig = new V2TXLiveTranscodingConfig();// 设置分辨率为 720 × 1280, 码率为 1500kbps,帧率为 20FPSconfig.videoWidth = 720;config.videoHeight = 1280;config.videoBitrate = 1500;config.videoFramerate = 20;config.videoGOP = 2;config.audioSampleRate = 48000;config.audioBitrate = 64;config.audioChannels = 2;// ArkTS 严格模式下不允许传 null,使用空串等价于不设置config.outputStreamId = '';config.mixStreams = [];// 主播摄像头的画面位置const local: V2TXLiveMixStream = new V2TXLiveMixStream();local.userId = "localUserId";local.streamId = ''; // 本地画面用空串(不填写 streamId)local.x = 0;local.y = 0;local.width = 720; // 与 config.videoWidth 一致local.height = 1280; // 与 config.videoHeight 一致local.zOrder = 0; // zOrder 为 0 代表主播画面位于最底层local.inputType = V2TXLiveMixInputType.V2TXLiveMixInputTypeAudioVideo;config.mixStreams.push(local);// 连麦者 A 的画面位置const remoteA: V2TXLiveMixStream = new V2TXLiveMixStream();remoteA.userId = "remoteUserIdA";remoteA.streamId = "remoteStreamIdA"; // 远端画面必须填写 streamIdremoteA.x = 400; // 仅供参考remoteA.y = 800; // 仅供参考remoteA.width = 180; // 仅供参考remoteA.height = 240; // 仅供参考remoteA.zOrder = 1;remoteA.inputType = V2TXLiveMixInputType.V2TXLiveMixInputTypeAudioVideo;config.mixStreams.push(remoteA);// 连麦者 B 的画面位置const remoteB: V2TXLiveMixStream = new V2TXLiveMixStream();remoteB.userId = "remoteUserIdB";remoteB.streamId = "remoteStreamIdB"; // 远端画面必须填写 streamIdremoteB.x = 400;remoteB.y = 800;remoteB.width = 180;remoteB.height = 240;remoteB.zOrder = 1;remoteB.inputType = V2TXLiveMixInputType.V2TXLiveMixInputTypeAudioVideo;config.mixStreams.push(remoteB);// 发起云端混流pusher.setMixTranscodingConfig(config);
注意:
发起云端混流后
不设置 outputStreamId,SDK 会执行默认逻辑,即房间里的多路流会混合到该接口调用者的视频流上,也就是 A + B => A
设置 outputStreamId,SDK 会将房间里的多路流混合到您指定的直播流 ID 上,也就是 A + B => C。
推荐取值默认值,不进行设置,即房间里的多路流会混合到该接口调用者的视频流上。
6. 结束连麦
注意:
RTC 连麦基于实时音视频 TRTC 实现,因此连麦结束后,需停止所有连麦参与者(主播和观众)的 RTC 推流和拉流,否则会产生额外的 TRTC 在房时长费用,具体实现请参考下方代码。
主播 A 停止连麦,先调用
V2TXLivePusher 组件的 setMixTranscodingConfig 并设置为 null 从而停止混流。然后调用 V2TXLivePlayer 的 stopPlay 停止播放连麦观众 B 的流。// 停止混流pusher.setMixTranscodingConfig(null);// 停止播放连麦观众 B 的流player.stopPlay();
// 停止混流[pusher setMixTranscodingConfig: nil];// 停止播放连麦观众 B 的流[player stopPlay];
// wxml<live-player src="{{ player.url }}" />// 停止播放连麦观众 B 的流this.setData({ player: {} })
import { V2TXLiveTranscodingConfig } from '@tencentcloud/liteavsdk_professional';// 停止混流:ArkTS 类型严格,需用 ESObject 中转后再传 nullconst empty: ESObject = null;pusher.setMixTranscodingConfig(empty as V2TXLiveTranscodingConfig);// 停止播放连麦观众 B 的流player.stopPlay();
连麦观众 B 停止连麦,先调用
V2TXLivePusher 组件的 stopPush 停止自身推流。然后停止播放主播 A 的 RTC 流。如需继续以观众身份留在房中观看,请按照步骤2,进行 CDN 拉流。// 停止推流pusher.stopPush();// 停止播放主播 A 的 RTC 流player.stopPlay();
// 停止推流[pusher stopPush];// 停止播放主播 A 的 RTC 流[player stopPlay];
// wxml<live-pusher url="{{ pusher.url }}" /><live-player src="{{ player.src }}" />// 停止播放主播 A 的 RTC 流this.setData({ pusher: {}, player: {} })
// 停止推流pusher.stopPush();// 停止播放主播 A 的 RTC 流player.stopPlay();
常见问题
1. 为什么使用 V2TXLivePusher&V2TXLivePlayer 接口时,同一台设备不支持使用相同 streamid 同时推流和拉流,而 TXLivePusher&TXLivePlayer 可以支持?
当前
V2TXLivePusher&V2TXLivePlayer 是 腾讯云 TRTC 协议实现,其基于 UDP 的超低延时的私有协议,考虑到用户的具体使用场景,不支持同一台设备,使用相同的 streamid,一边推超低延时流,一边拉超低延时的流。2. V2TXLivePusher&V2TXLivePlayer 如何设置音质或者画质呢?
3. V2TXLivePusher#startPush 或 V2TXLivePlayer#startLivePlay 收到错误码:-5代表什么意思?
4. RTC 连麦方案的时延性有可以参考的数据吗?
主播连麦的延时 < 200ms,主播和观众的延时在 100ms - 1000ms。
5. RTC 推流成功后,使用 CDN 拉流一直提示404?
检查一下是否有开启实时音视频服务的旁路直播功能,基本原理是 RTC 协议推流后,如果需要使用 CDN 播放,RTC 会在后台服务中旁路流信息到 CDN 上。
6. 如何避免额外计费?
及时主动停止推流(
V2TXLivePusher 的 stopPush)和拉流(V2TXLivePlayer 的 stopPlay)。只要推流或拉流在进行中,就会正常计费。7.观众连麦支持哪些平台?
观众连麦支持 iOS、Android、OHOS、小程序和 Flutter 端。


