操作场景
腾讯云容器服务 TKE 支持通过创建 PV/PVC,并在创建工作负载添加数据卷时使用已有 PVC,实现通过 PV 和 PVC 管理云硬盘。本文介绍如何通过控制台、kubectl 两种方式实现 PV 和 PVC 管理云硬盘。
操作步骤
控制台操作指引
通过控制台创建 StorageClass
静态创建 PV
说明:
静态创建 PV 适用于已有存量云盘,并在集群内使用的场景。
1. 登录 容器服务控制台,在左侧导航栏中选择集群。
2. 在集群列表中,单击目标集群 ID,进入集群详情页。
3. 选择左侧菜单栏中的存储 > PersistentVolume,在 PersistentVolume 页面单击新建。如下图所示:

4. 在新建 PersistentVolume 页面,参考以下信息进行创建。如下图所示:
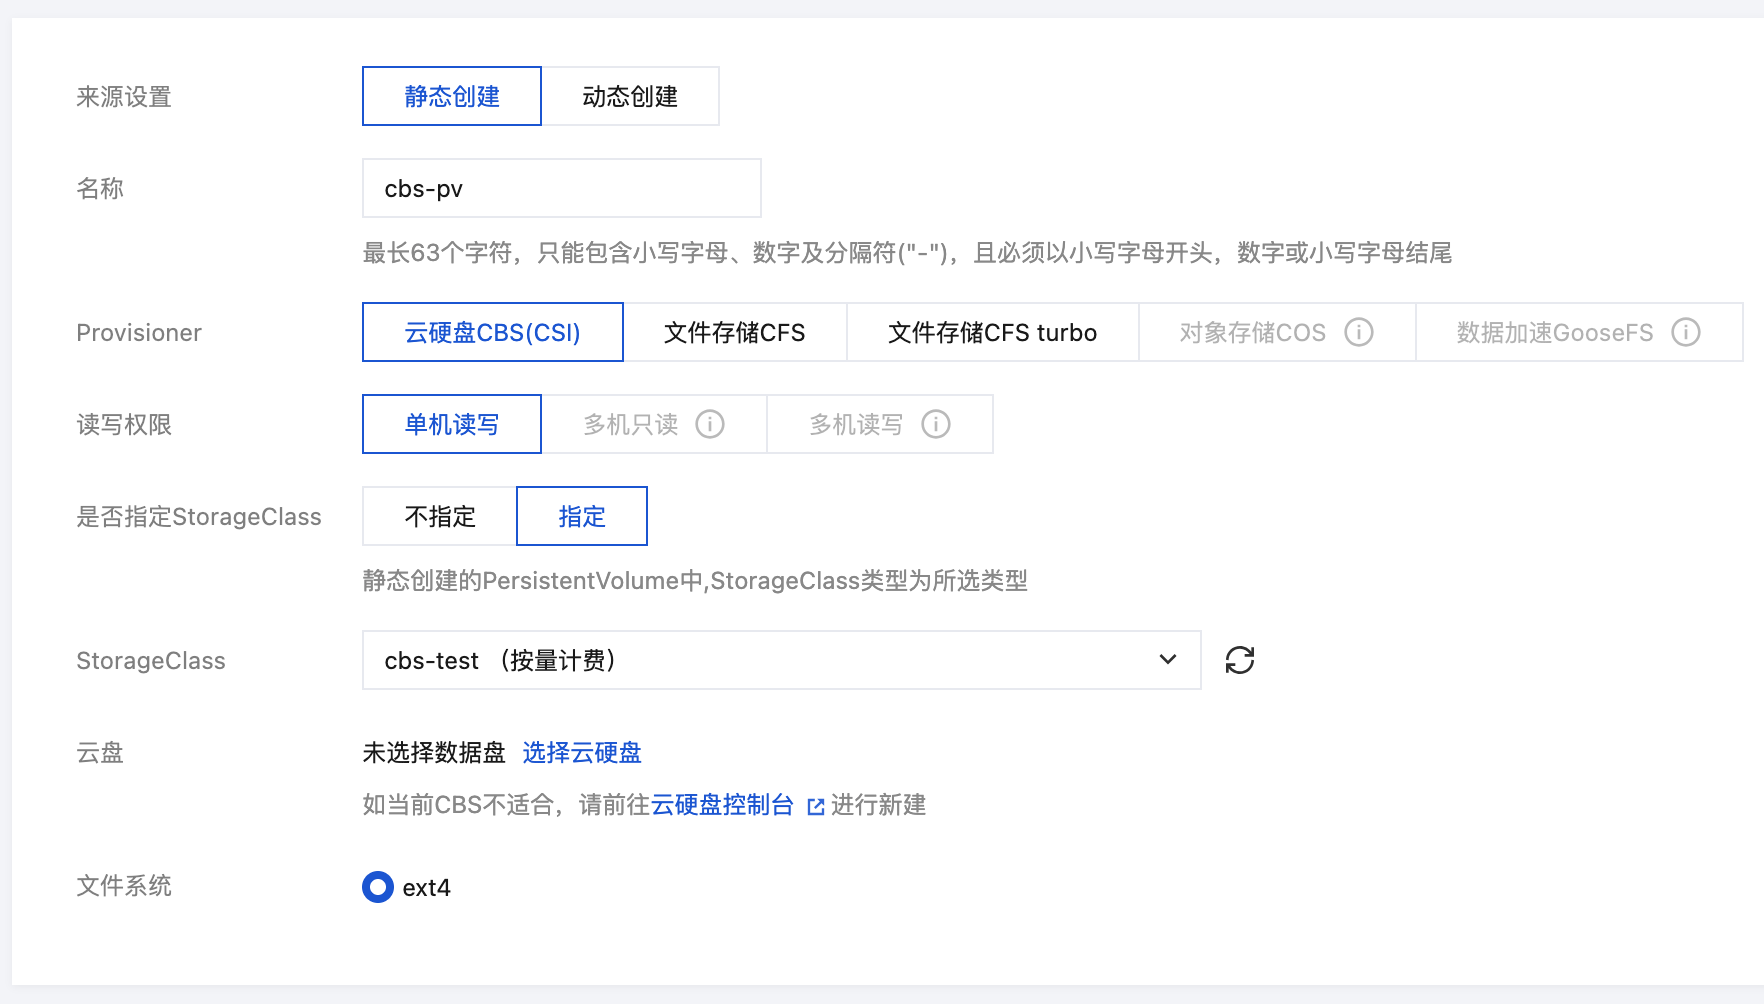
主要参数信息如下:
来源设置:选择静态创建。
名称:自定义,本文以
cbs-pv 为例。Provisioner:选择云硬盘CBS。
读写权限:云硬盘仅支持单机读写。
StorageClass:按需选择合适的 StorageClass。本文以选择在 通过控制台创建 StorageClass 步骤中创建的
cbs-test 为例。说明:
PVC 和 PV 会绑定在同一个 StorageClass 下。
不指定意味着该 PV 对应的 StorageClass 取值为空,对应 YAML 文件中的
storageClassName 字段取值为空字符串。云盘:选择已经创建好的云硬盘。
文件系统:默认为 ext4。
5. 单击创建 PersistentVolume 即可完成创建。
创建 PVC
1. 在集群详情页,选择左侧菜单栏中的存储 > PersistentVolumeClaim,在 PersistentVolumeClaim 页面单击新建。如下图所示:

2. 在新建 PersistentVolumeClaim 页面,参考以下信息进行创建。如下图所示:
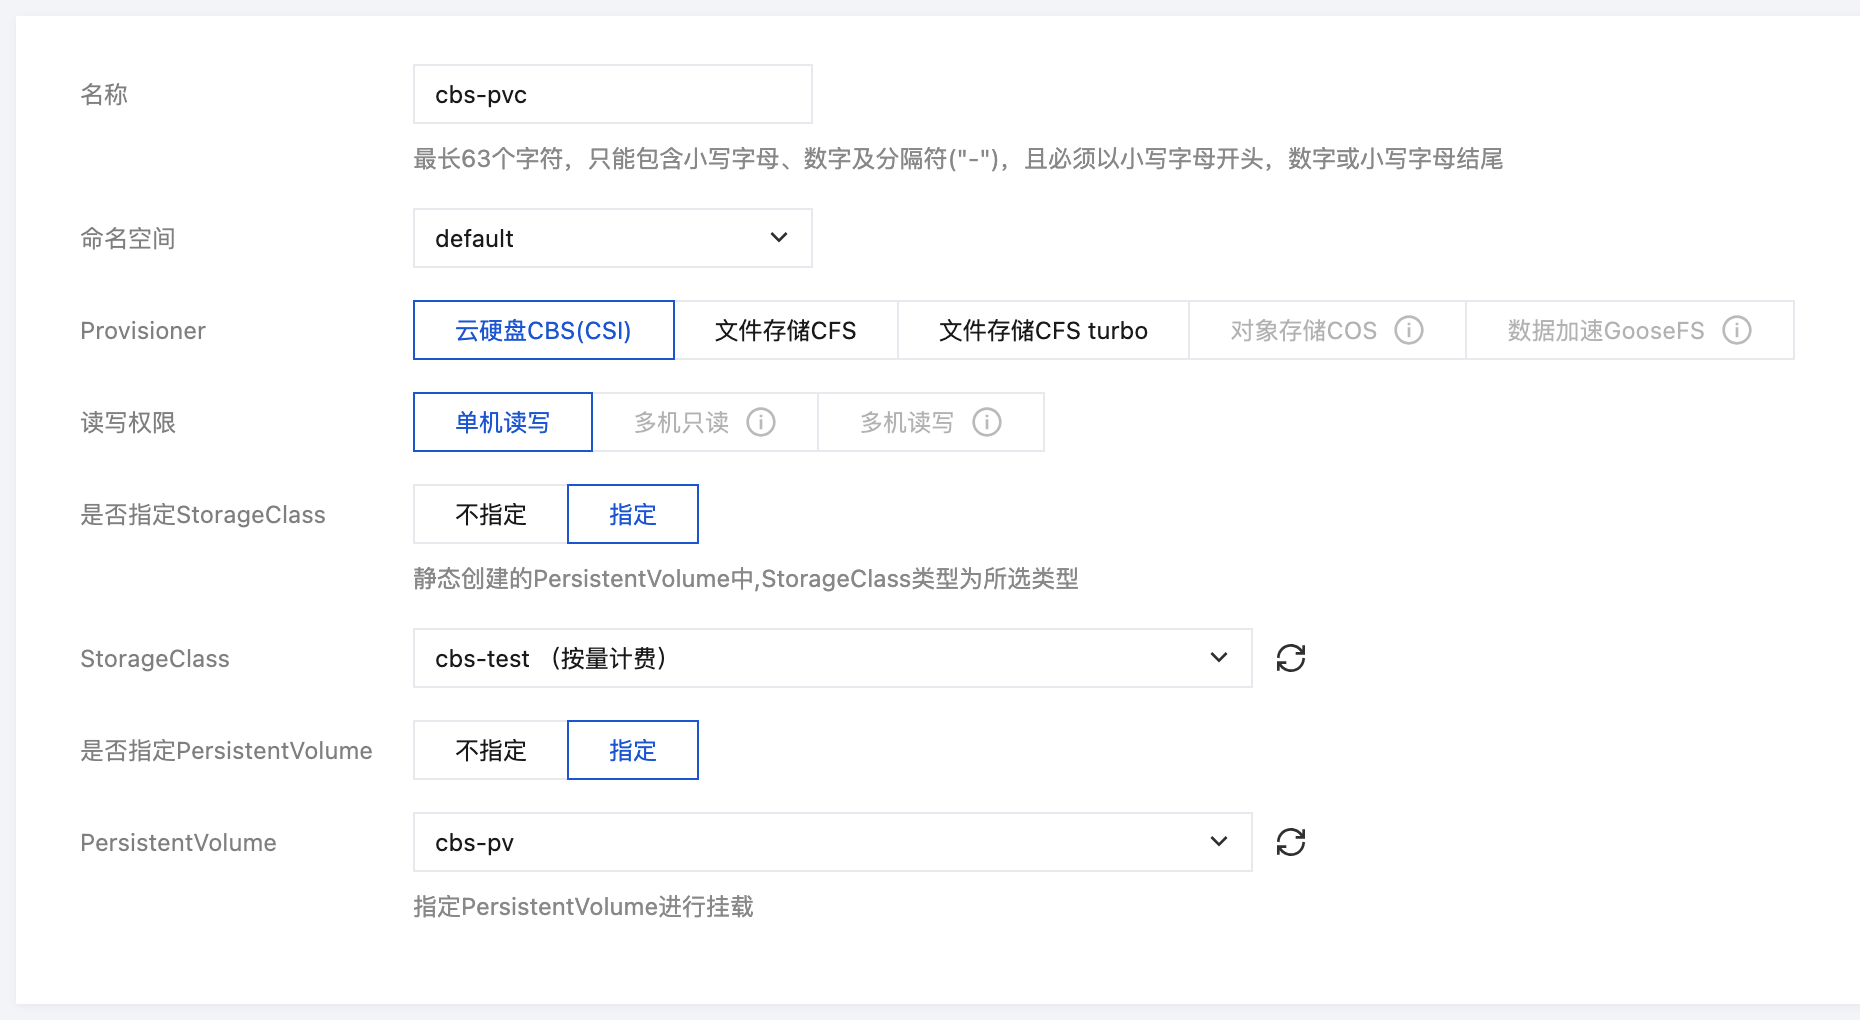
主要参数信息如下:
名称:自定义,本文以
cbs-pvc 为例。命名空间:选择 “default”。
Provisioner:选择云硬盘CBS。
读写权限:云硬盘只支持单机读写。
StorageClass:按需选择合适的 StorageClass。本文以选择在 通过控制台创建 StorageClass 步骤中创建的
cbs-test 为例。说明:
PVC 和 PV 会绑定在同一个 StorageClass 下。
不指定意味着该 PVC 对应的 StorageClass 取值为空,对应 YAML 文件中的
storageClassName 字段取值为空字符串。PersistentVolume:按需指定 PersistentVolume,本文选择在 静态创建PV 步骤中创建的
cbs-pv 为例。说明:
只有与指定的 StorageClass 相同并且状态为 Available 和 Released 的 PV 为可选状态,如果当前集群内没有满足条件的 PV 可选,请选择“不指定”PersistentVolume。
如果选择的 PV 状态为 Released,还需手动删除该 PV 对应 YAML 配置文件中的
claimRef 字段,该 PV 才能顺利与 PVC 绑定。详情请参见 查看 PV 和 PVC 的绑定规则。3. 单击创建PersistentVolumeClaim,即可完成创建。
创建 Workload 使用 PVC 数据卷
说明:
该步骤以创建工作负载 Deployment 为例。
1. 在集群详情页,选择左侧菜单栏中的工作负载 > Deployment。
2. 单击新建,在新建 Deployment 页面,参考 创建 Deployment 进行创建,并参考以下信息进行数据卷挂载。如下图所示:
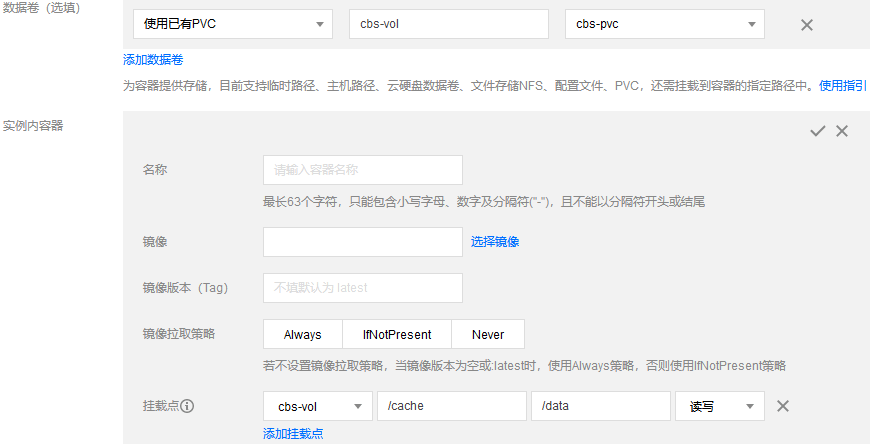
数据卷(选填):
数据卷类型:选择“使用已有PVC”。
数据卷名称:自定义,本文以
cbs-vol 为例。选择 PVC:选择在步骤 创建 PVC 中已创建的 “cbs-pvc”。
实例内容器:单击添加挂载点,进行挂载点设置。
数据卷:选择该步骤中已添加的数据卷 “cbs-vol”。
目标路径:填写目标路径,本文以
/cache 为例。挂载子路径:仅挂载选中数据卷中的子路径或单一文件。例如,
/data 或 /test.txt。3. 单击创建 Deployment 即可完成创建。
注意:
如使用 CBS 的 PVC 挂载模式,则数据卷只能挂载到一台 Node 主机上。
kubectl 操作指引
您可通过以下 YAML 示例文件,使用 kubectl 进行创建操作。
(可选)创建 PV
apiVersion: v1kind: PersistentVolumemetadata:name: cbs-testspec:accessModes:- ReadWriteOncecapacity:storage: 10Gicsi:driver: com.tencent.cloud.csi.cbsfsType: ext4readOnly: falsevolumeHandle: disk-xxx # 指定已有的CBS idstorageClassName: cbs
创建 PVC
kind: PersistentVolumeClaimapiVersion: v1metadata:name: nginx-pv-claimspec:storageClassName: cbsaccessModes:- ReadWriteOnceresources:requests:storage: 10Gi
云硬盘大小必须为10的倍数。
高性能云硬盘最小为10GB,SSD 和增强型 SSD 云硬盘最小为20GB,详情见 创建云硬盘。
使用 PVC
可通过创建 Deployment 使用 PVC 数据卷。YAML 示例如下:
apiVersion: apps/v1kind: Deploymentmetadata:name: nginx-deploymentspec:replicas: 1selector:matchLabels:qcloud-app: nginx-deploymenttemplate:metadata:labels:qcloud-app: nginx-deploymentspec:containers:- image: nginximagePullPolicy: Alwaysname: nginxvolumeMounts:- mountPath: "/opt/"name: pvc-testvolumes:- name: pvc-testpersistentVolumeClaim:claimName: nginx-pv-claim # 已经创建好的 PVC


