AtomicXCore 提供了
CoHostState 核心模块,用于处理主播连线。本文档将指导您如何组合使用该工具,来完成直播场景下连线的完整流程。核心场景
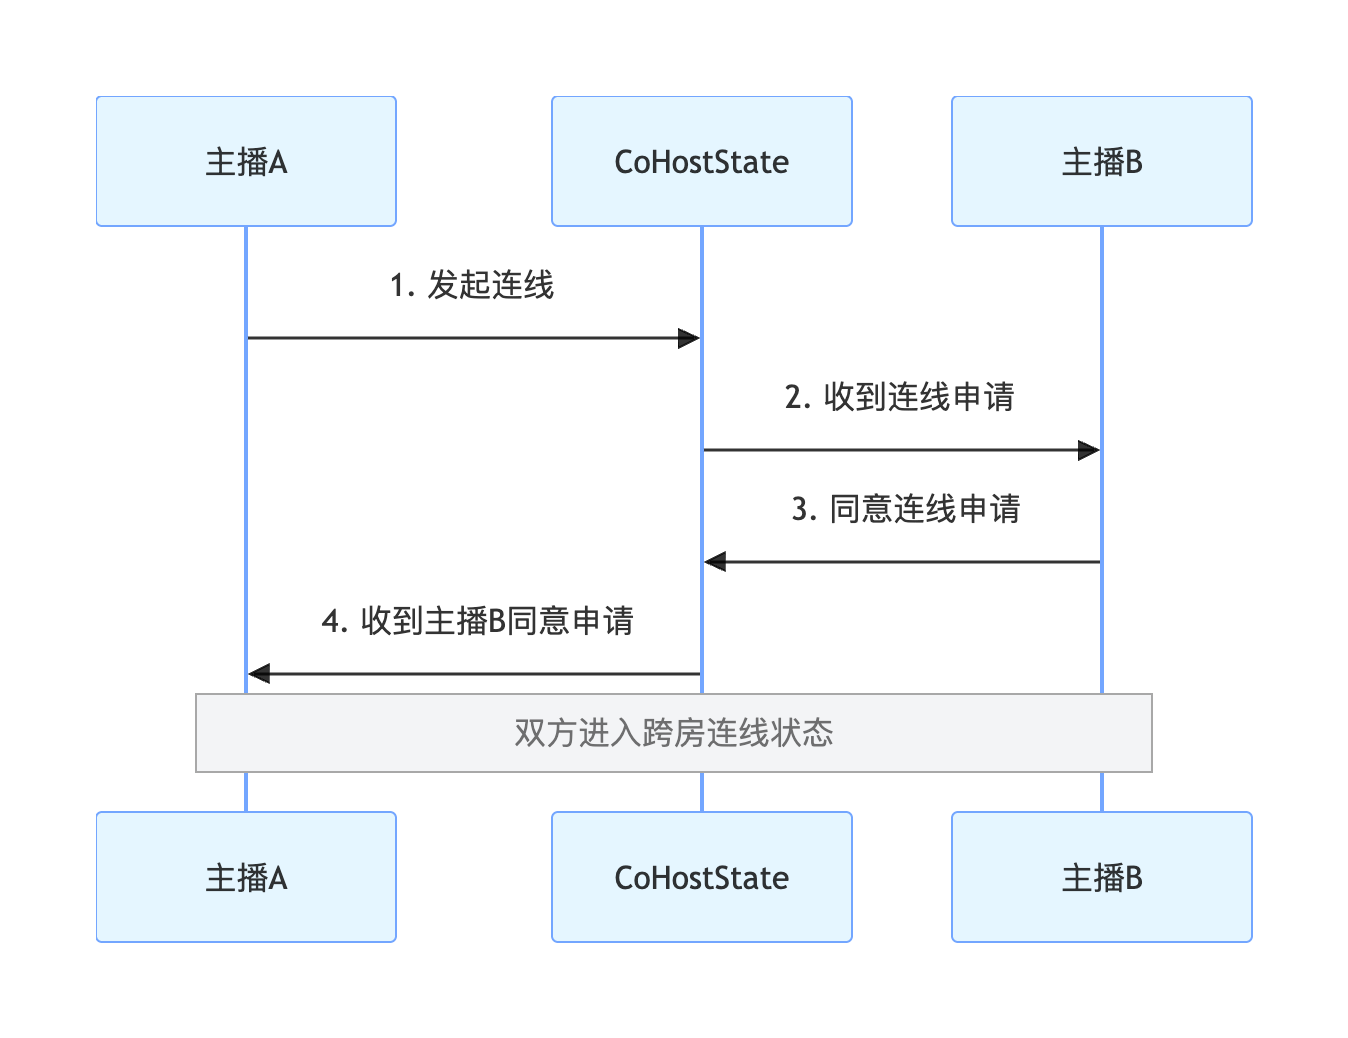
一次完整的“主播连线”通常包含两个核心阶段,其整体流程如下:
实现步骤
步骤1:组件集成
步骤2:实现主播连线
此步骤的目标是让两个主播的画面出现在同一个视图中,我们将使用
CoHostState 来完成。邀请方(主播 A)实现
1. 发起连线邀请
当主播 A 在界面上选择目标主播 B 并发起连线时,调用
requestHostConnection 方法。import { useCoHostState } from 'react-native-tuikit-atomic-x/lib/module/atomic-x/state/CoHostState';const liveID = 'xxx'; // 主播 A 的房间 ID// 通过 liveID 获取 CoHostState 的实例const { requestHostConnection } = useCoHostState(liveID);// 用户点击"连线"按钮,并选择了主播Bconst handleRequestHostConnection = (targetHostLiveID) => {requestHostConnection({liveID, // 主播 A 的房间 IDtargetHostLiveID, // 主播 B 的房间 IDlayoutTemplate: 'HOST_DYNAMIC_GRID', // 选择一个布局模版timeout: 30, // 邀请超时时间onSuccess: () => { console.log('连线邀请已发送,等待对方处理...'); },onError: (error) => { console.log('邀请发送失败', error); },});};
2. 监听邀请结果
通过
addCoHostListener 订阅对应的事件,您可以接收到主播 B 的处理结果。import { useEffect } from 'react';import { useCoHostState } from 'react-native-tuikit-atomic-x/lib/module/atomic-x/state/CoHostState';const liveID = 'xxx'; // 主播 A 的房间 ID// 通过 liveID 获取 CoHostState 的实例const { addCoHostListener, removeCoHostListener } = useCoHostState(liveID);useEffect(() => {const onCoHostRequestAccepted = (event) => {console.log('主播同意了您的连线邀请', event);};const onCoHostRequestRejected = (event) => {console.log('主播拒绝了您的连线邀请', event);};const onCoHostRequestTimeout = () => {console.log('邀请超时,对方未回应');};addCoHostListener('onCoHostRequestAccepted', onCoHostRequestAccepted);addCoHostListener('onCoHostRequestRejected', onCoHostRequestRejected);addCoHostListener('onCoHostRequestTimeout', onCoHostRequestTimeout);return () => {removeCoHostListener('onCoHostRequestAccepted', onCoHostRequestAccepted);removeCoHostListener('onCoHostRequestRejected', onCoHostRequestRejected);removeCoHostListener('onCoHostRequestTimeout', onCoHostRequestTimeout);};}, []);
受邀方(主播 B)实现
1. 接收连线邀请
通过
addCoHostListener 订阅 onCoHostRequestReceived 事件,主播 B 可以监听到来自主播 A 的邀请。import { useEffect } from 'react';import { useCoHostState } from 'react-native-tuikit-atomic-x/lib/module/atomic-x/state/CoHostState';const liveID = 'xxx'; // 主播 B 的房间 ID// 通过 liveID 获取 CoHostState 的实例const { addCoHostListener, removeCoHostListener } = useCoHostState(liveID);useEffect(() => {const onCoHostRequestReceived = (event) => {const inviterData = JSON.parse(event.inviter);console.log('收到连线邀请', inviterData);// 可以在这里进行弹窗提示};addCoHostListener('onCoHostRequestReceived', onCoHostRequestReceived);return () => {removeCoHostListener('onCoHostRequestReceived', onCoHostRequestReceived);};}, []);
2. 响应连线邀请
当主播 B 在弹出的对话框中做出选择后,调用相应的方法。
import { useCoHostState } from 'react-native-tuikit-atomic-x/lib/module/atomic-x/state/CoHostState';const liveID = 'xxx'; // 主播 B 的房间 ID// 通过 liveID 获取 CoHostState 的实例const { acceptHostConnection, rejectHostConnection } = useCoHostState(liveID);// 主播 B 接受连线邀请const handleAcceptHostConnection = (fromHostLiveID) => {acceptHostConnection({liveID,fromHostLiveID, // 从 onCoHostRequestReceived 事件中获取该数据onSuccess: () => { console.log('已接受连线邀请'); },onError: (error) => { console.log('接受连线失败', error); },});};// 主播 B 拒绝连线邀请const handleRejectHostConnection = (fromHostLiveID) => {rejectHostConnection({liveID,fromHostLiveID, // 从 onCoHostRequestReceived 事件中获取该数据onSuccess: () => { console.log('已拒绝连线邀请'); },onError: (error) => { console.log('拒绝连线失败', error); },});};
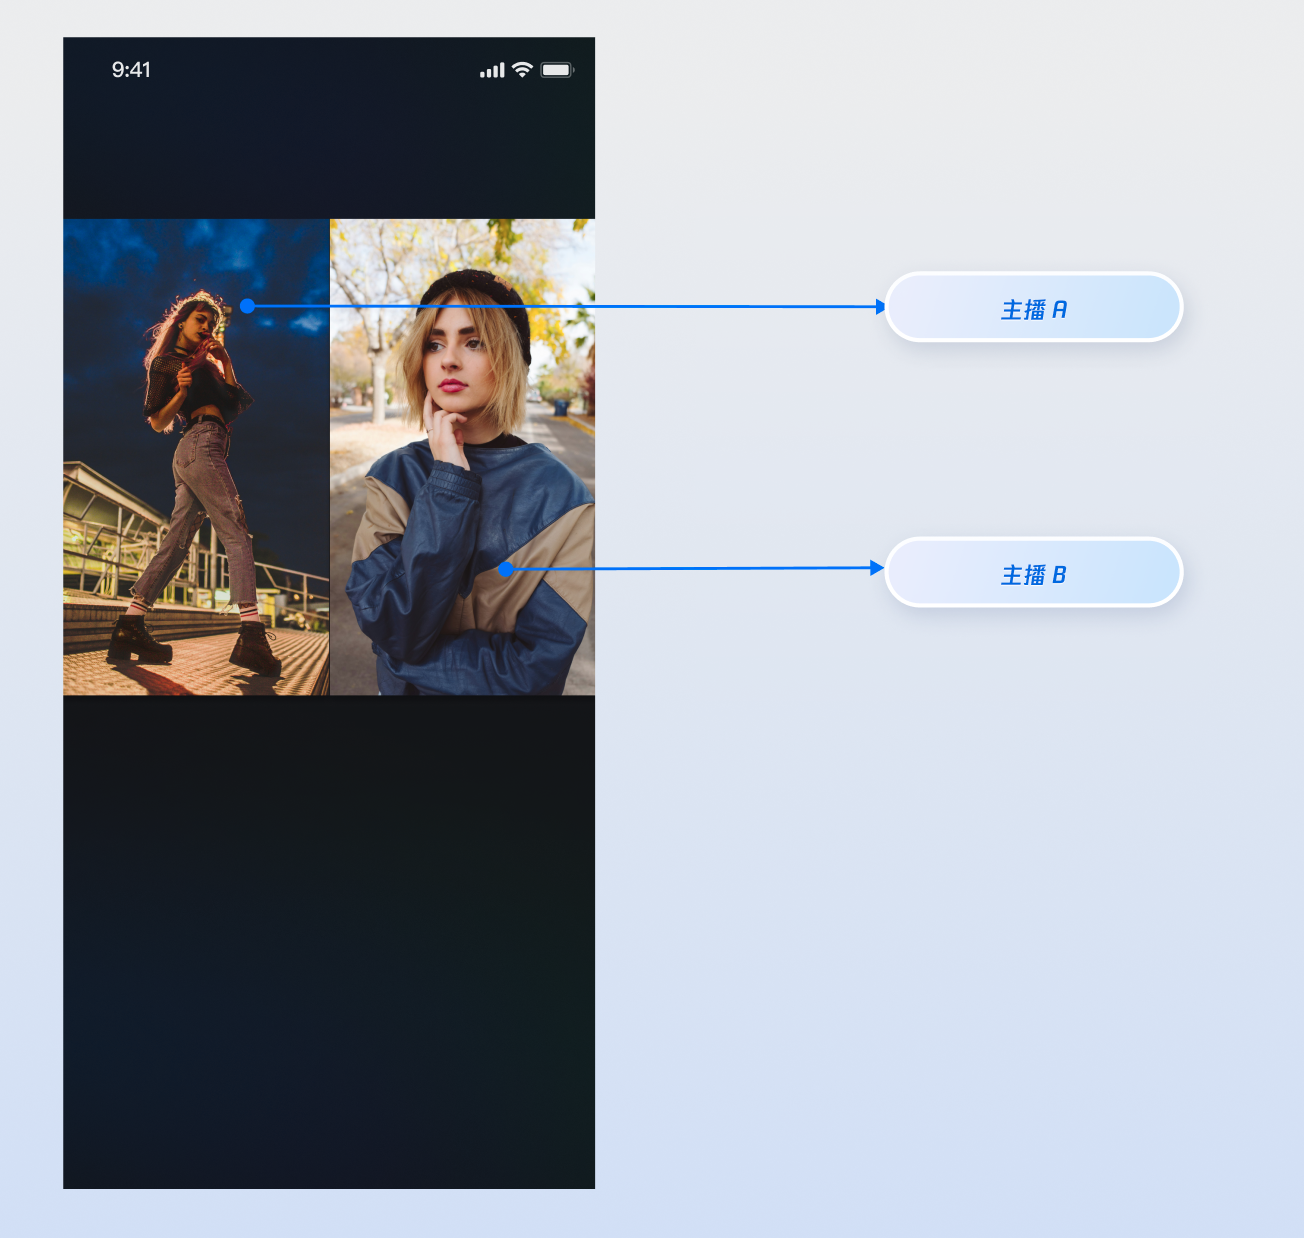
运行效果
当您集成以上功能实现后,请分别使用主播 A 和主播 B 进行对应操作,运行效果如下,您可以参考下一章节 完善 UI 细节 来定制您想要的 UI 逻辑。
完善 UI 细节
您可以在主播连线的视频流画面上添加自定义视图,用于显示昵称、头像等信息,或在他们关闭摄像头时提供占位图,以优化视觉体验。
实现视频流画面的昵称显示
实现效果

实现方式
步骤 1:创建自定义 UI 覆盖层组件 (ParticipantOverlay.js)
这个组件是我们的"UI 贴纸",它只负责根据数据渲染 UI,不关心视频。 在您的 components 目录下,创建一个新文件 ParticipantOverlay.js。 将以下代码复制到文件中。
注意:React Native 中 region 的坐标基于 SDK 返回的 canvas(服务端画布尺寸),需要通过 canvas.w / canvas.h 与屏幕宽度计算缩放比例,不能使用固定的设计稿宽度。
import React, { useMemo } from 'react';import { View, Text, Image, StyleSheet, Dimensions } from 'react-native';const DEFAULT_AVATAR = 'https://liteav-test-1252463788.cos.ap-guangzhou.myqcloud.com/voice_room/voice_room_cover1.png';const { width: SCREEN_WIDTH } = Dimensions.get('window');// 接收来自父组件的核心数据:seatList 和 canvasexport default function ParticipantOverlay({ seatList, canvas }) {if (!seatList || seatList.length === 0) return null;// 根据 canvas 计算缩放比例const scale = useMemo(() => {if (!canvas?.w || !canvas?.h) return { scaleX: 1, scaleY: 1 };const displayWidth = SCREEN_WIDTH;const displayHeight = SCREEN_WIDTH * (canvas.h / canvas.w);return {scaleX: displayWidth / canvas.w,scaleY: displayHeight / canvas.h,};}, [canvas]);// 计算每个成员 UI 容器的精确位置和大小const getParticipantStyle = (participant) => {if (!participant?.region) return {};return {position: 'absolute',left: participant.region.x * scale.scaleX,top: participant.region.y * scale.scaleY,width: participant.region.w * scale.scaleX,height: participant.region.h * scale.scaleY,};};return (// overlay-container<View style={styles.overlayContainer} pointerEvents="none">{/* 遍历 seatList,为每个麦位成员创建独立的 UI 容器 */}{seatList.map((participant) => {if (!participant?.userInfo?.userID) return null;const isCameraOff = participant.userInfo.cameraStatus === 'OFF';return (// participant-ui-container<View key={participant.userInfo.userID} style={getParticipantStyle(participant)}>{/* 条件渲染:根据摄像头状态显示不同 UI */}{isCameraOff ? (// 1. 当摄像头关闭时,显示居中的头像和昵称<View style={styles.avatarPlaceholder}><Imagestyle={styles.avatarImage}source={{ uri: participant.userInfo.userAvatar || DEFAULT_AVATAR }}/><Text style={styles.avatarName}>{participant.userInfo.userName || participant.userInfo.userID}</Text></View>) : (// 2. 当摄像头开启时,显示左下角的昵称条<View style={styles.nicknameBar}><Text style={styles.nicknameText}>{participant.userInfo.userName || participant.userInfo.userID}</Text></View>)}</View>);})}</View>);}const styles = StyleSheet.create({overlayContainer: {position: 'absolute',top: 0,left: 0,right: 0,bottom: 0,},avatarPlaceholder: {flex: 1,backgroundColor: '#2E323A',justifyContent: 'center',alignItems: 'center',},avatarImage: {width: 60,height: 60,borderRadius: 30,},avatarName: {marginTop: 8,fontSize: 13,color: '#fff',},nicknameBar: {position: 'absolute',left: 6,bottom: 6,backgroundColor: 'rgba(0, 0, 0, 0.5)',paddingHorizontal: 8,paddingVertical: 3,borderRadius: 10,},nicknameText: {color: '#fff',fontSize: 11,},});
步骤 2:在直播间页面中组合所有组件
这是将视频层和 UI 层"叠"在一起的关键步骤。 打开您的直播间页面文件,按照以下结构和样式进行修改。
import React from 'react';import { StyleSheet, View } from 'react-native';import { LiveCoreView } from 'react-native-tuikit-atomic-x/lib/module/components/LiveCoreView';import { useLiveSeatState } from 'react-native-tuikit-atomic-x/lib/module/atomic-x/state/LiveSeatState';import ParticipantOverlay from '../../components/ParticipantOverlay';export default function YourAnchorScreen({ route, navigation }) {const { liveID } = route.params || {};const { seatList, canvas } = useLiveSeatState(liveID);return (// page-container<View style={styles.pageContainer}>{/* live-container */}<View style={styles.liveContainer}>{/* 底层:视频渲染层 */}<LiveCoreViewliveID={liveID}coreViewType="pushView" // 主播端: pushView, 观众端: playViewstyle={styles.videoLayer}/>{/* 上层:自定义 UI 覆盖层 */}<ParticipantOverlay seatList={seatList} canvas={canvas} /></View>{/* 页面的其他 UI,例如底部的操作栏 */}{/* <View style={styles.bottomControls}>...</View> */}</View>);}const styles = StyleSheet.create({pageContainer: {flex: 1,backgroundColor: '#000',},liveContainer: {flex: 1,},videoLayer: {flex: 1,},});
API 文档
常见问题
为什么发起了连线邀请,对方却没收到?
请检查
targetHostLiveID 是否正确,并且对方直播间处于正常开播状态。检查网络连接是否通畅,邀请信令有30秒的默认超时时间。


