如何在 Visual Studio 编译调试 Windows 版本的 Nginx 源码?
如何在 Visual Studio 编译调试 Windows 版本的 Nginx 源码?

在我们的《C/C++ 网络编程实战训练营》第二课,我们给大家布置了两个作业,其中之一是为 Nginx 源码制作一个 Visual Studio 工程文件,可以在 Visual Studio 中调试 Windows 版本的 Nginx,这个作业的目的是:
- 熟悉 Visual Studio 的常用工程配置和目录结构;
- 熟悉 Visual Studio 中如何调试 Windows 程序;
- 得到一份可以在 Visual Studio 中调试的 Nginx 版本,为后续继续学习 Nginx 做铺垫。
不少同学在完成这个作业时感觉特别困难,遇到各种错误,本文将详细介绍这一过程。
在 Nginx 官网有一篇帮助文档,告诉我们如何编译生成 Windows 版本的 Nginx,文档链接:https://nginx.org/en/docs/howto_build_on_win32.html
但是这个文档语焉不详,很多关键步骤都没说清楚。本文来详细介绍一下,如何为 Nginx 源码制作一个 Visual Studio 工程文件,并利用 Visual Studio 强大的编译和调试能力学习 Nginx 源码。
根据这个帮助文档,我们需要安装如下依赖环境:
- Visual Studio
- MSYS or MSYS2.
- Perl, if you want to build OpenSSL® and nginx with SSL support. For example ActivePerl or Strawberry Perl.
- Mercurial client.
- PCRE, zlib and OpenSSL libraries sources.
其中,Mercurial 不是必需的,我们可以根据官方给的这个链接,安装 Visual Studio 2022、MSYS2、Strawberry Perl,并下载三个依赖库,我们实际下载的三个文件名和版本号是:
- OpenSSL_1_1_1m.tar.gz
- pcre2-10.40.tar.gz
- zlib-1.2.11.tar.gz
官网 nginx.org 下载链接中提供的 nginx 源码只有 Linux 相关的头文件,缺少 Windows 平台对应的头文件,所以这个源码是无法在 Windows 平台编译的。
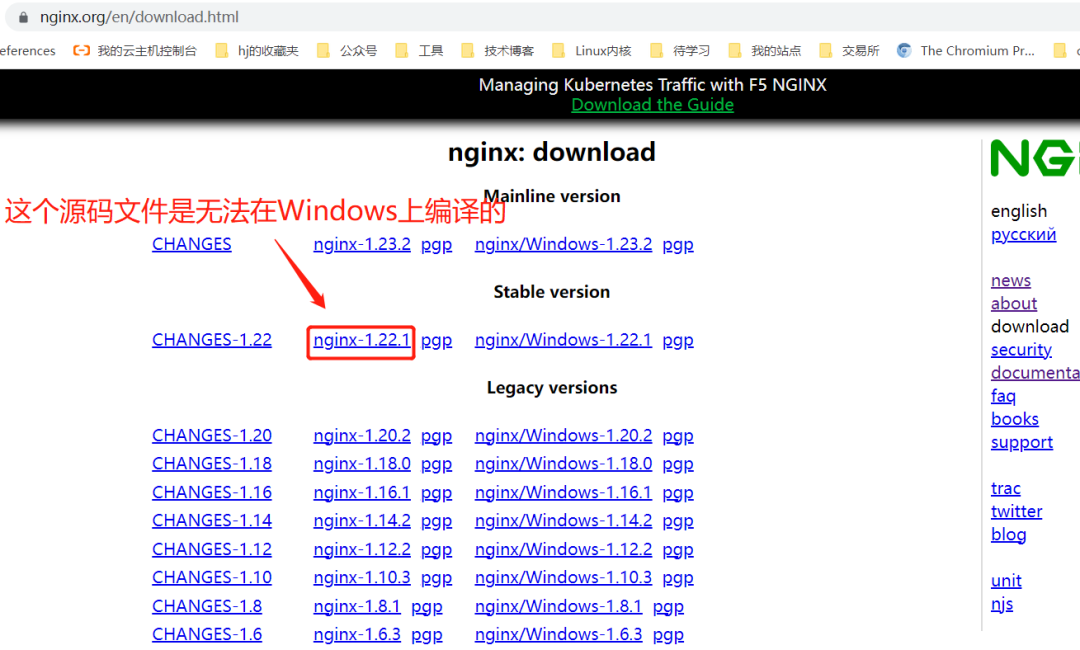
我们可以在上述帮助文档链接的第一步中给出 hg 网址中下载带 Windows 平台的头文件的源码。
hg clone http://hg.nginx.org/nginx
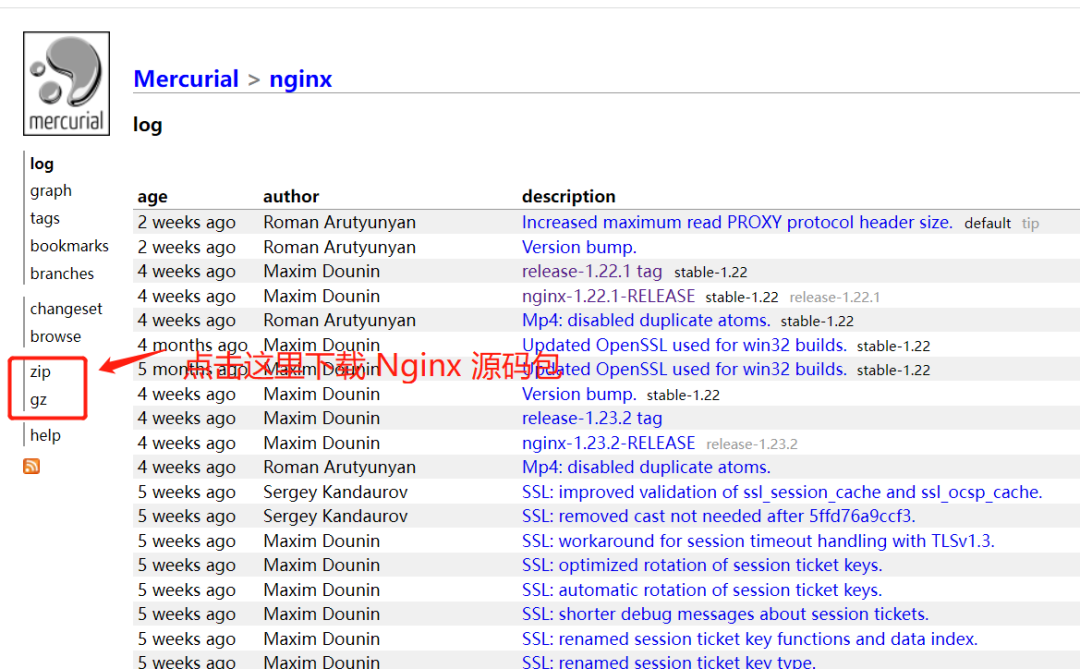
浏览器中访问 http://hg.nginx.org/nginx 这个链接,在左侧导航栏中 zip 或者 tar 包链接中选择一个版本下载:
或者在 github Nginx 仓库 https://github.com/nginx/nginx/tags 已经发布的 tags 中下载一个源码包:
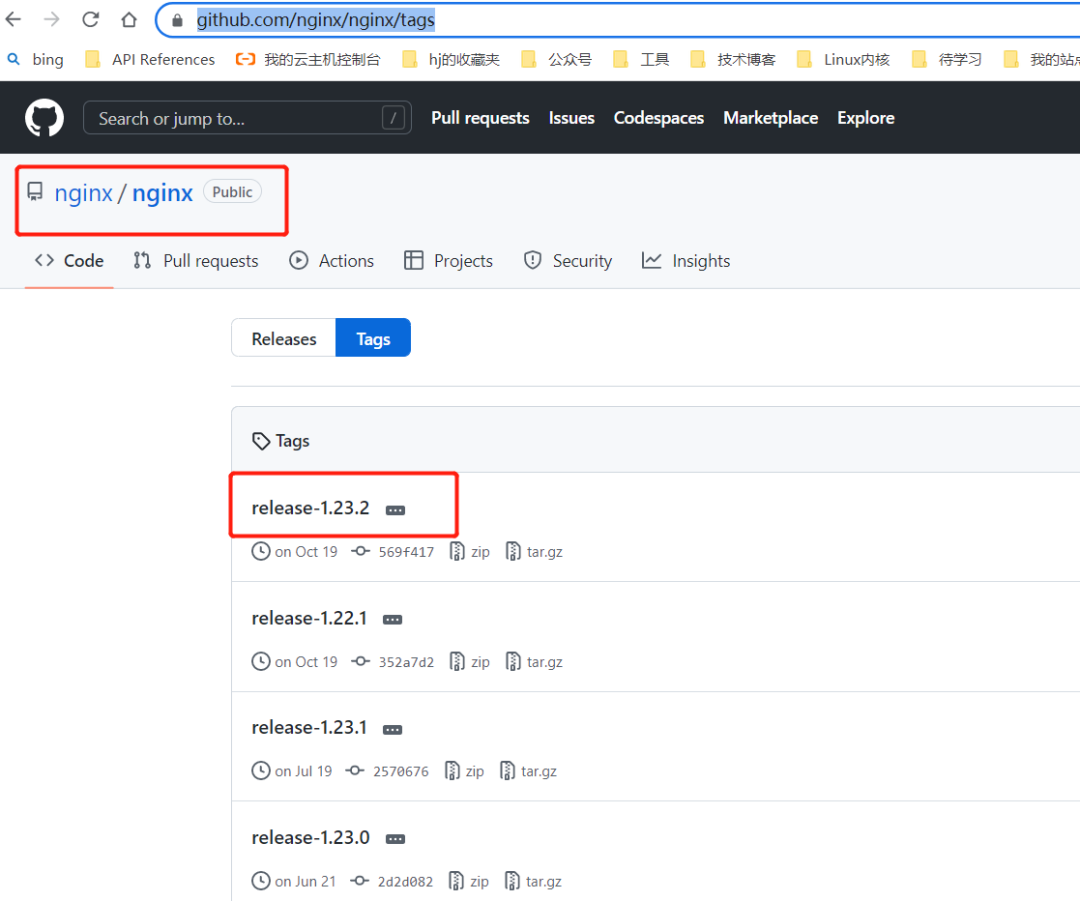
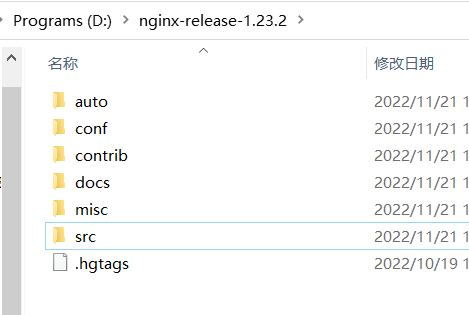
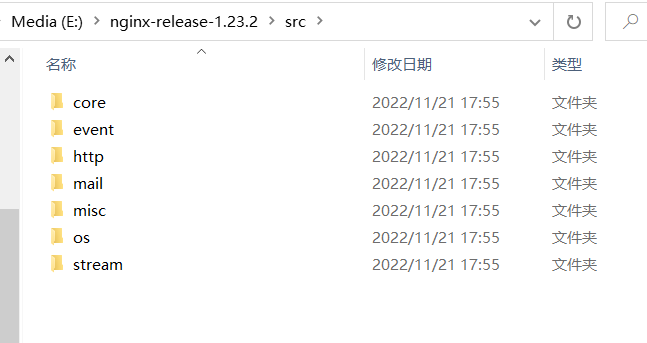
这里我们选择后者,下载源码包 nginx-release-1.23.2.tar.gz,解压后,调整目录结构如下:
然后,将上述三个依赖包 OpenSSL_1_1_1m.tar.gzpcre2-10.40.tar.gzzlib-1.2.11.tar.gz 放入 nginx-release-1.23.2 目录下的 thirdParty 目录。
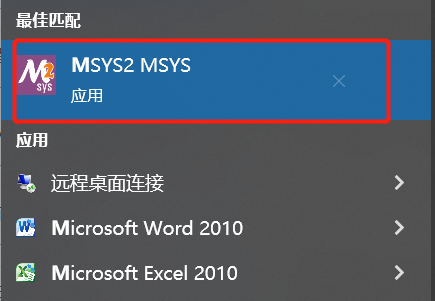
然后启动 MSYS2,进入 nginx-release-1.23.2,在这个目录下建立子目录 objs,在 objs 目录下新建目录 lib,然后将上述三个依赖包解压到 lib 目录:
mkdir -p objs/lib
cd objs/lib
tar -xzf ../../thirdParty/pcre2-10.40.tar.gz
tar -xzf ../../thirdParty/zlib-1.2.11.tar.gz
tar -xzf ../../thirdParty/OpenSSL_1_1_1m.tar.gz
然后进行上两层目录,回到根目录 nginx-release-1.23,执行:
auto/configure \
    --with-cc=cl \
    --with-debug \
    --prefix= \
    --conf-path=conf/nginx.conf \
    --pid-path=logs/nginx.pid \
    --http-log-path=logs/access.log \
    --error-log-path=logs/error.log \
    --sbin-path=nginx.exe \
    --http-client-body-temp-path=temp/client_body_temp \
    --http-proxy-temp-path=temp/proxy_temp \
    --http-fastcgi-temp-path=temp/fastcgi_temp \
    --http-scgi-temp-path=temp/scgi_temp \
    --http-uwsgi-temp-path=temp/uwsgi_temp \
    --with-cc-opt=-DFD_SETSIZE=1024 \
    --with-pcre=objs/lib/pcre2-10.40 \
    --with-zlib=objs/lib/zlib-1.2.11 \
    --with-openssl=objs/lib/openssl-1.1.1m \
    --with-openssl-opt=no-asm \
    --with-http_ssl_module
注意:objs/lib/pcre2-10.40 objs/lib/zlib-1.2.11 objs/lib/openssl-1.1.1m 三个目录要改成你的 objs/lib 下三个依赖库解压后的实际子目录。
执行这个命令会生成 Makefile 文件,输出如下:
zhangyl@zhangyl-pc MSYS /e/nginx-release-1.23.2
# auto/configure \
    --with-cc=cl \
    --with-debug \
    --prefix= \
    --conf-path=conf/nginx.conf \
    --pid-path=logs/nginx.pid \
    --http-log-path=logs/access.log \
    --error-log-path=logs/error.log \
    --sbin-path=nginx.exe \
    --http-client-body-temp-path=temp/client_body_temp \
    --http-proxy-temp-path=temp/proxy_temp \
    --http-fastcgi-temp-path=temp/fastcgi_temp \
    --http-scgi-temp-path=temp/scgi_temp \
    --http-uwsgi-temp-path=temp/uwsgi_temp \
    --with-cc-opt=-DFD_SETSIZE=1024 \
    --with-pcre=objs/lib/pcre2-10.40 \
    --with-zlib=objs/lib/zlib-1.2.11 \
    --with-openssl=objs/lib/openssl-1.1.1m \
    --with-openssl-opt=no-asm \
    --with-http_ssl_module
checking for OS
 + MSYS_NT-10.0-19044 3.3.5-341.x86_64 x86_64
 + using Microsoft Visual C++ compiler
 + cl version: 19.32.31332 for x64
checking for MSYS_NT-10.0-19044 specific features
creating objs/Makefile

Configuration summary
  + using PCRE2 library: objs/lib/pcre2-10.40
  + using OpenSSL library: objs/lib/openssl-1.1.1m
  + using zlib library: objs/lib/zlib-1.2.11

  nginx path prefix: ""
  nginx binary file: "/nginx.exe"
  nginx modules path: "/modules"
  nginx configuration prefix: "/conf"
  nginx configuration file: "/conf/nginx.conf"
  nginx pid file: "/logs/nginx.pid"
  nginx error log file: "/logs/error.log"
  nginx http access log file: "/logs/access.log"
  nginx http client request body temporary files: "temp/client_body_temp"
  nginx http proxy temporary files: "temp/proxy_temp"
  nginx http fastcgi temporary files: "temp/fastcgi_temp"
  nginx http uwsgi temporary files: "temp/uwsgi_temp"
  nginx http scgi temporary files: "temp/scgi_temp"
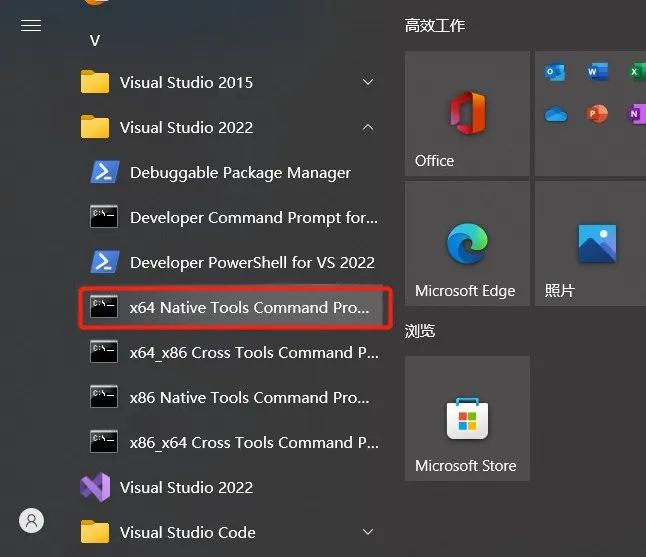
我们这里想编译 64 位版本的 Nginx,因此在电脑开始菜单选择 64 位版本的命令行工具以管理员权限启动:
然后进入 nginx-release-1.23.2 目录,执行:
cd E:\nginx-release-1.23.2
nmake -f objs/Makefile
大约等了几分钟后,使用 nmake 编译 Windows 版本成功。
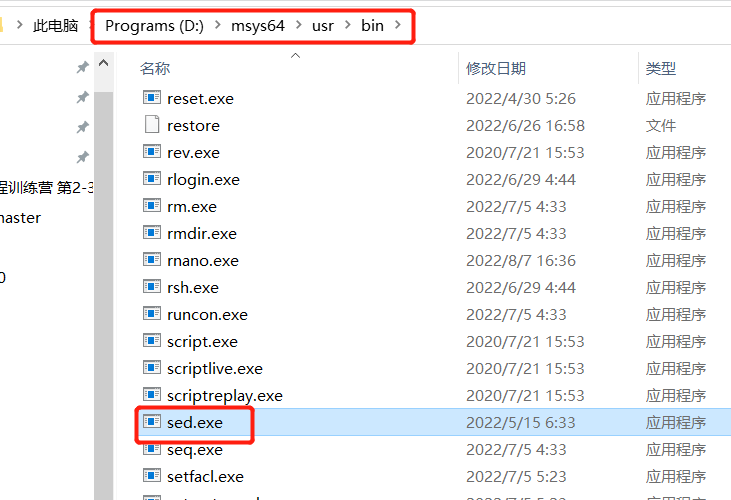
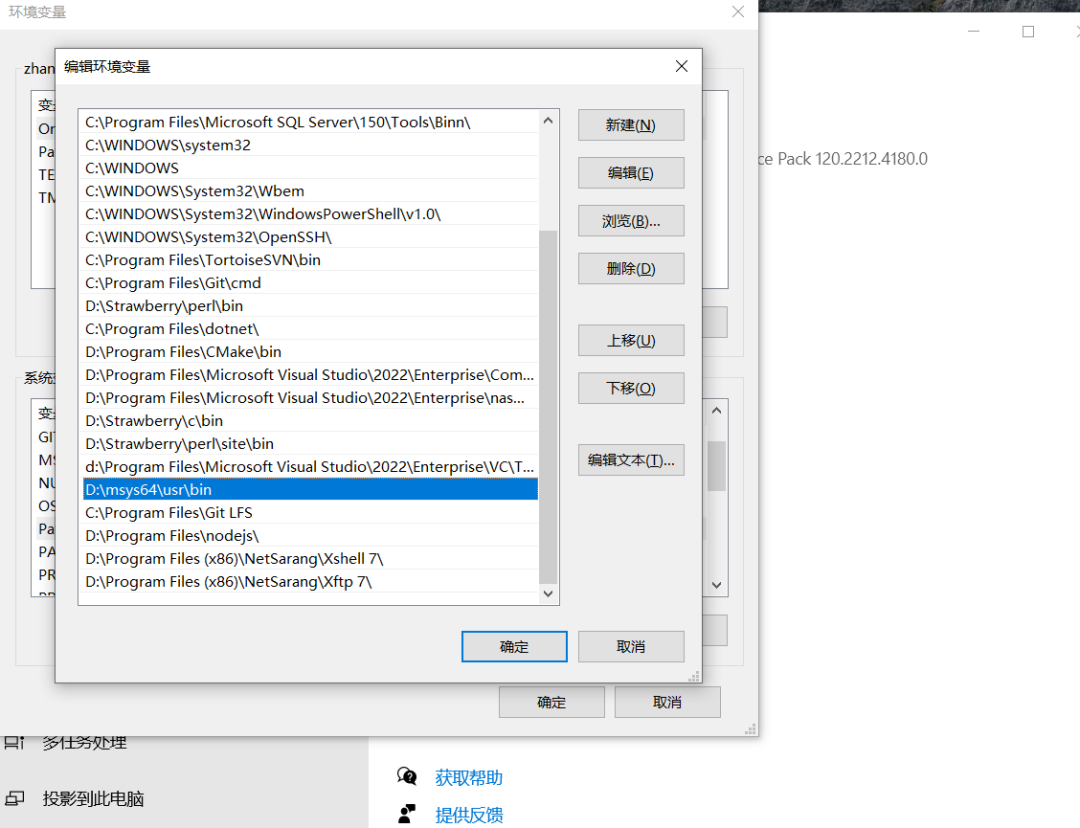
注意:如果在这个过程中提示找不到 sed,sed 原是 Linux 下的程序,我们安装了 MSYS2 之后,在 MSYS2 安装目录下就有了这个文件,叫 sed.exe,将这个文件添加到电脑环境变量 PATH 中即可,例如我的机器上的目录是 D:\msys64\usr\bin。
接着我们开始创建 Nginx 的 Visual Studio 解决方案文件。
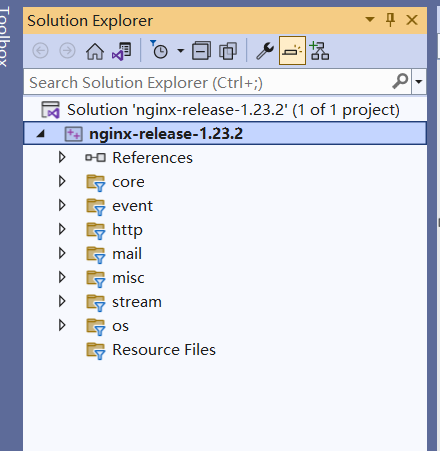
我们先打开 Visual Studio 2022 新建一个名为 nginx-release-1.23.2 的工程,删掉工程中默认的 Header 和 Source 目录,然后保存并关闭解决方案文件。
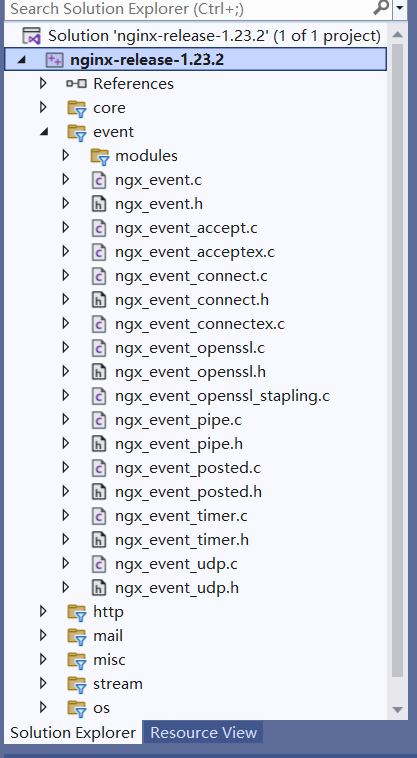
此时 Visual Studio 会在根目录 nginx-release-1.23.2 下新建了一个 nginx-release-1.23.2 子目录,我们将 nginx-release-1.23.2.sln nginx-release-1.23.2.vcxproj nginx-release-1.23.2.vcxproj.filters 三个文件拷贝到根目录 nginx-release-1.23.2 中,然后删掉子目录 nginx-release-1.23.2,接着用 Visual Studio 打开这个 nginx-release-1.23.2.sln 解决方案,然后在这个工程中新建与 src 目录一样的层级结构,如图所示:
然后将 src 子目录下对应的各个 .h 文件和 .c 文件加到 VS 工程对应的目录。
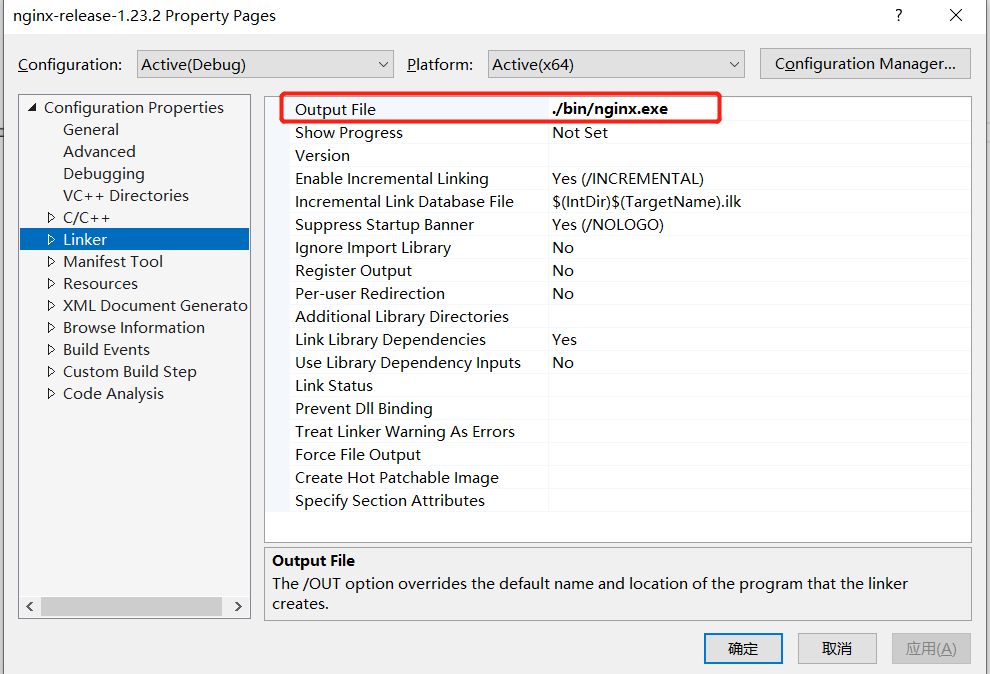
接着修改工程属性设置:
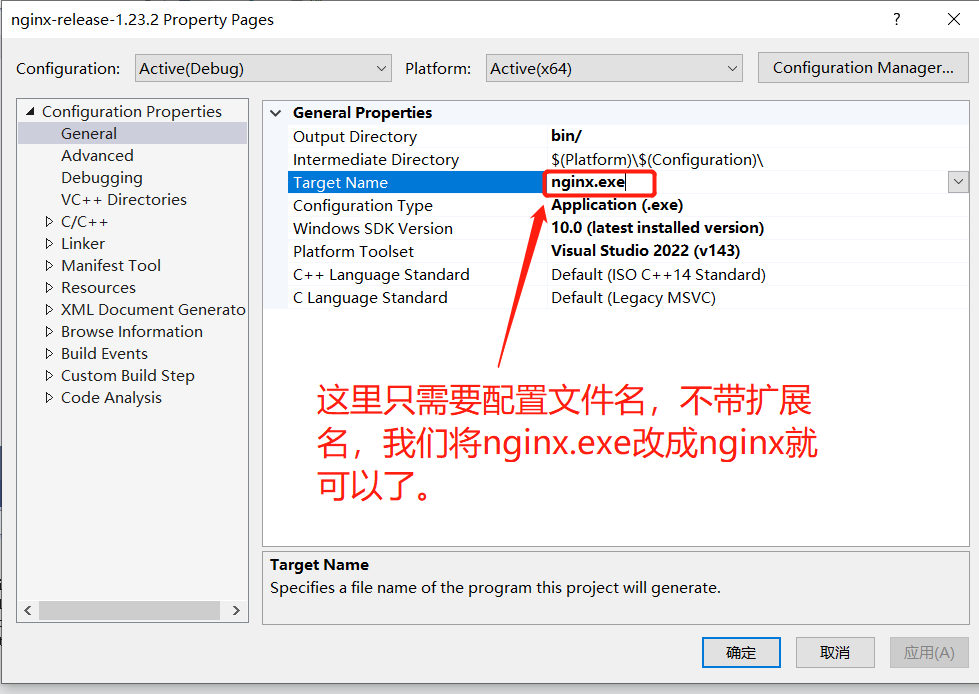
- 将目标输出文件修改为 ./bin/nginx.exe,一共有两个地方需要修改。

2. 由于 Nginx 的自带各个头文件都是用尖括号 <> 形式的 #include,例如:
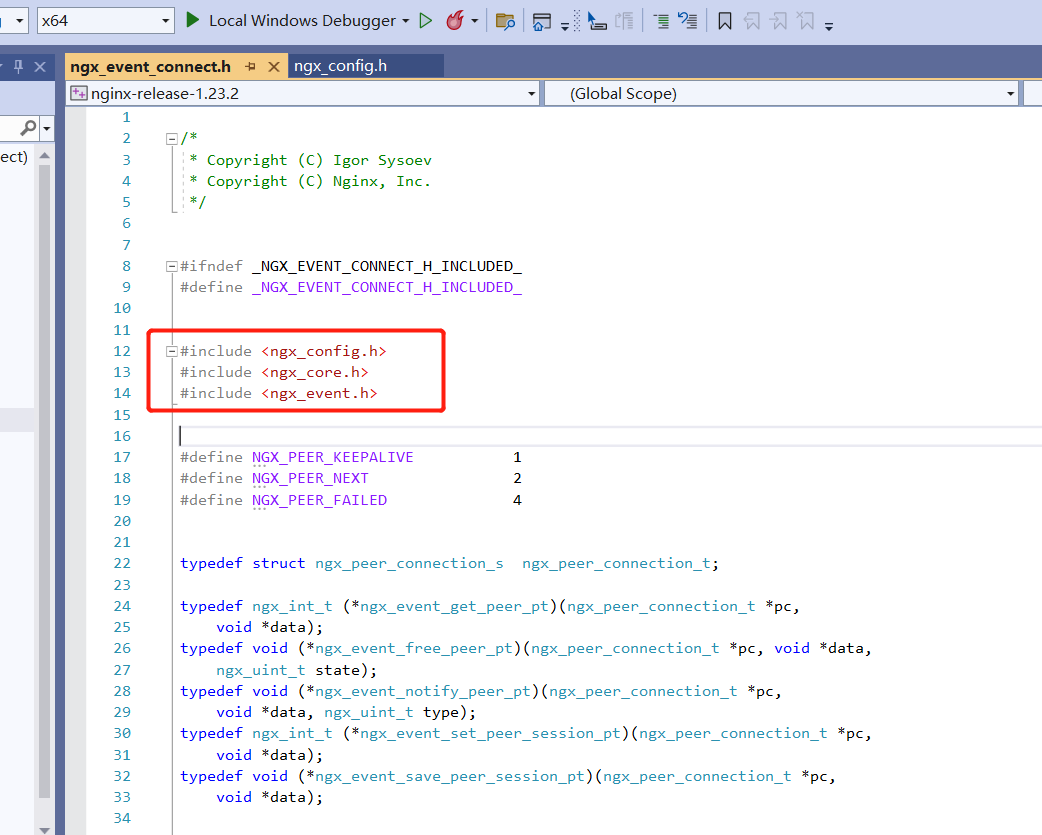
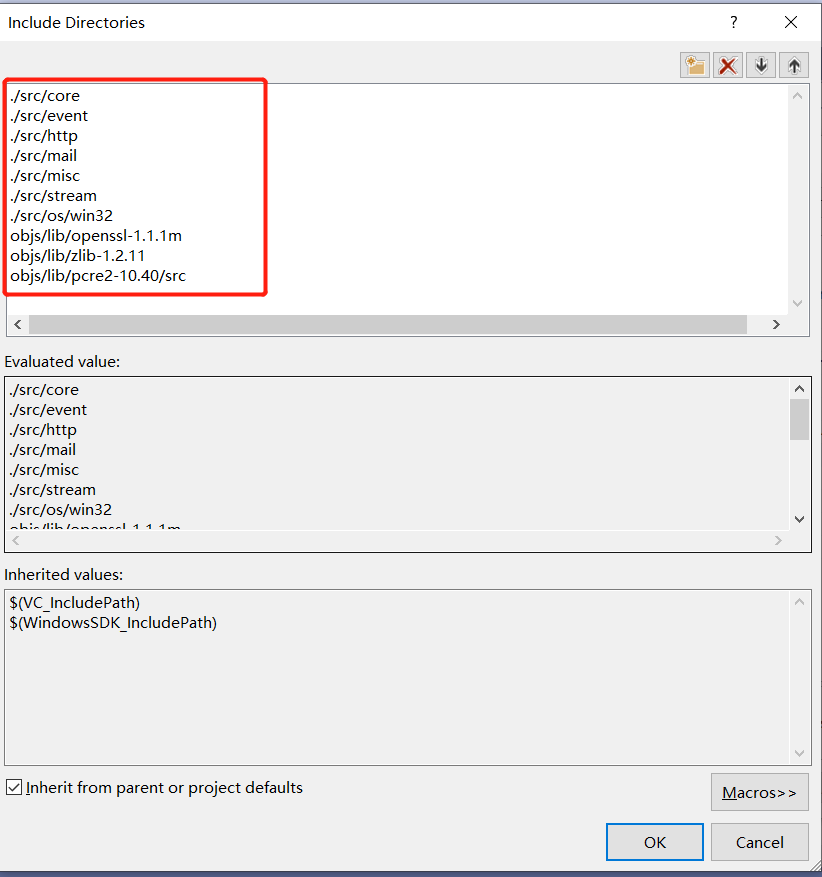
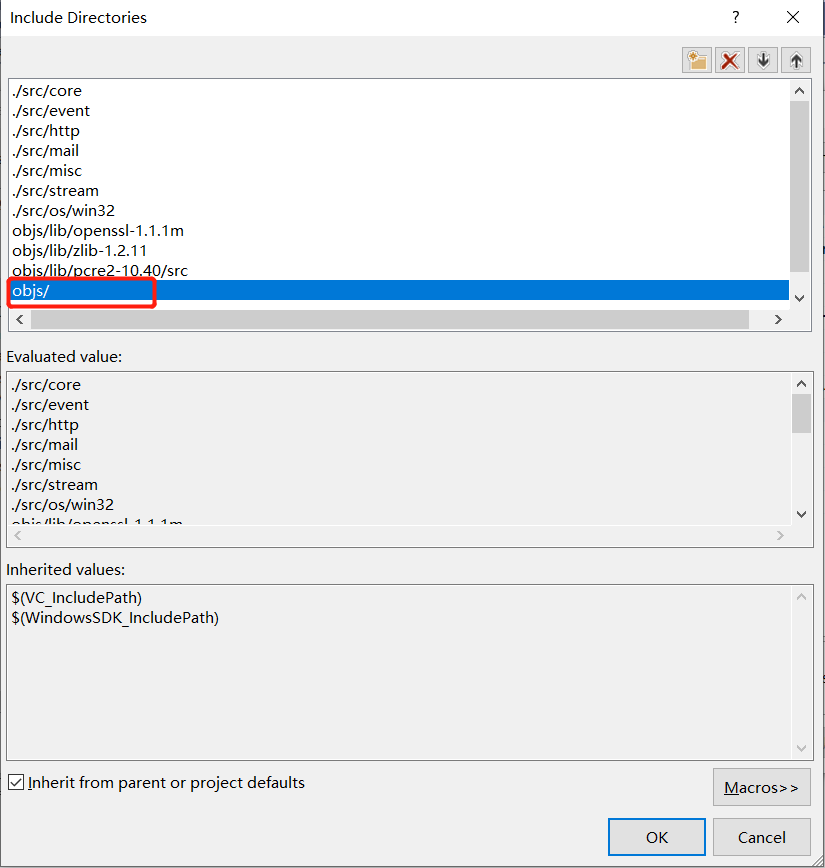
因此,我们需要把这些目录加入到工程的 include 目录,同时 Nginx 依赖 zlib、openssl、pcre2 三个库,我们也需要这三个库的头文件也添加到 工程的 include 目录。

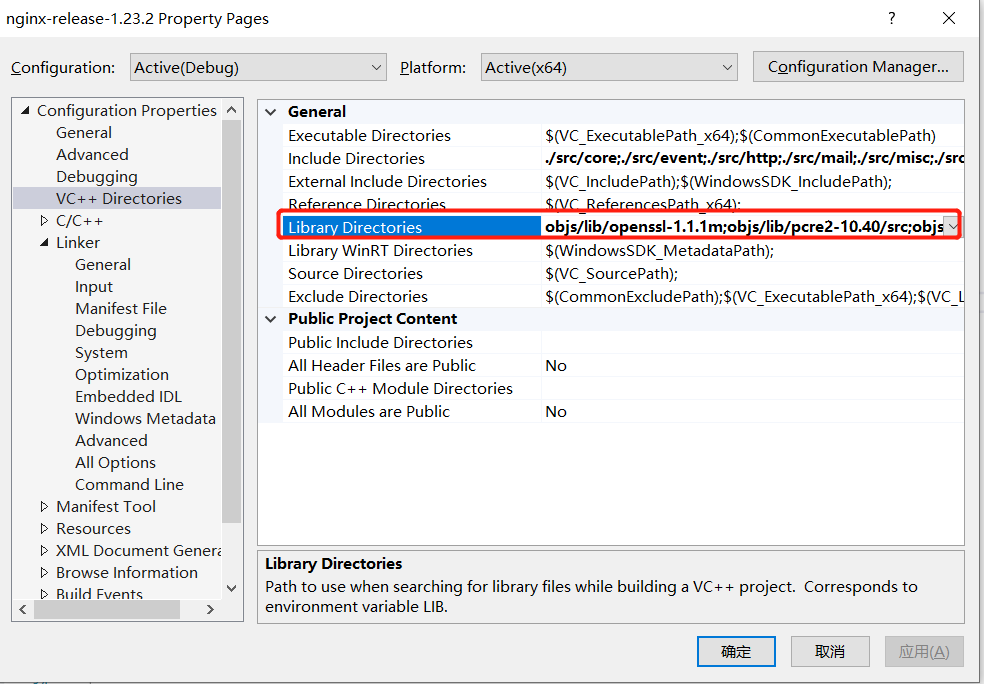
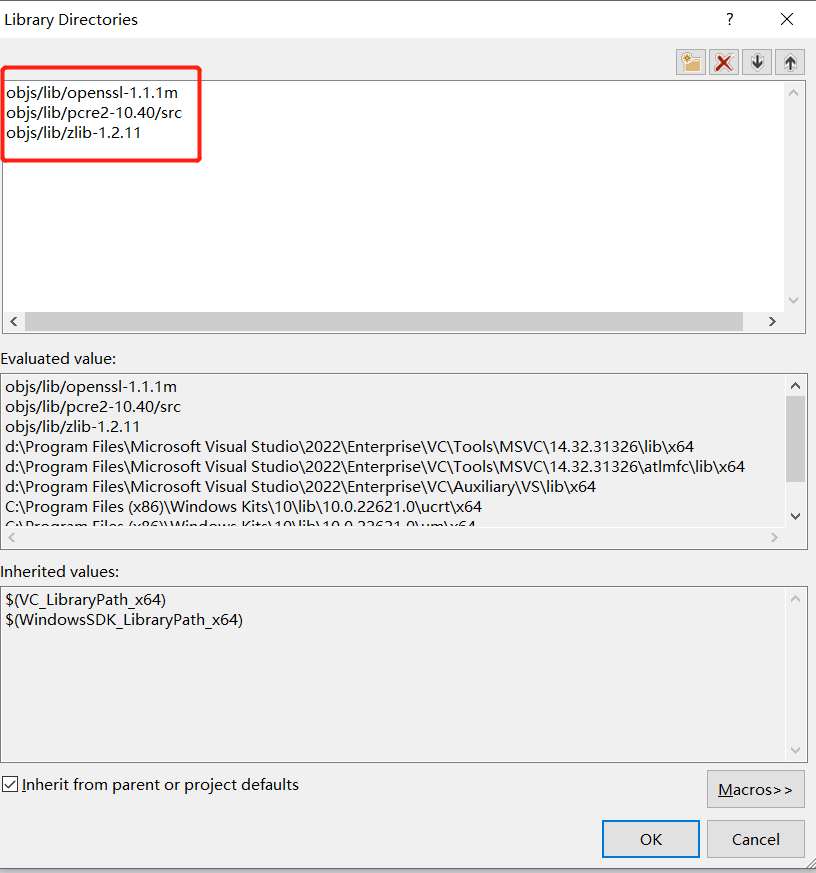
在前面步骤,我们已经生成了 zlib、openssl、pcre2 对应的 lib 文件,我们也需要把他们添加到 VS 的工程 Library 目录,一共两个地方:
配置好之后,我们尝试编译 Nginx 工程,发现报如下错误:
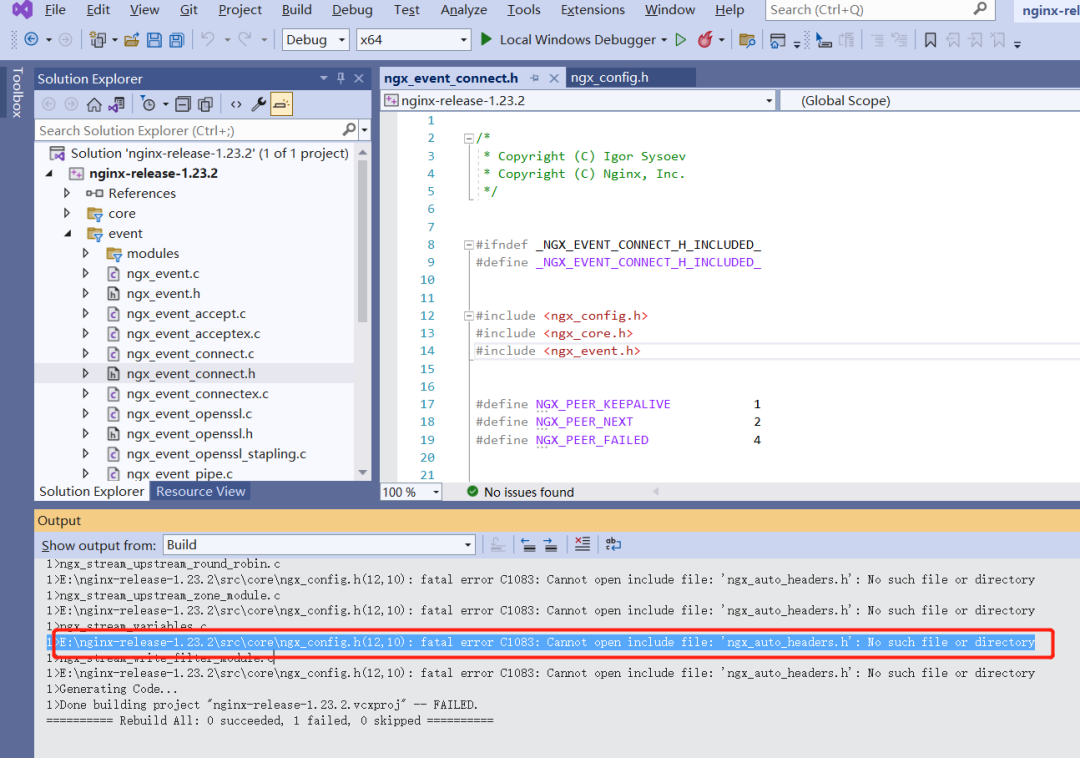
我们在根目录 nginx-release-1.23.2 搜索文件 ngx_auto_headers.h,发现它在 objs 目录,我们将 objs 目录也添加到 Nginx 工程的 include 目录:
再次编译 Nginx 工程,此时报如下错误:
E:\nginx-release-1.23.2\src\event\ngx_event_openssl.h(17,10): fatal error C1083: Cannot open include file: 'openssl/ssl.h': No such file or directory
这个文件在 objs\lib\openssl-1.1.1m\openssl\include,我们将它也添加到工程的 include 目录,然后再次编译。
再次报错 ngx_iocp_module.h 文件找不到,这个文件在 src\event\modules 目录下,我们将这个目录也添加到工程的 include 目录,然后再次编译。
编译时,会有类似如下一些错误或者警告:
1>nginx.c
1>E:\nginx-release-1.23.2\src\core\nginx.c(717,9): warning C4133: 'function': incompatible types - from 'const char *' to 'LPCWSTR'
1>E:\nginx-release-1.23.2\src\core\nginx.c(732,13): warning C4133: 'function': incompatible types - from 'const char *' to 'LPCWSTR'
1>E:\nginx-release-1.23.2\src\core\nginx.c(971,13): warning C4133: 'function': incompatible types - from 'char *' to 'LPWSTR'
1>E:\nginx-release-1.23.2\src\core\nginx.c(1557,14): warning C4133: 'function': incompatible types - from 'char *' to 'LPCWSTR'
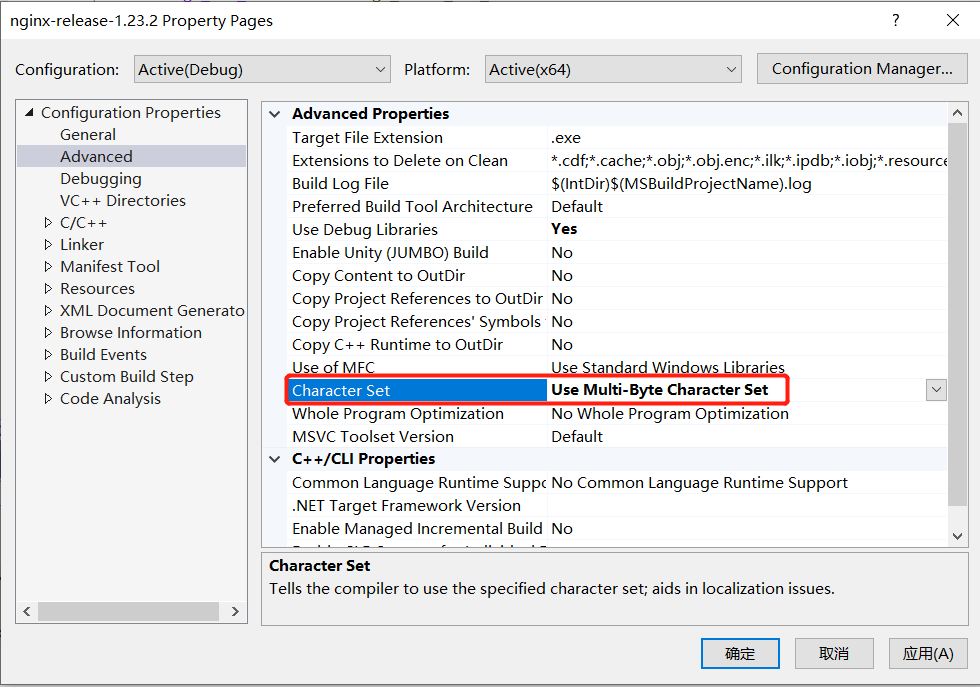
我们将工程的字符集设置改成多字节:
继续编译会提示 ngx_http_ssi_filter_module.h 找不到,同样的道理找到该文件,将该文件所在目录添加到工程属性 include 目录中。
此时 ngx_thread_pool.c 中会报一些编译错误,这个文件是 Linux 平台才会用,我们将其从工程中移除。
同理 ngx_http_geoip_module.c 也不需要将其从工程中移除。
在移除以下文件之后:
- ngx_thread_pool.c
- ngx_http_geoip_module.c
- ngx_http_xslt_filter_module.c
- ngx_event_connectex.c
- ngx_http_grpc_module.c
- ngx_http_stub_status_module.c
- ngx_http_v2.h
- ngx_http_v2.c
- ngx_http_dav_module.c
- ngx_http_degradation_module.c
- ngx_http_image_filter_module.c
- ngx_http_realip_module.c
- ngx_http_v2_encode.c
- ngx_http_perl_module.h
- ngx_http_perl_module.c
- ngx_http_v2_filter_module.c
- ngx_http_v2_module.h
- ngx_http_v2_module.c
- ngx_http_v2_table.c
- ngx_mail_ssl_module.h
- ngx_mail_ssl_module.c
- ngx_service.c
- ngx_stream_geoip_module.c
- ngx_stream_ssl_module.h
- ngx_stream_ssl_module.c
- ngx_stream_upstream_zone_module.c
- ngx_select_module.c
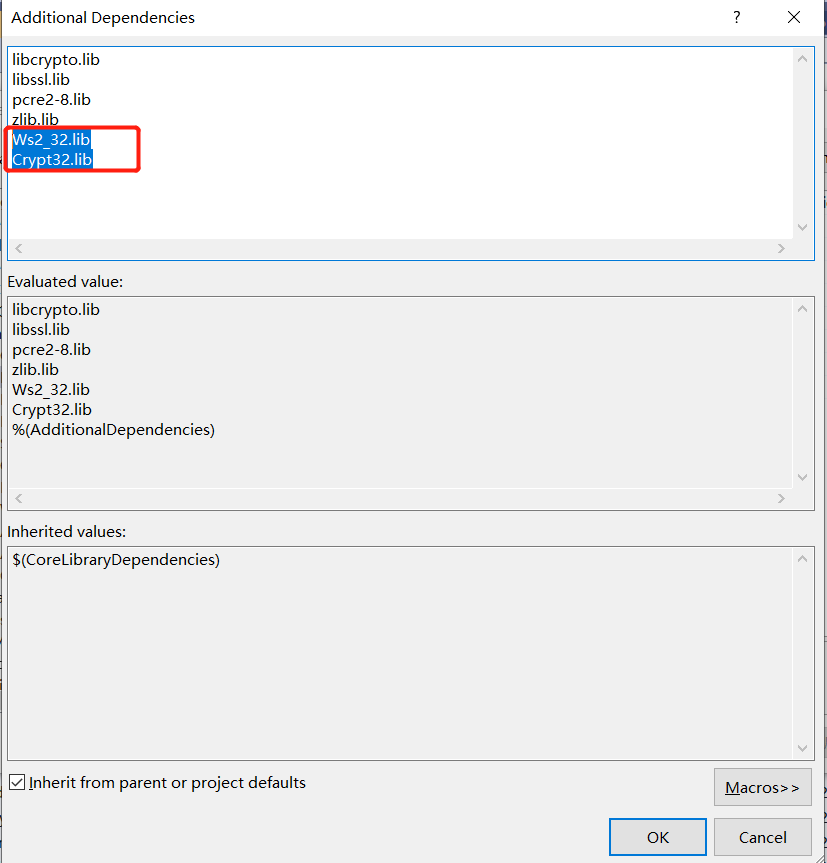
编译终于编译过了,但是报如下链接错误:
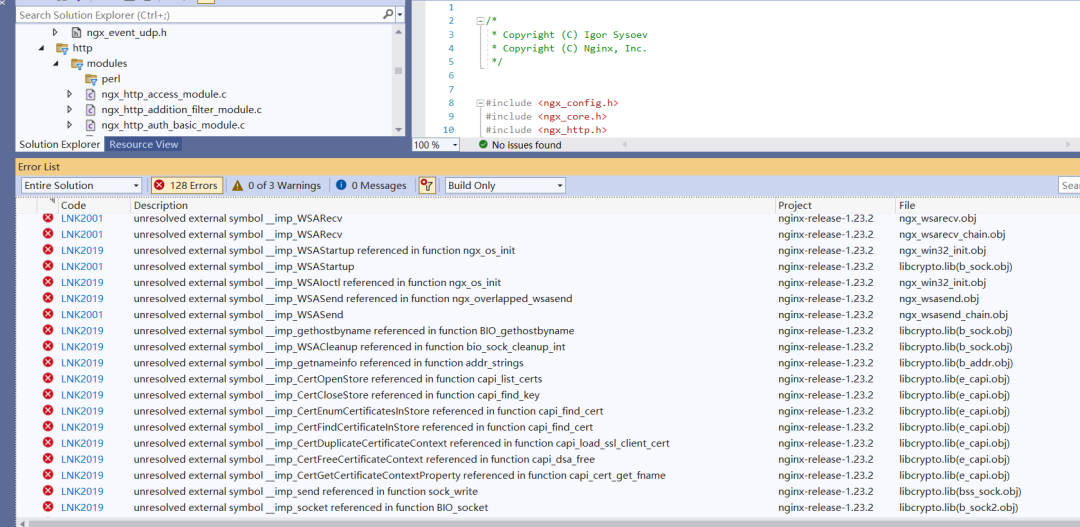
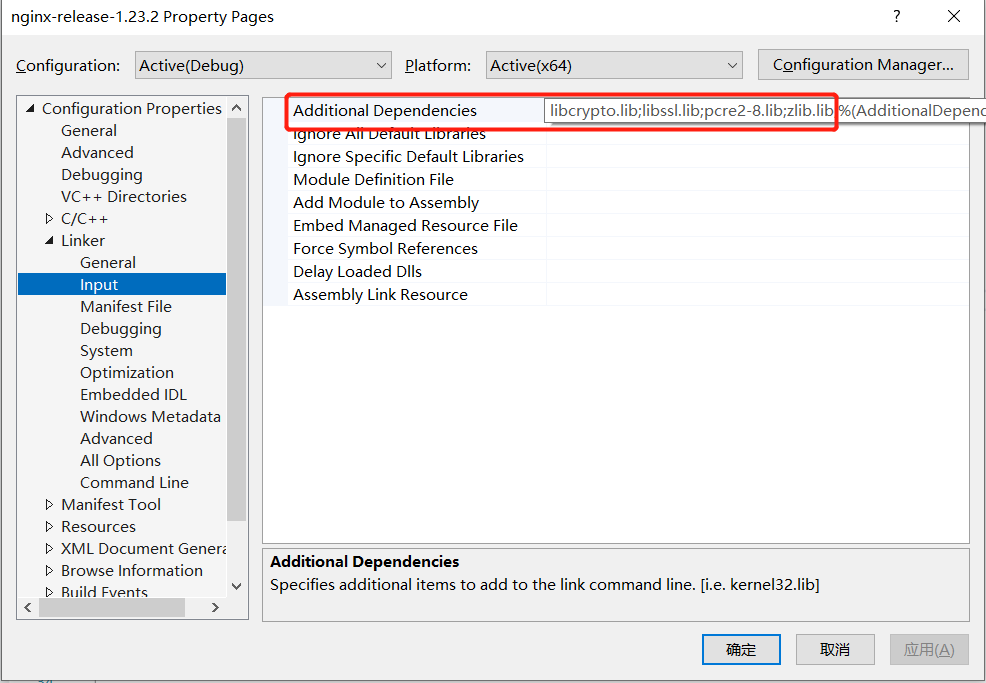
这是因为依赖 Ws2_32.lib 和 Crypt32.lib 库,我们需要给工程添加上。
再次编译,报如下错误:
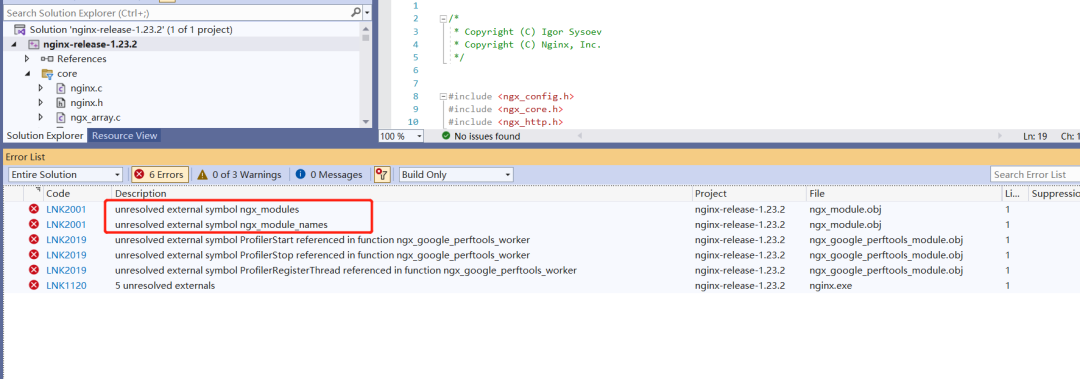
ngx_modules 和 ngx_module_names 这两个变量定义在 obj 目录下的 ngx_modules.c 文件中,这个文件是前面步骤执行 configure 命令生成的,具体包含哪些 modules,根据我们给 configure 传递的参数决定。
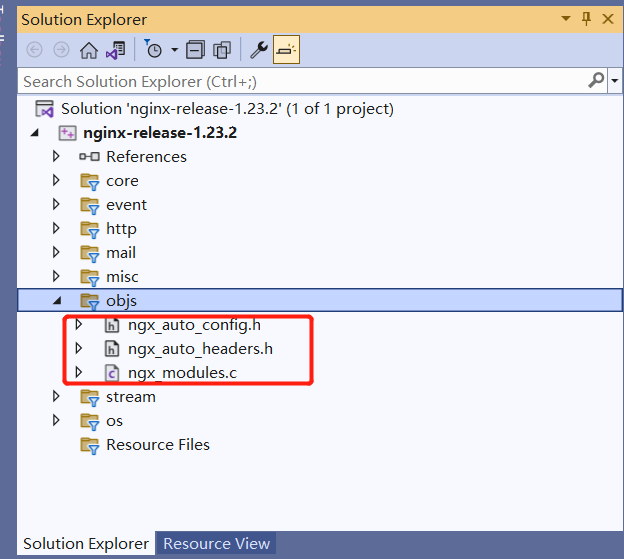
我们将 ngx_modules.c 和同目录下 ngx_auto_headers.h 和 ngx_auto_config.h 添加到工程中去,为了保持目录结构,我们在工程中新建一个 objs 目录。如下图所示:
接着编译,报如下链接错误:
ngx_google_perftools_module.obj : error LNK2019: unresolved external symbol ProfilerStart referenced in function ngx_google_perftools_worker
1>ngx_google_perftools_module.obj : error LNK2019: unresolved external symbol ProfilerStop referenced in function ngx_google_perftools_worker
1>ngx_google_perftools_module.obj : error LNK2019: unresolved external symbol ProfilerRegisterThread referenced in function ngx_google_perftools_worker
可以移除掉项目中的 misc/ngx_google_perftools_module.c 文件。
最后还有一个小的警告:
1>d:\Program Files\Microsoft Visual Studio\2022\Enterprise\MSBuild\Microsoft\VC\v170\Microsoft.CppBuild.targets(1371,5): warning MSB8012: TargetPath(E:\nginx-release-1.23.2\bin\nginx.exe.exe) does not match the Linker's OutputFile property value (E:\nginx-release-1.23.2\bin\nginx.exe). This may cause your project to build incorrectly. To correct this, please make sure that $(OutDir), $(TargetName) and $(TargetExt) property values match the value specified in %(Link.OutputFile).
1>d:\Program Files\Microsoft Visual Studio\2022\Enterprise\MSBuild\Microsoft\VC\v170\Microsoft.CppBuild.targets(1373,5): warning MSB8012: TargetName(nginx.exe) does not match the Linker's OutputFile property value (nginx). This may cause your project to build incorrectly. To correct this, please make sure that $(OutDir), $(TargetName) and $(TargetExt) property values match the value specified in %(Link.OutputFile).
这是因为我们前面步骤中配置工程输出文件信息中,有一处配置错了,导致两处的目标文件输出设置不一样,我们修改一下。
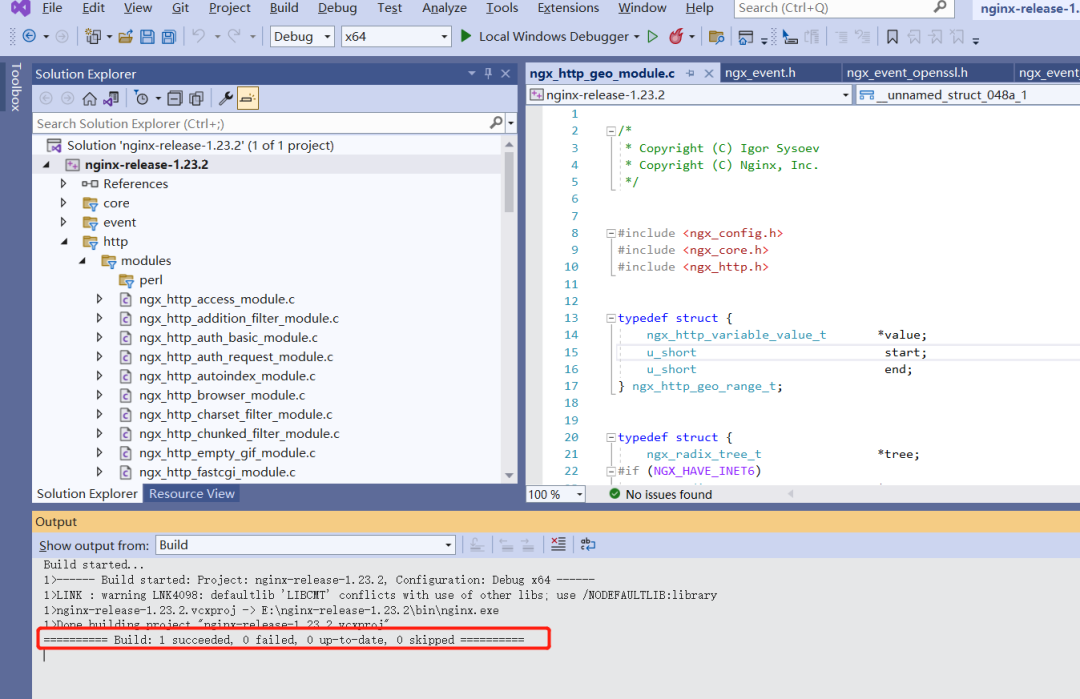
至此,整个工程就可以编译了。
但是启动时,Nginx 仍然无法启动,如下图所示:
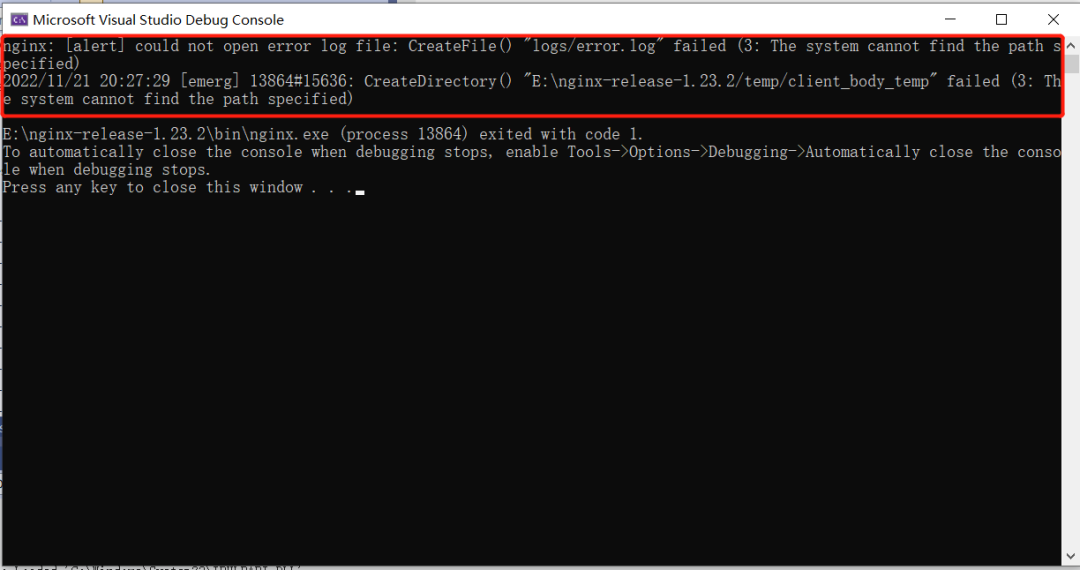
这是因为相关目录不存在,我们在 bin 目录下创建 logs 和 temp 目录,并将根目录下 conf 整个目录拷贝一份到 bin 目录下,将 docs/html 目录也拷贝到 bin 目录下。
然后在 VS 工程属性设置中将工作目录改成 bin 目录,同时设置命令行参数为 -c nginx.conf。
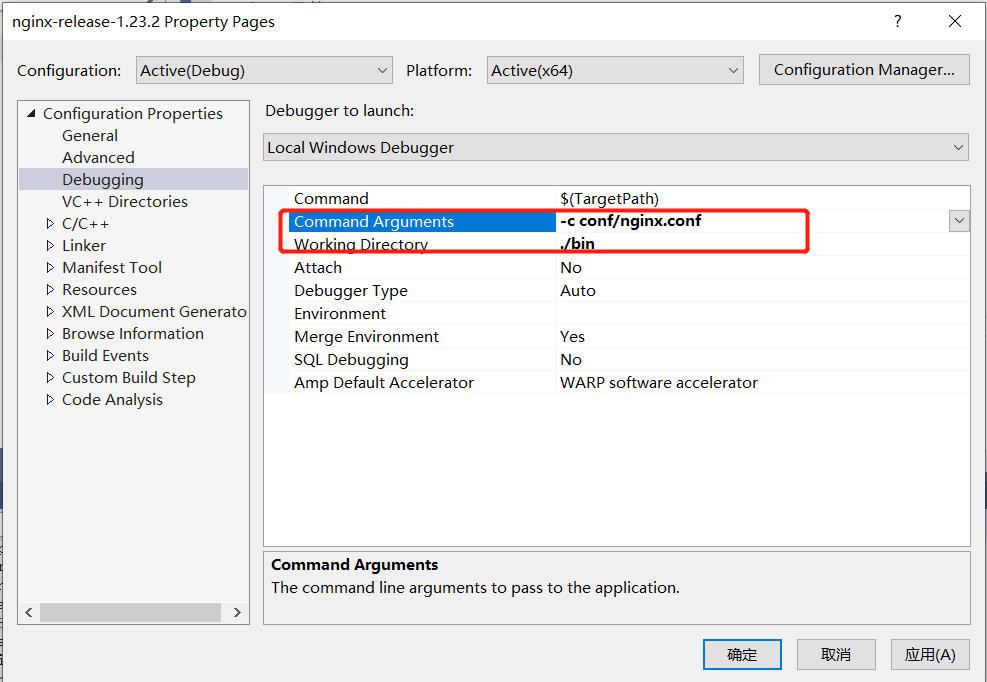
至此,Nginx 就可以启动了。
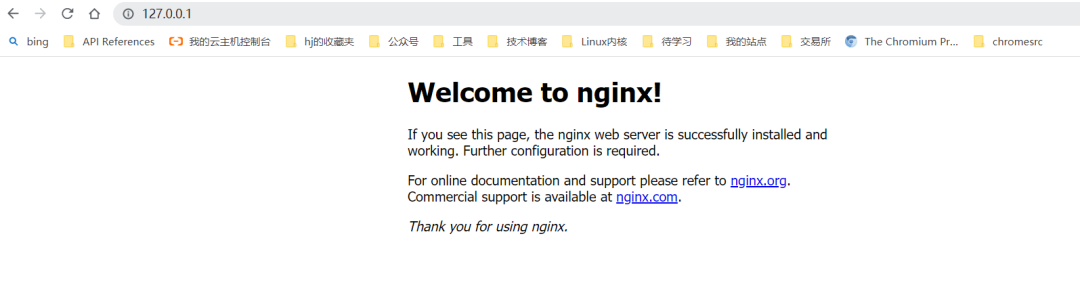
我们在浏览器中,输入 http://127.0.0.1,端口号默认是 80,就会看到 Nginx 默认页面。
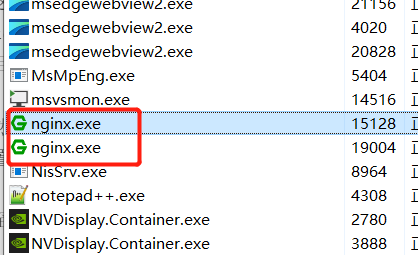
但是,此时会产生两个 Nginx 进程,我们可以在任务管理器中看到,这是因为 Nginx 是多进程模型,默认会有一个 Master 进程和一个 Worker 进程。
两个进程不方便我们调试 Nginx,我们修改 bin/conf/nginx.conf 配置文件,增加如下一行:
#user  nobody;
worker_processes  1;
#新增配置行
master_process    off;
这个时候,任务管理器中仍然有两个 nginx.exe,其中有一个是上次调试时产生的,不会自动退出,我们如果区分不了,将两个都结束掉,然后重新启动调试即可。
现在,我们在 ngx_http_parse.c:137 行添加一个断点,然后再次在浏览器中访问 http://127.0.0.1,断点按预期的效果触发,我们可以看到接收缓冲区就是浏览器发给我们的 HTTP 报文。
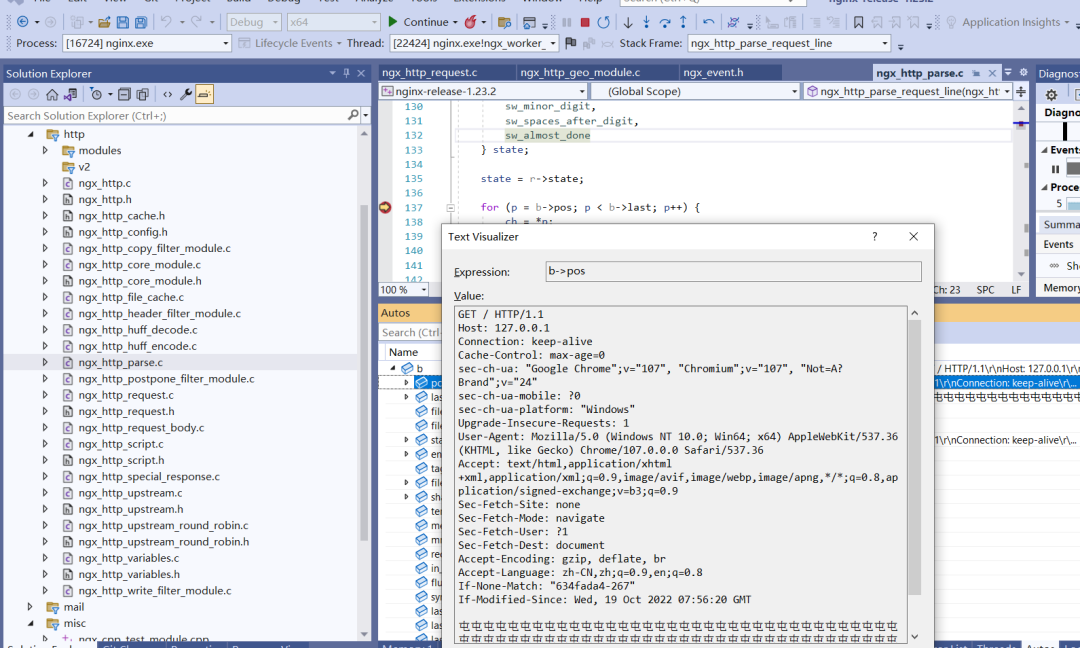
这样我们就可以利用 Visual Studio 强大的调试能力愉快地调试和分析 Nginx 源码了,同时我们也得到了一份 Nginx VS 工程项目。
腾讯云开发者
