【Java】A Guide to Java 9 Modularity

【Java】A Guide to Java 9 Modularity

阿东
发布于 2023-09-02 17:28:05
发布于 2023-09-02 17:28:05
引言
近期在 Baeldung 看到了一篇有关Java9模块化入门介绍的文章,整体翻译加理解下来发现确实不错,个人认为美中不足的是项目构建过于简单和偏手动,个人建议找一些简单的Java9以及之上的开源项目结合参考使用更佳。
原文
A Guide to Java 9 Modularity | Baeldung
1. Overview
Java 9 introduces a new level of abstraction above packages, formally known as the Java Platform Module System (JPMS), or “Modules” for short.
Java 9 在包上面引入了新的层次,正式的名称叫做 Java 平台模块系统(JPMS),或者更简单称之为“模块”。
In this tutorial, we'll go through the new system and discuss its various aspects.
本教程介绍新系统的各个方面。
We'll also build a simple project to demonstrate all concepts we'll be learning in this guide.
本部分构建了一个简单项目介绍这些概念。
2. What's a Module?
First of all, we need to understand what a module is before we can understand how to use them.
首先,先理解什么是模块才能理解什么是模块化。
A Module is a group of closely related packages and resources along with a new module descriptor file.
一个模块是一组密切相关的包和资源,以及一个新的模块描述符文件。 怎么理解这个概念呢?实际上抽象理解为在 package 的基础上再套了一层包即可。
In other words, it's a “package of Java Packages” abstraction that allows us to make our code even more reusable.
抓住“package of Java Packages”这个概念,目的是让不同模块之间代码不产生干扰,并且具备更强的可维护性和安全性。
2.1. Packages
The packages inside a module are identical to the Java packages we've been using since the inception of Java.
模块的包和Java原始包的概念是一样的。
When we create a module, we organize the code internally in packages just like we previously did with any other project.
创建一个新模块,内部再使用包组织结构代码,这意味着代码不需要任何改变。
Aside from organizing our code, packages are used to determine what code is publicly accessible outside of the module.
而模块的加入显然就是为了确定包还被用来确定哪些代码可以在模块之外公开访问。
2.2. Resources
Each module is responsible for its resources, like media or configuration files.
每个模块负责各自的资源,比如媒体和配置文件。
Previously we'd put all resources into the root level of our project and manually manage which resources belonged to different parts of the application.
模块化出现之前的代码,所有的资源基本都在 根目录管理,需要手动管理划分资源的归属。
With modules, we can ship required images and XML files with the module that needs it, making our projects much easier to manage.
通过模块可以对于资源进行进一步的划分,使得项目更容易管理。
2.3. Module Descriptor
When we create a module, we include a descriptor file that defines several aspects of our new module:
当构建一个模块的时候,我们创建描述符文件,并且定义模块的相关内容。
- Name – the name of our module 模块名称
- Dependencies – a list of other modules that this module depends on 模块的描述信息
- Public Packages – a list of all packages we want accessible from outside the module 允许对外访问的模块
- Services Offered – we can provide service implementations that can be consumed by other modules 可以被其他模块使用的服务实现
- Services Consumed – allows the current module to be a consumer of a service 允许当前模块成为一个服务的使用者
- Reflection Permissions – explicitly allows other classes to use reflection to access the private members of a package 明确地允许其他类使用反射来访问包的私有成员。
The module naming rules are similar to how we name packages (dots are allowed, dashes are not). It's very common to do either project-style (my.module) or Reverse-DNS (com.baeldung.mymodule) style names.
模块的命名规则类似于我们命名包的方式(允许使用点,不允许使用破折号)。 比如:
- 项目风格(my.module)
- 反向DNS(_com.baeldung.ymodule_)
下文的案例将会一直使用项目风格介绍。
We need to list all packages we want to be public because by default all packages are module private.
我们需要列出所有我们想要公开的软件包,因为在默认情况下,所有软件包都是模块私有的。
The same is true for reflection. By default, we cannot use reflection on classes we import from another module.
反射在默认情况下也是不能对外使用的。
2.4. Module Types
There are four types of modules in the new module system:
在新的模块系统中,有四种类型的模块:
- System Modules – These are the modules listed when we run the list-modules command above. They include the Java SE and JDK modules.
系统模块:通常是在java --list-modules 这样的命令执行结果中,它们包括Java SE和JDK模块。
- Application Modules – These modules are what we usually want to build when we decide to use Modules. They are named and defined in the compiled module-info.class file included in the assembled JAR.
应用模块:决定使用模块的时候,这些模块通常是想要构建的,这部分命名会归属到一个 module-info.class 这样的文件当中,当然也包含在具体的jar当中。
- Automatic Modules – We can include unofficial modules by adding existing JAR files to the module path. The name of the module will be derived from the name of the JAR. Automatic modules will have full read access to every other module loaded by the path.
自动化模块:以通过在模块路径中添加现有的JAR文件来包括非官方模块。自动模块拥有路径加载的每个模块的完整读取权限。
- Unnamed Module – When a class or JAR is loaded onto the classpath, but not the module path, it's automatically added to the unnamed module. It's a catch-all module to maintain backward compatibility with previously-written Java code.
未命名模块:当一个类或JAR被加载到classpath上,而不是模块路径上,它就会被自动添加到未命名模块中。
如果从一个不具备模块化的Java项目迁移到具备模块化的Java项目,为了保持向前兼容,会将所有的包归属于未命名模块。
2.5. Distribution
Modules can be distributed one of two ways: as a JAR file or as an “exploded” compiled project. This, of course, is the same as any other Java project so it should come as no surprise.
模块同可以通过jar形式发布,或者作为编译项目发布,发布方式和其他Java项目一样。
We can create multi-module projects comprised of a “main application” and several library modules.
我们可以创建”一个主程序应用“和多个库模块形成的多模块项目。
和Maven的多Moudule概念类似,只不过是语言本身开始支持这种封包方式。
We have to be careful though because we can only have one module per JAR file.
但我们必须小心,因为每个JAR文件只能有一个模块。
When we set up our build file, we need to make sure to bundle each module in our project as a separate jar.
在构建各个模块确保项目每个模块都可以捆绑为单独的jar包。
3. Default Modules
When we install Java 9, we can see that the JDK now has a new structure.
安装JDK9之后可以看到现在有一个新结构。
They have taken all the original packages and moved them into the new module system.
原本零散的分包方式现在被搬运到新的模块系统当中。
We can see what these modules are by typing into the command line:
我们可以通过下面的命令查看JDK的原始模块(JDK17为例)
java --list-modules
$ java --list-modules
java.base@17.0.7
java.compiler@17.0.7
java.datatransfer@17.0.7
java.desktop@17.0.7
java.instrument@17.0.7
java.logging@17.0.7
java.management@17.0.7
java.management.rmi@17.0.7
java.naming@17.0.7
java.net.http@17.0.7
java.prefs@17.0.7
java.rmi@17.0.7
java.scripting@17.0.7
java.se@17.0.7
java.security.jgss@17.0.7
java.security.sasl@17.0.7
java.smartcardio@17.0.7
java.sql@17.0.7
java.sql.rowset@17.0.7
java.transaction.xa@17.0.7
java.xml@17.0.7
java.xml.crypto@17.0.7
jdk.accessibility@17.0.7
jdk.attach@17.0.7
jdk.charsets@17.0.7
jdk.compiler@17.0.7
jdk.crypto.cryptoki@17.0.7
jdk.crypto.ec@17.0.7
jdk.crypto.mscapi@17.0.7
jdk.dynalink@17.0.7
jdk.editpad@17.0.7
jdk.hotspot.agent@17.0.7
jdk.httpserver@17.0.7
jdk.incubator.foreign@17.0.7
jdk.incubator.vector@17.0.7
jdk.internal.ed@17.0.7
jdk.internal.jvmstat@17.0.7
jdk.internal.le@17.0.7
These modules are split into four major groups: java, javafx, jdk, and Oracle.
java modules are the implementation classes for the core SE Language Specification.
javafx modules are the FX UI libraries.
Anything needed by the JDK itself is kept in the jdk modules.
And finally, anything that is Oracle-specific is in the oracle modules.
主要模块组成分为 java(包含Java SE 的语言规范实现类)、javafx(FX用户界面库)、jdk(JDK本身需要的任何东西) 和 Oracle(任何与Oracle有关的东西)
4. Module Declarations【Important】
To set up a module, we need to put a special file at the root of our packages named module-info.java.
定义模块化需要在root根目录新建 module-info.java 文件。在一个Maven项目当中,类似下面的组织结构:
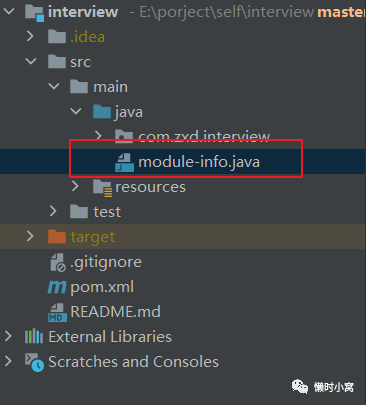
image.png
This file is known as the module descriptor and contains all of the data needed to build and use our new module.
这个文件被称为模块描述符,包含了构建和使用我们的新模块所需的所有数据。
We construct the module with a declaration whose body is either empty or made up of module directives:
module myModuleName {
    // all directives are optional
}
We start the module declaration with the module keyword, and we follow that with the name of the module.
我们使用 module 关键字进行声明,然后用模块的名称跟在关键字后面。
The module will work with this declaration, but we'll commonly need more information.
该模块将在这个声明下工作,但我们通常需要更多的信息。
That is where the module directives come in.
下面就是模块指令上场的时候了。
4.1. Requires
Our first directive is requires. This module directive allows us to declare module dependencies:
第一个指令为 requires,该模块指令允许声明依赖性。
module my.module {
    requires module.name;
}
Now, my.module has both a runtime and a compile-time dependency on module.name.
上面的语法说明 my.module 对于 module.name 运行和编译的时候都具备了依赖性。
And all public types exported from a dependency are accessible by our module when we use this directive.
当使用这个命令的时候,所有的依赖关系关联的public类型都可以被模块访问。
4.2. Requires Static
Sometimes we write code that references another module, but that users of our library will never want to use.
有的时候会出现代码引用了另一个模块但是永远没有使用。
For instance, we might write a utility function that pretty-prints our internal state when another logging module is present. But, not every consumer of our library will want this functionality, and they don't want to include an extra logging library.
例如,我们可能会需要另一个类似日志的模块在需要的时候帮忙打印内容,当然并不是所有的模块都需要用到这样的功能。
By using the requires static directive, we create a compile-time-only dependency:
通过 requires static 这样的语法,我们创建一个仅仅在编译的时候使用的依赖。
module my.module {
    requires static module.name;
}
4.3. Requires Transitive
We commonly work with libraries to make our lives easier.
But, we need to make sure that any module that brings in our code will also bring in these extra ‘transitive' dependencies or they won't work.
有时候我们会有类似图书馆这样“合作关系”的依赖,因此我们也需要确保任何引入我们代码的模块也会引入这些额外的 "及物 "依赖关系,否则它们将无法正常工作。
这里的及物含义:及物动词必须有一个对象,否则意思上不完整。
Luckily, we can use the requires transitive directive to force any downstream consumers also to read our required dependencies:
我们可以使用 requires transitive 指令来强制任何下游消费者也读取我们所需的依赖。
module my.module {
    requires transitive module.name;
}
Now, when a developer requires my.module, they won't also have also to say requires module.name for our module to still work.
现在当开发者引入 my.module模块时,无需再显示声明引入module.name模块。
4.4. Exports
By default, a module doesn't expose any of its API to other modules. This strong encapsulation was one of the key motivators for creating the module system in the first place.
Our code is significantly more secure, but now we need to explicitly open our API up to the world if we want it to be usable.
We use the exports directive to expose all public members of the named package:
module my.module {
    exports com.my.package.name;
}
Now, when someone does requires my.module, they will have access to the public types in our com.my.package.name package, but not any other package.
4.5. Exports … To
We can use exports…to to open up our public classes to the world.
我们可以使用 exports...to 将我们的公共类向世界开放。
But, what if we don't want the entire world to access our API?
但是如果不想公开API应该怎么办?
We can restrict which modules have access to our APIs using the exports…to directive.
我们可以使用exports...tod的指令限制模块访问API。
Similar to the exports directive, we declare a package as exported. But, we also list which modules we are allowing to import this package as a requires. Let's see what this looks like:
与 exports 指令类似,我们将一个包声明为 exported。但是,我们也列出了我们允许哪些模块导入这个包作为 requires 。
相关的操作语法如下:
module my.module {
    export com.my.package.name to com.specific.package;
}
4.6. Uses
A service is an implementation of a specific interface or abstract class that can be consumed by other classes.
服务是一个特定接口或抽象类的实现,可以被其他类所使用。
We designate the services our module consumes with the uses directive.
我们使用 uses 指令指定模块使用的服务。
Note that the class name we use is either the interface or abstract class of the service, not the implementation class:
注意,指定的类名称应该是 接口 而不是具体的实现类。
module my.module {
    uses class.name;
}
We should note here that there's a difference between a requires directive and the uses directive.
在这里我们应该注意到,_requires_ 指令和 uses 指令之间是有区别的。
We might require a module that provides a service we want to consume, but that service implements an interface from one of its transitive dependencies.
比如我们可能使用requires指令引入了提供服务的模块,但服务实现的接口来自某个传递依赖。
Instead of forcing our module to require all transitive dependencies just in case, we use the uses directive to add the required interface to the module path.
这时无需强制我们模块通过requires引入所有传递依赖,可以使用uses指令引入接口至模块路径。
4.7. Provides … With
A module can also be a service provider that other modules can consume.
一个模块可以是服务的提供者给其他模块进行使用。
The first part of the directive is the provides keyword. Here is where we put the interface or abstract class name.
指令的第一部分是 provides 关键字。这部分要把接口和抽象类的名字放这里。
Next, we have the with directive where we provide the implementation class name that either implements the interface or extends the abstract class.
接下来,我们有 with 指令,在这里我们提供实现类的名称,该类要么是 implements 接口,要么是 extends 抽象类。
Here's what it looks like put together:
上面两个关键字放在一起的结果如下:
module my.module {
    provides MyInterface with MyInterfaceImpl;
}
4.8. Open
We mentioned earlier that encapsulation was a driving motivator for the design of this module system.
前面的模块化概念实际上就是进一步提高Java语言的封装性。
Before Java 9, it was possible to use reflection to examine every type and member in a package, even the private ones. Nothing was truly encapsulated, which can open up all kinds of problems for developers of the libraries.
在Java9之前,可以利用反射强制访问每个类型和成员,甚至可以直接读取private变量,这实际属于完全破坏封装性的行为,只不过这些规则全部靠开发人员遵守而已。
Because Java 9 enforces _strong encapsulation_(封闭性), we now have to explicitly(明确) grant permission for other modules to reflect on our classes.
在Java9之后,这种反射滥用的行为受到明确限制,我们必须要明确授予其他模块对于我们模块的反射访问权限。
If we want to continue to allow full reflection as older versions of Java did, we can simply open the entire module up:
当然如果想要省事,想继续像旧版本的Java那样允许完全反射,我们可以简单地_开放整个模块:
open module my.module {
}
4.9. Opens
If we need to allow reflection of private types, but we don't want all of our code exposed, we can use the opens directive to expose specific packages.
如果我们需要允许反射私有类型,但我们不希望所有的代码都暴露出来,**我们可以使用 opens 指令来暴露特定的包。
But remember, this will open the package up to the entire world, so make sure that is what you want:
但是需要注意 opens 之后整个包就完全对外开放访问了,使用之前需要仔细确认这个行为是否需要。
module my.module {
  opens com.my.package;
}
4.10. Opens … To
Okay, so reflection is great sometimes, but we still want as much security as we can get from encapsulation. We can selectively open our packages to a pre-approved list of modules, in this case, using the opens…to directive:
我们可以有选择地将我们的包开放给预先批准的模块列表,在这种情况下,使用opens...to指令
module my.module {
    opens com.my.package to moduleOne, moduleTwo, etc.;
}
比如上面只开放 to后面这部分的包对外反射使用。
5. Command Line Options
By now, support for Java 9 modules has been added to Maven and Gradle, so you won't need to do a lot of manual building of your projects. However, it's still valuable to know how to use the module system from the command line.
到目前为止,Maven和Gradle已经加入了对Java 9模块的支持,所以你不需要对你的项目进行大量的手动构建。
当然知道如何从命令行使用模块系统对于我们学习依然很有帮助。
We'll be using the command line for our full example down below to help solidify how the entire system works in our minds.
下面会介绍完整例子中如何使用命令行,帮助理解整个公共系统的运作方式。这里只需要理解工作机制即可。
- module-path – We use the –module-path option to specify the module path. This is a list of one or more directories that contain your modules.
- add-reads – Instead of relying on the module declaration file, we can use the command line equivalent of the requires directive; –add-reads.
- add-exports – Command line replacement for the exports directive.
- add-opens – Replace the open clause in the module declaration file.
- add-modules – Adds the list of modules into the default set of modules
- list-modules – Prints a list of all modules and their version strings
- patch-module – Add or override classes in a modules
- illegal-access=permit|warn|deny – Either relax strong encapsulation by showing a single global warning, shows every warning, or fails with errors. The default is permit.
- module-path - 我们使用 module-path 选项来指定模块路径。包含比如一个模块的一个或多个目录的列表。
- add-reads - 我们可以使用相当于 requires 指令的命令行;_-add-reads_,而不是依赖模块声明文件。
- add-exports ** - 此命令行替代 exports 指令。
- add-opens - 替换模块声明文件中的_open_条款。
- add-modules - 将模块列表添加到默认的模块集中。
- list-modules - 打印所有模块的列表和它们的版本字符串 。
- patch-module - 添加或覆盖模块中的类 。
- illegal-access=permit|warn|deny - 通过显示单一的全局警告来弱化强封装,显示每个警告,或者以错误的方式失败。默认是 permit 。
6. Visibility
下面将要讨论可见行问题。
A lot of libraries depend on reflection to work their magic (JUnit and Spring come to mind).
很多库都依赖反射来发挥它们的魔力(比如 JUnit 和 Spring )。
By default in Java 9, we will only have access to public classes, methods, and fields in our exported packages. Even if we use reflection to get access to non-public members and call setAccessible(true), we won't be able to access these members.
如果我们需要允许反射私有类型,但我们不希望所有的代码都暴露出来,**我们可以使用 opens 指令来暴露特定的包。
We can use the open, opens, and opens…to options to grant runtime-only access for reflection. Note, this is runtime-only!
虽然我们可以使用 open 、_opens_ 和 opens...to 选项来处理反射只在运行时授权访问。但是需要注意这些指令都是 只在运行时间内生效!
We won't be able to compile against private types, and we should never need to anyway.
我们将无法针对私有类型进行编译,而且无论如何我们都不需要这样做。
If we must have access to a module for reflection, and we're not the owner of that module (i.e., we can't use the opens…to directive), then it's possible to use the command line –add-opens option to allow own modules reflection access to the locked down module at runtime.
如果我们必须访问一个模块进行反射,而我们又不是该模块的所有者(也就是说,我们不能使用 opens...to 指令),那么可以使用命令行 -add-opens 选项来允许自己的模块在运行时反射访问被锁定的模块。
The only caveat here's that you need to have access to the command line arguments that are used to run a module for this to work.
这里唯一需要注意的是,你必须能够访问用于运行模块的命令行参数,这样才能发挥作用。
7. Putting It All Together
Now that we know what a module is and how to use them let's go ahead and build a simple project to demonstrate all the concepts we just learned.
上面介绍了模块化的基础语法,现在用一个简单案例把这些内容串起来。
To keep things simple, we won't be using Maven or Gradle. Instead, we'll rely on the command line tools to build our modules.
为了保持简单,我们将不使用Maven或Gradle。相反,我们将依靠命令行工具来构建我们的模块。
7.1. Setting Up Our Project
First, we need to set up our project structure. We'll create several directories to organize our files.
首先,我们需要设置我们的项目结构。我们将创建几个目录来组织我们的文件。
Start by creating the project folder:
通过下面的命令进行构建。
mkdir module-project
cd module-project
This is the base of our whole project, so add files in here such as Maven or Gradle build files, other source directories, and resources.
只需要一串命令构建项目,没有Maven和Gradle那样的额外依赖。
We also put a directory to hold all our project specific modules.
我们还放了一个目录来存放我们所有的项目特定模块。
Next, we create a module directory:
下面创建模块目录。
mkdir simple-modules
Here's what our project structure will look like:
最后整个项目结构如下:
module-project
|- // src if we use the default package
|- // build files also go at this level
|- simple-modules
  |- hello.modules
    |- com
      |- baeldung
        |- modules
          |- hello
  |- main.app
    |- com
      |- baeldung
        |- modules
          |- main
7.2. Our First Module
Now that we have the basic structure in place, let's add our first module.
现在我们有了基本的结构,让我们来添加我们的第一个模块。
Under the simple-modules directory, create a new directory called hello.modules.
在simple-modules这个目录下面构建一个新的名为hello.modules的模块。
We can name this anything we want but follow package naming rules (i.e., periods to separate words, etc.). We can even use the name of our main package as the module name if we want, but usually, we want to stick to the same name we would use to create a JAR of this module.
我们可以给它起任何名字,但要遵循包的命名规则(即用句号来分隔单词,等等)。如果我们愿意,我们甚至可以使用我们的主包的名字作为模块的名字,但是通常我们希望坚持使用与创建这个模块的JAR相同的名字。
Under our new module, we can create the packages we want. In our case, we are going to create one package structure:
在我们的新模块下面,我们可以创建想要的包。
com.baeldung.modules.hello
Next, create a new class called HelloModules.java in this package. We will keep the code simple:
接下来,在这个包中创建一个名为 HelloModules.java 的新类。为了方便里面,这里将保持代码的简单:
package com.baeldung.modules.hello;

public class HelloModules {
    public static void doSomething() {
        System.out.println("Hello, Modules!");
    }
}
And finally, in the hello.modules root directory, add in our module descriptor; _module-info.java_:
最后,在 hello.modules 根目录下,加入我们的模块描述符;_module-info.java_:
module hello.modules {
    exports com.baeldung.modules.hello;
}
To keep this example simple, all we are doing is exporting all public members of the com.baeldung.modules.hello package.
为了保持这个例子的简单,我们所做的就是导出 com.baeldung.modules.hello 包中的所有公共成员。
7.3. Our Second Module
Our first module is great, but it doesn't do anything.
第一个模块很好,但是它没有做任何事情。
We can create a second module that uses it now.
我们现在可以创建一个使用它的第二个模块。
Under our simple-modules directory, create another module directory called main.app. We are going to start with the module descriptor this time:
在 simple-modules 目录下面,创建另一个名叫 main.app 的模块目录,这次将会从模块描述符开始:
module main.app {
    requires hello.modules;
}
We don't need to expose anything to the outside world. Instead, all we need to do is depend on our first module, so we have access to the public classes it exports.
我们不需要向外部世界暴露任何东西。相反,我们需要做的是依赖我们的第一个模块,所以我们可以访问它所输出的公共类。
Now we can create an application that uses it.
现在我们可以创建一个应用程序来使用它。
Create a new package structure: com.baeldung.modules.main.
创建新的包 _com.baeldung.modules.main_。
Now, create a new class file called MainApp.java.
创建名为 MainApp.java 的新类。
package com.baeldung.modules.main;

import com.baeldung.modules.hello.HelloModules;

public class MainApp {
    public static void main(String[] args) {
        HelloModules.doSomething();
    }
}
And that is all the code we need to demonstrate modules. Our next step is to build and run this code from the command line.
这就是我们演示模块所需的全部代码。我们的下一步是在命令行中构建并运行这段代码。
7.4. Building Our Modules
To build our project, we can create a simple bash script and place it at the root of our project.
Create a file called compile-simple-modules.sh:
为了构建我们的项目,我们可以创建一个简单的bash脚本,并把它放在我们项目的根目录。
创建一个名为 compile-simple-modules.sh 的文件:
#!/usr/bin/env bash
javac -d outDir --module-source-path simple-modules $(find simple-modules -name "*.java")
There are two parts to this command, the javac and find commands.
这个命令有两个部分,_javac_ 和 find 命令。
The find command is simply outputting a list of all .java files under our simple-modules directory. We can then feed that list directly into the Java compiler.
find 命令是简单地输出simple-modules目录下所有. java 文件的列表。然后我们可以把这个列表直接输入到Java编译器中。
The only thing we have to do differently than the older versions of Java is to provide a module-source-path parameter to inform the compiler that it's building modules.
我们唯一要做的与旧版本的Java不同的事情是提供一个 module-source-path参数来通知编译器它正在构建模块。
Once we run this command, we will have an outDir folder with two compiled modules inside.
一旦我们运行这个命令,我们将有一个 outDir 文件夹,里面有两个已编译的模块。
7.5. Running Our Code
And now we can finally run our code to verify modules are working correctly.
现在我们终于可以运行我们的代码来验证模块是否正常工作。
Create another file in the root of the project: run-simple-module-app.sh.
在项目的根目录下创建另一个文件: run-simple-module-app.sh 。
#!/usr/bin/env bash
java --module-path outDir -m main.app/com.baeldung.modules.main.MainApp
To run a module, we must provide at least the module-path and the main class. If all works, you should see:
要运行一个模块,我们必须至少提供 module-path 和主类。如果一切正常,你应该看到:
>$ ./run-simple-module-app.sh
Hello, Modules!
7.6. Adding a Service
Now that we have a basic understanding of how to build a module, let's make it a little more complicated.
当我们使用指令,所有从依赖关系导出的公共类型都可以被我们的模块访问。
We're going to see how to use the provides…with and uses directives.
我们将看到如何使用provides...with和uses指令。
Start by defining a new file in the hello.modules module named HelloInterface.java:
首先在 hello.modules 模块当中定义新文件,名字叫做 HelloInterface.java。
public interface HelloInterface {
    void sayHello();
}
To make things easy, we're going to implement this interface with our existing HelloModules.java class:
为了方便起见,我们将用现有的HelloModules.java.class来实现这个接口。
public class HelloModules implements HelloInterface {
    public static void doSomething() {
        System.out.println("Hello, Modules!");
    }

    public void sayHello() {
        System.out.println("Hello!");
    }
}
That is all we need to do to create a service.
这就是创建服务所需要做的操作。
Now, we need to tell the world that our module provides this service.
现在需要对外公开自己支持某些服务。
Add the following to our module-info.java:
比如像下面这样对外暴露接口。
provides com.baeldung.modules.hello.HelloInterface with com.baeldung.modules.hello.HelloModules;
As we can see, we declare the interface and which class implements it.
正如我们所看到的,我们声明了接口以及哪个类实现了它。
Next, we need to consume this service. In our main.app module, let's add the following to our module-info.java:
接下来,我们需要使用这个服务。在我们的main.app模块中,让我们在我们的module-info.java中添加以下内容:
uses com.baeldung.modules.hello.HelloInterface;
Finally, in our main method we can use this service via a ServiceLoader:
最后,在main方法中,我们可以通过一个ServiceLoader使用这个服务:
Iterable<HelloInterface> services = ServiceLoader.load(HelloInterface.class);
HelloInterface service = services.iterator().next();
service.sayHello();
Compile and run:
编译并且运行。
#> ./run-simple-module-app.sh
Hello, Modules!
Hello!
We use these directives to be much more explicit about how our code is to be used.
我们使用这些指令来更明确地说明我们的代码将如何被使用。
We could put the implementation into a private package while exposing the interface in a public package.
我们可以把实现放在一个私有包中,而把接口暴露在一个公共包中。
This makes our code much more secure with very little extra overhead.
这使得我们的代码更加安全,而且几乎没有额外的开销。
Go ahead and try out some of the other directives to learn more about modules and how they work.
继续尝试其他一些指令,以了解更多关于模块和它们如何工作。
8. Adding Modules to the Unnamed Module
向未命名的模块添加新模块的方法如下。
The unnamed module concept is similar to the default package. Therefore, it's not considered a real module, but can be viewed as the default module.
未命名模块的概念类似于默认包。 这个模块被叫做默认模块。
If a class is not a member of a named module, then it will be automatically considered as part of this unnamed module.
如果一个类不是一个命名的模块的成员,那么它将被自动认为是这个未命名的模块的一部分。
Sometimes, to ensure specific platform, library, or service-provider modules in the module graph, we need to add modules to the default root set. For example, when we try to run Java 8 programs as-is with Java 9 compiler we may need to add modules.
有时候我们需要在默认根集上添加模块。比如我们使用Java9运行低版本的Java8的程序时候,可能需要添加模块化。
将命名的模块添加到默认的根模块集中的命令如下:
In general, the option to add the named modules to the default set of root modules is –add-modules < module >(,< module >)* where < module > is a module name.
将命名的模块添加到默认的根模块集的选项是 -add-modules <module>(,<module>) ,其中<module>是一个模块名称。
For example, to provide access to all java.xml.bind modules the syntax would be:
要提供对所有_java.xml.bind_模块的访问,语法如下:
--add-modules java.xml.bind
To use this in Maven, we can embed the same to the maven-compiler-plugin:
Maven项目中则可以使用下面的插件:
<plugin>
    <groupId>org.apache.maven.plugins</groupId>
    <artifactId>maven-compiler-plugin</artifactId>
    <version>3.8.0</version>
    <configuration>
        <source>9</source>
        <target>9</target>
        <compilerArgs>
            <arg>--add-modules</arg>
            <arg>java.xml.bind</arg>
        </compilerArgs>
    </configuration>
</plugin>
9. Conclusion
整个文章大致梳理了下面的内容:
- 讨论Java出现的模块化概念。
- JDK中包含的模块。
- 介绍模块声明文件,如何在实际项目使用。
- 创建了一个建立在模块系统之上的简单应用程序
最后可以从 案例代码 中找到本文的所有实践部分。
本文参与 腾讯云自媒体同步曝光计划,分享自微信公众号。
原始发表:2023-06-27,如有侵权请联系 cloudcommunity@tencent.com 删除
评论
登录后参与评论
推荐阅读
目录
腾讯云开发者

Copyright © 2013 - 2026 Tencent Cloud. All Rights Reserved. 腾讯云 版权所有
深圳市腾讯计算机系统有限公司 ICP备案/许可证号:粤B2-20090059 ![]() 粤公网安备44030502008569号
粤公网安备44030502008569号
腾讯云计算(北京)有限责任公司 京ICP证150476号 | 京ICP备11018762号