Shiro学习之SpringBoot整合(2)
Shiro学习之SpringBoot整合(2)

默 语
发布于 2024-11-20 11:03:21
发布于 2024-11-20 11:03:21
代码可运行
运行总次数:0
代码可运行
登录认证整合
博主 默语带您 Go to New World. ✍ 个人主页—— 默语 的博客👦🏻 《java 面试题大全》 🍩惟余辈才疏学浅,临摹之作或有不妥之处,还请读者海涵指正。☕🍭 《MYSQL从入门到精通》数据库是开发者必会基础之一~ 🪁 吾期望此文有资助于尔,即使粗浅难及深广,亦备添少许微薄之助。苟未尽善尽美,敬请批评指正,以资改进。!💻⌨
shiro总目录: Shiro学习之Shiro基本使用(1) Shiro学习之Shiro基本使用(2) Shiro学习之SpringBoot整合(1) Shiro学习之SpringBoot整合(2)
1.0 登录认证整合之实现前端页面
继上整合(1)我们来继续整理 shiro和springboot的整合
1.1 Shiro整合Thymeleaf
1.1.1 pom新增
  <!--             前端页面-->
        <dependency>
            <groupId>org.springframework.boot</groupId>
            <artifactId>spring-boot-starter-thymeleaf</artifactId>
        </dependency>
1.1.2 创建登录页面(复制即可)
<!DOCTYPE html>
<html lang="en">
<head>
    <meta charset="UTF-8">
    <title>Title</title>
</head>
<body>
<h1>Shiro 登录认证</h1>
<br>
<form action="/myController/userLogin">
    <div>用户名:<input type="text" name="name" value=""></div>
    <div>密码:<input type="password" name="pwd" value=""></div>
    <div><input type="submit" value="登录"></div>
</form>
</body>
</html>
1.1.3 创建登录成功跳转页面(复制即可)
<!DOCTYPE html>
<html lang="en" xmlns:th="http://www.thymeleaf.org">
<head>
  <meta charset="UTF-8">
  <title>Title</title>
</head>
<body>
<h1>Shiro 登录认证后主页面</h1>
<br>
登录用户为:<span th:text="${session.user}"></span>
</body>
</html>
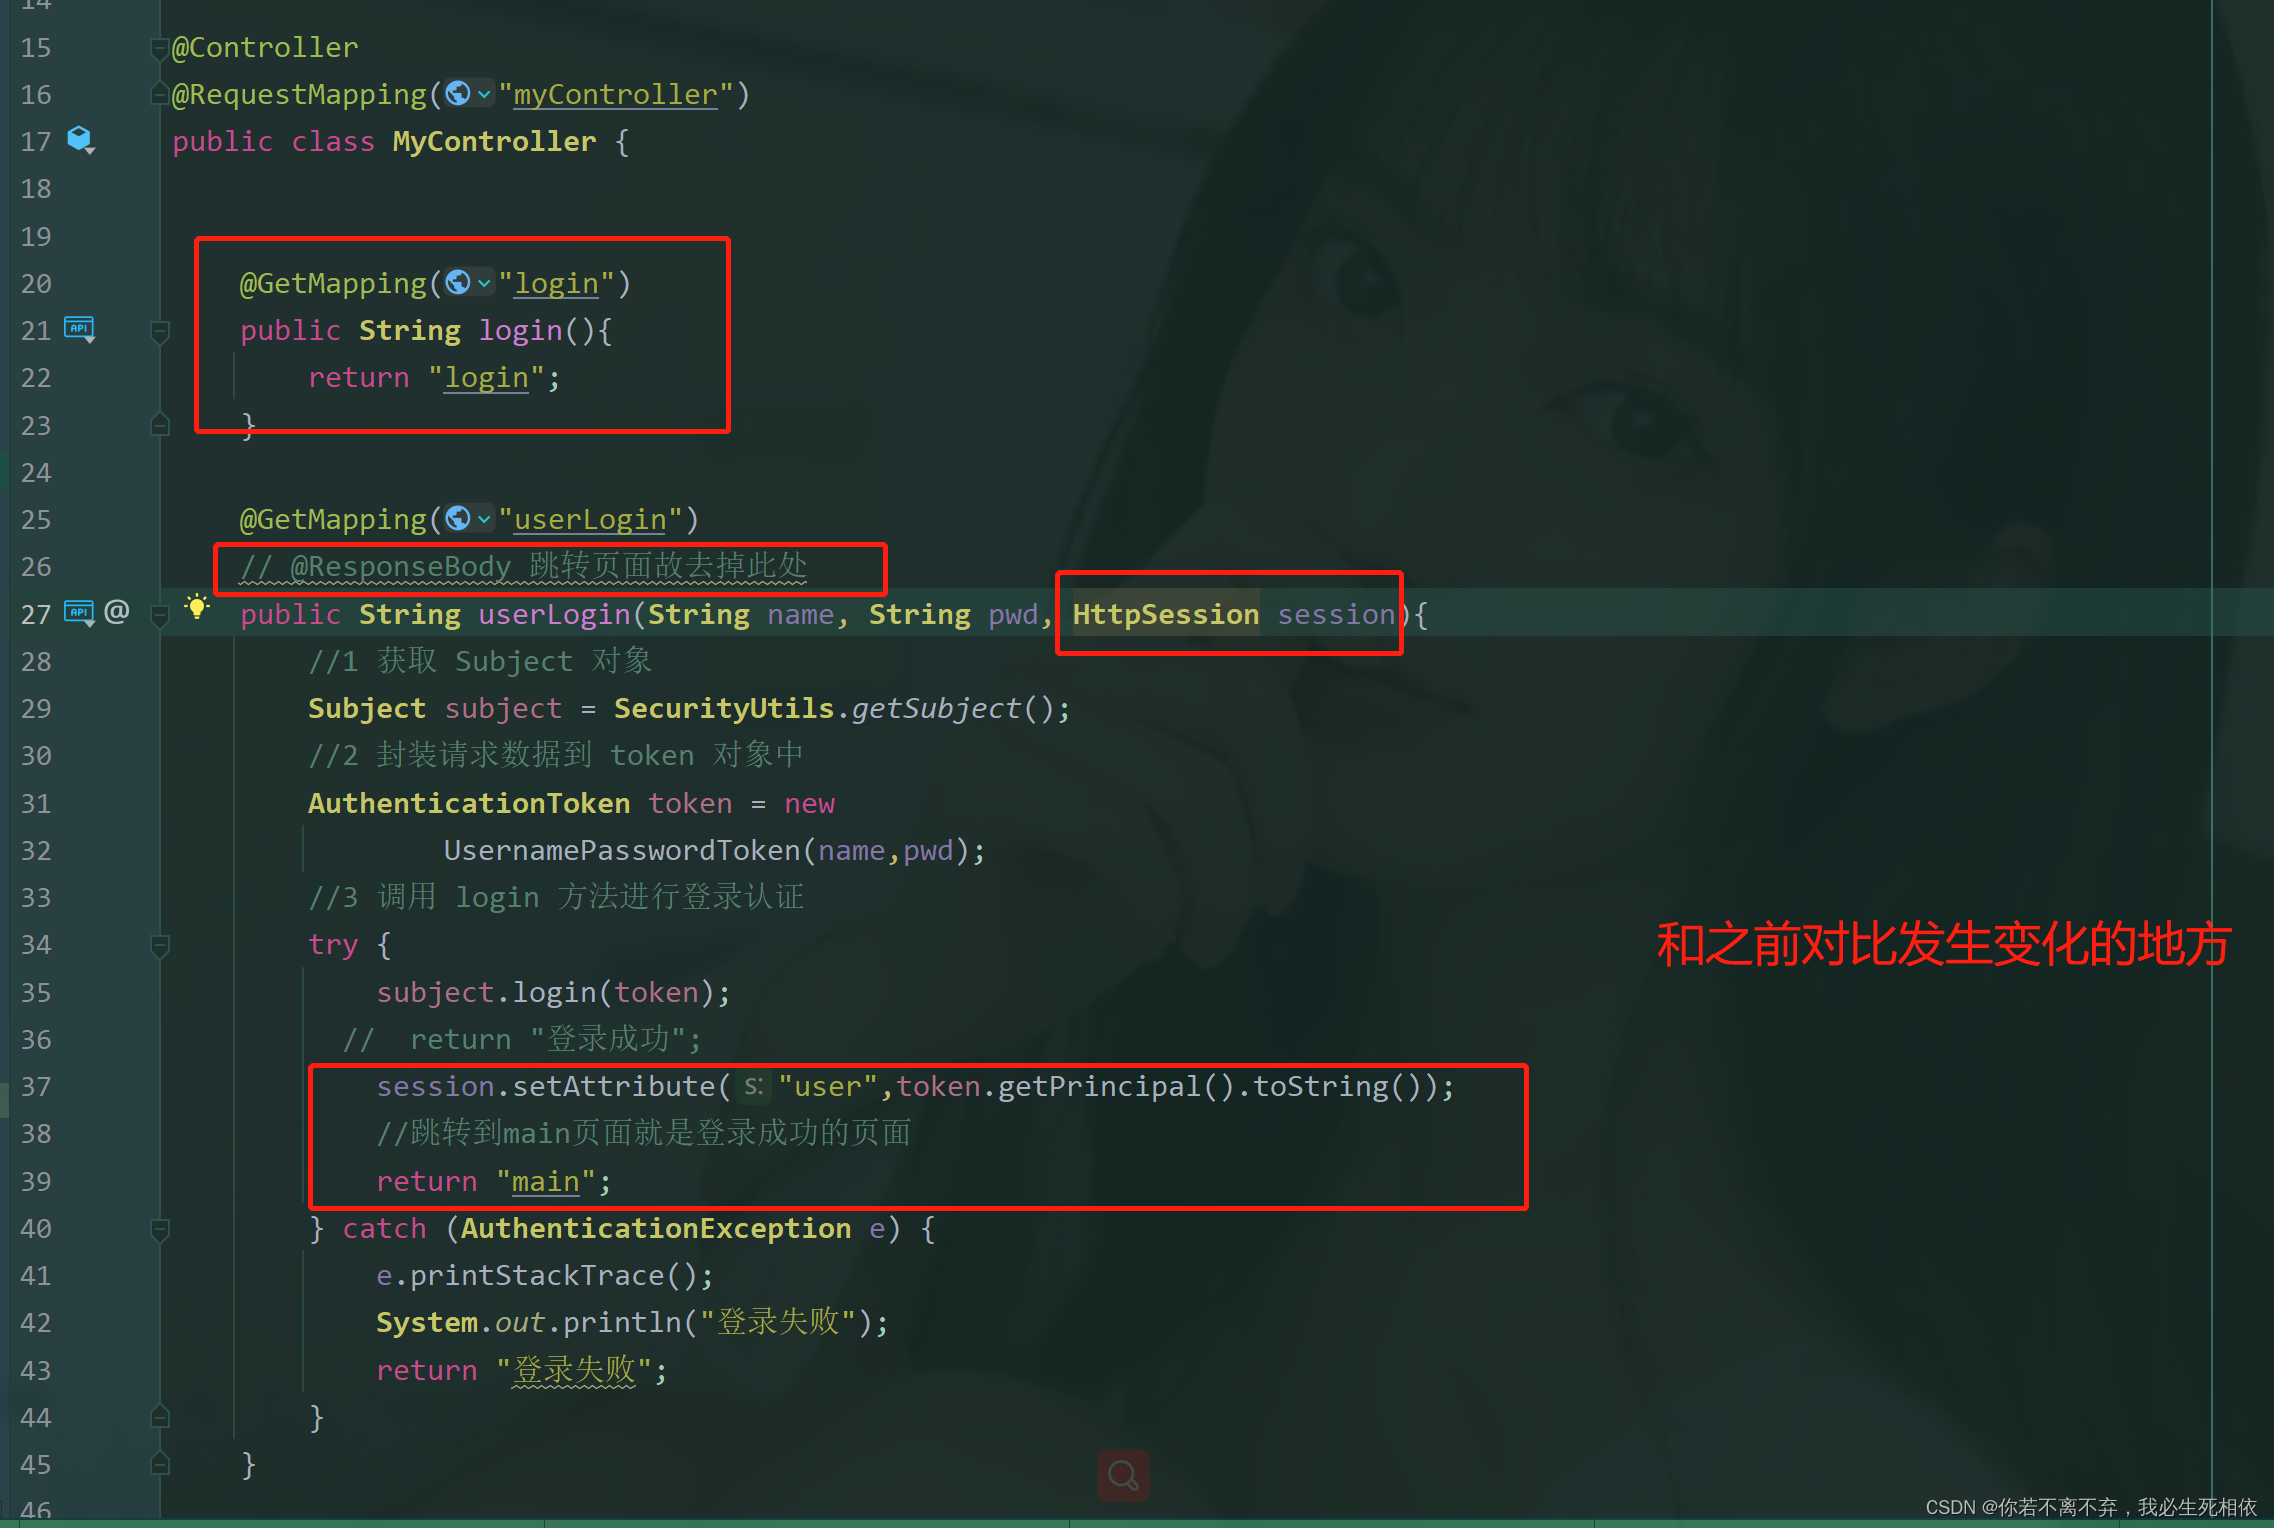
1.1.4 修改控制台
package com.yanwc.shiro.controller;

import org.apache.shiro.SecurityUtils;
import org.apache.shiro.authc.AuthenticationException;
import org.apache.shiro.authc.AuthenticationToken;
import org.apache.shiro.authc.UsernamePasswordToken;
import org.apache.shiro.subject.Subject;
import org.springframework.stereotype.Controller;
import org.springframework.web.bind.annotation.GetMapping;
import org.springframework.web.bind.annotation.RequestMapping;
import org.springframework.web.bind.annotation.ResponseBody;

import javax.servlet.http.HttpSession;

@Controller
@RequestMapping("myController")
public class MyController {


    @GetMapping("login")
    public String login(){
        return "login";
    }

    @GetMapping("userLogin")
    // @ResponseBody 跳转页面故去掉此处
    public String userLogin(String name, String pwd, HttpSession session){
        //1 获取 Subject 对象
        Subject subject = SecurityUtils.getSubject();
        //2 封装请求数据到 token 对象中
        AuthenticationToken token = new
                UsernamePasswordToken(name,pwd);
        //3 调用 login 方法进行登录认证
        try {
            subject.login(token);
          //  return "登录成功";
            session.setAttribute("user",token.getPrincipal().toString());
            //跳转到main页面就是登录成功的页面
            return "main";
        } catch (AuthenticationException e) {
            e.printStackTrace();
            System.out.println("登录失败");
            return "登录失败";
        }
    }

}
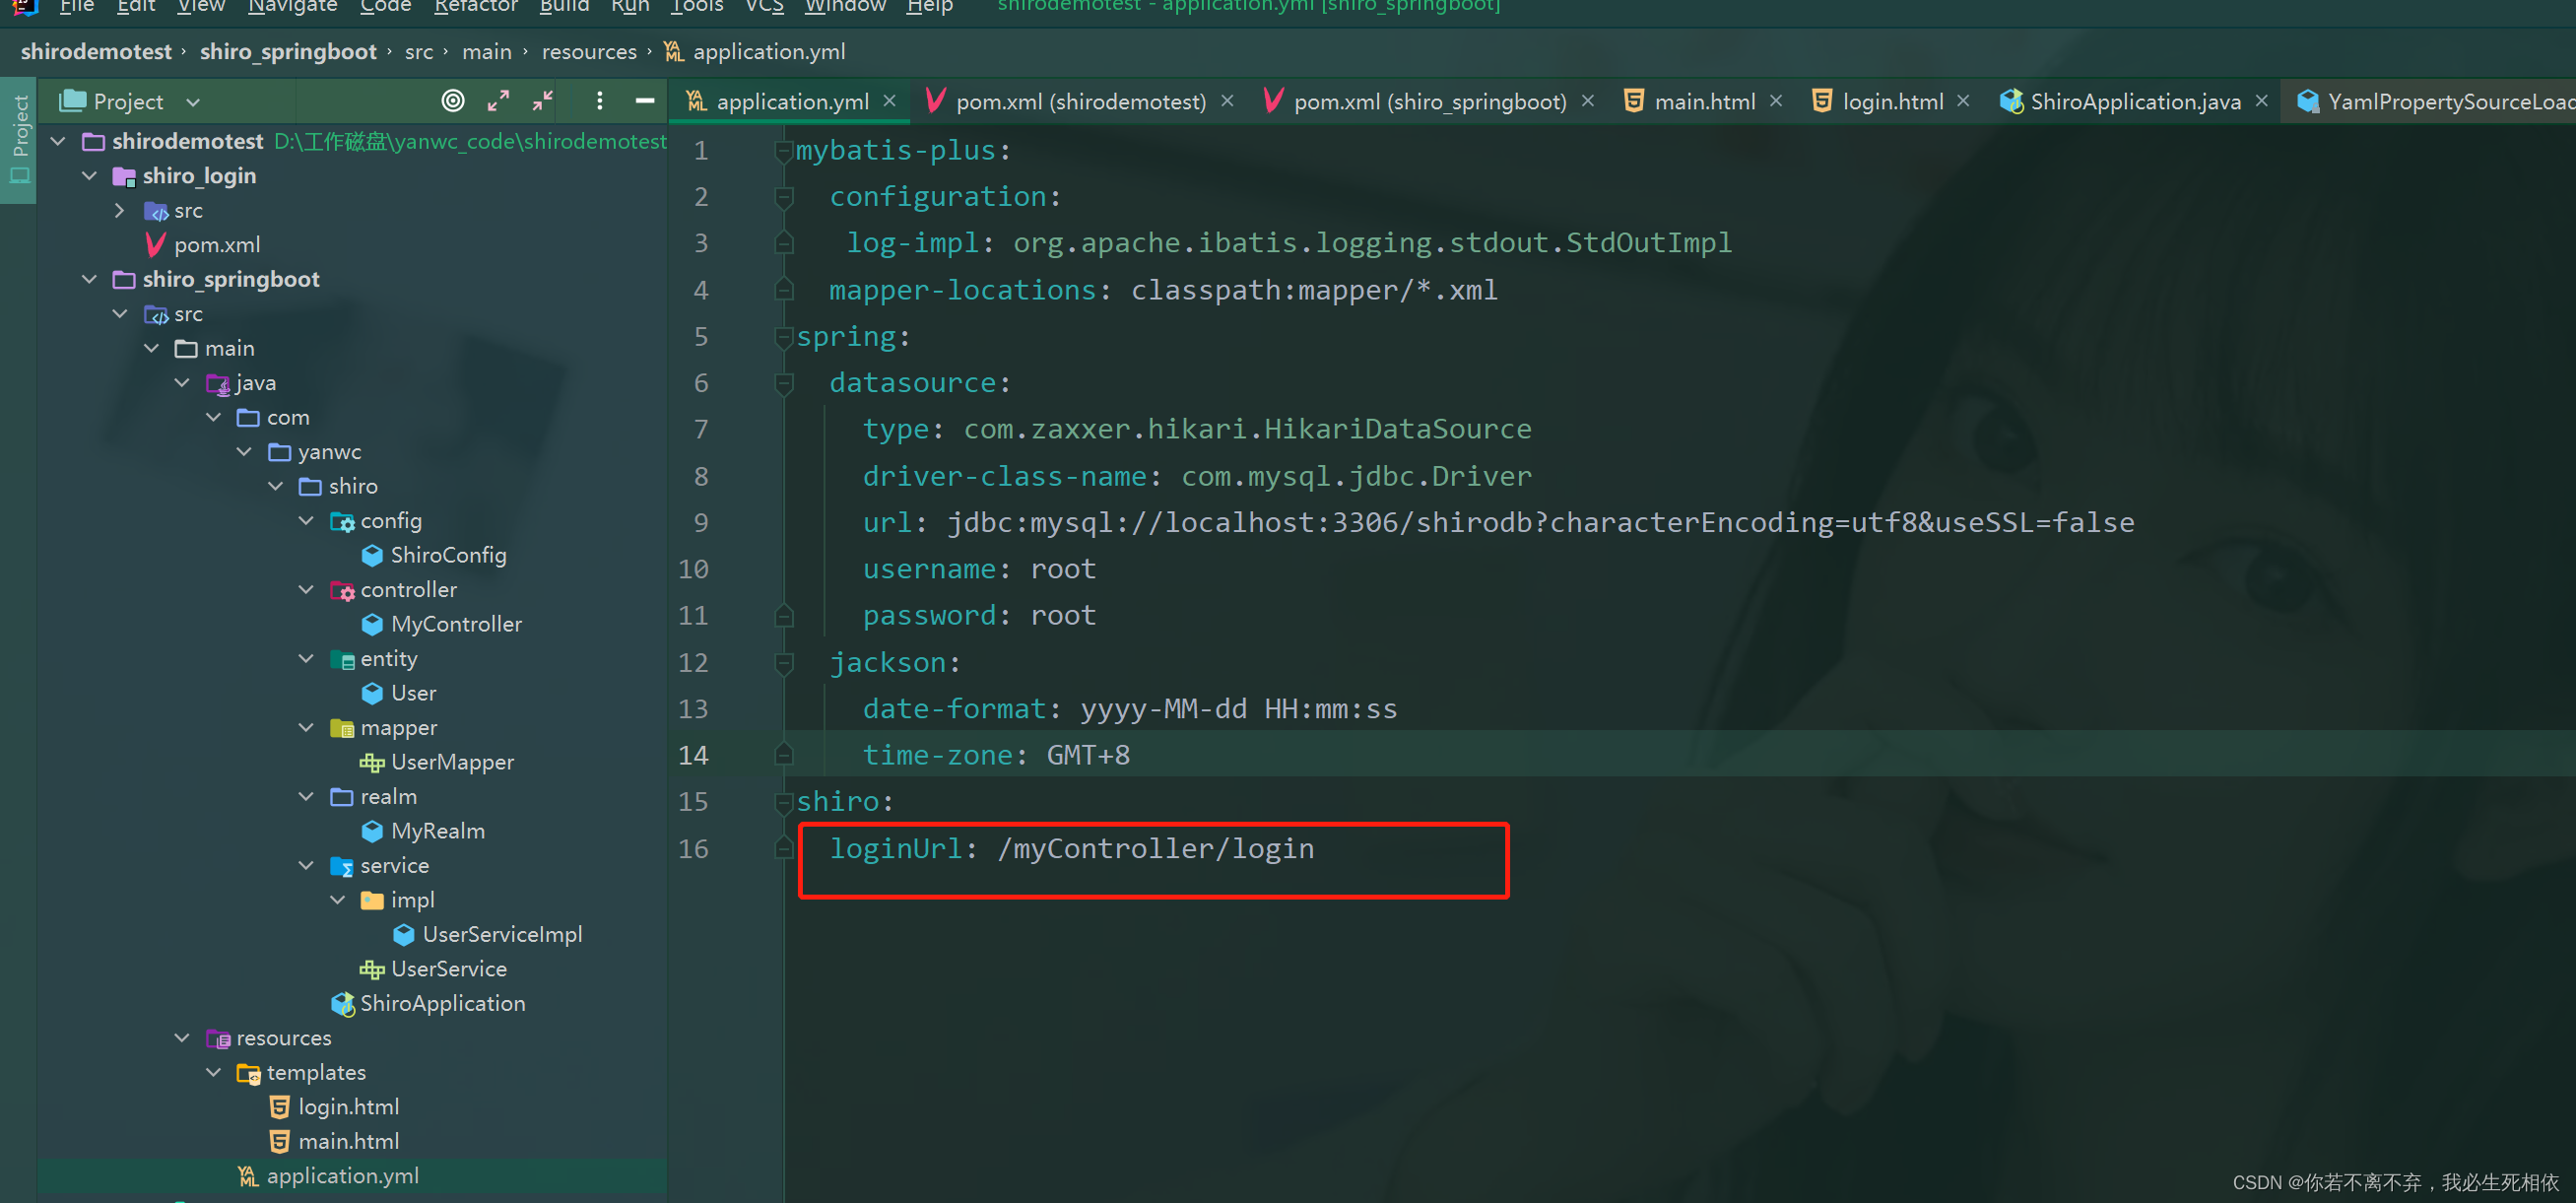
1.1.5 需要确认的配置文件
YML
mybatis-plus:
  configuration:
   log-impl: org.apache.ibatis.logging.stdout.StdOutImpl
  mapper-locations: classpath:mapper/*.xml
spring:
  datasource:
    type: com.zaxxer.hikari.HikariDataSource
    driver-class-name: com.mysql.jdbc.Driver
    url: jdbc:mysql://localhost:3306/shirodb?characterEncoding=utf8&useSSL=false
    username: root
    password: root
  jackson:
    date-format: yyyy-MM-dd HH:mm:ss
    time-zone: GMT+8
shiro:
  loginUrl: /myController/login
指向我们登录的方法;
配置类:
package com.yanwc.shiro.config;

import com.yanwc.shiro.realm.MyRealm;
import org.apache.shiro.authc.credential.HashedCredentialsMatcher;
import org.apache.shiro.spring.web.config.DefaultShiroFilterChainDefinition;
import org.apache.shiro.web.mgt.DefaultWebSecurityManager;
import org.springframework.beans.factory.annotation.Autowired;
import org.springframework.context.annotation.Bean;
import org.springframework.context.annotation.Configuration;

@Configuration //配置类注解
public class ShiroConfig {

    @Autowired
    private MyRealm myRealm;


    // 配置SecurityManager
    @Bean
    public DefaultWebSecurityManager defaultWebSecurityManager() {
        //1.创建defaultWebSecurityManager 对象
        //2.创建加密对象,设置相关的属性
        //3.将加密对象存储到myRealm中
        //4.将myRralm存入defaultWebSecurityManager镀锡
        //5.返回

        //1 创建 defaultWebSecurityManager 对象
        DefaultWebSecurityManager defaultWebSecurityManager = new
                DefaultWebSecurityManager();
        //2 创建加密对象,并设置相关属性
        HashedCredentialsMatcher matcher = new
                HashedCredentialsMatcher();
        //2.1 采用 md5 加密
        matcher.setHashAlgorithmName("md5");
        //2.2 迭代加密次数
        matcher.setHashIterations(3);
        //3 将加密对象存储到 myRealm 中
        myRealm.setCredentialsMatcher(matcher);
        //4 将 myRealm 存入 defaultWebSecurityManager 对象
        defaultWebSecurityManager.setRealm(myRealm);
        //5 返回
        return defaultWebSecurityManager;


    }


    //配置 Shiro 内置过滤器拦截范围
    @Bean
    public DefaultShiroFilterChainDefinition shiroFilterChainDefinition() {
        DefaultShiroFilterChainDefinition definition = new
                DefaultShiroFilterChainDefinition();
        //设置不认证可以访问的资源

        definition.addPathDefinition("/myController/userLogin", "anon");
         definition.addPathDefinition("/myController/login", "anon");
//我这边上面,貌似 只用login也可以

        //设置需要进行登录认证的拦截范围
        definition.addPathDefinition("/**", "authc");
        return definition;
    }


}
1.2 Shiro整合Thymeleaf 测试
访问地址:http://localhost:8080/myController/login


账号:张三 密码:z3
本文参与 腾讯云自媒体同步曝光计划,分享自作者个人站点/博客。
原始发表:2023-08-10,如有侵权请联系 cloudcommunity@tencent.com 删除
评论
登录后参与评论
推荐阅读
目录

