Docker使用手册-基础篇
原创
Docker Hub
类似于github和国内的gitee一样的远程仓库,只不过docker hub是公共的镜像仓库,用户可以上传和下载公开的镜像使用。
镜像
Docker 镜像是一个轻量级、可执行的独立软件包,它包含了运行某个应用所需的所有代码、库、依赖项和配置文件。
获取镜像
获取镜像的方式有两种,一是通过docker hub获取,二是通过Dockerfile文件自己构建。目前先直接用docker hub上的简单镜像做演示,Dockerfile章节中会介绍第二种方式。
可以使用docker search来搜寻镜像。
docker search hello-world,输出如下:

NAME                       DESCRIPTION                                         STARS     OFFICIAL
hello-world                Hello World! (an example of minimal Dockeriz…       2359      [OK]
rancher/hello-world        This container image is no longer maintained…       6
okteto/hello-world                                                             0
atlassian/hello-world                                                          0
tutum/hello-world          Image to test docker deployments. Has Apache…       90
dockercloud/hello-world    Hello World!                                        20
OFFICIAL表示官方镜像
使用docker pull 来获取该镜像。
docker pull hello-world 输出信息如下:

Using default tag: latest
latest: Pulling from library/hello-world
c1ec31eb5944: Pull complete
Digest: sha256:305243c734571da2d100c8c8b3c3167a098cab6049c9a5b066b6021a60fcb966
Status: Downloaded newer image for hello-world:latest
docker.io/library/hello-world:latest
镜像列表
使用docker image list来查看所有的镜像。
docker image list 输入信息如下:
REPOSITORY        TAG       IMAGE ID       CREATED             SIZE
hello-world       latest    d2c94e258dcb   19 months ago       13.3kB
删除镜像
使用docker rmi 来删除镜像。
前提:该镜像是空闲的!即该没有容器依赖这个镜像,无论容器的状态是运行中还是停止,只要容器是使用该镜像启动的那么就无法删除该镜像,需要先删除对应的容器。
docker rmi d2c94e258dcb 输出信息如下:
Untagged: hello-world:latest
Untagged: hello-world@sha256:305243c734571da2d100c8c8b3c3167a098cab6049c9a5b066b6021a60fcb966
Deleted: sha256:d2c94e258dcb3c5ac2798d32e1249e42ef01cba4841c2234249495f87264ac5a
Deleted: sha256:ac28800ec8bb38d5c35b49d45a6ac4777544941199075dff8c4eb63e093aa81e
删除失败示例。
docker rmi d2c94e258dcb 输出信息如下:
Error response from daemon: conflict: unable to delete d2c94e258dcb (must be forced) - image is being used by stopped container e1d2d3bffc83
构建镜像
为了自己的项目构建镜像时需要编写Dockerfile文件,详细见第三章Dockerfile。。。
容器
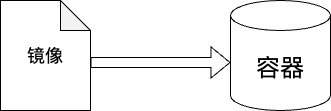
容器和镜像的关系如下图。
启动容器
获取容器的方式有二种,一是自己通过镜像运行,二是导入容器快照文件(见最后一章)。
依靠上面获取的hello-world镜像,通过docker run 命令运行容器。
docker run -it --name mytest hello-world:latest 输出信息如下:

Hello from Docker!
This message shows that your installation appears to be working correctly.

To generate this message, Docker took the following steps:
 1. The Docker client contacted the Docker daemon.
 2. The Docker daemon pulled the "hello-world" image from the Docker Hub.
    (amd64)
 3. The Docker daemon created a new container from that image which runs the
    executable that produces the output you are currently reading.
    .....
常用选项:
-d:后台运行容器。-it:以交互式终端运行容器。-t:为镜像指定标签。--name:为容器指定名字。-p:端口映射
容器列表
查看容器列表有两个方式
通过docker ps 查看正在运行的容器(写文章时我没有正在运行的容器所以什么都没显示)
[tommwwu@VM-227-156-tencentos composetest]$ docker ps 输出信息如下:

CONTAINER ID   IMAGE     COMMAND   CREATED   STATUS    PORTS     NAMES
通过docker ps -a可以查看所有状态的容器,包括停止的。
[tommwwu@VM-227-156-tencentos composetest]$ docker ps -a 输出信息如下:(除了hello-word我的linux中还有三个容器)

CONTAINER ID   IMAGE                COMMAND                  CREATED        STATUS                      PORTS     NAMES
8ffb5fbcf657   hello-world:latest   "/hello"                 23 hours ago   Exited (0) 23 hours ago               mytest
86ffb99888d0   redis:alpine         "docker-entrypoint.s…"   25 hours ago   Exited (0) 25 hours ago               composetest-redis-1
51afbf2cfaca   composetest-web      "flask run"              25 hours ago   Exited (137) 25 hours ago             composetest-web-1
b5cbb98411ee   centos:latest        "/bin/bash"              26 hours ago   Exited (0) 26 hours ago               nervous_maxwell
停止容器
要演示停止容器我们需要一个运行中的容器,借此机会我们在复习一下从获取镜像到启动容器的过程。
[tommwwu@VM-227-156-tencentos composetest]$ docker search centos 输出信息如下:

NAME                           DESCRIPTION                                     STARS     OFFICIAL
centos                         DEPRECATED; The official build of CentOS.       7759      [OK]
centos/postgresql-10-centos7   PostgreSQL is an advanced Object-Relational …   20
centos/systemd                 systemd enabled base container.                 115
centos/redis-5-centos8                                                         0
centos/httpd-24-centos8                                                        3
我们获取官方的centos镜像来做演示。
[tommwwu@VM-227-156-tencentos composetest]$ docker pull centos 输出信息如下:

Using default tag: latest
latest: Pulling from library/centos
a1d0c7532777: Pull complete
Digest: sha256:a27fd8080b517143cbbbab9dfb7c8571c40d67d534bbdee55bd6c473f432b177
Status: Downloaded newer image for centos:latest
docker.io/library/centos:latest
以后台模式启动容器。
[tommwwu@VM-227-156-tencentos composetest]$ docker run -itd centos:latest /bin/bash 输出信息如下:

1133ea8764fa4f49e046f7fe37d5c5e9204c3f93c719ed51d05871c4d223a7e9
查看容器信息。
[tommwwu@VM-227-156-tencentos composetest]$ docker ps 输出信息如下:

CONTAINER ID   IMAGE           COMMAND       CREATED          STATUS          PORTS     NAMES
1133ea8764fa   centos:latest   "/bin/bash"   35 seconds ago   Up 34 seconds             festive_cori
可以看到STATUS的状态为Up。
此时我们可以根据输出的容器ID来停止容器。
[tommwwu@VM-227-156-tencentos composetest]$ docker stop 1133ea8764fa 输出信息如下:
1133ea8764fa

再次查看容器列表 docker ps 输出信息如下:
[tommwwu@VM-227-156-tencentos composetest]$ docker ps
CONTAINER ID   IMAGE     COMMAND   CREATED   STATUS    PORTS     NAMES
进入容器
当我们在启动容器时使用 -d 选项时容器会在后台运行。
进入容器有两种命令,一是docker attach 容器ID。二是docker exec 容器ID。
推荐第二种,因为attach进入容器再退出之后会结束容器运行。
我们先启动容器,对stop的容器可以使用docker start启动。
[tommwwu@VM-227-156-tencentos composetest]$ docker start 1133ea8764fa 输出信息如下:

1133ea8764fa
然后使用exec进入
[tommwwu@VM-227-156-tencentos composetest]$ docker exec -it 1133ea8764fa /bin/bash
[root@1133ea8764fa /]#
[root@1133ea8764fa /]# pwd
/
[root@1133ea8764fa /]# whoami
root
使用exit退出容器。
[root@1133ea8764fa /]# exit
exit
[tommwwu@VM-227-156-tencentos composetest]$ docker ps
CONTAINER ID   IMAGE           COMMAND       CREATED          STATUS         PORTS     NAMES
1133ea8764fa   centos:latest   "/bin/bash"   13 minutes ago   Up 4 minutes             festive_cori
删除容器
docker rm -f 可以删除容器。
这里我删除的是之前的hello-word。
[tommwwu@VM-227-156-tencentos composetest]$ docker rm -f 8ffb5fbcf657 输出信息如下:
8ffb5fbcf657
如果觉得容器一个一个删除也在docker rm -f 后面跟多个容器的ID这样就一次删除一批。
或者docker container prune来清理掉所有的停止状态的容器。
[tommwwu@VM-227-156-tencentos ~]$ docker ps -a 看到目前有三个容器stop
CONTAINER ID   IMAGE             COMMAND                  CREATED        STATUS                      PORTS     NAMES
1133ea8764fa   centos:latest     "/bin/bash"              17 hours ago   Exited (0) 17 hours ago               festive_cori
86ffb99888d0   redis:alpine      "docker-entrypoint.s…"   43 hours ago   Exited (0) 43 hours ago               composetest-redis-1
51afbf2cfaca   composetest-web   "flask run"              43 hours ago   Exited (137) 43 hours ago             composetest-web-1
[tommwwu@VM-227-156-tencentos ~]$ docker container prune 删除所有的stop容器
WARNING! This will remove all stopped containers.
Are you sure you want to continue? [y/N] y 输入y进行确认
Deleted Containers:
1133ea8764fa4f49e046f7fe37d5c5e9204c3f93c719ed51d05871c4d223a7e9
86ffb99888d082981d39ec3484f916b256ba88a42a566f7c3194ca7209a55065
51afbf2cfaca440ebd17ce132ce8efa6e8f5d763b782dcc33e6e5a9edf68a90e

Total reclaimed space: 96.18kB
[tommwwu@VM-227-156-tencentos ~]$ docker ps -a  再次查看容器列表为空了!
CONTAINER ID   IMAGE     COMMAND   CREATED   STATUS    PORTS     NAMES
[tommwwu@VM-227-156-tencentos ~]$
Dockerfile
在实际的开发当中我们往往需要构建出自己项目的镜像,这时就需要用到Dockerfile文件了。
Dockerfile文件应位于项目的根目录下,文件的内容就是镜像构建的过程。
比如我们存在如下目录。
├──my_test
    ├── app.py
    ├── Dockerfile
    └── requirements.txt
app.py文件内容是使用Flask框架搭建的一个简单wed应用。
import time

import redis
from flask import Flask

app = Flask(__name__)
cache = redis.Redis(host='redis', port=6379)


def get_hit_count():
    retries = 5
    while True:
        try:
            return cache.incr('hits')
        except redis.exceptions.ConnectionError as exc:
            if retries == 0:
                raise exc
            retries -= 1
            time.sleep(0.5)


@app.route('/')
def hello():
    count = get_hit_count()
    return 'Hello World! I have been seen {} times.\n'.format(count)
requirements.txt是所需要的依赖。
flask
redis
接下来就是介绍Dockerfile文件了。
先来看一下基本的Dockerfile的样例。这里只给出了一些常用的指令,比如FROM,RUN等等。还有很多复杂的指令可以查看官方文档或google。
FROM python:3.8-slim # 导入基础镜像,这里使用官方的 Python 基础镜像

WORKDIR /app # 设置工作目录

COPY . /app # 复制当前目录下的所有文件到工作目录

RUN pip install --no-cache-dir -r requirements.txt # 安装依赖项

ENV PYTHONUNBUFFERED=1 # 设置环境变量

EXPOSE 5000 # 暴露应用程序运行的端口

CMD ["python", "app.py"] # 运行应用程序
然后再看我们项目中实际使用的Dockerfile的内容就会好很多。
FROM python:3.7-alpine
WORKDIR /code
ENV FLASK_APP app.py
ENV FLASK_RUN_HOST 0.0.0.0
RUN apk add --no-cache gcc musl-dev linux-headers
COPY requirements.txt requirements.txt
RUN pip install -r requirements.txt
COPY . .
CMD ["flask", "run"]
现在万事俱备只欠东风,只需要一条指令就可以构建出我们项目的镜像了。
[tommwwu@VM-227-156-tencentos composetest]$ docker build -t mytest:latest ./ 输出信息如下
[+] Building 1.2s (11/11) FINISHED                                                                                        docker:default
 => [internal] load build definition from Dockerfile                                                                                0.1s
 => => transferring dockerfile: 279B                                                                                                0.0s
 => [internal] load metadata for docker.io/library/python:3.7-alpine                                                                1.0s
 => [internal] load .dockerignore                                                                                                   0.0s
 => => transferring context: 2B                                                                                                     0.0s
 => [1/6] FROM docker.io/library/python:3.7-alpine@sha256:f3d31c8677d03f0b3c724446077f229a6ce9d3ac430f5c08cd7dff00292048c3          0.0s
 => [internal] load build context                                                                                                   0.0s
 => => transferring context: 1.06kB                                                                                                 0.0s
 => CACHED [2/6] WORKDIR /code                                                                                                      0.0s
 => CACHED [3/6] RUN apk add --no-cache gcc musl-dev linux-headers                                                                  0.0s
 => CACHED [4/6] COPY requirements.txt requirements.txt                                                                             0.0s
 => CACHED [5/6] RUN pip install -r requirements.txt                                                                                0.0s
 => CACHED [6/6] COPY . .                                                                                                           0.0s
 => exporting to image                                                                                                              0.0s
 => => exporting layers                                                                                                             0.0s
 => => writing image sha256:3e8b1ac4ca82696dd9a356dba59e1f46ed61593a651c40b2b83de66c76612d64                                        0.0s
 => => naming to docker.io/library/mytest:latest                                                                                    0.0s
docker build还有很多的选项可以选择。
-t, --tag:为构建的镜像指定一个名称和标签(例如,myimage:latest)。-f, --file:指定Dockerfile的路径(如果不是默认的Dockerfile)。--build-arg:设置构建时的变量。--no-cache:不使用缓存来构建镜像。--rm:成功构建后删除中间容器(默认行为)。
现在可以试试使用自己的镜像启动容器了!
导入导出容器
除了上面我们提到的通过镜像启动容器的获取方式,还可以通过导入容器快照的方式来获取容器,要导入容器快照就需要先获取容器快照,也就是导出。
我们使用通过自己的Dockerfile文件构建出的镜像来运行容器,然后导出这个容器到我们本地文件中去,然后再在我们本地通过这个文件导出容器。
tommwwu@VM-227-156-tencentos ~]$ docker run -d mytest:latest 输出信息如下:
81adbef1e035cad04b2322421b1e750d50cc382e5e2513e0f769f19c8a9328b9
[tommwwu@VM-227-156-tencentos ~]$ docker ps
CONTAINER ID   IMAGE           COMMAND       CREATED         STATUS         PORTS     NAMES
81adbef1e035   mytest:latest   "flask run"   9 seconds ago   Up 7 seconds             stupefied_buck
[tommwwu@VM-227-156-tencentos ~]$ docker export 81adbef1e035 > mytest.tar 导出到本地的mytest.tar文件中
[tommwwu@VM-227-156-tencentos ~]$ ls 查看导出的文件mytest.tar
composetest  go  go1.22.10.linux-amd64.tar.gz  go_project  mytest.tar  polaris  python_project
可以看到导出容器的方式非常简单,和大多数docker的功能指令一样只需要一条docker export 容器ID > 文件路径。即可。
现在我们再来试试通过刚才生成的文件进行导出。
[tommwwu@VM-227-156-tencentos ~]$ docker import ./mytest.tar mytest2:v1.0
sha256:2e7c662b20a92f63cd8da4eec12b84f93e083de32d366df06b4d5d7a66359f2c
[tommwwu@VM-227-156-tencentos ~]$ docker image list
REPOSITORY        TAG       IMAGE ID       CREATED              SIZE
mytest2           v1.0      2e7c662b20a9   2 seconds ago        213MB
mytest            latest    3e8b1ac4ca82   43 hours ago         214MB
composetest-web   latest    4d99d119e76d   43 hours ago         214MB
redis             alpine    87b460005bd3   2 months ago         46.7MB
hello-world       latest    d2c94e258dcb   19 months ago        13.3kB
centos            latest    5d0da3dc9764   3 years ago          231MB
可以看到上面出现了mytest2镜像!!
原创声明:本文系作者授权腾讯云开发者社区发表,未经许可,不得转载。
如有侵权,请联系 cloudcommunity@tencent.com 删除。
原创声明:本文系作者授权腾讯云开发者社区发表,未经许可,不得转载。
如有侵权,请联系 cloudcommunity@tencent.com 删除。
腾讯云开发者
